Snooper Syrius Pro User Manual
7” screen portable satellite navigation system with dvb-t receiver
Hide thumbs
Also See for Syrius Pro:
- User manual (83 pages) ,
- User manual (350 pages) ,
- User manual (92 pages)

Related Manuals for Snooper Syrius Pro


Summary of Contents for Snooper Syrius Pro
- Page 1 S8000 S8000 7” Screen Portable Satellite Navigation System with DVB-T Receiver User manual...
- Page 2 New Map Guaranteed! Ensure your sat nav has the very latest Snooper mapping available. Register within 30 days of first use and if a more recent map is available you can download it for free.
- Page 3 Please note that AURA™ updates are subject to a subscription charge. Please refer to the subscription and download section of this manual for further details or visit www.snooperneo.co.uk. Drive Safely with Snooper! S8000’ camera location technology has been designed and manufactured to help enhance road safety and is in no way a licence to speed nor has it been designed as a substitute for concentration.
-
Page 4: Table Of Contents
S8000 Contents Page Page 61 Camera Alert What’s included? Display Cameras Overview Alert Sound Registering S8000 62 School Switched On Alert Quick Start Guide to Navigation 63 Touch Tone 11 Start Up – Installing the SD Card Route Alert System Requirements and Downloading My Speed 12 Downloading the AURA™... -
Page 5: What's Included
S8000 What’s included? 1 x S8000 satellite navigation system 1 x SD Card containing mapping 1 x Windscreen Mounting Bracket 1 x Home Charger 1 x12/24v DC in Vehicle charger 1 x USB Cable 1 x TMC Antenna 1 x Hard protective case 1 x Video In adaptor 2.5mm (for use with reversing camera Not included) 1 x CD ROM This user guide explains the functionality of all 3 variants of the S8000, these symbols will illustrate if the feature is relevant to your... -
Page 6: Overview
S8000 Overview 15. Internal GPS antenna Do not cover 1. Power/MENU Button 7. Video-In can be used for rear camera input (not supplied refer to page 14 for details) Press and hold to switch on or off. Press and release to 8. -
Page 7: Registering S8000
Registering S8000 IMPORTANT! PLEASE READ BEFORE USING S8000. To enable S8000 to locate Fixed Speed Cameras and Accident Black spots you will have to register and download the AURA™ Camera Database. Register Online Go to the official website www.snooperneo.co.uk and register your unit online. Your unit should normally be activated within 30 minutes of registration. -
Page 8: S8000
S8000 Switching On 1. Slide the battery on/off button, on the rear of the unit, towards the ON position. 2. Press and hold the Power/Menu button on the top of the unit the LED will illuminate Green and the LCD screen will display the Home menu Home menu screen 3. -
Page 9: Quick Start Guide To Navigation
S8000 Quick Start Guide to Navigation 1. Take the S8000 outside so that the GPS receiver can locate your position. This may take between 15 - 30 minutes the first time. When satellite lock is achieved, the screen will display your current position on its map in a ‘3D’ navigation view. -
Page 10: S8000
Tip: The default route options are set to Quickest Route. To change the route options refer to section 6 in this user manual. 4. Press and S8000 will calculate the fastest route from your current position to your destination. This should only take a few moments and a progress bar is shown on the screen. -
Page 11: Start Up - Installing The Sd Card
Start Up – Installing the SD Card Before using the S8000, you will need to install the SD Card included with the device. The SD Card comes complete with digital mapping and is also where the AURA™ camera database is stored if you choose to subscribe and download it. Start by moving the ‘Batt. -
Page 12: Downloading The Aura™ Camera Database
Downloading the AURA™ Camera Database Please Note: You must register S8000 before you can perform a download. Performing a download is simple. 1. Connect the AC Power adapter provided to a mains plug socket and attach the other end to the S8000 power socket. 2. -
Page 13: Installing S8000
Installing S8000 S8000 comes with a windscreen bracket so that the unit can be mounted onto your vehicles windscreen. When installing S8000 please ensure that: The unit, with its built in GPS antenna has a clear view of the sky* ●... -
Page 14: Power Connection & Charging
Power Connection & Charging Powering and charging S8000 from the cigarette lighter socket S8000 comes with a power cable designed to plug into your vehicles cigarette lighter socket. The power cable is suitable for both 12v DC and 24v DC vehicles. This lead will power the device but will also charge S8000’s internal battery. 1. -
Page 15: Charging The Internal Battery
Charging the internal battery Although S8000 can be charged using the cigarette lighter in your vehicle, a complete charge is more easily achieved by using the 240V AC mains charger included. When new, the battery contains a nominal charge. To charge the unit fully, move the ‘Batt. ON/OFF’ switch to the ‘ON’ position and connect the 240V AC mains charger as indicated in the picture on the right. -
Page 16: S8000
CAUTION: THERE IS A RISK OF EXPLOSION IF THE BATTERY IS REPLACED WITH AN UNAPPROVED TYPE. USING THE WRONG TYPE OF BATTERY MAY DAMAGE YOUR UNIT AND INVALIDATE YOUR WARRANTY. ONLY SNOOPER AUTHORISED PERSONNEL SHOULD REPLACE THE BATTERY. PLEASE DISPOSE OF USED BATTERIES ACCORDING TO LOCAL WASTE MANAGEMENT RULES AND REGULATIONS. -
Page 17: Easy Setup
Detailed Guide to Satellite Navigation 1.Starting Up Once you have synchronised the Micro-SD Card and performed a download as necessary it is time to perform the first Start Up. First make sure your vehicle is parked in as open a space as possible, clear of tall trees and buildings so that the built in GPS antenna has a clear view of the sky above. - Page 18 Snoopers’ advanced lane guidance will assist the driver by clarifying which lane the vehicle should be using. Snooper has extensive coverage of motorway, complex junctions, some dual carriage way exits and some inner city junctions. The criteria for lane guidance is that the turning lanes or exit lanes will have more than ONE lane to be included.
- Page 19 Additional warning or information pop ups will appear at the bottom left hand corner of the screen. If lane guidance is displayed then the warning pop ups will be displayed at the top left hand side of the screen. Restrictions Warning Steep road up ahead Height...
-
Page 20: Volume
To modify the information shown: Press the centre of the screen to access the menu. ● ● Press the ‘Configure’ button. ● ● Press the icon where you will see the list of options below. ● ● Select the option you wish to change on the left. ●... -
Page 21: Setting Vehicle Parameters Truckmate
Setting up vehicle parameters For Ventura to calculate a route suitable for your vehicle it needs to know certain information about the vehicle itself such as its height, weight and width. It is possible to save the settings of 10 different vehicles. Follow these instructions to enter your vehicles details. -
Page 22: Setting Vehicle Parameters Ventura
Setting up vehicle parameters For Truckmate to calculate a route suitable for your vehicle it needs to know certain information about the vehicle itself such as its height, weight and width. It is possible to save the settings of 10 different trucks. Follow these instructions to enter your vehicles details. - Page 23 Tunnel Category B/D ● ● Tunnel Category B/E ● ● Tunnel Category C ● ● TUNNEL CATEGORY C/D ● ● Tunnel Category C/E ● ● Tunnel Category D ● ● Tunnel Category D/E ● ● Tunnel Category E ● ● B Most restrictive Passage forbidden through tunnels of category B, C, D and E B1000C...
-
Page 24: Planning A Route
3. Planning a route There are several ways to plan a route on S8000. 3.1 Find by post code Press the centre of the screen to access the ‘Navigate to’ menu. ● ● Press the ‘Find by post code’ icon. ●... -
Page 25: Find By City
Once the calculation is complete you can either press ‘Go’ to start navigation, ‘Simulation’ to see the actual route that will be taken, ‘Route Option’ to change the parameters of the route or ‘Guide’ which will list the turn by turn instructions of the journey. The ‘Summary Screen’... -
Page 26: Home
3.3.1 Home You can navigate easily and quickly from a previous journey or destination to your home, by personalising S8000 so that a route can be calculated by pressing just a few buttons. 3.3.2 Setting the ‘Home’ Destination Press the centre of the display to enter the ‘Navigate to’ menu. ●... -
Page 27: Office
3.4 Office You can navigate easily and quickly from a previous journey or destination to your office or place of work, by personalising S8000 so that a route can be calculated by pressing just a few buttons. 3.4.1 Setting the ‘Office’ Destination Press the centre of the display to enter the ‘Navigate to’... -
Page 28: Multi-Route
Once a route has been calculated, the ‘Recent Route’ icon is replaced with a ‘Clear Route’ icon. To cancel a route that you have calculated: Press the centre of the screen to enter the ‘Navigate to’ menu. ● ● Press the ‘Clear Route’ icon. ●... -
Page 29: Find By Favourites
If you are happy with the start position, you can now begin to enter the data of your first destination. Press ‘Add’ – you are provided with several options to find your ● ● destination stage: > Find address by city >... -
Page 30: S8000
Once you have pressed ‘Go’ S8000 will now display your current map position along with a small summary screen located in the bottom left hand corner. The following information is displayed on the summary screen: Stage 1/2 - indicates this is the first destination of the journey Estimated time of arrival Distance to first... -
Page 31: Recent Destinations
3.7 Find by favourites S8000 has the capacity to store up to 150 user locations. To add your favourite locations see Section 4.1.1 on page 45. To navigate to one of your stored locations: Press the centre of the screen to enter the ‘Navigate to’ menu. ●... -
Page 32: Find By Points Of Interest (Poi)
3.9 Find by POI (points of interest) If you would like to calculate a route to a hotel, airport, restaurant or even a golf course S8000 can calculate a route using its extensive database of POI’s (Points of Interest). To navigate using this database: Press the centre of the screen to access the ‘Navigate to’... -
Page 33: Find By Nearest Poi
3.10 Find by nearest POI This function will help you to find the nearest POI from either your ‘Current Position’ or a ‘Different Position’ within a certain radius which can specified up to a maximum of 60 miles. 3.10.1 To navigate using the ‘Current Position’ Press the centre of the screen to enter the ‘Navigate to’... -
Page 34: S8000
3.10.2 To navigate using a ‘Different Position’ Press the centre of the screen to enter the ‘Navigate to’ menu. ● ● Press the black arrow once. ● ● Press the ‘Find by nearest POI’ icon. ● ● Select ‘Different Position’ ●... -
Page 35: User Poi
Once the calculation is complete you can either press ‘Go’ to start navigation, ‘Simulation’ to see the actual route that will be taken, ‘Route Option’ to change the parameters of the route or ‘Guide’ which will list the turn by turn instructions of the journey. - Page 36 Select the POI with your finger; an information screen will be displayed. Press ‘OK’ if the POI is correct, press ‘Map’ to view the POI location on the map, press ‘Route options’ to change start position or press to return to the previous screen. Press ‘Calculate’...
-
Page 37: S8000
3.11.3 Find around different position Press the centre of the screen to enter the ‘Navigate to’ menu. ● ● Press the black arrow once. ● ● Press the ‘User POI’ icon. ● ● Press the POI you wish to look for ●... -
Page 38: Find By Map
Once the calculation is complete you can either press ‘Go’ to start navigation, ‘Simulation’ to see the actual route that will be taken, ‘Route Option’ to change the parameters of the route or ‘Guide’ which will list the turn by turn instructions of the journey. -
Page 39: Find By Coordinate
3.13 Find by coordinate To navigate to a location using a coordinate: Press the centre of the screen to access the ‘Navigate to’ menu ● ● Press the black arrow once ● ● Press the ‘Find by coordinate’ icon ● ●... -
Page 40: Avoid By Road Name
3.14.1 Avoid By Road Name If you know the road name or road number you wish to avoid, then select this option. Press ‘Avoid by Road Name’ . ● ● You will be provided with the turn by turn instructions of the route that you are currently following. If the road you are looking for is not visible, press the down arrow on the right hand side of the display to see further turn by turn instructions. -
Page 41: Clear Avoided Road
3.14.3 Clear Avoided Road If you do not wish to use the alternative routes offered by S8000 and you wish to return to the original calculated route, press the ‘Clear Avoided Road’ button and the original route plotted by S8000 will be restored. Once the re-calculation of the original route is complete the summary screen is displayed. - Page 42 To calculate a route which is appropriate for your vehicle, once a second link has been added the following screen will be displayed: if this is the correct vehicle press ‘Calculate’ or if you need to change the vehicle press ‘Change’. 6.
-
Page 43: Route Description
3.16 Route Description After a route has been calculated and the journey has commenced, you can access the summary display again by using this function. To view the summary screen: Press the centre of the screen to enter the ‘Navigate to’ menu. ●... -
Page 44: S8000
The options can be deselected by pressing the – the box will be displayed with the red tick removed . To finalize your selection press TMC Icon Once the unit starts to receive TMC alerts one of the two following icons will appear on the main screen This icon appears if S8000 has received TMC information but the delay or incident is not on your route. -
Page 45: S8000
To view the incident press To return to the previous screen press If you want to return to the original route (not avoiding the incident) then press the TMC Icon select the TMC alert you originally wanted to avoid and then press S8000 will recalculate the original route Note: TMC data is transmitted simultaneously by commercial FM radio stations - the reception of TMC data can be affected by geographical and environmental conditions. -
Page 46: Campsite Search Ventura Only
3.18 Campsite Search (Ventura ONLY) Ventura can search from over 20,000 caravan and motor home sites and rest stops. This unique, content rich, data is supplied by some of the biggest camping organizations in Europe: ASCI , Bordatlas and Camperstop (by Facile en Route). Additional campsite data for Caravan Club and The Camping and Caravanning Club can be found in the User POI - refer to page 35 for User POI details. -
Page 47: Favourites
You can select as many or as few options as you require to narrow or expand the search. Press OK to continue Press ‘Review facilities selected’ to show a summary of the facilities chosen. If required, you can remove some of the facilities On this screen you can edit the selected facilities. - Page 48 4.1.1 Add a favourite destination Press the centre of the screen to access the ‘Navigate to’ menu. ● ● Press ‘My Favourite’ at the top of the display. ● ● Press the ‘Favourites’ icon. ● ● Press ‘Add’. ● ● You can now search for the destination using the following options displayed: Find address by city ●...
-
Page 49: Recent Destination
4.2 Recent destination This function can be used to delete any or all of the recent destinations that are stored on S8000. S8000 can store up to a maximum of 40 recent destinations. 4.2.1 To delete individually stored recent destinations Press the centre of the screen to access the ‘Navigate to’... -
Page 50: Home
Home To set up and use this function was explained in Section 3.3 earlier in the manual. When this function is accessed from the ‘My Favourite’ menu, you are able to change the ‘Home’ location (for example if you move house) or to delete the ‘Home’ location. 4.4.1 To change the home location Press the centre of the screen to access the ‘Navigate to’... -
Page 51: Office
Office To set up and use this function was explained in Section 3.4 earlier in the manual. When this function is accessed from the ‘My Favourite’ menu, you are able to change the ‘Office’ location (for example if you move house) or to delete the ‘Office’ location. 4.5.1 To change the office location Press the centre of the screen to access the ‘Navigate to’... -
Page 52: Configure Menu
Press ‘Quick Menu’ and ‘Continue’ . ● ● Press ‘OK’ ● ● S8000 will automatically save this location as your ‘Home’ or ‘Office’ destination. 5.0 Configure The ‘Configure’ menu is used to customise the operation and appearance of your unit. To access the ‘Configure’ menu Press the centre of the screen to enter the ‘Navigate to’... - Page 53 Truck Setting up vehicle perameters For Truckmate to calculate a route suitable for your vehicle it needs to know certain information about the vehicle itself such as its height, weight and width. It is possible to save the settings of 10 different trucks. Follow these instructions to enter your vehicles details.
- Page 54 Tunnel Category B1000C ● ● Tunnel Category B/D ● ● Tunnel Category B/E ● ● Tunnel Category C ● ● TUNNEL CATEGORY C/D ● ● Tunnel Category C/E ● ● Tunnel Category D ● ● Tunnel Category D/E ● ● Tunnel Category E ●...
- Page 55 5.3 Caravan/Motorhome Setting up vehicle perameters For Ventura to calculate a route suitable for your vehicle it needs to know certain information about the vehicle itself such as its height, weight and width. It is possible to save the settings of 10 different vehicles. Follow these instructions to enter your vehicles details.
-
Page 56: Change Language
5.4 Volume Control S8000 volume can be adjusted using this function within the ‘Configure’ menu. To adjust the volume: Press the centre of the screen to enter the ‘Navigate to’ menu. ● ● Press ‘Configure’. ● ● Press the ‘Volume Control’ icon. ●... -
Page 57: Speed/Time
This facility customises the map view between North To make your selection, touch the relevant tick box with your finger. 5.6.2 Speed/Time This option allows you to change the information displayed in the bottom left hand side of the navigation screen between the vehicle speed and the current time. -
Page 58: Map Text Size
5.6.5 Map Text Size This option allows you to increase or decrease the size of the road and place name text which appears on the map screen Select the text size then press OK to save and exit 5.6.6 Car Icon This option allows you to choose the icon which appears on the navigation screen. -
Page 59: Lane Guidance
5.6.7 Lane Guidance The allows you to show or hide lane guidance on the navigation screen Lane Guidance On To show or hide lane guidance choose Yes or No then press OK to confirm your selection. Lane Guidance Off Return to contents 59 •... -
Page 60: Show Poi
5.7 Show POI S8000 comes complete with a comprehensive list of POI’s (Point’s of Interest). You can search for addresses using POI’s and save POI’s in your list of favourites. You can also choose which of the POI’s you would like to have indicated on your map. -
Page 61: Camera Alert
5.9 Camera alert In order for this feature to operate you will need to subscribe to and download the AURA™ Camera Database onto S8000. See ‘Registering S8000’ (Page 4) and ‘System Requirements & Downloading’ (page 11) for further details. This function allows you to personalise the camera alert settings that you will receive during operation. To alter the camera alert settings: Press the centre of the screen to enter the ‘Navigate to’... -
Page 62: School
5.9.3 School You can choose between the following options: Yes: Provided you have selected the option to download schools on S8000 updater software, this feature enables the unit to alert you when you are near a primary school*. No: The unit will not provide alerts of Primary schools. Schools are indicated on S8000 display by the icon. -
Page 63: Touch Tone
5.11.1 Touch Tone You can choose between the following options: Yes: The unit emits a confirmation tone each time the screen is touched. No: This will turn off the confirmation beep when the screen is touched. To make your selection, touch the relevant tick box with your finger. 5.11.2 Route Alert If you deviate from the calculated route, S8000 will automatically recalculate a route without any user intervention. -
Page 64: Qwerty Keyboard
5.12 Map Colour This function allows you to choose between the alternative colour schemes that are available for the maps used in S8000 system (several of which are most suitable for use at night). To access this facility: Press the centre of the screen to enter the ‘Navigate to’ menu. ●... -
Page 65: Tmc
5.14 TMC This feature allows you to configure the type of TMC alerts you receive along with the facility to view the radio tuner that searches for TMC transmissions when the TMC aerial is plugged into the TMC socket. To access this facility: Press the centre of the screen to enter the ‘Navigate to’... -
Page 66: Gps Status
5.15 GPS status You can check the health of the GPS connection of your unit at any time as well as being able to see the exact coordinates of your current position by using this feature. Press the centre of the screen to enter the ‘Navigate to’ menu. ●... -
Page 67: Save User Point
5.18 Save user point As mentioned earlier in this user manual you have the facility to store, edit and delete on the S8000. (For more information regarding User Points, please refer to Section 4.3 earlier in the user manual) Before you can store any user points onto your S8000, you need to activate the button that will allow you to do this. Press the centre of the screen to access the ‘Navigate to’... -
Page 68: Version (Hardware & Software)
5.20 Version This option allows you to view the hardware and software version numbers of your unit. To view this information: Press the centre of the screen to enter the ‘Navigate to’ menu. ● ● Press the ‘Configure’ button. ● ●... -
Page 69: Avoid Tollway
6.1.3 Avoid Tollway If you want to calculate a route avoiding any type of Toll Roads, select this feature before calculating your route. Press again to deselect. 6.1.4 Avoid Motorway If you would like to take a more leisurely journey with the chance of a more picturesque view then select the ‘Avoid Motorway’... -
Page 70: Clear Avoided Road
Once the calculation is complete you can either press ‘Go’ to start navigation, ‘Simulation’ to see the actual route that will be taken, ‘Route Option’ to change the parameters of the route or ‘Guide’ which will list the turn by turn instructions of the journey. The ‘Summary Screen’... -
Page 71: Change Start Position
6.4 Change Start Position You can use this function if you would like to calculate a route but from a different location to the one you are currently at. First input your destination address as normal but when you reach the Summary page, press the ‘Route Option’ button. Now press the ‘Change Start Position’... -
Page 72: Volume
Volume Setting Selecting this option opens the Volume menu whereby you can increase or decrease the audio level of the unit. Press the ‘Volume Control’ icon. To adjust the volume, use your finger to press either the button to increase the volume or the button to decrease the volume. -
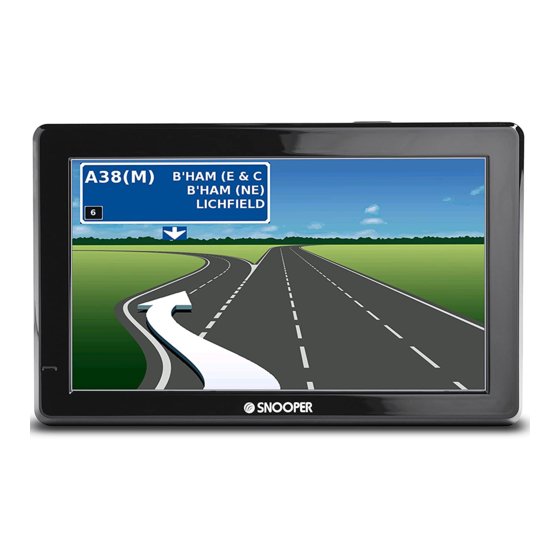
Page 73: Understanding The Mapping Screen
8.0 Understanding the Mapping Screen The red line indicates Distance to next junction or the route you will be instruction taking Whilst navigating a calculated route the S8000 display will show Next motorway exit an information box. This box will or road you are due to tell you the next road you should travel on... -
Page 74: Dvb-T Portable Digital Television
DVB-T Portable Digital Television IMPORTANT NOTICE. PLEASE READ Never attempt to watch DVB-T digital TV whilst driving a vehicle. If a passenger wishes to view DVB-T in a moving vehicle, the unit must be positioned so that the driver cannot see the screen. Watching DVB-T TV whilst driving is illegal and highly dangerous. Do not operate or attempt to operate this device whilst driving a vehicle. -
Page 75: Dvb-T Set
4. TV Shows a list of TV channels that are currently available to view in your area 5. Radio Shows a list of Radio channels that are currently available to view in your area Favourites Shows a list of channels you have saved as Favourites. See section on Saving Favourites below. 6. -
Page 76: Video
VIDEO To view Video files press the ‘Media’ button then the ‘Video’ button. Due to the size of some video files you will need to prepare a separate SD card with your video files and insert it in to the SD card slot. 1. -
Page 77: Music
MUSIC Press MUSIC button from the Media Menu 1. Stop 2. Move to previous file 3. Play/Pause 4. Move to next file 5. List 6. EQ Setting 7. Random Play 8. Repeat Play 9. File Name 10. Volume Up 11. Volume Down 12. -
Page 78: Phone
PHONE By connecting the S8000 with a phone which has built-in Bluetooth users can call and receive phone calls. Press the Phone button in the main menu. 1. Dial Pad : shows the Dial pad screen to make a phone call 2. -
Page 79: Pairing
Pairing In order to use the Bluetooth facility you must first ‘pair’ your unit with your mobile phone. Once the phone is paired with the S8000, there is no need to do the pairing again unless the mobile phone is changed. 1. -
Page 80: Connect / Disconnect
Connect / Disconnect 1. When a connection between the mobile phone and a tool is done through “Pairing” on the “Setup” screen, press the “Connect” button and activate the Bluetooth connection. 2. To disconnect, press the “Disconnect” button. CAUTION: THERE ARE SOME FUNCTIONS WHICH CAN ONLY BE PERFORMED ON THE MOBILE PHONE DEPENDING ON THE MOBILE PHONE TYPE. -
Page 81: Phone Call
Phone Call When in the Bluetooth main screen and you press ‘Redial’ or you make/answer a call using the ‘Call’ , ‘Dial’ or ‘Call History’ functions the following icons at the top of the screen are displayed (see picture below). 1. -
Page 82: Photo
PHOTO To view photos press the PHOTO button. Photos can be added to the existing SD card or prepared on a separate SD card. Press the button in the Media Menu to switch to PHOTO 1. Sub Folder 2. Image 3. -
Page 83: System Settings
System Settings To enter the and adjust the systems settings press the SETTINGS button. Please note Press on the tab to view or change setting on the device SCREEN START MENU You can chose how the S8000 starts when it is powered On. NAVI When the device is switched on the unit will automatically start in navigation mode... - Page 84 SOUND To enter and adjust the sound settings of the DB5800 press the SOUND tab. VOLUME To adjust the master volume of the S8000 press the right arrow to increase the volume and the left arrow to decrease the volume TOUCH SOUND The touch screen ‘beep’...
-
Page 85: Version
FIRMWARE UPGRADE Periodically Snooper may find it necessary to release firmware updates for the S8000, these updates will be downloadable from www.snooperneo.co.uk. Instructions for performing the the download will made available at the time of the firmware release. -
Page 86: Screen Icons
Screen Icons Receive Sensitivity of DVB-T Indicates the receive sensitivity of the broadcast currently being received X means there is no reception and 5 antenna bars mean the highest receive sensitivity. No reception Maximum Caution! These antenna icons do not indicate the receive sensitivity of GPS but will be displayed only during DVB-T (Digital Video Broadcasting –... -
Page 87: Troubleshooting S8000 Downloads
If you are still unable to perform a download after following all of this checklist then please send an email to Support@snooper.eu stating the nature of your difficulty. To expedite your enquiry please supply as much detail as possible including your contact details, S8000 serial number, PC operating system, error codes and any other relevant information. - Page 88 4. Is the USB cable supplied with S8000 connected correctly? Please make sure the USB lead has a secure connection to the PC and is fully plugged in. Ensure the smaller connector is plugged into the USB socket on the side of the unit. Only plug the USB lead into S8000 once you see the ‘Menu Screen’ after turning S8000 ‘ON’...
- Page 89 Warning: We do not recommend disabling your firewall software in order to perform a download to S8000, nor can we provide advice on how to alter the settings on third party software, nor can we be held responsible for any action taken by the PC user that makes the PC more vulnerable to malicious viruses, software and computer hackers.
- Page 90 12. Can’t charge the battery -Please check if the AC adapter/cigarette lighter adapter is connected correctly. -Please check if the contact area is dirty. If you operate the unit during USB charging, the charging may not be completed. So please turn off the unit to charge or charge the unit by using AC/cigaratte lighter adapter.
-
Page 91: Specification
S8000 SPECIFICATION WIN CE 6.0 *Note: Only the SD Core edition card supplied will work with S8000 once Speed 720 MHz synchronisation of the Type TCC9101/Telechips card and the unit has been Memory 128 MB Nand Flash completed. Replacement 256 MB DDR2 cards are available from Performance Products Display... - Page 92 Video Player WMV9(SP)(3) Photo Viewer BMP, JPG, GIF, PNG(2) Multi-Task MP3 & NAVI, MP3 & Photo, MAP Language 14 countries “English/French/German/Dutch/Italian/Spanish/Portuguese/ Finnish/Swedish/Norwegian/Danish/Czech/Turkish/Greek” EXT-ANT External Active ANT D-TV External Passive ANT Port/Jack Audio Out Earphone Jack 3.5 Ø (Stereo) USB 2.0 OTG MINI AB OTG Connector DC Input 5.5V...
-
Page 93: Accessories
The AC mains adaptor must not be used outdoors or in damp areas. Never alter the power cord or plug. If the plug will not fit into the outlet, have a proper outlet installed by a qualified technician. Only use Snooper approved chargers intended for use with S8000. Other charges may not be designed to the same safety or performance standards. - Page 94 Snooper product. The recycling of materials will help to conserve natural resources. For more detailed information about recycling of this product, please contact your local waste authority.
-
Page 95: Service Under Warranty
ACCESSORIES & PRICE LIST The following accessories are available from your local Snooper dealer. For further details please contact our sales department on 0333 240 1000 (Option 1). £149.99 Replacement European Mapping SD Card £34.99 Remote GPS extension antenna (5m) In-car charger (24v/12v DC) adaptor £19.99...
Need help?
Do you have a question about the Syrius Pro and is the answer not in the manual?
Questions and answers