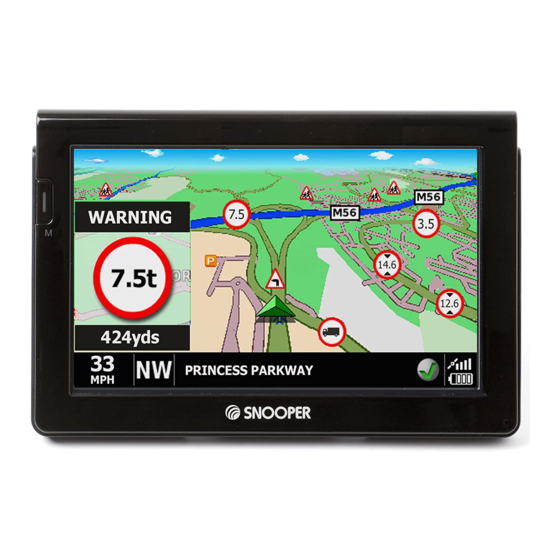
Snooper S7000 User Manual
7” screen portable satellite navigation system & dvb-t television
Hide thumbs
Also See for S7000:
- Quick start manual (108 pages) ,
- Quick start manual (120 pages) ,
- User manual (350 pages)

Related Manuals for Snooper S7000


Summary of Contents for Snooper S7000
- Page 1 S7000 7” Screen Portable Satellite Navigation System & DVB-T Television User Manual...
- Page 2 S7000 comes with an SD Card that contains the UK & Ireland navigation software. The SD Card can be activated in seconds by inserting the card into the SD slot on the top of the unit. When necessary, upgrades to this mapping data will be made available for you once every twelve months.
-
Page 3: Table Of Contents
11 Installing S7000 Shortest Time 12 Power Connection & Charging Shortest Distance 13 Charging the internal battery 49 Avoid Tollway Powering S7000 using the built-in battery Avoid Motorway 15 Satelite Navigation Navigate Avoiding Road 16 Brightness Avoid by Road Name... -
Page 4: What's Included
S7000 What’s included? 1 x Snooper S7000 satellite navigation system 1 x windscreen mounting bracket 1 x home charger 1 x in-car charger 1 x TMC antenna 1 x CD Rom PLEASE NOTE Due to our desire to continually improve our products, the speci cation may change without notice. -
Page 5: Overview
S7000 Overview 1. Power/MENU Button 6. Video In socket Press and hold to switch on or o . Press and release to Can be used for attaching a rear camera – sold separately switch between functions. 7. USB socket 2. LED Power indicator 8. -
Page 6: Registering S7000
If you register by post, your unit should normally be activated within 24 hours upon our receipt of your completed registration form. Please Note: To register S7000 you will need the serial number of your unit which can be found on the back of the device. -
Page 7: Quick Start Guide To Navigation
S7000 Quick Start Guide to Navigation 1. Take S7000 outside so that the GPS receiver can locate your position. This may take between 15 - 50 minutes the rst time. When satellite lock is achieved, the screen will display your current position on its map in a ‘3D’ navigation view. - Page 8 The navigation view will now be displayed, but with the route now highlighted for you. As you approach a speci c turn in the calculated route, S7000 will advise you what to do. For example, “After 200 yards, turn left”, followed by “Now turn left”.
-
Page 9: Start Up - Installing The Sd Card
*When S7000 Updater is run for the rst time you will be asked to select your language and then to select the camera data that you wish to download. Select the data you would like and then click ‘OK’ . The software is now ready for use. -
Page 10: Downloading The Aura™ Camera Database
**If you have a Firewall on your computer, the Firewall software may inform you that S7000 Updater software is trying to access the internet. Please make sure that you grant/allow/permit access to S7000 Updater program through the Firewall. -
Page 11: Installing S7000
DC 5V on the back of S7000 and plug the larger plug into the cigarette lighter socket of your vehicle. Please Note: Only use the cigarette lighter power cable provided with S7000. S7000 operates on 5V not 12V and using any other cigarette lighter power cable will damage your device and void the warranty. -
Page 12: Power Connection & Charging
3. Plug the other end of the cigarette lighter adaptor into your vehicles cigarette lighter socket. If S7000 is powered using the cigarette lighter socket a Red LED will illuminate below a Blue LED on the left hand side of the unit. -
Page 13: Charging The Internal Battery
Powering S7000 using the built-in battery Once S7000 is fully charged, it is ready for use. Move the ‘Batt. ON/OFF’ switch to the ‘ON’ position and press and hold the standby/ power switch on the left hand side of the unit for 2 seconds to switch on the device. - Page 14 WARNING: PLEASE DO NOT USE OR LEAVE S7000 IN EITHER WET OR HUMID CONDITIONS, OR IN EXTREME TEMPERATURES, AS THIS COULD PERMANENTLY DAMAGE THE UNIT AND THE BATTERY. WHEN NOT IN USE DO NOT LEAVE THE UNIT ATTACHED TO THE WINDSCREEN, ESPECIALLY WHEN THE WEATHER IS WARM, TO AVOID DAMAGE TO THE UNIT AND ALSO REDUCE THE RISK OF THEFT.
- Page 15 Whilst S7000 software is loading a start-up display will be shown for just a few seconds and then the screen will show a section of a map. S7000 needs to acquire a minimum of four satellites in order to work. Once this has been achieved S7000 will ascertain your position and this will be indicated by a green arrow icon on the on-screen map and the GPS signal strength will be shown in the bottom right hand corner of the display.
- Page 16 Press ‘OK’ at the bottom of the screen to save your preferences. Your chosen settings will now be saved and will appear on the screen each time you use S7000. If you want to switch between your Current Speed and the Atomic Clock or the Estimated Time of Arrival and Time to Destination during your journey simply touch the screen where either piece of information is displayed and the unit will display the alternate setting and vice versa.
-
Page 17: Planning A Route
Press the centre of the screen to access the ‘Navigate to’ menu. Press the ‘Find by Post Code’ icon. If you have the European version of S7000, you will need to select the ‘Country’ rst BEFORE typing the postcode. (If the correct country is already displayed, go to the next step). - Page 18 Next press ‘City’ and enter the city name using the keyboard displayed. As you begin to input the city name, S7000 will automatically prompt you with a list of possible matches. If you can see the name of the destination you are searching for in the lower window, you can select it easily by pressing that name with your nger.
- Page 19 Press the centre of the display to enter the ‘Navigate to’ menu. Press the ‘Home’ icon. S7000 will display details of the destination and o er a ‘Go’ button and a ‘Route Option’ button. Press ‘Go’ to begin your journey. Return to contents...
- Page 20 S7000 will display details of the destination and o er a ‘Go’ button and a ‘Route Option’ button. Press ‘Go’ to begin your journey. S7000 automatically stores the last route that has been calculated, so that if you wish to return to that address you do not have to re-input all the details again.
- Page 21 NOT been entered. With S7000 you have the facility to enter more than one destination at a time (for instance if you wish to visit other locations before reaching your ultimate destination). You can store up to ten individual destinations. The unit will process and calculate the destinations in the following order: A to B, B to C, and C to D etc.
-
Page 22: Multi-Route
Press ‘Calculate’. S7000 will calculate the route to each destination stage and provide a new summary screen with the distance to each destination stage along with the estimated duration of the journey to each destination stage from the start point. -
Page 23: System Security Code
S7000 or you will not be able to operate the device. NB. It is important that you do not lose or forget this code. If you forget this code you will need to return your S7000 so that the unit can be reset. -
Page 24: Find By Favourites
S7000. NB. It is important that you do not lose or forget this code. If you forget this code you will need to return your S7000 so that the unit can be reset. - Page 25 3.10 (Points of Interest) If you would like to calculate a route to a hotel, airport, restaurant or even a golf course S7000 can calculate a route using its extensive database of POI’s (Points of Interest). To navigate using this database: Press the centre of the screen to access the ‘Navigate to’...
- Page 26 Once the calculation is complete you can either press ‘Go’ to start navigation, ‘Simulation’ to see the actual route that will be taken, ‘Route Option’ to change the parameters of the route or ‘Guide’ which will list the turn by turn instructions of the journey. The ‘Summary Screen’...
- Page 27 Next press ‘City’ and enter the city name using the keyboard displayed. As you begin to input the city name, S7000 will automatically prompt you with a list of possible matches. If you can see the name of the destination you are searching for in the lower window, you can select it easily by pressing that name with your nger.
-
Page 28: Find By Map'
Once the calculation is complete you can either press ‘Go’ to start navigation, ‘Simulation’ to see the actual route that will be taken, ‘Route Option’ to change the parameters of the route or ‘Guide’ which will list the turn by turn instructions of the journey. -
Page 29: Re-Route
3.13.2 If you wish to avoid several roads from the selected route calculated by S7000, then this function allows you to re-calculate a route over a user de ned distance, ranging from 1 mile up to a maximum of 100 miles. -
Page 30: Clear Avoided Road
3.13.3 If you do not wish to use the alternative routes o ered by S7000 and you wish to return to the original calculated route, press the ‘Clear Avoided Road’ button and the original route plotted by S7000 will be restored. -
Page 31: Tmc
Wheel Wheel Wheel Wheel TMC Options The type of alerts you receive whilst using TMC can be edited in the con guration menu of S7000. To access the menu press the Windscreen Windscreen Windscreen Windscreen centre of the display, then press... -
Page 32: Favourites
To show TMC events which are NOT on your route press To see a more detailed description press the TMC warning: To avoid the incident press S7000 will now calculate an alternative route. To view the incident press To return to the previous screen press... - Page 33 4.1.1 Add a favourite destination Press the centre of the screen to access the ‘Navigate to’ menu. Press ‘My Favourite’ at the top of the display. Press the ‘Favourites’ icon. Press ‘Add’. You can now search for the destination using the following options displayed: Find address by City Find address by post code...
- Page 34 This function can be used to edit or delete any or all user stored locations that you can store in S7000. The unit has the facility of storing up to 100 user locations. (For further information on saving new coordinates, please refer to the section ‘Saving New User Points’...
- Page 35 4.3.1 Editing user points Once a user point has been stored onto S7000 the location requires editing so that the correct alert will be given when you approach the user stored coordinate. To edit the user point: Press the centre of the display to enter the ‘Navigate to’ menu.
- Page 36 4.3.3 Delete individually stored user points Press the centre of the display to enter the ‘Navigate to’ menu. Press ‘My Favourite’ at the top of the display. Press the ‘User Point’ icon Select the user point you wish to delete. You can scroll through the list of user points by using the up, down arrows located on the right hand side of the display.
- Page 37 Once you have entered your ‘Home’ location details you also have the facility to name your destination. Press ‘Name’ and a keyboard will be displayed with the road name of the destination you selected. Press the ‘Arrow’ key to erase this data then input the new name using the keyboard. Press ‘Save’...
- Page 38 If this is not correct, select the correct road with your nger. Press ‘Quick Menu’ and ‘Continue’ . Press ‘OK’ S7000 will automatically save this location as your ‘Home’ or ‘O ce’ destination.
-
Page 39: Brightness
‘OK’ button at the bottom of the screen. Please note: If ‘Day’ is ticked when you press ‘OK’ at the bottom of the display S7000 will retain this setting when the unit is switched OFF. The same also applies if ‘Night’ is ticked. - Page 40 S7000 comes with a choice of voice prompts and alerts in several languages. Changing the language also changes the language of the menu items as well on the unit. To use this facility: Press the centre of the screen to enter the ‘Navigate to’ menu.
- Page 41 Your new settings will now be saved and will appear on the screen each time you use S7000. S7000 comes complete with a comprehensive list of POI’s (Point’s of Interest). You can search for addresses using POI’s and save POI’s in your list of favourites. You can also choose which of the POI’s you would like to have indicated on your map. As standard ALL POI’s are shown, however this list can be edited within the POI Menu.
-
Page 42: Auto Scale
In order for this feature to operate you will need to subscribe to and download the AURA™ Camera Database onto S7000. See ‘Registering S7000’ (Page 6) and ‘System Requirements & Downloading’ (page 9) for further details. - Page 43 This function allows you to personalise the camera alert settings that you will receive during operation. To alter the camera alert settings: Press the centre of the screen to enter the ‘Navigate to’ menu. Press the ‘Con gure’ button. Press the ‘Camera alert’ icon. A list of options is displayed on the left hand side of the screen.
-
Page 44: Auto Mute
Yes: The unit will provide an audible alert at your set audible level but will then reduce this alert to a lower level after a few seconds when you are approaching a safety camera. No: S7000 will continue to emit a tone at a constant audio level until the camera has been passed. To make your selection, touch the relevant tick box with your nger. - Page 45 To make your selection, touch the relevant tick box with your nger. 5.8.2 If you deviate from the calculated route, S7000 will automatically recalculate a route without any user intervention. To indicate rerouting is in progress S7000 will emit an audible tone.
- Page 46 5.10 This function allows you to choose between the alternative colour schemes that are available for the maps used in S7000 system (several of which are most suitable for use at night). To access this facility: Press the centre of the screen to enter the ‘Navigate to’ menu.
- Page 47 5.12 S7000 comes with the facility to wirelessly connect to other Bluetooth enabled devices such as mobile phones. 5.12.1 Activating Bluetooth on S7000 Press the centre of the display to enter the ‘Navigate to’ menu. Press ‘Con gure’ . Press the black arrow once.
- Page 48 If you wish to check the reliability of the software data on your SD card then press this button and S7000 will then perform a ‘system check’ to ensure that the SD card information is at optimum e ciency.
- Page 49 6.1.3 If you want to calculate a route avoiding any type of Toll Roads, select this feature before calculating your route. Press again to deselect. 6.1.4 If you would like to take a more leisurely journey with the chance of a more pi cturesque view then select the ‘Avoid Motorway’...
- Page 50 6.2.3 If you do not wish to use the alternative routes o ered by S7000 and you wish to return to the original calculated route, press the ‘Clear Avoided Road’ button and the original route plotted by S7000 will be restored.
-
Page 51: Summary Screen
If you would like to calculate a route to a destination but want to go via a speci c location along the way you can use this function. Simply input the details of your nal destination as usual but press the ‘Route Option’ button in the summary screen and then select the ‘Navigate Via Location’... -
Page 52: Quick Access Menu
Please note that this new setting is only temporary and if S7000 is switched o and then back on the audio level returns to either the factory default or your personalised setting. If you press the speaker icon you can turn o the audio on the unit completely. -
Page 53: Scroll Map
. To restore the camera alerts press the top of S7000’s display to show the drop down menu and then press the camera icon. -
Page 54: Understanding The Mapping Screen
B5358 Distance to roundabout As well as navigating Gatso Safety Camera Alerts you safely from A to B, S7000 will also alert you automatically to all Fixed Speed Cameras on your route whether you have a route planned or not. -
Page 55: Speed Camera Alert Patterns
9.4 Saving User Points If in the unlikely event that you pass the location of a safety camera and S7000 does not provide you with an alert, you have the opportunity to store the coordinates of that location manually. Simply park safely and as close as possible to the site, then press and hold the ‘M’... -
Page 56: Troubleshooting - Saving User Points
When you attempt to save the new User Point and the Information window with ‘Save user point?’ is not displayed it means that the memory in S7000 is completely full. If you want to store any di erent coordinates, you will have to either delete some or all of the existing coordinates stored in the unit’s memory. -
Page 57: Dvb-T Portable Digital Television
REGION button. Select the region you are in and then press the back arrow in the top right hand corner of the screen to return to the previous screen. Then press the SCAN button followed by the START button. The S7000 will then begin to scan for the channels available in your area. -
Page 58: Dvb-T Set
Favourites Shows a list of channels you have saved as Favourites. See section on Saving Favourites below. Signal Strength Shows current strength of DVB-T signal in your area. Volume Shows current volume level set Mute button Press the mute button to temporarily mute the sound. Please note that it is not possible to listen to DVB-T TV or Radio channels if you have the TMC antenna plugged in. -
Page 59: Video
VIDEO To view play and view Video press the Video button. Due to the size of some video les you will need to prepare a separate SD card with your video les and insert it in to the SD card slot. 1. -
Page 60: Music
7. List Down Please note 1. S7000 can play WMA, MP3, OGG les only. 2. If a le has not been converted to MP3, WMA, or OGG successfully it will not be played or will skip to another le during playing. -
Page 61: Photo
7. Slide Show Please note 1. Some photos can be added to the SD card provided with the S7000. It is recommended however that you prepare a separate SD card for your music, photos and video etc 2. PHOTO folder will be created when you insert the SD card and turn on the power. -
Page 62: System Settings
System Settings To enter the and adjust the systems settings press the button. 1. Volume – press this button to enter and adjust the systems volume control. 2. Brightness – press this button to enter and adjust the systems brightness control. 3. - Page 63 8. Version Information Press this button to identify the software version of your product. To restore the original factory settings of your device press the button. Return to contents...
-
Page 64: Phone
PHONE By connecting the S7000 with a phone which has built-in Bluetooth users can call and receive phone calls. Press the Phone button in the main menu. 1. Dial Pad : shows Dial pad screen to make a phone call 2. -
Page 65: Pairing
Pairing It means an operation which registers a tool in order to setup connections between a mobile phone which has Bluetooth function and tools. In order to use Bluetooth function, it must be done with “Pairing”. Once the phone is done with “Pairing”, there is no need to do “Pairing” again unless the phone is newly changed. 1. -
Page 66: Connect / Disconnect
Connect / Disconnect It means an operation that sets up connection between a mobile phone that has Bluetooth function and a tool. When the “Paring” is done, “Connection” must be done in order to use Bluetooth function. 1. When a mutual registration between the mobile phone and a tool is done through “Pairing” on the “Setup” screen, press “Connect”... -
Page 67: Phone Call
Phone Call When the user presses a “Redial” button in the Bluetooth main screen, or makes a phone call by pressing a “Call” button in a “Dial pad” screen, “History” screen, or answers a phone call by pressing an “Answer” button, makes a phone call or answers a phone call, the top of the screen shows as below. -
Page 68: Screen Icons
Screen Icons 1. Receive Sensitivity of DVB-T Indicates the receive sensitivity of the broadcast currently being received X means there is no reception and 5 antenna bars mean the highest receive sensitivity. No reception Maximum CAUTION! THESE ANTENNA ICONS DO NOT INDICATE THE RECEIVE SENSITIVITY OF GPS BUT WILL BE DISPLAYED ONLY DURING DVB T DIGITAL VIDEO BROADCASTING TERRESTRIAL . -
Page 69: Troubleshooting S7000 Downloads
Downloads S7000 If you are having any di culty in performing a download onto S7000 unit it is advisable to refer to the checklist in Section A rst before contacting us. If you are still unable to perform a download after following all of this checklist then please send an email to Support@snooper.eu stating the nature of your di culty. - Page 70 Please check to see if you have the latest version of the software by visiting http://www.snooperneo.co.uk/software.cfm to check what software version you have, double left click S7000 icon in your system tray, look at the top of the window that opens and you will see the version number in brackets.
- Page 71 Section A for how to determine what Service Pack your windows XP Operating System has. If you do have a Firewall on your computer S7000 Updater software may appear to stop and it is at this point that your Firewall software will inform you that S7000 Updater software is trying to access the internet.
- Page 72 9. Can’t read the SD card - Please remember that this device supports SD type or SDHC class 6 type card with max. 8GB. Please check if the le system is of FAT16 or FAT32. Please check if the surface of the card is stained with dirt. 10.
-
Page 73: Specification
Do not place your product in the area above your cars airbag. CHILDREN KEEP OUT OF CHILDRENS REACH. DO NOT ALLOW CHILDREN TO PLAY WITH S7000 OR ITS ACCESSORIES. THEY COULD HURT THEMSELVES OR OTHERS, OR COULD ACCIDENTALLY DAMAGE YOUR UNIT OR ACCESSORY. S7000 CONTAINS SMALL PARTS THAT COULD BE DETACHED AND CREATE A CHOKING HAZARD. - Page 74 Battery We recommend that you fully charge the battery before you use S7000 for the rst time. A new battery or one that has not been used for a long time could have a reduced capacity the rst few times it is used.
-
Page 75: Service Under Warranty
** This attachment must be purchased to enable you to attach S7000 to a Pro Fit bracket. SERVICE UNDER WARRANTY S7000 comes with a standard two-year manufacturer’s warranty. If, for some reason your unit requires service under warranty return S7000 by special delivery and in suitable packaging to: The Returns Dept., Performance Products Limited,...
Need help?
Do you have a question about the S7000 and is the answer not in the manual?
Questions and answers