
Related Manuals for Snooper AVN S7000


Summary of Contents for Snooper AVN S7000
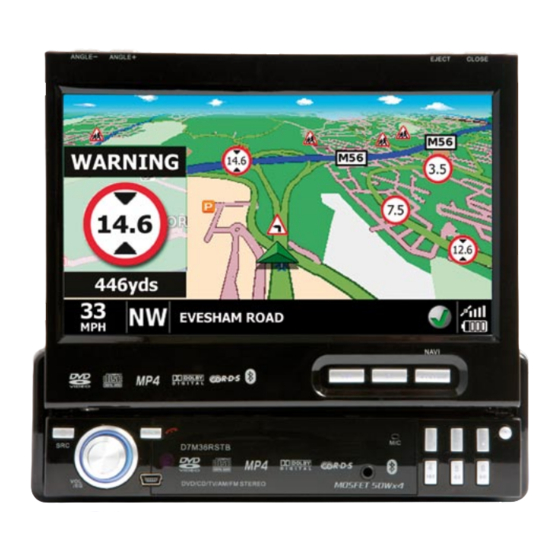
- Page 1 AVN S7000 In-dash Motorised 7” Wide Touchscreen Satellite Navigation, AM/FM Receiver, DVD Player User Manual...
-
Page 2: Table Of Contents
TABLE OF CONTENTS SAFETY INFORMATIONS Safety Informations PLEASE READ COMPLETELY AND BECOME FAMILIAR WITH THE CONTENTS OF THIS MANUAL Features BEFORE INSTALLATION AND OPERATION OF THIS UNIT, AND KEEP IT CAREFULLY FOR FUTURE REFERENCE. Accessories Unit Installation 7-12 CAUTION: This unit is a class 1 laser product. The laser beam may cause hazardous Installation radiation if exposure to laser system directly. -
Page 3: Features
• Do not use any chemical solvent, cleaning agent or corrosive detergent to clean away • Full Function Remote Control dirt on the surface of the TFT monitor screen. It may cause irreversible damage. AM/FM PLL Synthesizer Tuner with 30 Memory Presets •... -
Page 4: Accessories
ACCESSORIES UNIT INSTALLATION INSTALLATION Please read all of the instructions before beginning the installation. It is strongly recommended to have your unit installed by a professional installation shop. Tools and Supplies: You will need these tools and supplies to install your unit: Bolt Steel Bar x 1 M5X5 Screws x 4... -
Page 5: Removal
SECURINg ThE UNIT TO ThE MOUNTINg BRACkET REMOVAL 1. Detach the front panel. Installation Method 1. Install the front panel into the unit. 2. Insert the keys that supply to the unit at both sides of the unit (shown as illustrated) 2. - Page 6 WIRINg CONNECTION FUSE REPLACEMENT – WARNINg! Cautions: Never replace any fuse with one of a higher value than the fuse supplied • To prevent short circuits, remove the key from the ignition and disconnect the with your unit. Using a higher current rated fuse may cause damage to your unit terminal of the battery.
-
Page 7: Disc Notes
Notes: DISC NOTES • If the TV antenna is mounted near a radio antenna, reception quality may be affected during simultaneous reception of TV and Radio broadcasts. Disc formats supported by this player • Please separate Battery Units before setting products to prevent from fire and electric shock. -
Page 8: Installing The N7000 Navibox
INSTALLINg ThE N7000 NAVI BOX Mounting the Navi box The Navi box needs to be mounted in a position where you have access to the SD card. Components This is critical if you wish to perform speed camera updates or map updates. There are a number of suitable places to mount the Navi box depending on your vehicle including 1. -
Page 9: Unit View
UNIT VIEW 1. [ANgLE -] / 2. [ANgLE +] Adjust the view angle of the monitor to choose the best displaying effect. FRONT PANEL 1- Continual angle adjustment Hold on pressing the [ANGLE +] / [ANGLE -] buttons to adjust the angle of TFT monitor upward / downward by continual increasing / decreasing. -
Page 10: Front Panel Display
FRONT PANEL DISPLAY 13. [F.FWD] Press to select fast forward with different speed. 14. [F.REV] Press to select fast reverse with different speed. 15. [PREVIOUS] Press to skip to play the pervious track. 16. [NEXT] Press to skip to play the next track. 17. -
Page 11: Remote Control
REMOTE CONTROL 9. LD Icon: (Loudness) It displays when the LOUD function is on. 10. ST Icon: (Stereo) It displays if listened station has stereo broadcast. 11. Disc Type Indicator: It indicates the type of disc played (DVD, CD, VCD and MP3). 1. - Page 12 1. [POWER/SOURCE] 12. [RANDOM/TRANSFER] Same functions as key on front panel. Press to turn RANDOM function on / off when playing CD / VCD disc (PBC OFF). During a phone call, press to transfer the call between the unit and your cell phone. 2.
-
Page 13: Basic Operation
BASIC OPERATIONS 26. [F.FWD] Press to select fast forward with different speed. Startup Press the [POWER/SOURCE] button on the panel or remote control to startup the 28. [STOP] power, the TFT monitor will spread out automatically and the system return to the Press to stop the playback. -
Page 14: Touch Screen Operations
TOUCh SCREEN OPERATIONS Brake Control It is necessary to connect the Brake Control wire to the Hand-brake switch of the car. While driving, the TFT monitor will display the alarm picture (see as follows) in order to TOUCh SCREEN CALIBRATE ensure the safety. -
Page 15: Main Menu
MAIN MENU RADIO OPERATIONS Touch the icon “RADIO” to enter the 1st operation page of RADIO Mode: Touch the icon “MORE” to enter the 2nd page of main menu: 1~6. STORED ChANNEL Manual Store Radio Station Hold on touching the icon, you can store current radio frequency to the stored channel. For example, the current frequency is 98.5MHZ, by hold on touching the icon 1, you can store the radio station of 98.5MHZ to the channel 1. - Page 16 Press any button to stop seeking. 4. NEXT PAgE Seeking will stop automatically when seek an available channel then play this station. Touch the icon to enter the 3rd page of RADIO Mode: The unit will stop on the beginning frequency if no available station after seeking one cycle.
- Page 17 3. MENU 5. AF (ALTERNATIVE FREQUENCY) Touch the icon to return the main menu. Touch this icon or press the [AF] button to activate/deactivate the AF function. When receiving conditions become bad, a station with better receiving conditions is 4. NEXT PAgE automatically tuned into.
-
Page 18: Dvd Operations
buttons to move the cursor to TA VOLUME, then press [<] / [>] buttons to adjust DVD OPERATIONS the volume. No matter how loud the volume is in the other mode, it will broadcast the traffic announcement in the same sound level. When listening to the traffic Touch the icon “DVD”... -
Page 19: Usb Operations
7. STOP 8. NEXT PAgE During movie playback, touch the icon once; the DVD player memorizes the location Touch the icon to enter the 1st page of DVD Mode. where you stopped (touch the [PLAY] icon to resume playing from the memorized location). - Page 20 1~6. STORED ChANNEL 1. SEEk – / 2. SEEk + Manual Store TV Station Touch the icon to seek the next available channel by increasing / decreasing the tuning frequency. Hold on touching the icon, you can store current station to the stored channel. For example, the current station is 3 CH, by hold on touching the icon 1, you can store the Press any button to stop seeking.
-
Page 21: Ipod Operations
2. SYSTEM 1. The Number of Playing Song Touch the icon to switch the TV system as follow: 2. The Total Songs in Play List NTSC – PAL/BG – PAL/I – PAL/DK – NTSC 3. The Playing Time 3. MENU 4. -
Page 22: Av In Operations
AV IN OPERATIONS Video Operation Touch the icon “AV IN” to enter the AV IN Mode: 1. MUTE Touch the icon to mute the sound; touch it again to resume to the previous volume level. 1. MUTE 2. MUSIC Touch the icon to mute the sound; touch it again to resume to the previous volume Touch the icon to switch to the MUSIC operation. -
Page 23: Bluetooth Operations
BLUETOOTh OPERATIONS SETTINgS Touch the BLUETOOTH icon to enter the Bluetooth mode: NOTE: Touch the icon 2~6, when item is changed to blue color, the item is selected. 1. RETURN Touch it again to change the item to red color, the operation is active. Touch the icon to return the MAIN MENU. - Page 24 PhONE CALL 5. AUDIO PAIRINg Touch the icon, then see the below message on information display: Then set the audio device to pair it with the unit. Touch the icon again to cancel the pairing, and see the below message on information display: When pairing finished, set the audio device to connect it with the unit, then you can see the audio device name on information display.
- Page 25 PhONEBOOk CALLINg OUT When call out, you will see the below information: Then when talking, you will see the below information: And end the call, you will see the below information: CALLINg IN When call in, you will see the below image: NOTE: Touch the icon 7~11, to select the item;...
- Page 26 AUDIO 8. SIM PhONEBOOk The Simbook stored in the paired phone. 9. DIALLED CALL The dialled calls stored in the paired phone. 10. RECEIVED CALL The received calls stored in the paired phone. 11. MISSED CALL The missed calls stored in the paired phone. Touch the icon to enter the phonebook, you will see the below image: 1.
-
Page 27: System Setup
SYSTEM SETUP SYSTEM SETUP Touch the icon “SETUP” or press the [SYSTEM] button of panel to enter the SETUP of system parameters: USA – JAPAN – OIRT – EUROPE – ASIA – USA RADIO AREA: US – CCIR – IT – AUS – NZ – US TV AREA: BLUETOOTh: OFF –... - Page 28 AUDIO SETUP CLOCk SETUP - 15 ~ + 15 BASS: - 15 ~ + 15 TREBLE: BALANCE: L 15 ~ R 15 12H / 24H CLOCk: FADER: F 15 ~ R 15 ON / OFF DISPLAY: 00 ~ 23 hOUR: MAUD SETUP (MORE AUDIO SETUP) 00 ~ 59 MINUTE:...
-
Page 29: Dvd Setup Menu
DVD SETUP MENU SYSTEM MENU SETUP MENU OPERATION Press the [SETUP] button of remote control to enter the DVD SETUP Menu. Press the [<] / [>] buttons to switch the main menus as following: SYSTEM – LANgUAgE – AUDIO – VIDEO – SPEAkER – DIgITAL Press the [ ] / [ ] buttons to enter the submenus from main menus. -
Page 30: Language Setup
LANgUAgE SETUP AUDIO SETUP AUDIO OUT OSD LANgUAgE Following options are available for the AUDIO OUT: Following options are available for the OSD LANGUAGE: SPDIF / OFF SPDIF / RAW SPDIF / PCM ENGLISH GERMAN SPANISH FRENCH PORTUGUESE ITALIAN RUSSIAN DUTCH SWEDISH KOREAN... -
Page 31: Speaker Setup
DIgITAL SETUP BRIghTNESS Following options are available for the BRIGHTNESS: 0 2 4 6 8 10 12 CONTRAST Following options are available for the CONTRAST: 0 2 4 6 8 10 12 Following options are available for the HUE: -6 -4 -2 0 +2 +4 +6 SATURATION Following options are available for the SATURATION: 0 2 4 6 8 10 12... -
Page 32: Troubleshooting
TROUBLEShOOTINg Problem Cause Corrective Action If any of problem persists after checking the below list, Please consult your nearest TFT MONITOR service dealer. Never attempt to disassemble and repair unit personally. Monitor does not TFT Auto Open is turned of Turn TFT Auto open on open automatically Problem... -
Page 33: Specifications
SPECIFICATIONS Problem Cause Corrective Action Power Load 4 Ohms Front Power Output Interruption Frequency Response: 20Hz-20kHz occurred during Disc is dirty or scratched Clean disc or replace ≤30%(VOL MAX) playback Power Load 4 Ohms File is damaged/bad recording Recreate disc with good files Rear Power Output Frequency Response: 20Hz-20kHz... - Page 34 Performance Products Ltd Cleaver House, Sarus Court, Manor Park, Runcorn WA7 1UL UK www.snooper.eu...
Need help?
Do you have a question about the AVN S7000 and is the answer not in the manual?
Questions and answers