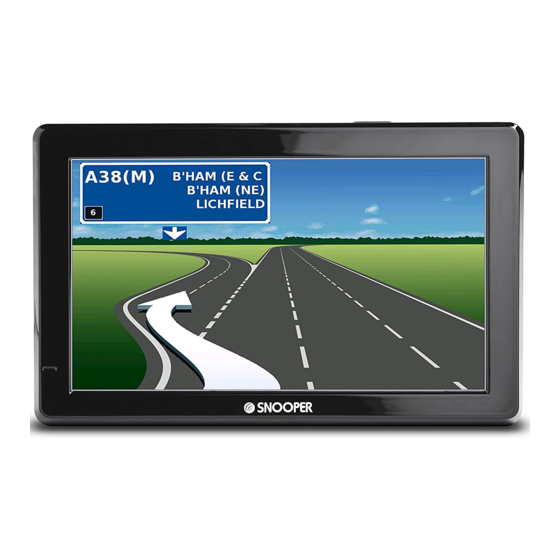
Snooper Syrius Pro User Manual

Snooper Syrius Pro User Manual

Portable satellite navigation system
Hide thumbs Also See for Syrius Pro:
Table of Contents

Advertisement

Quick Links

S2500, S5000 & 6 Series
Portable Satellite Navigation System
User manual

Advertisement

Table of Contents
loading
Need help?

Need help?

Do you have a question about the Syrius Pro and is the answer not in the manual?

Questions and answers

Subscribe to Our Youtube Channel

Summary of Contents for Snooper Syrius Pro

  • Page 1 S2500, S5000 & 6 Series Portable Satellite Navigation System User manual...
  • Page 2 ‘System Requirements & Downloading’ later in this manual. Once the database has been downloaded your Snooper compares your position using its built-in GPS antenna, with the position of every known ‘fixed’ speed monitoring system and accident ‘hotspot’ alerting you both audibly and visually with voice alerts and full colour graphics on the units LCD screen ensuring your highest concentration at all times.
  • Page 3: Table Of Contents

    11 Installing Snooper 58 School 12 Power Connection & Charging Alert 13 Charging the internal battery 59 Touch Tone Powering Snooper using the built-in battery Route Alert 15 Satelite Navigation My Speed 16 Easy Setup 60 Change Map Colour Screen Settings...
  • Page 4: What's Included

    1 x USB Download Cable 1 x TMC/Video in cable (NOT S2500) 1 x CD ROM This user guide explains the functionality of all 3 variants of the Snooper, these symbols will illustrate if the feature is relevant to your device Truckmate...
  • Page 5: Overview

    Overview 1. Power Button 3 Touch screen LCD Press and hold to switch on or off. 4. Earphone jack (Earphones not included) 2. LED Power indicator 5. Micro-SD Card Slot Status LED 6. TMC/Video In socket ** Powered by internal battery - no LED 7.
  • Page 6: Registering

    Registering IMPORTANT! PLEASE READ BEFORE USING. To enable to locate Fixed Speed Cameras and Accident Black spots you will have to register and download the AURA™ Camera Database. Register Online Go to the official website www.snooperneo.co.uk and register your unit online. Your unit should normally be activated within 30 minutes of registration.
  • Page 7: Quick Start Guide To Navigation

    Quick Start Guide to Navigation 1. Take the Snooper outside so that the GPS receiver can locate your position. This may take between 15 - 30 minutes the first time. When satellite lock is achieved, the screen will display your current position on its map in a ‘3D’ navigation view.
  • Page 8 The navigation view will now be displayed, but with the route now highlighted for you. As you approach a specific turn in the calculated route, Snooper will advise you what to do. For example, “After 200 yards, turn left”, followed by “Now turn left”.
  • Page 9: Start Up - Installing The Sd Card

    To launch the CD manually: Click on ‘Start’ and then ‘Run’ . In the dialogue box that opens click on ‘Browse’ – another dialogue box will open. Locate your CD ROM or DVD drive (drive letter is normally D) using the ‘Look in’ option and select ‘Snooper’ from the lower portion of the dialogue box.
  • Page 10: Downloading The Aura™ Camera Database

    The download process is as follows: The software will display the serial number of the Snooper and a green progress bar will start to progress across the screen. ●...
  • Page 11: Installing Snooper

    Snooper and plug the larger plug into the cigarette lighter socket of your vehicle. Please Note: Only use the cigarette lighter power cable provided with Snooper. Snooper operates on 5V and using any other cigarette lighter power cable will damage your device and void the warranty.
  • Page 12: Power Connection & Charging

    Replacing the Fuse If Snooper stops operating, the fuse in the cigarette lighter plug may have blown . If it has blown, follow these steps and replace it with a 3 amp, 5mm x 20mm fast acting fuse.
  • Page 13: Charging The Internal Battery

    240V AC mains socket Powering Snooper using the built-in battery Once Snooper is fully charged, it is ready for use. Press and hold the standby/power switch on the top left hand side of the unit for 2 seconds to switch on the device.
  • Page 14 WARNING: PLEASE DO NOT USE OR LEAVE Snooper IN EITHER WET OR HUMID CONDITIONS, OR IN EXTREME TEMPERATURES, AS THIS COULD PERMANENTLY DAMAGE THE UNIT AND THE BATTERY. WHEN NOT IN USE DO NOT LEAVE THE UNIT ATTACHED TO THE WINDSCREEN, ESPECIALLY WHEN THE WEATHER IS WARM, TO AVOID DAMAGE TO THE UNIT AND ALSO REDUCE THE RISK OF THEFT.
  • Page 15: Satelite Navigation

    Press “I Agree” to continue. Whilst Snooper software is loading a start-up display will be shown for just a few seconds and then the screen will show a section of a map. Snooper needs to acquire a minimum of four satellites in order to work. Once this has been achieved Snooper will ascertain your position and this will be indicated by a green arrow icon on the on-screen map and the GPS signal strength will be shown in the bottom right hand corner of the display.
  • Page 16 My Speed The speed limit of nearly every road across Europe can now be clearly displayed on your Snooper at all times. Choose between speed limits for cars and advisory speed limits for trucks from 3.5t and over. In addition, My Speed can also be set to alert you if you accidentally exceed the speed limit at any time.
  • Page 17 Additional warning or information pop ups will appear at the bottom left hand corner of the screen. If lane guidance is displayed then the warning pop ups will be displayed at the top left hand side of the screen. Restrictions Warning Steep road up ahead Height...
  • Page 18 Your chosen settings will now be saved and will appear on the screen each time you use Snooper. If you want to switch between your Current Speed and the Atomic Clock or the Estimated Time of Arrival and Time to Destination during your journey simply touch the screen where either piece of information is displayed and the unit will display the alternate setting and vice versa.
  • Page 19: Setting Vehicle Parameters Ventura

    Setting up vehicle parameters For Ventura to calculate a route suitable for your vehicle it needs to know certain information about the vehicle itself such as its height, weight and width. It is possible to save the settings of 10 different vehicles. Follow these instructions to enter your vehicles details.
  • Page 20: Setting Vehicle Parameters Truckmate

    Setting up vehicle parameters For Truckmate to calculate a route suitable for your vehicle it needs to know certain information about the vehicle itself such as its height, weight and width. It is possible to save the settings of 10 different trucks. Follow these instructions to enter your vehicles details.
  • Page 21 Tunnel Category B/D ● ● Tunnel Category B/E ● ● Tunnel Category C ● ● TUNNEL CATEGORY C/D ● ● Tunnel Category C/E ● ● Tunnel Category D ● ● Tunnel Category D/E ● ● Tunnel Category E ● ● B Most restrictive Passage forbidden through tunnels of category B, C, D and E B1000C...
  • Page 22: Planning A Route

    ● Press the ‘Find by post code’ icon. ● ● If you have the European version of Snooper, you will need to select ● ● the ‘Country’ first BEFORE typing the postcode. (If the correct country is already displayed, go to the next step). Use the arrow keys on the right of the display to scroll up and down the country options.
  • Page 23: Find By City

    ● ● As you begin to input the city name, Snooper will automatically prompt you with a list of possible matches. If you can see the name of the destination you are searching for in the lower window, you can select it easily by pressing that name with your finger. If you wish...
  • Page 24: Home

    Press the centre of the display to enter the ‘Navigate to’ menu. ● ● Press the ‘Home’ icon. ● ● Snooper will display details of the destination and offer a ‘Go’ button and a ‘Route Option’ button. Press ‘Go’ to begin your journey. Return to contents 24 • EN...
  • Page 25: Office

    3.5 Recent Route or Clear route Snooper automatically stores the last route that has been calculated, so that if you wish to return to that address you do not have to re-input all the details again. To use this function: ●...
  • Page 26: Multi-Route

    3.6 Multi route With Snooper you have the facility to enter more than one destination at a time (for instance if you wish to visit other locations before reaching your ultimate destination). You can store up to seven multi-routes, with up to sixteen destinations within each multi- route.
  • Page 27: Find By Favourites

    ● ● Snooper will calculate the route to each destination stage and provide a new summary screen with the distance to each destination stage along with the estimated duration of the journey to each destination stage from the start point.
  • Page 28 ‘OK’ and the unit will calculate your route to the next stage in the multi-route from your current position. Note: If Snooper is turned ‘OFF’ and then ‘ON’ during a multi-route journey the device will retain the current route and ask you if you wish to continue with the current destination or with the next stage of the destination or to cancel the multi-route.
  • Page 29: Recent Destinations

    3.8 Recent destination Snooper is capable of storing the last 40 routes that have been calculated, so that if you wish to return to an address you do not have to re-input the details again.
  • Page 30: Find By Points Of Interest (Poi)

    3.9 Find by POI (points of interest) If you would like to calculate a route to a hotel, airport, restaurant or even a golf course Snooper can calculate a route using its extensive database of POI’s (Points of Interest). To navigate using this database: Press the centre of the screen to access the ‘Navigate to’...
  • Page 31: Find By Nearest Poi

    3.10 Find by nearest POI This function will help you to find the nearest POI from either your ‘Current Position’ or a ‘Different Position’ within a certain radius which can specified up to a maximum of 60 miles. 3.10.1 To navigate using the ‘Current Position’ Press the centre of the screen to enter the ‘Navigate to’...
  • Page 32 ● ● As you begin to input the city name, Snooper will automatically prompt you with a list of possible matches. If you can see the name of the destination you are searching for in the lower window, you can select it easily by pressing that name with your finger. If...
  • Page 33: User Poi

    The instructions to use this facility are the same as above (see Section 3.10.2) but select ‘Along Route’ to open the search. 3.11 User POI The Snooper comes pre loaded with a number of ‘User POI’s’ . You can add additional POI (Points Of Interest) by downloading them to the device via a PC. The User POI Updater program can be downloaded from: https://www.snooperneo.co.uk/Software.cfm.
  • Page 34 Select the POI with your finger; an information screen will be displayed. Press ‘OK’ if the POI is correct, press ‘Map’ to view the POI location on the map, press ‘Route options’ to change start position or press to return to the previous screen. Press ‘Calculate’...
  • Page 35 ● ● As you begin to input the city name, Snooper will automatically prompt you with a list of possible matches. If you can see the name of the destination you are searching for in the lower window, you can select it easily by pressing that name with your finger. If you wish...
  • Page 36: Find By Map

    Once the calculation is complete you can either press ‘Go’ to start navigation, ‘Simulation’ to see the actual route that will be taken, ‘Route Option’ to change the parameters of the route or ‘Guide’ which will list the turn by turn instructions of the journey.
  • Page 37: Find By Coordinate

    3.14 Re-route Snooper can recalculate your route by avoiding certain roads or redirecting you by distance. This facility only becomes available once you have calculated a route. To perform a re-route: ●...
  • Page 38: Avoid By Road Name

    3.14.2 Avoid by Range If you wish to avoid several roads from the selected route calculated by Snooper, then this function allows you to re-calculate a route over a user defined distance, ranging from 1 mile up to a maximum of 100 miles.
  • Page 39: Clear Avoided Road

    3.14.3 Clear Avoided Road If you do not wish to use the alternative routes offered by Snooper and you wish to return to the original calculated route, press the ‘Clear Avoided Road’ button and the original route plotted by Snooper will be restored.
  • Page 40 To calculate a route which is appropriate for your vehicle, once a second link has been added the following screen will be displayed: if this is the correct vehicle press ‘Calculate’ or if you need to change the vehicle press ‘Change’. 6.
  • Page 41: Route Description

    Wheel Wheel Wheel Wheel TMC Options The type of alerts you receive whilst using TMC can be edited in the configuration menu of Snooper. To access the menu press the Windscreen Windscreen Windscreen Windscreen centre of the display, then press...
  • Page 42 Once the unit starts to receive TMC alerts one of the two following icons will appear on the main screen This icon appears if Snooper has received TMC information but the delay or incident is not on your route. This icon appears if the Snooper has received TMC information and the delay or incident affects your plotted route.
  • Page 43 TMC alert you originally wanted to avoid and then press Snooper will recalculate the original route Note: TMC data is transmitted simultaneously by commercial FM radio stations - the reception of TMC data can be affected by geographical and environmental conditions.
  • Page 44: Campsite Search Ventura Only

    3.18 Campsite Search (Ventura ONLY) Ventura can search from over 20,000 caravan and motor home sites and rest stops. This unique, content rich, data is supplied by some of the biggest camping organizations in Europe: ASCI , Bordatlas and Camperstop (by Facile en Route). Additional campsite data for Caravan Club and The Camping and Caravanning Club can be found in the User POI - refer to page 32 for User POI details.
  • Page 45: Favourites

    You can select as many or as few options as you require to narrow or expand the search. Press OK to continue Press ‘Review facilities selected’ to show a summary of the facilities chosen. If required, you can remove some of the facilities On this screen you can edit the selected facilities.
  • Page 46 4.1.1 Add a favourite destination Press the centre of the screen to access the ‘Navigate to’ menu. ● ● Press ‘My Favourite’ at the top of the display. ● ● Press the ‘Favourites’ icon. ● ● Press ‘Add’. ● ● You can now search for the destination using the following options displayed: Find address by city ●...
  • Page 47: Recent Destination

    4.2 Recent destination This function can be used to delete any or all of the recent destinations that are stored on Snooper. Snooper can store up to a maximum of 40 recent destinations. 4.2.1 To delete individually stored recent destinations Press the centre of the screen to access the ‘Navigate to’...
  • Page 48: Home

    Home To set up and use this function was explained in Section 3.3 earlier in the manual. When this function is accessed from the ‘My Favourite’ menu, you are able to change the ‘Home’ location (for example if you move house) or to delete the ‘Home’ location. 4.4.1 To change the home location Press the centre of the screen to access the ‘Navigate to’...
  • Page 49: Office

    Office To set up and use this function was explained in Section 3.4 earlier in the manual. When this function is accessed from the ‘My Favourite’ menu, you are able to change the ‘Office’ location (for example if you move house) or to delete the ‘Office’ location. 4.5.1 To change the office location Press the centre of the screen to access the ‘Navigate to’...
  • Page 50 ● ● Press ‘OK’ ● ● Snooper will automatically save this location as your ‘Home’ or ‘Office’ destination. 5.0 Configure The ‘Configure’ menu is used to customise the operation and appearance of your unit. To access the ‘Configure’ menu Press the centre of the screen to enter the ‘Navigate to’ menu ●...
  • Page 51 Truck Setting up vehicle perameters For Truckmate to calculate a route suitable for your vehicle it needs to know certain information about the vehicle itself such as its height, weight and width. It is possible to save the settings of 10 different trucks. Follow these instructions to enter your vehicles details.
  • Page 52 5.3 Caravan/Motorhome Setting up vehicle perameters For Ventura to calculate a route suitable for your vehicle it needs to know certain information about the vehicle itself such as its height, weight and width. It is possible to save the settings of 10 different vehicles. Follow these instructions to enter your vehicles details.
  • Page 53: Setup

    5.4 Volume Control Snooper volume can be adjusted using this function within the ‘Configure’ menu. To adjust the volume: Press the centre of the screen to enter the ‘Navigate to’ menu. ● ● Press ‘Configure’. ● ● Press the ‘Volume Control’ icon.
  • Page 54: Speed/Time

    If you wish to keep the settings unchanged you can exit the ‘Setup’ menu by pressing the return arrow located in the bottom right hand corner of the display. Your new settings will now be saved and will appear on the screen each time you use Snooper. Return to contents 54 • EN...
  • Page 55 5.6.5 Map Text Size This option allows you to increase or decrease the size of the road and place name text which appears on the map screen Select the text size then press OK to save and exit 5.6.6 Car Icon This option allows you to choose the icon which appears on the navigation screen.
  • Page 56: Show Poi

    5.7 Show POI Snooper comes complete with a comprehensive list of POI’s (Point’s of Interest). You can search for addresses using POI’s and save POI’s in your list of favourites. You can also choose which of the POI’s you would like to have indicated on your map.
  • Page 57: Camera Alert

    5.9 Camera alert In order for this feature to operate you will need to subscribe to and download the AURA™ Camera Database onto Snooper. See ‘Registering Snooper’ (Page 4) and ‘System Requirements & Downloading’ (page 8) for further details. This function allows you to personalise the camera alert settings that you will receive during operation. To alter the camera alert settings: Press the centre of the screen to enter the ‘Navigate to’...
  • Page 58: School

    Snooper display by the icon. *Please note: Snooper will only provide alerts to Primary Schools at the following specified times: 08:30 – 09:30; 12:00 – 13:00 and 15:30 – 16:30. To make your selection, touch the relevant tick box with your finger.
  • Page 59: Touch Tone

    To make your selection, touch the relevant tick box with your finger. 5.11.2 Route Alert If you deviate from the calculated route, Snooper will automatically recalculate a route without any user intervention. To indicate rerouting is in progress Snooper will emit an audible tone.
  • Page 60: Qwerty Keyboard

    5.12 Map Colour This function allows you to choose between the alternative colour schemes that are available for the maps used in Snooper system (several of which are most suitable for use at night). To access this facility: Press the centre of the screen to enter the ‘Navigate to’ menu.
  • Page 61: Tmc

    5.14 TMC This feature allows you to configure the type of TMC alerts you receive along with the facility to view the radio tuner that searches for TMC transmissions when the TMC aerial is plugged into the TMC socket. To access this facility: Press the centre of the screen to enter the ‘Navigate to’...
  • Page 62: Gps Status

    Snooper or you will not be able to operate the device. NB. It is important that you do not lose or forget this code. If you forget this code you will need to return your Snooper so that the unit can be reset.
  • Page 63: Route Timer

    5.19 Route Timer This function allows you to set an alert for when you need to take a break. Set the maximum driving time allowed and set the advanced warning time you require before your next break is due. The Route timer clock will then keep you advised of the driving time you have left and will automatically alert you when it’s time to take a break.
  • Page 64: Version (Hardware & Software)

    This option will calculate a route based on time using a combination of Motorways, ‘A Roads’ and ‘B Roads’ as necessary. The route is calculated by Snooper to navigate you to your destination in the shortest time possible whilst adhering to the national speed limits.
  • Page 65: Avoid Tollway

    Avoid by Range If you wish to avoid several roads from the selected route calculated by Snooper, then this function allows you to re-calculate a route over a user defined distance, ranging from 1 mile up to a maximum of 100 miles.
  • Page 66: Clear Avoided Road

    Clear Avoided Road If you do not wish to use the alternative routes offered by Snooper and you wish to return to the original calculated route, press the ‘Clear Avoided Road’ button and the original route plotted by Snooper will be restored.
  • Page 67: Change Start Position

    6.5.1 Simulation Press the ‘Simulation’ button and Snooper will take you through the calculated journey step by step with full on screen and voice instructions. Please Note: If at any time you wish to cancel the simulation press the return arrow located in the bottom right hand corner of the display.
  • Page 68: Volume

    Please note that this new setting is only temporary and if Snooper is switched off and then back on the audio level returns to either the factory default or your personalised setting. If you press the speaker icon you can turn off the audio on the unit completely.
  • Page 69: Understanding The Mapping Screen

    Distance to next junction or the route you will be instruction taking Whilst navigating a calculated route the Snooper display will Next motorway exit show an information box. This or road you are due to box will tell you the next road you...
  • Page 70: Bluetooth Not S2500

    10. Bluetooth (NOT S2500) This unit is equipped with Bluetooth functionality. You can use it as a hands free system for a mobile phone that is equipped with Bluetooth. Press the centre of the screen to enter the ‘Navigate to’ menu. ●●●...
  • Page 71 After the pairing is successful the Snooper will revert back to the ‘Phone Menu’ screen but the icons are no longer ‘greyed out’ . Press (6) to return to the Navigation menu. Dialling (1) To dial a number press ‘Dialling’ then enter the number, using the keypad, press Green button (a) to make the call.
  • Page 72: A2Dp

    A2DP (4) The Advanced Audio Distribution Profile is a Bluetooth profile that allows for the wireless transmission of stereo audio from an A2DP source (typically a phone or computer) to an A2DP receiver. This device also supports AVRCP The Audio/Video Remote Control Profile is a Bluetooth profile that allows Bluetooth devices to control media playback on remote devices.
  • Page 73 To open the browser press ‘Browser’ Back Forward Refresh Stop Address bar Close Keyboard To exit the browser and close the DUN connection press close on the browser task bar then on the DUN screen press DISCONNECT Return to contents 73 •...
  • Page 74: Troubleshooting Snooper Downloads

    Snooper Downloads If you are having any difficulty in performing a download onto the Snooper unit it is advisable to refer to the checklist in Section A first before contacting us. If you are still unable to perform a download after following all of this checklist then please send an email to Support@snooper.eu stating the nature of your difficulty.
  • Page 75 Snooper update software. If you do have a Firewall on your computer Snooper Updater software may appear to stop and it is at this point that your Firewall software will inform you that Snooper Updater software is trying to access the internet. Please make sure that you grant/allow/permit access through the Firewall.
  • Page 76 4. The unit is automatically shut down during operation Please check the power control setting in the Setting menu. 5. Can’t hear anything from speaker or earphone Please check the volume level. Please check the Mute status. For earphone, please check if the jack is inserted properly. 6.
  • Page 77: Specification S2500

    SPECIFICATION S2500 *Note: Only the SD card supplied will work with Snooper once synchronisation of the card and the unit has Product Specification S2500 been completed. Replacement cards are available from 1.1.1 Environmental parameters Operating temperature range : -10°C ~ +60°C Storage Performance Products Limited.
  • Page 78 PIN definition : 1. +5V Output to PND (+5V ±0.2V, 2A) ; 2. NC 3. NC 4. NC 5. GND; Expansion card : Micro SD/ SDHC slot (up to 16GB) Audio Mono 8 Ω/ 1.0W (MAX) speaker; High-fidelity stereo 16 Ω or 32 Ω headphone jacks (Φ 3.5); Plug in your headphones automatically turn off external sound (non-reversing rear).
  • Page 79: Specification S5000T

    SPECIFICATION S5000 *Note: Only the SD card Processor (CPU) MTK MT3351 468 MHZ supplied will work with WinCE 5.0 Snooper once synchronisation of the card and the unit has Memory 64MB (SLC) been completed. Replacement cards are available from SDRAM 64MB (DDR2) Performance Products Limited.
  • Page 80: Specification 6 Series

    W180mm x H110mm x D15mm *Note: Only the SD card supplied will work with OS - WinCE Snooper once synchronisation of the card and the unit has Display Size: 7” TFT LCD Display Resolution : 800x480 been completed. Replacement cards are available from Operating temperature range: -100C ~ +600C Performance Products Limited.
  • Page 81 ●●● CHILDREN KEEP OUT OF CHILDRENS REACH. DO NOT ALLOW CHILDREN TO PLAY WITH Snooper OR ITS ACCESSORIES. THEY COULD HURT THEMSELVES OR OTHERS, OR COULD ACCIDENTALLY DAMAGE YOUR UNIT OR ACCESSORY. Snooper CONTAINS SMALL PARTS THAT COULD BE DETACHED AND CREATE A CHOKING HAZARD.
  • Page 82 Battery We recommend that you fully charge the battery before you use Snooper for the first time. A new battery or one that has not been used for a long time could have a reduced capacity the first few times it is used.
  • Page 83: Accessories

    ** This attachment must be purchased to enable you to attach Snooper to a Pro Fit bracket. Service under warranty Snooper comes with a standard 12 month manufacturer’s warranty. If, for some reason your unit requires service under warranty return Snooper by special delivery and in suitable packaging to: The Returns Dept., Performance Products Limited,...

This manual is also suitable for:

Ventura proTruckmate pro6 seriesS2500S500

Table of Contents