Table of Contents
Advertisement
Quick Links
Download this manual
See also:
Operator's Manual
Advertisement
Table of Contents

Related Manuals for Lifescan SureStep


Summary of Contents for Lifescan SureStep
- Page 1 Diabetes Blood Glucose Monitoring System Système de surveillance de la glycémie Owner’s Booklet Manuel du propriétaire NOW WITH 150-Test Memory GARDE MAINTENANT 150 tests en mémoire...
- Page 2 C O M P L E T E B L O O D G L U C O S E M O N I T O R I N G S Y S T E M Owner’s Booklet...
- Page 4 The SureStep System is intended for use ® outside the body (in vitro diagnostic use). It should be used only for testing purposes and only with fresh whole blood samples. It should not be used for the diagnosis of diabetes.
- Page 5 60%. The results you get with the SureStep System can help you and your healthcare Important phone numbers: LifeScan Customer Care Line:...
- Page 6 Diabetes Educator Section of the Canadian Diabetes Association. IMPORTANT: If you have followed the tips to ensure accuracy and your blood glucose results are still out of range, call your healthcare professional. The SureStep System contains many small parts: test strip holder, battery ®...
-
Page 8: Table Of Contents
Discard 3 m Discard date Lot No. Exp. Date Control Solution Range © LIFESCAN I Detailed Test Procedure – Getting a Drop of Blood – How to Test Your Blood Optional Colour Chart LifeScan Customer Care Line: U.S.A. 1 800 227-8862... - Page 9 Health Conditions Causing Out-of-Range Results Recommendations for Better Diabetes Control Using the Meter for the First Time Recalling All Results in Meter Memory Uploading Memory Data General Care Cleaning the Meter Changing the Batteries LifeScan Customer Care Line: U.S.A. 1 800 227-8862...
- Page 10 Display of Last Result Unit of Measurement (mmol/L or mg/dL) 59 Beep Signals 14- and 30-Day Test Averages Time Format Date Format Exiting the Set-Up Mode Helpful Messages Error Messages Performance Characteristics Guarantee and Warranty LifeScan Customer Care Line: U.S.A. 1 800 227-8862...
-
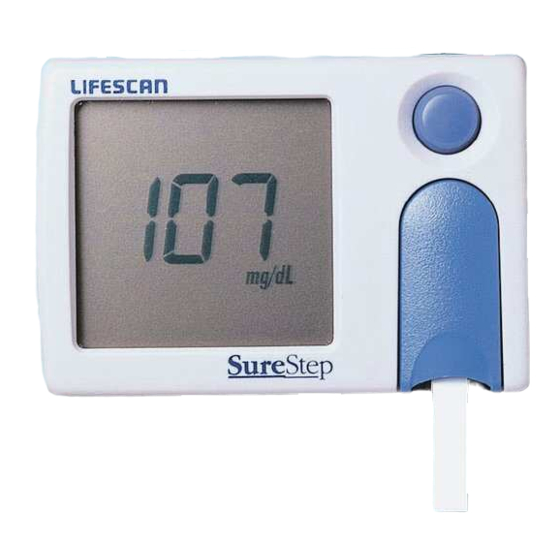
Page 12: Surestep Blood Glucose Meter
System is for people with diabetes who need to check the level of sugar (glucose) in their blood. A drop of blood is taken from the finger and placed on a SureStep Test Strip, which is then inserted into the SureStep Blood Glucose ®... - Page 13 Glucose Shake before Not Intended Discard 3 mo Discard date: Lot No. Exp. Date © LIFESCAN IN Extra Space for Diabetes Supplies...
-
Page 14: Surestep
CONTACT POINTS Sense the position and orientation of the SureStep Test Strip. ® TEST STRIP HOLDER Closed Opened Cover Test Strip Base Insertion Point The cover protects the lens area and the base holds the SureStep Test Strip. - Page 15 SureStep Test Strips ® When blood is applied to the pink test square, it is absorbed and a chemical reaction takes place. A blue colour forms in the confirmation is inserted White Tip into the meter. The side where you apply...
-
Page 16: Important Test Strip Information
If using test strips from a bottle, write the discard date on the bottle label. Discard unused test strips four months after first opening the bottle. DO NOT use SureStep Test Strips that are bent, torn, cut, or changed in any way. Before testing, the confirmation dot should be off-white. DO NOT use test strip if confirmation dot is darker than the colour of an unused test strip shown on the Colour Chart included with the test strip package. -
Page 17: Display Symbols
All symbols should appear. This display check will also appear briefly each time you turn on the meter. Call the LifeScan Customer Care Line at 1 800 663-5521 (U.S.A. 1 800 227-8862) if any segments are missing. - Page 18 (most recent) result with date. (Example) Your Code Number. the display must match the code number on your SureStep Strip package. It must be checked every time you use a new package of test strips and changed if the code number is different.
- Page 19 Apply Blood Sample to Pink Test Square. Push the Test Strip, Pink Side Up, Firmly into the Test Strip Holder Until It Stops. If you fail to completely insert the test strip, the test may start. However, you may receive an inaccurate low result.
- Page 20 HI mmol/L. In virtually all cases above 27.8 mmol/L (500 mg /dL), the meter reads “ . ” When proper procedures are followed, a reading of “ ” means very high blood glucose (severe hyperglycemia). In extremely rare circumstances, the meter will read “...
-
Page 21: Three Easy Steps To Coding
C O D I N G T H E M E T E R Code numbers are used to calibrate the SureStep Test Strip with ® the SureStep Meter for accurate ® results. You must code the meter before using it for the first time. - Page 22 The code number on the test strip package will range from 1 to 21. If the number on the display matches the code number on the SureStep Test Strip package, begin testing. If the two code numbers do not match, follow Step 3 to code the meter.
-
Page 23: Glucos
SureStep Glucose Control ® Solution Control solution is used instead of blood to tell you that the SureStep Blood Glucose Meter and SureStep Test Strips are working together properly. The control solution contains a known amount of glucose that reacts with a SureStep Test Strip. -
Page 24: Important Control Solution Test Information
Record the discard date on the control solution vial. Discard the vial three months after first opening it. The control range printed on the test strip bottle is for SureStep Glucose Control Solution only. It is NOT a recommended range for your blood glucose level. - Page 25 Follow the test procedure, using SureStep Glucose Control Solution ® instead of blood. Before Testing, Check the Code. After turning the meter on, the last result appears, followed by the CODE symbol and number. If the code on the meter does not match the code on the test strip package, press the green C button until the codes match.
- Page 26 Step 2: Check Confirmation Dot. Check to see that the confirmation dot on the back of the test strip has turned completely blue to ensure you have applied enough control solution. Step 3: Insert the Test Strip and Read Result. Within two minutes after applying control solution, insert the test strip firmly into the test strip holder,...
- Page 27 The control solution result appears, on average, in 30 seconds. (Example) Note: Do not use the Colour Chart to verify control solution tests. Step 4: Mark the Test Result as a Control Solution Test. You must mark the test result as a control solution test result so that it will appear in the memory as a control solution test result and not...
- Page 28 C next to the result to indicate a control solution test. Compare the control solution test result with the control range printed on the SureStep Strip package. (Example) When you can do three control solution tests in a row that are within the control range, you are ready to test your blood.
-
Page 29: Control Solution Range
Dirty meter or test strip holder Test strip deterioration Meter malfunction Control solution that is outside of the temperature range 15–35˚C (59–95˚F) If you are unable to resolve the problem, call the LifeScan Customer Care Line at 1 800 663-5521 (U.S.A. 1 800 227-8862). -
Page 30: Detailed Test Procedure
Detailed Test Procedure Choose a clean, dry work surface. Make sure you have all the items needed to test. Release Button Penlet ® Ejection/Cocking Control Plus Adjustable Blood Sampler SureStep Meter Test Strip Depth Settings Depth Adjustment Knob Depth Indicator Sterile ®... -
Page 31: Getting A Drop Of Blood
CAUTION: To reduce the chance of infection: Never share a lancet with another person. Always use a new, sterile LifeScan Lancet. Lancets are for single use only. Do not use lancet if protective disk has been removed or damaged. - Page 32 While the lancet is in the Penlet Plus Sampler, twist off the protective disk. Make two full turns to ensure that the lancet separates from the protective disk. Replace the Penlet ® the cap clockwise until it is snug but not overly tight. Plus Cap.
- Page 33 Adjust the puncture depth setting if necessary. Twist the knob counter- clockwise toward the smaller bumps for a shallower puncture. Twist the knob clockwise toward the larger bumps for a deeper puncture. Step 2: Cock the Penlet Sampler. Slide the ejection/cocking control backward until it clicks.
- Page 34 Step 3: Wash Your Hands. Use warm, soapy water. Rinse and dry hands thoroughly. To increase blood flow to your fingertips, massage the hand from the wrist to the fingertip two or three times without touching the puncture site. Step 4: Lance Your Finger. Choose a spot on the side of a different finger each time you test.
- Page 35 Gently massage your finger to obtain the required blood volume. Proceed with your blood glucose test. Step 5: Remove the Lancet. Remove the cap. Twist it counter- clockwise.
- Page 36 Optional: To replace the protective disk on the lancet, place the disk on a hard surface and push the exposed tip into the protective disk. Always use caution when removing the lancet. Point the lancet down and away from you. Push forward on the ejection/cocking control and eject the lancet directly into a container for sharp objects.
-
Page 37: How To Test Your Blood
Press the blue power button. Your last test result will appear. (Example) Next, the code number appears. It must match the code number on the SureStep Test Strip package. If it ® does not match, change the meter code number following the instruc- tions on pages 10 and 11. - Page 38 These symbols will alternate on the display: Apply blood to Insert test strip test strip. into meter. The meter is ready for a test. You have two minutes to insert the test strip before the meter automatically turns off. Step 1: Apply Blood to the Test Strip.
- Page 39 You can apply blood to the pink test square in one of two ways. 1) Turn the test strip over and dab the pink test square to the finger. You can touch the test strip. The pink test square will quickly absorb the blood and the confirmation dot will begin changing colour.
- Page 40 You have applied too much blood to the test strip if the entire white pad is soaked. You must begin the test with a new test strip to avoid false results from too much blood. Too Much Blood Front Step 2: Check the Confirmation Dot.
- Page 41 Step 3: Insert the Test Strip and Read Result. Turn the SureStep front side and slide it into the test strip holder, pink side up. Push the test strip in firmly until it stops.
- Page 42 (Example) short as 15 seconds. At the lower end of this temperature range, the test time will be extended. The SureStep to give plasma values. Because most clinical laboratories measure plasma glucose, the SureStep .” System is calibrated ®...
- Page 43 System enables you to more directly compare meter results with lab IMPORTANT: When proper procedures are followed, the meter will dis- play “ ” in virtually all cases when your result is above 27.8 mmol/L (500 mg/dL). This indicates very high blood glucose (severe hyperglycemia). Low and High Blood Glucose: Test results below 3.3 mmol/L (60 mg/dL) mean low blood glucose (hypoglycemia).
- Page 44 Record your test results in your LifeScan logbook. The logbook allows you to keep a record of your test results, along with information on your meals and medication. Press the blue power button to turn off the SureStep Blood Glucose ®...
-
Page 45: Optional Colour Chart
Optional Colour Chart A Colour Chart is included with each package of SureStep Strips. It is useful as an additional check that your meter and test strips are working properly. The Colour Chart is NOT a replacement for a SureStep Meter test. - Page 46 The Colour Chart is to be used as an additional check to confirm a meter read- ing. It is NOT a replacement for a SureStep Meter test. ® Note: If your Colour Chart reading and meter result do not agree and do...
-
Page 47: Overview
U N D E R S TA N D I N G Y O U R R E S U LT S Overview Long-Term Diabetes Findings. In 1993 the National Institutes of Health concluded an exten- sive long-term study of people with Type 1 diabetes. -
Page 48: Comparing Meter And Laboratory Results
Comparing Meter and Laboratory Results The SureStep System’s plasma ® calibration enables you to more directly compare SureStep results with your lab results because most laboratories measure plasma glucose; however, your meter blood glucose test result may be different from your labora- tory result (by up to 20%) normal sources of variation. - Page 49 Blood glucose levels can change significantly over short periods, especially if you have recently eaten, exercised, taken medication, or experienced stress. In addition, if you have eaten recently, the blood glucose level from a fingerstick can be up to 3.9 mmol/L higher than that of a venous sample (blood drawn from a vein) used for a laboratory test.
- Page 50 GLUCOSE RANGES FOR PEOPLE WITHOUT DIABETES, Before breakfast 3.9–5.8 Before lunch or dinner 3.9–6.1 1 hour after meals Less than 8.9 2 hours after meals Less than 6.7 Between 2 and 4 Greater than 3.9 YOUR TARGET mmol/L RANGES, mmol/L ______________________ ______________________ ______________________...
-
Page 51: Testing Tips To Ensure Accuracy
Colour Chart. Make sure the code on the meter matches the code on the test strip package. Do a test with SureStep Control Solution to verify that the test strip and meter are work- ing properly. -
Page 52: Health Conditions Causing Out-Of-Range Results
Out-of-Range Results If you are getting results outside your range of expected blood glucose levels, and you are certain that the SureStep Meter and SureStep ® Test Strips are working together properly, ask yourself the follow- ing questions: “How do I feel?”... - Page 53 “Do I have symptoms of high blood glucose (hyperglycemia): fatigue, dry mouth and skin, increased thirst or hunger, blurry vision, increased urination, rapid deep breathing, or a fruity smell to the breath?” “What have I eaten?” “How much have I exercised?” “Am I ill (common cold, flu, etc.)?”...
-
Page 54: Recommendations For Better Diabetes Control
5. Krall, L.P., and Beaser, R.S.: Joslin Diabetes Manual. Philadelphia: Lea and Febiger (1989), 138. 6. LifeScan data on file. 7. Wickham, N.W.R., et al.: Practical Diabetes, Vol. 3, No. 2 (1986), 100. 8. Cohen, F.E., et al.: Diabetes Care, Vol. 9, No. 3 (1986), 320–322. -
Page 55: Using The Meter For The First Time
RECALLING RESULTS FROM METER MEMORY The SureStep Blood Glucose Meter ® is pre-set to display your last test result automatically when you turn on the meter. The meter stores your 150 most recent blood glucose or control solution test results with alternating date and time in its memory. -
Page 56: Recalling All Results In Meter Memory
Recalling All Results in Meter Memory To access the meter memory, press the blue power button and hold down for five seconds. When the display flashes, release the blue power button. You are now in memory mode. First, the 14-day average will appear. -
Page 57: Uploading Memory Data
The time and date must be reset every time the batteries are replaced. Uploading Memory Data Test results stored in the memory may be uploaded to a personal computer. Call the LifeScan Customer Care Line at 1 800 663-5521 (U.S.A. 1 800 382-7226) for more information. -
Page 58: General Care
CAUTION: Use only water when cleaning the meter. Do not get water inside the SureStep Never immerse the meter or hold it under running water. Do not use cleansers or glass cleaners with ammonia. - Page 59 Always clean your meter when this symbol appears: If you are concerned that your test results do not compare with how you feel, clean the meter and do a control solution test to check if it is working properly. Clean the meter using these easy steps: Step 1: Remove the Test Strip Holder.
- Page 60 Make sure you thoroughly wipe the grey area on the inside cover. Wash both sides of test strip holder base; carefully clean around the hole. Dry the test strip holder completely with a soft cloth or lint-free tissue. Cover Top of Base Grey Area Hole (clean both sides)
- Page 61 Step 4: Replace the Test Strip Holder. Slide the test strip holder into the meter, press down, and push forward at the test strip insertion point until you hear a click. Make sure the test strip holder is firmly in place. Make sure it does not extend beyond the meter.
-
Page 62: Changing The Batteries
Wipe with a cloth dampened with water and dry thoroughly. Changing the Batteries The SureStep Blood Glucose ® Meter comes with two AAA alkaline batteries already installed. - Page 63 flashing, the batteries are now dead and the meter will not operate. (You will not be able to do a test.) You should replace both batteries immediately with new AAA alkaline batteries. Do not use rechargeable batteries. Note: Low batteries, dead batteries, and battery removal will not affect the test results stored in the memory.
- Page 64 Step 2: Remove the Old Batteries. Use your fingers or gently tap the meter on the palm of your hand. Never tap the meter against a hard surface. Step 3: Insert New Batteries. Insert two new AAA alkaline batteries, matching the + end of each battery with the + signs inside the meter.
- Page 65 C H A N G I N G M E T E R S E T T I N G S The SureStep Meter has been pre-set ® to meet the needs of most users. In addition to setting the time and date, there are six features you can change.
-
Page 66: Setting The Time And Date
Setting the Time and Date The SureStep Green C Button nal clock that will record the time Blue and date of each test you perform. - Page 67 test results will not be affected if you do not set the clock to the cor- rect time.) The time and date must be reset every time the batteries are replaced. Setting the Time. To set the time, enter the set-up mode.
- Page 68 Setting the Year. With the year on the display, press and release the green C button to advance one year. To move faster, hold the green C button down. With the correct year on the display, press the blue power button and the month and day will appear (month/ day format is default) on the display with the month segment flashing.
-
Page 69: Display Of Last Result
With the correct day on the display, press the blue power button and the display of last result setting will appear. Display of Last Result The SureStep Meter is pre-set to ® display your last test result automat- ically when you turn on the meter. - Page 70 Unit of Measurement The meter is pre-set to display test results in millimoles per litre (mmol/L). You have the option to select milligrams per decilitre (mg/dL), the unit of measurement used in the United States. The mmol/L results include a decimal point, but mg/dL results do not.
-
Page 71: Beep Signals
Beep Signals The SureStep Blood Glucose Meter ® uses beeping tones to signal various steps in the meter procedures. However, these tones do not indicate that the procedures are being per- formed correctly. The meter is pre-set to emit three different beep signals: 1. -
Page 72: And 30-Day Test Averages
You will hear a three-tone beep when is displayed. Press the blue power button to move to the 14- and 30-day test averages setting. 14- and 30-Day Test Averages The meter is pre-set to display 14-day and 30-day averages of your blood glucose test results in memory mode. -
Page 73: Time Format
Time Format The meter is pre-set to display the time in the 12-hour AM/PM format. An alternative 24-hour time format is available. Press the green C button if you wish to change the setting. Press the blue power button to move to the date format setting. -
Page 74: Exiting The Set-Up Mode
Exiting the Set-Up Mode You may exit the set-up mode at any time by simply pressing the blue power button and holding it down until the display is blank. -
Page 75: Helpful Messages
In most cases, a problem is easy to solve. Assis- tance is available from the LifeScan Customer Care Line at 1 800 663-5521 (U.S.A. 1 800 227-8862). WHAT TO DO Push the test strip in firmly until it stops. - Page 76 SYMBOL MESSAGE 1. The test strip was inserted before the meter was turned on or before the insert test strip symbol appeared, or 2. The test strip was inserted incorrectly, or WHAT TO DO 1. Remove the test strip and then reinsert after this symbol appears.
- Page 77 SYMBOL MESSAGE 3. The test strip was inserted too quickly. If the symbol is constant, the batteries are low. If the symbol is flashing, the bat- teries are dead. WHAT TO DO 3. Reinsert test strip slowly. Replace the batteries (see pages 51–53).
-
Page 78: Error Messages
Error Messages The meter gives specific error mes- sages when it detects a problem with its internal functions, the test strip, or the testing procedure. However, improper use may cause ERROR POSSIBLE CAUSE 1. Blood was applied to the wrong side of the test strip, or 2. - Page 79 ERROR POSSIBLE CAUSE 3. The test strip was inserted more than two minutes after applying blood, or 4. You may have a very high blood glucose level, possibly exceeding 27.8 mmol/L (500 mg/dL). WHAT TO DO 3. Repeat the test with a new test strip.
- Page 80 ERROR POSSIBLE CAUSE 1. Not enough blood was applied to the test strip, or 2. The test strip has been altered, exposed to air, or has passed its expiration date. WHAT TO DO 1. Repeat the test with a new test strip.
- Page 81 ERROR POSSIBLE CAUSE 1. The test strip was removed or partially removed before the result was displayed, or 2. The meter contact points are dirty. Note: If more than two minutes have passed since you applied blood to the test strip, repeat the test with a new test strip.
- Page 82 ERROR POSSIBLE CAUSE The meter is not within the temperature range of 10–35°C (50–95°F). 1. The meter test strip holder, lens area, and contact points are dirty, or 2. The test strip holder is not fully in place, or WHAT TO DO Allow the meter to warm or cool slowly before performing another test.
- Page 83 Turn meter on. Before testing, check that the code on your meter matches the code on your test strip package. If call the LifeScan Customer Care Line at 1 800 663-5521 (U.S.A. 1 800 227-8862). continues,...
-
Page 84: Performance Characteristics
Performance Characteristics Power Supply: Two AAA alkaline batteries. Battery Life: Approximately 18 months when doing two tests a day. Result Range: 0–27.8 mmol/L (0–500 mg/dL). Higher results are displayed as “ .” Display: Liquid crystal. Blood Source: Whole blood. S P E C I F I C AT I O N S Calibration: Hematocrit Range: Size:... -
Page 85: Guarantee And Warranty
LifeScan Customer Services Representative at 1 800 663-5521 (Canada) within 30 days of pur- chase. After calling LifeScan, you will need to return the SureStep Meter and a copy of your receipt to receive a refund. Six-Year Warranty. If, at any time during the first... - Page 86 SureStep Meter when used with any test strip other than SureStep Test Strips from ® LifeScan, or when the SureStep Meter or Test Strips are modified in any way. Before you return your meter, or any product, first call your...
-
Page 87: Regulatory Information
REGULATORY INFORMATION The SureStep Blood Glucose Meter complies with the following standards: ® CAN/CSA C22.2 No. 601.1 - M90 “Medical Electrical Equipment - Part 1: General Requirements for Safety” (Complies with UL 2601-1). CAN/CSA C108.6 - M91 (CISPR 11:1990) “Limits and Methods of Measurement of Electromagnetic Disturbance Characteristics of Industrial, Scientific and Medical (ISM) Radio-Frequency Equipment”... -
Page 88: Coding The Meter
CODING THE METER Before testing, make sure the meter is coded correctly. Press blue Meter automatically power button. displays last test result with date. (Example) Code number is Press green C button automatically until code number on displayed. meter matches code number on test strip package. -
Page 89: Blood Application
How you can be sure that you have applied the right amount of blood: Front Back Pink Test Square White Confirmation Pink test square is Apply a drop of blood where you apply a to the pink test square drop of blood. on the front of the test strip. - Page 90 Du lundi au vendredi de 9 h à 20 h, heure de l’Est et de 6 h à 17 h, heure du Pacifique Canada U.S.A./É.-U. Distributed by/Distribué par : LifeScan Canada Ltd./ Produits médicaux LifeScan Canada Ltée, V5C 6C6 AW 050-906-01A AW *05090601A* © LifeScan, Inc. 1999 Milpitas, CA 95035 8/99 –5...
Need help?
Do you have a question about the SureStep and is the answer not in the manual?
Questions and answers