
Related Manuals for Roberts ChronoDAB


Summary of Contents for Roberts ChronoDAB
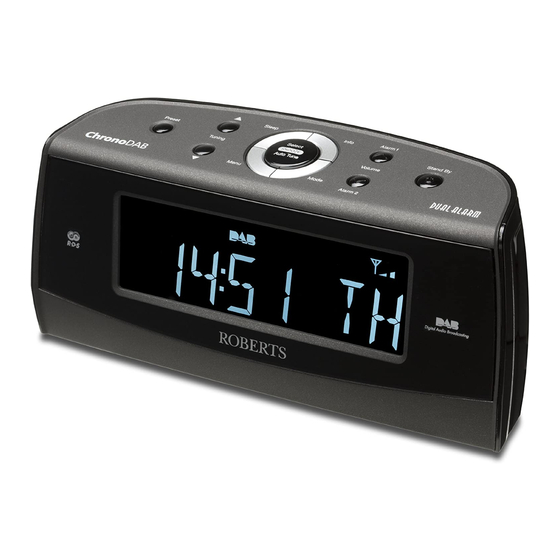
- Page 1 DAB / FM RDS Digital Clock Radio with large display Please read this manual before use...
-
Page 2: Table Of Contents
Contents Controls ................2-3 Setting the clock manually ........... 22-23 Using the clock radio for the fi rst time .........4 To return to auto clock set mode ........24 Operating your clock radio...........5 Clock display ..............24 Selecting a station - DAB.............6 Display backlight dimmer...........25 Secondary services - DAB...........7 Software version ..............25... -
Page 3: Controls
Controls (Top) 1. Menu button 5. Sleep button 9. On / Standby button 2. Tuning Down button 6. Select / Snooze button 10. Alarm 2 / Volume Down button 3. Preset button 7. Info button 11. Mode button 4. Tuning Up button 8. - Page 4 Controls (rear) 12. Loudspeaker 16. Mains lead 13. Alarm 1 switch 17. DAB / FM wire aerial 14. Alarm 2 switch 18. USB socket (for software upgrades) 15. Dimmer switch 19. Headphone socket...
-
Page 5: Using The Clock Radio For The Fi Rst Time
3. Plug the mains lead into a standard 13 amp mains socket outlet. The display will show 'ROBERTS' for a few seconds and will then show 'SET CLOCK'. During this time the radio is scanning to fi nd a DAB radio signal. -
Page 6: Operating Your Clock Radio
Operating your clock radio 1. Press the On / Standby button to switch on your clock radio. Standby When fi rst switched on, the radio will be in DAB mode. After each use the radio will remember the mode used and then switch on in that mode the next time that it is used. -
Page 7: Selecting A Station - Dab
Selecting a station - DAB 1. Press the On / Standby button to switch on your clock radio. 2. Press and release the Mode button until the DAB mode is selected. The display will show the name of the radio station currently selected. 3. -
Page 8: Secondary Services - Dab
Secondary services - DAB 1. Certain radio stations have one or more secondary services associated with them. If a station has a secondary service associated with it then the secondary service will then appear immediately after the primary service as you press the Tuning Up button. 2. - Page 9 d. Signal error Displays the bit error rate for the currently tuned DAB station. e. Station name Displays the station name being listened to. f. Scrolling text Displays scrolling text messages such as artist/track name, phone in number, etc. g. Programme type Displays the type of station being listened to e.g.
-
Page 10: Finding New Stations - Dab
Finding new stations - DAB From time to time, new DAB radio stations may become available. Or you may have moved to a different part of the country. In this case you may need to cause your radio to scan for new stations. 1. -
Page 11: Manual Tuning - Dab
Manual tuning - DAB Manual tuning allows you to tune your radio to a particular DAB frequency in Band III. Any new stations found will be added to the station list. This function can also be used to assist the positioning of the aerial or the clock radio to optimise reception for a specifi... -
Page 12: Dynamic Range Control (Drc) - Dab
Dynamic Range Control (DRC) - DAB The DRC facility can make quieter sounds easier to hear when your radio is used in a noisy environment. There are three levels of compression: DRC 0 No compression applied. (default) DRC 1/2 Medium compression applied. DRC 1 Maximum compression applied. -
Page 13: Operating Your Radio - Fm Auto-Tune
Operating your radio - FM auto-tune 1. Fully extend the wire aerial located on the rear of your clock radio. Standby Place the wire antenna so that it is as straight as possible extending either above or below the clock radio. 2,10 2. -
Page 14: Manual Tuning - Fm
Manual tuning - FM 1. Fully extend the wire aerial located on the rear of your clock radio. Standby Place the wire antenna so that it is as straight as possible extending either above or below the clock radio. 2. Press the On / Standby button to switch on your clock radio. 3. -
Page 15: Display Options - Fm
Display options - FM Your radio has a range of display options for FM mode:- The Radio Data System (RDS) is a system in which inaudible digital information is transmitted in addition to the normal FM radio programme. RDS offers several useful features. The following are available on your clock radio. -
Page 16: Presetting Stations
Presetting stations You may store your preferred DAB and FM radio stations to the preset Standby station memories. There are 20 memory presets in your radio, 10 for DAB and 10 for FM. Presets are remembered by your radio in the event of a power failure. -
Page 17: Recalling A Preset Station
Recalling a preset station 1. Press the On / Standby button to switch on the clock radio. 2. Press the Mode button to select the desired waveband. 3. Press and release the Preset button. The display will show, for example, 'Empty 1' if no station has been stored to that preset. -
Page 18: Setting The Alarm Times
Setting alarm times Your clock radio has two alarms which can be set to wake you to DAB, FM radio or buzzer alarm. Each alarm can be set to sound once, daily, on weekdays or at weekends. The alarms can only be set when your clock radio is in standby. - Page 19 • If setting the alarm to once only, continue with step 7 below. Otherwise skip to step 13 below. 7. Press and release the Select button to enter the setting. The alarm year will fl ash on the display. 7-13 8.
-
Page 20: Cancelling Alarms
When your clock radio is set to wake by the radio alarm, your clock radio will switch to the last used DAB or FM radio station. If the radio cannot connect to the radio station, the buzzer alarm will be used instead. The alarm volume will start from minimum and increase in level every few seconds. -
Page 21: Snooze Function
Snooze function 1. When the radio or buzzer alarm sounds, press and release the Snooze button. This will silence the alarm for the selected number of minutes. The Snooze duration can be adjusted between 5 and 20 minutes in 5 minute increments. The default setting is 5 minutes. When the Snooze button has been pressed during an alarm, the display will show the Snooze symbol . -
Page 22: Sleep Function
Sleep function Your clock radio can be set to turn off after a preset time has elapsed. The sleep setting can be adjusted between 5 and 90 minutes in 5 minute increments. Ensure your clock radio is switched on. 1. When using your clock radio, press the Sleep button. 2. -
Page 23: Setting The Clock Manually
Setting the clock manually Normally your clock radio will set its clock automatically using the DAB radio signal. If no DAB signal is available and you need to set the time manually, please follow the procedure shown below. 1. Press the On / Standby button to switch on the clock radio. 2. - Page 24 9. Press and release the Select button to enter the minutes setting. The year will then fl ash on the display. 10. Press the Tuning Up or Down buttons to change the year as needed. 11. Press and release the Select button to enter the year setting. The month will then fl...
-
Page 25: To Return To Auto Clock Set Mode
To return to auto clock set mode 1. Press the On / Standby button to switch on the clock radio. 2. Press and release the Menu button to enter the setup menu. 3. Press the Tuning Up or Down buttons until 'CLOCK' appears on the display. -
Page 26: Display Backlight Dimmer
Display backlight dimmer The brightness of the display can be adjusted when the radio is in standby or when the unit is in use. 1. In order to adapt the intensity of the display to suit the ambient room lighting, switch the Dimmer switch located on the left hand side of your clock radio to select the dimmer brightness from High, Medium and an almost off 'night-time' (Low) setting. -
Page 27: Language Function
Language function Your clock radio can be confi gured to a different language. Ensure your clock radio is switched on. 1. Press and release the Menu button. 2. Press the Tuning Up or Down buttons until 'LANGUAGE' appears on the display. 3. -
Page 28: System Reset
4. A full reset will be performed. The station list and presets will be erased. Alarms will be cancelled and snooze and sleep timer settings will be set to their default values. The display will show 'ROBERTS' and after a short time the current time and day will appear on the display. -
Page 29: Headphone Socket
Headphone socket A 3.5mm Headphone Socket located on the rear of your clock radio is provided for use with either headphones or an earpiece. Inserting a plug automatically mutes the internal loudspeaker. Please be aware that the sensitivity of headphones can vary widely. We therefore recommend setting the volume to a low level before connecting headphones to the clock radio. -
Page 30: Mains Supply
Mains supply The wire coloured BLUE must be connected to the terminal marked N or The ChronoDAB will operate from a supply of AC 230 volts, coloured BLACK. 50Hz only. The wire coloured BROWN must be connected to the terminal marked L DO NOT cut off the mains plug from this equipment. -
Page 31: Cautions
Cautions Do not allow this clock radio to be exposed to water, steam or sand. Do not • Your clock radio should not be exposed to dripping or splashing and leave your clock radio where excessive heat could cause damage such as that no objects fi... -
Page 32: Guarantee
Company’s service department for attention. In the event that it is not possible to return the instrument to the Roberts' dealer from whom it was purchased, please contact Roberts Radio Technical Services at the address shown below.
Need help?
Do you have a question about the ChronoDAB and is the answer not in the manual?
Questions and answers