
Subscribe to Our Youtube Channel
Related Manuals for iBall iB-WRX300NP Baton


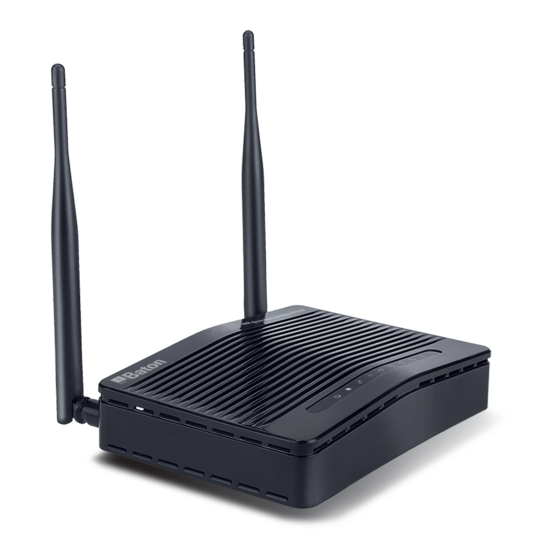
Summary of Contents for iBall iB-WRX300NP Baton
- Page 1 300M Extreme High Power Wireless-N Router Model No.: iB-WRX300NP User Manual Ver.: 1.0.0...
-
Page 2: Fcc Statement
FCC STATEMENT This equipment has been tested and found to comply with the limits for a Class B digital device, pursuant to part 15 of the FCC Rules. These limits are designed to provide reasonable protection against harmful interference in a residential installation. This equipment generates uses and can radiate radio frequency energy and, if not in-stalled and used in accordance with the instructions, may cause harmful interference to radio communications. -
Page 3: Ce Mark Warning
This device complies with part 15 of the FCC Rules. Operation is subject to the following two conditions: This device may not cause harmful interference. This device must accept any interference received, including interference that may cause undesired operation. -
Page 4: Table Of Contents
Chapter 1 Product Overview ................5 1.1 Package Contents..................5 1.2 Panel Overview .................... 6 Chapter 2 Installation ................... 8 Chapter 3 Internet Connection Setup ............... 10 3.1 Configure your PC’s TCP/IP Settings ............10 3.2 Login to Router ..................15 3.3 Quick Internet Connection Setup ............... - Page 5 5.4 MAC Filtering ..................... 38 5.5 Connection Status ..................40 Chapter 6 DHCP ....................41 6.1 DHCP Settings ................... 41 6.2 DHCP Clients & Address Reservation ............41 Chapter 7 Virtual Server ..................43 7.1 Port Forwarding ..................43 7.2 DMZ ......................45 7.3 UPnP ......................
-
Page 6: Chapter 1 Product Overview
Resource CD for 300M eXtreme High Power Wireless-N Router, including Easy Setup Wizard, Other Helpful Information Conventions The Router or iB-WRX300NP mentioned in this guide stands for iBall Baton 300M eXtreme High Power Wireless-N Router without any explanation. -
Page 7: Panel Overview
1.2 Panel Overview LED overview: Status LED Status Description Power Router is power ON Green Router is working properly WPS function is activated, LED will keep Green on about 2 minutes Device linked to the corresponding port but WLAN Blue there is no activity RJ45 cable is plugged, and Ethernet Green... - Page 8 Port/Button Overview: Port/Button Description Internet port connecting to a DSL/Cable modem or ISP directly For connection to a computer or router. Pressing this button for 7 seconds restores the device to factory default RESET settings. Kindly use bundled power adapter to avoid hardware failure...
-
Page 9: Chapter 2 Installation
Chapter 2 Installation Connect one end of the included power adapter to the router and then plug the other end into a wall outlet nearby. 2. Connect the LAN port on the Router to the NIC port on your PC using an Ethernet cable. - Page 10 As you click on Start button router web page will open http://192.168.1.1 Login to the router interface by inserting default password: admin & click on OK.
-
Page 11: Chapter 3 Internet Connection Setup
Chapter 3 Internet Connection Setup 3.1 Configure your PC’s TCP/IP Settings If you are using Windows XP operating system, do as follows. 1. Right click “My Network Places” and select “Properties”. 2. Right click “Local Area Connection” and select “Properties”... - Page 12 3. Select “Internet Protocol (TCP/IP)” on the appearing window and click “Properties” button. 4. Select “Use the following IP address” ● IP address: Enter 192.168.1.xxx (xxx can be any value from 2~254). ● Subnet mask: Enter 255.255.255.0. ● Default gateway: Enter 192.168.1.1. Preferred DNS server: Enter 192.168.1.1 in case that you don’t know ●...
- Page 13 If you are using Windows 7 operating system, do as follows: 1. Right click network icon on your desktop and then click the “Open Network and Sharing Center”. 2. Click “Change adapter settings”.
- Page 14 3. Right click “Local Area Connection” and select “Properties”” 4. Select “Internet Protocol (TCP/IP)” on the appearing window and click “Properties” button.
- Page 15 5. Select “Use the following IP address” ● IP address: Enter 192.168.1.xxx (xxx can be any value from 2~254). ● Subnet mask: Enter 255.255.255.0. ● Default gateway: Enter 192.168.1.1. Preferred DNS server: Enter 192.168.1.1 in case that you don’t know ●...
-
Page 16: Login To Router
3.2 Login to Router 1. Open a web browser; enter http:// 192.168.1.1 in the address bar to access router web based Type password and then press “Enter” to go to interface below: 3.3 Quick Internet Connection Setup There are 2 Internet connection types on this screen, PPPoE and Dynamic IP (DHCP). - Page 17 PPPoE Select PPPoE, if your ISP are using a PPPoE connection and enter the PPPoE user name and password provided by your ISP. Then setup a wireless security key on the interface below to secure your wireless network. At last, click the OK button to save your settings. Dynamic IP Select Dynamic IP if your ISP does not give you any IP information or account information.
-
Page 18: Quick Wizard
type other than the above- mentioned. 3.4 Quick Wizard Use the interface below to fast secure your wireless network (Only a catchy security key is required) or go to Advanced (click the “Advanced” tab on the upper right corner)–Wireless--Security Settings for more settings (Apart from the security key option, you can select a security mode and a cipher type that best fit yourself or keep the defaults thereof unchanged. -
Page 19: Chapter 4 Network Settings
Chapter 4. Network Settings 4.1 Status Info This section allows you to view the router’s WAN and system information. ● Connection Status: Displays WAN connection statuses: Disconnected, Connecting or Connected. Disconnected: Indicates that the Ethernet cable from your ISP side is not / not correctly connected to the WAN port on A5 or A5 is not logically connected to your ISP. -
Page 20: Wan
LAN MAC Address: Displays router’s LAN MAC address. ● WAN MAC Address: Displays router’s WAN MAC address. ● ● System Time: Displays the time when system is updated. ● Connected client: Displays the number of connected computers (which obtains IP addresses from the device’ DHCP server). Software Version: Displays router’s firmware version. - Page 21 ● Connection Type: Displays current Internet connection type. ● User Name: Enter the user name provided by your ISP. ● Password: Enter the password provided by your ISP. ● MTU: Maximum Transmission Unit. DO NOT change it from the factory default of 1492 unless necessary.
-
Page 22: Static Ip
4.2.2 Static IP If your ISP offer you static IP Internet connection type, select “Static IP" from Mode drop-down menu and then enter IP address, subnet mask, Primary DNS and secondary DNS information provided by your ISP into corresponding fields. ●... -
Page 23: Pptp
● MTU: Maximum Transmission Unit. DO NOT change it from the factory default of 1500 unless necessary. You may need to change it for optimal performance with some specific websites or application software that cannot be opened or enabled. 4.2.4 PPTP: ●... -
Page 24: L2Tp
performance with some specific websites or application software that cannot be opened or enabled; in this case, try 1450, 1400, etc. Address mode: Select “Dynamic” if you don’t get any IP information ● from the PPTP server, otherwise select “Static”. ●... -
Page 25: Lan
(PPTP server). Inquire your local ISP if you are not clear (Static IP address mode only). ● Subnet mask: Enter the subnet mask provided by your ISP, normally, 255.255.255.0 (Static IP address mode only). ● Gateway: Enter the gateway provided by your ISP (Static IP address mode only). -
Page 26: Mac Clone
4.4 MAC Clone This section allows you to configure router’s WAN MAC address. Some ISP may require binding an accepted MAC address for communication MAC Address: Configure router’s WAN MAC address. ● MAC Address Clone: Clicking this button changes router’s WAN MAC ●... -
Page 27: Bandwidth Control
● DNS Setting: Check the box to enable DNS settings. ● Primary DNS: Enter the DNS server address provided by your ISP. ● Secondary DNS: Enter the secondary DNS address if your ISP offers 2 DNS addresses (Optional). Note: 1. Wrong DNS server addresses will lead to failure in accessing websites. - Page 28 ● Bandwidth Control: Maximum and minimum data flow which is permitted to be uploaded/downloaded by computers within a specified IP range. Unit is Kbytes/s. (For WAN bandwidth range, consult your ISP.) ● Enable: Check the box to enable current rule. The existing rule will not take effect when left unchecked.
-
Page 29: Traffic Statistics
For example: Supposing that you want PCs within the IP range of 192.168.1.2--192.168.1.254 to have 100-120KByte/s download rate and 20-30KByte/s upload rate, then repeat same settings shown on below screenshort on your router: 4.7 Traffic Statistics Statistics dynamically displays bandwidth usage by PCs on your LAN. -
Page 30: Wan Speed
● Enable Traffic Statistics: Check the box to gather bandwidth usage by PCs on your LAN. It is disabled by default. Disabling this option may boost router’s packet processing capacity. When enabled, system will dynamically renew statistics information every 5 seconds. ●... - Page 31 ● AUTO: DO NOT change this default setting unless you are connecting an excessively long Ethernet cable from your ISP, which may degrade drive capability, to the router’s WAN port. 10M HALF-duplex: Select it if your router’s WAN port does not function ●...
-
Page 32: Chapter 5 Wireless Settings
Chapter 5 Wireless Settings 5.1 Wireless Basic Settings ● Enable Wireless function: Check/uncheck to enable/disable the wireless feature. When disabled, all wireless related features will be disabled automatically. ● Network Mode: Network Mode: Select a right mode according to your wireless client. -
Page 33: Wireless Security
existing wireless network or to customize the wireless network. From the drop-down list,you can select a most effective channel, which ranges from 1 to 11. You can also select “Auto Select” to let system detect and choose one that best fits your network. ●... -
Page 34: Wpa-Psk
● WPS Settings: Select to enable/disable the WPS encryption. It is enabled by default. ● WPS Mode: Select PBC (Push-Button Configuration) or PIN. ● PBC: Click this software button or directly press the hardware WPS button on both your router and the new wireless client device (that you want to connect to your router wirelessly) for 1 second to establish an easy and secure wireless connection. -
Page 35: Wpa2-Psk
● Security Mode: Select a proper mode, which is also supported by your wireless clients, from the drop-down menu. ● WPA Algorithms: Select either AES (advanced encryption standard) or TKIP (temporary key integrity protocol) type. Key: Enter a security key , which must be between 8-63 ASCII ●... -
Page 36: Operation Mode
● WEP Key: You can select either ASCII or Hexadecimal from the drop-down menu. Note: If you select ASCII, enter 5 or 13 valid ASCII characters; or if you select Hexadecimal, enter 10 or 26 Hexadecimal characters. ● Default Key: Select one key from the 4 preset keys. 5.3 Operation Mode Operation Mode is used to set the different wireless working mode. -
Page 37: Wds Bridge Mode
Repeat same process as for Universal Repeater 5.3.3 WDS Bridge Mode To extend your existing wireless network coverage, select the WDS (Wireless Distribution System) feature. ● AP MAC Address: Enter the MAC address of a wireless link partner or populate this field using the Open Scan option. Application example: Implement... - Page 38 2. Add iB-WRX300NP-2’s MAC address to iB-WRX300NP-1 and change iB-WRX300NP-1’s SSID and channel respectively to those of iB-WRX300NP-2. (Assuming that iB-WRX300NP-2’s SSID is changed to OFFICE) a. If you already know iB-WRX300NP-2’s MAC address, SSID and channel settings, then you can manually configure the same settings on iB-WRX300NP-1.
-
Page 39: Mac Filtering
2) Select the iB-WRX300NP-2’s SSID from the list and click OK on the appearing dialogue box; iB-WRX300NP-2’s MAC address, SSID and channel settings will be automatically added to the iBl-WRX300NP-1 3) Click OK to save your settings. 4) Configure wireless security settings. For this step, refer to section 5.2 hereof. - Page 40 MAC Address Filter: “Permit” means to permit PCs at specified MAC ● addresses to connect to your wireless network while “Forbid” means to block PCs at specified MAC addresses from connecting to your wireless network. ● MAC Address: Enter the MAC addresses of a wireless client and click “Add”.
-
Page 41: Connection Status
Example 2: To prohibit only a PC at the MAC address of 00:1e:a6:67:d4:23 from connecting to your wireless network, follow steps above and make a few necessary changes as shown follow. 5.5 Connection Status This interface displays the information of currently connected wireless clients including MAC addresses and bandwidth. -
Page 42: Chapter 6 Dhcp
Chapter 6 DHCP 6.1 DHCP Settings The Dynamic Host Configuration Protocol (DHCP) is an automatic configuration protocol used on IP networks. If you enable the built-in DHCP server on the device, it will automatically configure the parameters of TCP/IP protocol for all your LAN computers (including IP address, subnet mask, gateway and DNS etc), eliminating the need for manual intervention. - Page 43 If you would like some devices on your network to always have fixed IP addresses, you can manually add a static DHCP assignment entry for each such device. You can manually add an IP address and a MAC address, and then whenever a host with this MAC address connects to the router, it will always get the same IP address (the one you just added).
-
Page 44: Chapter 7 Virtual Server
Chapter 7 Virtual Server 7.1 Port Forwarding ● Start/End Port: Enter the service port range provided by the mapped host in internal network. ● LAN IP: The IP address of the computer which is used as a server in LAN. Protocol: Includes TCP, UDP and Both. - Page 45 1. Enter 21 for both the start and end port in ID 1, or select "FTP" from “Well-Known Service Port” and port 21 will be added automatically to ID 1. 2. Enter 192.168.1.10 for the "IP Address", select "TCP" and then select "Enable'.
-
Page 46: Dmz
7.2 DMZ In some cases, we need to set a computer to be completely exposed to extranet for implementation of a 2-way communication. To do so, we set it as a DMZ host. ● DMZ Host IP Address: Enter the IP address of a LAN computer which you want to set to a DMZ host. -
Page 47: Upnp
7.3 UPnP UPnP (Universal Plug and Play) allows a network device to discover and connect to other devices on the network. With this feature enabled, hosts in LAN can request the device to perform special port forwarding so as to enable external hosts to access resources on internal hosts. ●... -
Page 48: Chapter 8 Security Settings
Chapter 8 Security Settings 8.1 IP Address Filtering To better manage the computers in LAN, you can regulate LAN computers’ access to certain ports on Internet using Client Filter functionality. ● Filter Mode: Select Forbid only or Permit only according to your own needs. - Page 49 Example 1: To prohibit PCs within the IP address range of 192.168.1.100 -- 192.168.1.120 from accessing Internet from Monday to Friday, do as follows: ● Example 2: To allow only the computer at an IP address of 192.168.1.145 to access Internet from 8:00 to 18:00 without restricting other computers in LAN, do as follow...
-
Page 50: Mac Address Filtering
8.2 MAC Address Filtering To better manage the computers in LAN, you can use the MAC Address Filter function to control the computer’s access to Internet. ● Filter Mode: Select Forbid only or Permit only according to your own needs. ●... - Page 51 Example1: To prevent a PC at the MAC address of 00:1E:A6:44:35:69 from accessing Internet within the time range of 8:00-18:00 from Monday to Friday, do as follows: Example2: To allow only the PC at a MAC address of 00:1E:A6:44:35:69 to access Internet from Monday to Friday, do as follows:...
-
Page 52: Url Filtering
8.3 URL Filtering To better control the LAN computers’ access to websites, you can use URL filtering to allow or disallow their access to certain websites within a specified time range. ● Filter Mode: Select Disable or Forbid only according to your own needs. ●... -
Page 53: Remote Management
Note: Each URL character string entry can corresponded to only a domain name. So you need to set multiple rules if you want to filter out multiple domain names. 8.4 Remote Management The Remote Web-based Management feature allows users to configure your router from Internet via a web browser. - Page 54 Note: If you enter 0.0.0.0 in the IP address box, then all PCs on Internet can access your router’s Web-based utility to view or change your settings remotely once you enable the remote Web-based management feature. For example: If you want to allow only a PC at the IP address of 218.88.93.33 to access your router’s web-based utility from Internet via port: 8080, you need to configure same settings shown in the diagram above on your router.
-
Page 55: Chapter 9 Routing Settings
Chapter 9 Routing Settings 9.1 Routing Table This page displays the router’s core routing table which lists destination IP address, subnet mask, gateway, hop count and interface. The principal task for a router is to look for an optimal transfer path for each data packet passing through it, and transfer it to the specified destination. - Page 56 ● Destination Network IP Address: Enter a destination IP address or subnet. ● Subnet Mask: Enter a Subnet Mask that corresponds to destination IP address or subnet you entered. ● Gateway: Next-hop IP address. Note: 1. Gateway IP address must be on the same subnet with the router’s LAN/WAN IP address.
-
Page 57: Chapter 10 Maintenance
Chapter 10 Maintenance 10.1 Time Settings This section assists you in setting the device’s system time; you can either select to set the time and date manually or automatically obtain the GMT time from Internet. Note: The configured time settings lose once the router is powered off. -
Page 58: Backup/Restore
● DDNS Service: Click Enable or Disable radio button to enable/disable the DDNS feature. ● Service Provider: Select your DDNS service provider from the drop-down menu (Dyndns or no-ip). ● Username: Enter the DDNS username provided by your DDNS service provider. - Page 59 ● Backup : Once you have configured the device the way you want it, you can save these settings to a configuration file on your local hard drive that can later be imported to your device in case that the device is restored to factory default settings.
-
Page 60: Factory Default
And then click the "Restore" button to reset your device to previous settings. 10.4 Factory Default To restore all settings to the device's factory default values, click the "Restore to Factory Default” button on the interface below: Note: To activate your settings, reboot the device after you reset... -
Page 61: Firmware Upgrade
10.5 Firmware Upgrade Firmware upgrade is released periodically to improve the functionality of your device and also to add new features. If you run into a problem with a specific feature of the device, log on to our website(www.iballbaton.com )to download the latest firmware to update your device. ●... -
Page 62: System Logs
● Old Password: Enter the old password. ● New Password: Enter a new password. ● Confirm new Password: Re-enter the new password for confirmation. ● OK: Click it to save your new password. Note: For the sake of security, it is highly recommended that you change default login password. -
Page 63: Appendix A: Product Specification
Appendix A: Product Specification General Standards IEEE 802.3, 802.3u, 802.11b, 802.11g & 802.11n Protocols TCP/IP, PPPoE, DHCP, ICMP, NAT, SMTP One 10/100M Auto-Negotiation WAN RJ45 port, Ports Four 10/100M Auto-Negotiation LAN RJ45 ports supporting Auto MDI/MDIX 10BASE-T: UTP category 3, 4, 5 cable (maximum 100m) EIA/TIA-568 100Ω... - Page 64 Security WEP/WPA/WPA2/WPA2-PSK/WPA-PSK 130M: -68dBm@10% PER 108M: -68dBm@10% PER; Sensitivity 54M: -68dBm@10% PER @PER 11M: -85dBm@8% PER; 6M: -88dBm@10% PER 1M: -90dBm@8% PER RF Power 20dBm(max) Antenna Gain 5dBi Omni Directional Power adapter 12V DC, 0.5A Environmental and Physical Operating : 0℃~40℃...
-
Page 65: Appendix B: Glossary
Appendix B: Glossary Channel A communication channel, also known as channel, refers either to a physical transmission medium such as a wire or to a logical connection over a multiplexed medium such as a radio channel. It is used to transfer an information signal, such as a digital bit stream, from one or more transmitters to one or more receivers. -
Page 66: Appendix C: Contact Information
Appendix C: COPYRIGHT & TRADEMARKS Specifications are subject to change without notice. iBall Baton is a registered trademark of Best IT World (India) Pvt. Ltd. Other brands and product names are trademarks or registered trademarks of their respective holders. No part of the specifications may be reproduced in any form or by...
Need help?
Do you have a question about the iB-WRX300NP Baton and is the answer not in the manual?
Questions and answers