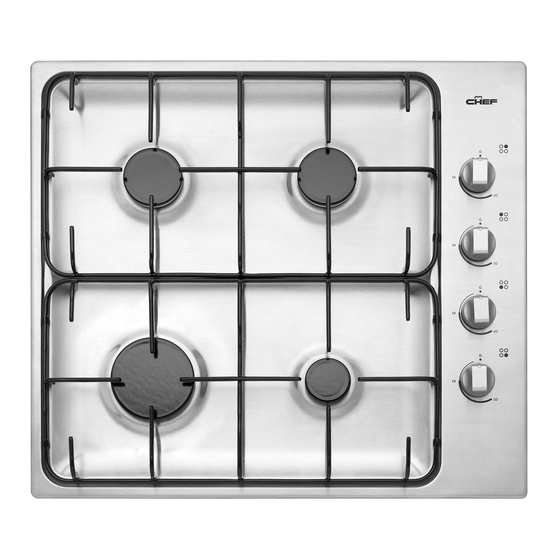
Summary of Contents for Electrolux GHS607W
- Page 1 MODELS GHS607W, GHS607S, GHC607W, GHC607S, GHC617W, GAS COOKTOPS GHC617S, GHS917W, GHS917S, GHC937W, GHC937S, 72K315W, 72K315S, GHR12W, GHR12S, GHR92W, User and Installation Manual GHR92S, WHG640WA, WHG640SA...
-
Page 2: Table Of Contents
CONGRATULATIONS CONTENTS General safety ............3 Congratulations and thank you for choosing our Gas Cooktop. We are sure you will find your new appliance a Using your cooktop ..........4 pleasure to use and a great asset to your cooking. Before Cleaning and care ..........5 you use the appliance, we recommend that you read through Troubleshooting .............6 the whole user manual which provides... -
Page 3: General Safety
general safety Read the following carefully to avoid an electric NOTE: You must read these warnings carefully before shock or fire installing or using the cooktop. If you need assistance, contact your Customer Care Department. The manufacturer General warnings will not accept liability should the instructions below, or any •... -
Page 4: Using Your Cooktop
using your cooktop Hotplates warning WARNING Choice of hotplate DO NOT spray aerosols in the vicinity of this appliance while it is For your convenience there is a choice of hotplates: in operation as aerosols can contain flammable propellants. • A small burner for special low heat and slow cooking. warning •... -
Page 5: Cleaning And Care
cleaning and care warning WARNING Ensure the appliance is off and cool before cleaning. Enamel Persistent stains may require rubbing with a nylon scourer or creamed powder cleansers. Household enamel cleaners are available, follow the manufacturer’s instructions in their use. Harsh abrasive cleaners, powder cleaners, steel wool or wax polishes should not be used. -
Page 6: Troubleshooting
troubleshooting If you have a problem with the cooktop, check the table below. You may be able to solve the problem and this will save you from paying for a service call. You will have to pay for a service call even in the warranty period if the problem is one listed below. -
Page 7: Installation
installation Table 2 Barrier protection is not necessary if the product is installed above an underbench oven or similar appliance Cooktop dimensions Square Rectangular and/or if the cupboard construction is such that the width (mm) underside of the cooktop is not accessible. Figure 4 depth (mm) height (mm) -
Page 8: Gas Connection
installation 4. Fitting the cooktop into the bench. Carry out as follows. Operation on NG/SNG Regulator • Place the rubber seal provided around the edge of the hob. An appliance regulator is provided. The regulator must be NOTE: The rubber seal has talc powder applied to it’s positioned so that the pressure test nipple is accessible when surface which should be wiped off with a damp cloth the appliance is installed. -
Page 9: Lpg Conversion - Dong Yang Regulator
installation LPG conversion - DONG YANG regulator Checking the gas supply tips & information TIPS & INFORMATION 1. Check the manometer zero point is correct. Refer to page 10 if you have been supplied with a 2. Connect the manometer to the cooktop pressure point. This CHANT regulator. - Page 10 LPG conversion - DONG YANG regulator • Check that the regulator has been fitted to the gas supply line in the correct orientation, the arrow on the base of the body indicates the direction of gas flow. Once these checks have been completed, if the regulator still fails to perform in a satisfactory manner it should be replaced.
-
Page 11: Lpg Conversion - Chant Regulator
LPG conversion - CHANT regulator 9. One by one, turn the knobs to minimum and screw in the bypass screw (accessible when the knob is removed) until tips & information TIPS & INFORMATION a small stable flame results. Turn the knob to maximum and Refer to page 9 if you have been supplied with a DONG then back to minimum to ensure that the correct minimum YANG regulator. -
Page 12: Electrical Connection
electrical connection Battery connection Battery holder installation instructions The battery used is a 1.5 Volt ‘AA’ Battery. This supplies the 1. Locate a convenient position to mount battery holder, power for the ignition system of the cooktop. To install, follow keeping it away from hot surfaces. -
Page 13: Testing Appliance Operation
testing appliance operation After installation, test the appliance and ensure that it operates correctly before handing it over to the customer. The Injector sizes required for various gas types are shown in following procedure is recommended: Table 3 (page 10). The appliance inlet pressure for each gas type is also shown. - Page 14 notes 14 NOTES Gas Cooktops...
-
Page 15: Warranty
Australia or New Zealand. the Appliances come with a guarantee by Electrolux that cannot be 3. During the Warranty Period Electrolux or its ASC will, at no extra charge excluded under the ACL. You are entitled to a replacement or refund... - Page 16 ....www.westinghouse.co.nz (Westinghouse models) Top service Top Service encompasses the after sales service provided by The Electrolux Group to consumers including delivery, home service and spare parts. We are part of the Electrolux family. Share more of our thinking at www.electrolux.com.au ©...


Need help?
Do you have a question about the GHS607W and is the answer not in the manual?
Questions and answers