Table of Contents
Advertisement
Quick Links
Advertisement
Table of Contents

Related Manuals for PowerTec TS1001


Summary of Contents for PowerTec TS1001
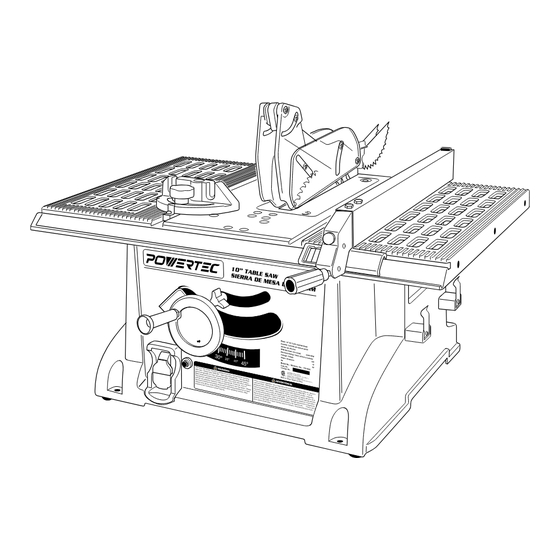
- Page 1 Model No. TS1001 Owner’s Manual 10” TABLE SAW QUESTION... 1•877•393•7121 Visit us on the web at www.southerntechllc.com You will need this manual for safety instructions, operating procedures, and warranty. Put it and the original sales invoice in a safe, dry place for future reference.
-
Page 2: Table Of Contents
TABLE OF CONTENTS PRODUCTION SPECIFICATIONS SECTION PAGE SAFETY RULES Horsepower (Peak HP) ....2-1/2 HP Voltage ........120 Work Preparation Amp . -
Page 3: Safety Rules
SAFETY RULES Some dust created by power sanding, sawing, grinding, remove switch keys to prevent any unintentional use of drilling and other construction activities contains chemicals power tools. known to cause cancer, birth defects or other reproductive TOOL MAINTENANCE harm. •... -
Page 4: Assembly
ASSEMBLY UNPACKING Figure 1 Check for shipping damage. If damage has occurred, a claim must be filled with carrier. Check for completeness. Immediately report missing parts to dealer. Your table saw is shipped complete in one container. Carefully unpack the table saw and all loose items from the shipping container. -
Page 5: Mount Table Saw
RAISE AND LOWER THE SAW BLADE CAUTION: Do not attempt assembly if parts are missing. Refer to Figure 4 Use this manual to order replacement parts. 1. Screw the crank handle into the hand wheel. 2. Turn the hand wheel clockwise to lower the blade and WARNING turn the hand wheel counterclockwise to raise the blade. -
Page 6: Install And Change The Blade
INSTALL AND CHANGE THE BLADE BLADE GUARD ASSEMBLY Refer to Figure 7, 8 and 9 Refer to Figure 10 WARNING WARNING Turn the switch to OFF position and disconnect the ma- Turn the switch to OFF position and disconnect the chine from power source. -
Page 7: Adjust Cutting Angle
ADJUST CUTTING ANGLE Figure 12 Cross Bar Blade Guard Refer to Figure 14 Assembly 1. Check the angle of the saw blade relative to the angle Guard adjustment scale on the saw table in order to operate a Release Lever clear perpendicular 90°cut. -
Page 8: Grounding Instructions
9. Tighten the two front and four rear adjustment nuts. WARNING Reach under the front and rear of table with a wrench to access these nuts. Re-check the alignment. If ad Do not permit fingers to touch the terminals of plug when ditional adjustments are necessary, loosen only the installing or removing from outlet. -
Page 9: Maintenance
OPERATION • If the key is removed when the switch is at the “ON” WARNING position, the switch can be turned off but cannot be turned on again. For your own safety, read the operating manual and • To unlock, place the key into the slot on switch unit until all the safety instructions before using the table saw. -
Page 10: Ripping
CROSSCUTTING 90° MITER GAUGE • Lift up fence lock handle to move the rip fence. • Slide the fence to the desred cutting width and push Refer to Figure 21 down the fence lock handle to lock the fence. • Ride one edge of workpiece against the rip fence while 1. -
Page 11: Cleaning
COMPOUND MITER CROSSCUTTING Figure 24 0° ~ 45° BLADE BEVEL AND 0° ~ 45° MITER GAUGE Refer to Figure 23 1. Place the miter gauge at the right side goove of the table and set it to the desired angle. 2. -
Page 12: Troubleshooting
TROUBLESHOOTING SYMPTOM POSSIBLE CAUSE(S) CORRECTIVE ACTION Motor will not start 1. Low voltage 1. Check power supply for proper voltage 2. Short circuit in line cord or plug 2. Inspect line cord and plug for faulty insulation or 3. Short circuit in motor shorted connection 4. - Page 13 TROUBLESHOOTING SYMPTOM POSSIBLE CAUSE(S) CORRECTIVE ACTION Does not make 1. Positive stop not adjusted 1. Check blade with square and accurate 45°and 90° correctly. adjust positive stop. rip cuts 2. Tilt angle pointer not set 2. Check blade with square and accurately.
-
Page 14: Parts Illustration
10” TABLE SAW PARTS ILLUSTRATION... - Page 15 10” TABLE SAW PARTS LIST Key No. Part No. Description Key No. Part No. Description 60 TS1001060 Lock Shaft 1 TS1001001 Screw, GB845-85 ST4.2x12 61 TS1001061 Pin, GB879.1-2000 ø4X18 2 TS1001002 Rear Cover 62 TS1001062 Knob A 3 TS1001003 Brush Holder 4 TS1001004 Carbon Brush 63 TS1001063 Knob B 5 TS1001005 Motor Housing...
- Page 16 10” TABLE SAW PARTS LIST Key No. Part No. Description Key No. Part No. Description 119 TS1001119 Screw, GB/T818-2000 M5X14 147 TS1001147 Heat-shrink Tube 120 TS1001120 Screw, GB/T818-2000 M5X12 148 TS1001148 Miter Gauge Storage 149 TS1001149 Spring Washer, GB93-87 M4 121 TS1001121 Block Plate 122 TS1001122 Wave Washer, GB/T955-1987 12 150 TS1001150 Washer, GB848-85 4...
- Page 17 Key No. Part No. Description Key No. Part No. Description Specification 169 TS1001169 Breaker Nut 170 TS1001170 Inner Plate 171 TS1001171 Screw, GB819-85 M4X10 172 TS1001172 Gear Plate 173 TS1001173 Lock Nut, GB889.1-2000 M4 174 TS1001174 Knob Cover 175 TS1001175 Lock Knob 176 TS1001176 Angle Bolt 177 TS1001177 Miter Gauge 178 TS1001178 Guide Ruler...
-
Page 18: Warranty
WARRANTY Thank you for investing in a POWERTEC power tool. These products have been made to demanding, high-quality standards and are guaranteed for domestic use against manufacturing faults for a period of 12 months from the date of purchase. This guarantee does not affect your statutory rights. In case of any malfunction of your tool (failure, missing part, etc.), please contact one of our service technician at our service line at 1-877-393-7121 from 9 AM to 5 PM, Monday to Friday, Central time. - Page 19 ADDITIONAL LIMITATIONS To the extent permitted by applicable law, all implied warranties, including warranties of MERCHANTABILITY or FITNESS FOR A PARTICULAR PURPOSE, are disclaimed. Any implied warranties, including warranties of merchant- ability or fitness for a particular purpose, that cannot be disclaimed under state law are limited to one year from the date of purchase.
- Page 20 Southern Technologies, LLC 206 Terrace Drive Mundelein, Illinois 60060...
Need help?
Do you have a question about the TS1001 and is the answer not in the manual?
Questions and answers