Advertisement
Quick Links
Owner's Manual
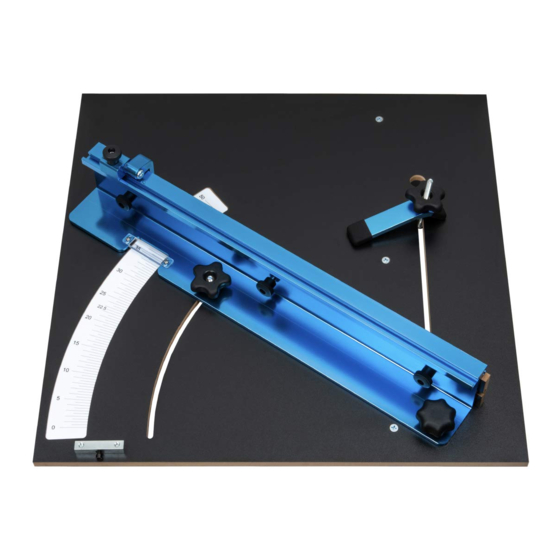
Table Saw Crosscut Sled
QUESTION...
1•847•780•6120
Visit us on the web at powertecproducts.com
You will need this manual for safety instructions, operating procedures, and warranty.
Put it and the original sales invoice in a safe, dry place for future reference.
Model No. 71403
20-0717
Advertisement

Subscribe to Our Youtube Channel
Related Manuals for PowerTec 71403


Summary of Contents for PowerTec 71403
- Page 1 Model No. 71403 Owner’s Manual Table Saw Crosscut Sled QUESTION... 1•847•780•6120 Visit us on the web at powertecproducts.com You will need this manual for safety instructions, operating procedures, and warranty. Put it and the original sales invoice in a safe, dry place for future reference.
-
Page 2: Table Of Contents
TABLE OF CONTENTS PRODUCT SPECIFICATIONS SECTION PAGE SAFETY RULES Base ......23-13/16" x 23-13/16" x .488" MDF fence face ....24-3/8" x 2-9/16" x .488" Fence . -
Page 3: Safety Rules
SAFETY RULES FOLLOW ALL STANDARD SHOP SAFETY WARNING PRECAUTIONS, INCLUDING: For your own safety, read all of the rules and precautions before • Keep children and visitors at a safe distance from work area. operating tool. • Keep work area clean. Cluttered work areas invite accidents. WARNING Work area should be properly lit. - Page 4 SPECIFIC SAFETY WARNINGS • The crosscut sled is not intended for making compound cuts. DANGER • During setup, the crosscut sled is cut to fit your specific saw. Read the instructions carefully to complete this essential • To avoid serious injury, keep hands out of the path of setup step.
-
Page 5: Assembly
ITEM DESCRIPTION MDF sled MDF fence face Extruded Fence Miter bar 3" Flip stop (Powertec 71367) 5-1/2" Hold down clamp with hardware (Powertec 71083) Five star knob, 2" in diameter 5/16"-18 round knobs (3/4" tall) 5/16"-18 x 1" T-Bolts 5/16"-18 x 1-1/2"... - Page 6 ASSEMBLY Attach the adjustable stop to the table using two 1/4"-20 x 3/4" flat head Phillips screws. Make sure the set screw is Refer to Figure 2–9 positioned to the outer edge of the sled and the side marked with a ”O” is facing up. See Figure 4. Apply the self-adhesive wear resistant strips to the underside of the sled.
-
Page 7: Set-Up
Attach the cursor, flat side up, using the two M4 screws. Place the nylon bushing into the hole on the end of the See Figure 9. extruded fence. Align the nylon bushing over the extended steel insert in the top of the MDF sled and secure with the Figure 9 seven star knob. - Page 8 Trim the crosscut sled platform to fit the table saw With the fence square to the blade, use the included hex being used. wrenches to turn the set screw in the adjustable stop until it contacts the back of the fence. This screw will act as a stop WARNING every time you return the fence to 0°.
-
Page 9: Operation
Edge of Sled Flip Stop Refer to Figure 14, 17 The POWERTEC 71367 3" fence flip stops are extremely NOTE: If desired, the MDF fence face can provide zero- versatile and quickly convert from inboard to outboard clearance support to minimize tear-out on the back of the position for a variety of applications. -
Page 10: Maintenance
To Convert from Inboard to Outboard Position Remove the knob and T-Bolt and rotate the stop body 180°. Replace the knob and T-bolt. See Figure 17. Figure 17 Knob Stop Body inboard transition outboard T-Bolt MAINTENANCE WARNING GENERAL MAINTENANCE WARNING Keep the table saw crosscut sled dry, clean, and free from oil and grease. -
Page 11: Warranty
30- DAY SATISFACTION GUARANTEE POLICY During the first 30 days after the date of purchase, if you are dissatisfied with the performance of this POWERTEC tool for any reason, you may return the tool to the retailer from which it was purchased for a full refund or exchange. You must present proof of purchase and return all original equipment packaged with the original product. - Page 12 Southern Technologies, LLC Waukegan, IL 60087...
Need help?
Do you have a question about the 71403 and is the answer not in the manual?
Questions and answers