Table of Contents
Advertisement
Quick Links
Advertisement
Table of Contents

Subscribe to Our Youtube Channel
Related Manuals for Toshiba e-studio 211c


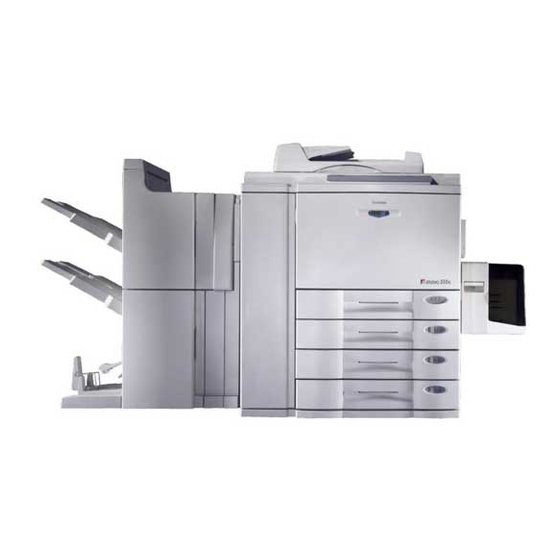
Summary of Contents for Toshiba e-studio 211c
- Page 2 How to affix the PM labels WARNING: Changes or modification made to this equipment, not expressly approved by Toshiba TEC or parties authorized by Toshiba TEC could void the user’s authority to operate the equipment. Trademarks: Fiery is a trademark registered in the U.S.Patent and Trademark Office.
-
Page 3: Toshiba Quality Is Second To None
Genuine Toshiba supplies are designed to provide consistently stable image output. Copier Kind Genuine Toshiba supplies are designed to keep the copier and all its parts in trouble-free working order. Reduction of machine wear is due to Toshiba’s intimate knowledge of the copier’s characteristics ensuring the highest standard of care. - Page 4 Environmental Harmony Genuine Toshiba toner is manufactured with the environment in mind. To care for Mother Earth, we use embossed or plastic labels making our toner fully recyclable. In addition, harmful dust and ozone levels have been reduced to improve the working environment.
-
Page 5: Preface
When the digital copier is used as a printer or scanner, be sure to read the Operator’s Manual for the Printer Controller (User Document CD-ROM). To ensure correct and safe use of the Toshiba Digital Colour Copier e-STUDIO211c/311c, this Operator’s Manual describes safety precautions according to the following three levels of warning: Before reading this Operator’s Manual, you should fully understand the meaning and importance of... -
Page 6: Features Of The E-Studio211C/311C
You can make copies pleasantly in no time. The warm-up time is drastically shortened to approximately 4 minutes (about half of that of the Toshiba copiers FC15/22). Electronic sorting improves both colour and black-and-white copying productivity. OHP film feeding is available from the drawer. -
Page 7: Table Of Contents
TABLE OF CONTENTS Toshiba quality is second to none ...................... 1 Preface ..............................3 Features of the e-STUDIO211c/311c ....................4 Table of contents ..........................5 Precautions ............................8 1. Installation ............................8 2. General precautions ........................9 Disclaimer notice ..........................12 Forgery prevention function/ Storage of colour copies .............. -
Page 8: Table Of Contents
TABLE OF CONTENTS (Cont.) 4. Colour editing and adjustment ..................... 4-1 1. Monocolour copying ........................4-2 2. Hue adjustment ........................... 4-3 3. Saturation ............................ 4-4 4. Colour balance (YMCK adjustment) ................... 4-5 5. RGB adjustment .......................... 4-6 6. One-touch adjustment ......................... 4-7 7. - Page 9 7.Selecting finishing modes (Using the optional finishers) ............7-1 1. Finishing modes and finishers (optional) ................... 7-2 2. Sort/group copying ........................7-3 3. Staple sorting ..........................7-4 4. Magazine sort & saddle stitching mode (booklet mode) ............7-6 5. Hole punching mode ........................7-8 8.Network scanning function (Using the optional printer controller) ..........
-
Page 10: Precautions
PRECAUTIONS 1. Installation The e-STUDIO211c/311c should be installed by a qualified service technician. Note: The packing material should be disposed of properly. To obtain the best possible results, this copier should be used in conjunction with a dedicated AC power line at the following ratings. 220–240V, 50/60Hz, 9A Notes: 1. -
Page 11: General Precautions
• If the copier has been exposed to rain or liquid. It is recommended that only supplies made or designated by Toshiba be used for the e- STUDIO211c/311c in order to optimize copy quality. All supplies should be stored in a cool, dry area. - Page 12 PRECAUTIONS (Cont.) 2. General Precautions (Cont.) WARNING: DO NOT LEAN ON, APPLY FORCE OR PLACE HEAVY OBJECTS ON THE FINISHER. PERSONAL INJURY OR PROPERTY DAMAGE MAY RESULT. Machine Noise Information Ordinance3. GSGV, January 18, 1991: The maximum sound pressure level is equal to or less than 70dB(A) according to EN27779.
- Page 13 Fixing the adjusters (stoppers) There are two adjusters (stoppers) located in the front bottom part of the copier. After moving/installing the copier, be sure to turn the adjusters clockwise to fix them firmly on the ground. *To unlock the adjusters when moving the copier, turn them anticlockwise.
-
Page 14: Disclaimer Notice
2. All warranties, conditions and other terms implied by law are, to the fullest extent permitted by law, excluded and no such implied warranties are given or apply in relation to the Products. 3. TOSHIBA TEC CORPORATION shall not be liable for any loss, cost, expense, claim or damage whatsoever caused by any of the following:... -
Page 15: Forgery Prevention Function/ Storage Of Colour Copies
FORGERY PREVENTION FUNCTION/ STORAGE OF COLOUR COPIES FORGERY PREVENTION FUNCTION This copier has a forgery prevention function. Please ensure that your digital full-colour copier is not used for making copies of prohibited items. STORAGE OF COLOUR COPIES (1) The copies should be kept in a place which is not exposed to light to prevent fading when they are stored for a long time. -
Page 16: Before Making Copies
1. BEFORE MAKING COPIES 1. Description of the digital colour copier and the optional equipment..- Main components ..................1-2 - Optional equipment ..................1-3 - Control panel ....................1-4 - Touch panel ....................1-6 2. Turning ON the power switch ............. - Controlling the use of the copier with access codes ........ -
Page 17: Description Of The Digital Colour Copier And The Optional Equipment
1. DESCRIPTION OF THE DIGITAL COLOUR COPIER AND THE OPTIONAL EQUIPMENT Main Components Original cover Original scales (Optional) Original glass Control panel Exit cover (Left side) Drawers* Power switch Bypass guide Feed side cover Paper size indicator Operator’s manual pocket (Back side) Toner cartridges Fuser unit... -
Page 18: Optional Equipment
One optional module cannot be attached when the automatic duplexer (optional) is installed. Large-Capacity Feeder Feeds up to 1500 sheets of A4-sized paper (80g/m )(recommended by Toshiba) continuously. Finisher Enables the use of the hole punching (available when the optional hole punch unit is installed) and saddle stitching modes (MJ-1020 only) in addition to the sort, group and stapling modes. -
Page 19: Control Panel
1. DESCRIPTION OF THE DIGITAL COLOUR COPIER AND THE OPTIONAL EQUIPMENT (Cont.) Control Panel TIMER lamp The TIMER lamp lights when the timer is being used. HELP key When this key is pressed, the appropriate operation procedures are displayed. PRINTER/NETWORK key If you have a printing and scanning option (printer controller) installed, press this key to switch between the printer/scanner function and copier function. - Page 20 ACCESS CODE key Press this key to administer the users of the copier by the access code. Press this key again when you finish making copies so that the next person must enter his/her own access code to make the copier available again.
-
Page 21: Touch Panel
1. DESCRIPTION OF THE DIGITAL COLOUR COPIER AND THE OPTIONAL EQUIPMENT (Cont.) Touch Panel When the power is turned on, the following basic screen is shown on the touch panel. (If each department is controlled by an access code, a different screen is displayed. Page 1-9) On the screen, currently set functions, selected functions and the copier status are shown using mes- sages and illustrations. - Page 22 Set functions confirmation key This key allows you to confirm the functions that have been set. (The display shown on the right is an example.) The icons displayed on the screen are as follows (some icons may not appear on the screen): Clearing the Functions Selected If you press any key that is half-tone shaded, the function selected is cleared.
-
Page 23: Turning On The Power Switch
2. TURNING ON THE POWER SWITCH Turn ON the power switch. - This message appears on the message panel of the Basic Screen: Wait Warming Up About 4 minutes later, the copier will become ready for copying. - This message appears on the message panel: READY While the copier is warming up, you can use the Auto Job Start function. -
Page 24: Controlling The Use Of The Copier With Access Codes
Controlling the Use of the Copier with Access Codes With the use of access codes, you can restrict copier users as well as manage copy volumes made by individual groups or departments of your company. * Registering, changing and deleting an access code Page 6-25 When the department management function is in use, the screen shown on the right appears imme-... -
Page 25: Energy-Saving Functions
*1 With full options: Reversing automatic document feeder, automatic duplexer, finisher, large-capacity feeder, hole punch unit , drawer modules - Power consumption and warm-up time are the actual measurements made according to Toshiba’s method of measuring. - The initial (default) setting of the energy saving mode is Level 1. You can switch the level depending on the user’s environment. -
Page 26: How To Make Copies
2. HOW TO MAKE COPIES 1. General copying procedures ............2. Setting copy paper ..............- Acceptable copy paper types and sizes ............2-4 - Recommended paper / Handling and storing paper ........2-5 - Changing the paper size of the drawer / Setting the drawer for special uses ..2-6 3. -
Page 27: General Copying Procedures
1. GENERAL COPYING PROCEDURES After setting (confirming) paper in the drawers, place the originals. When the START key is pressed with any settings unchanged, copies are made in the initial (default) settings (*1). You can make copies as desired by setting different copy modes. The initial (default) settings of the copier at the time of installa- Initial (default) settings tion are as shown on the right. - Page 28 HELP Place the next original (2nd side) and press the START key. - Set the first page of your originals first. - You can also press the YES key before pressing the START key to perform the same operation. - Repeat this step for the subsequent originals. Once the final original has been scanned, press the FINISHED key.
-
Page 29: Setting Copy Paper
*2 When the finisher (optional) is installed, the images may not output easily according to the environ- ment. - Paper with filing holes is not acceptable. - The maximum capacity is the approximate number of sheets when Toshiba-recommended paper is used Page 2-5). - LT format is the standard format for North America. -
Page 30: Recommended Paper/Handling And Storing Paper
BG78 / Folex A4(125µm) OHP FILM * Be sure to use only the OHP films specified by Toshiba. Using other types of OHP films may result in the breakdown of the copier. Handling and Storing Paper Pay attention to the following points: - Avoid using paper that is specially treated or paper that was printed on another machine, and also avoid performing double copying on the same side of paper;... -
Page 31: Changing The Paper Size Of The Drawer / Setting The Drawer For Special Uses
2. SETTING COPY PAPER (Cont.) Changing the Paper Size of the Drawer / Setting the Drawer for Special Uses The paper size of the drawers of the copier can be changed. The drawers can also be set for THIN, THICK1 paper or OHP films. * Bypass copying Page 6-5 Pull out the drawer toward you. - Page 32 Press the drawer key corresponding to that in which the paper size has been changed. Press the key of the paper size newly set. - Pressing the Next key will display the LT format paper sizes. Setting the Drawer for THIN/THICK1/OHP Film For types of copy paper that can be set in the drawer Page 2-4 Place the THICK1 paper (or THIN paper or OHP films)
- Page 33 2. SETTING COPY PAPER (Cont.) Changing the Paper Size of the Drawer / Setting the Drawer for Special Uses (Cont.) Press the drawer key in which the THICK1 paper (or THIN paper or OHP films) has been set, then select the THICK1 (or THIN or OHP ) key.
-
Page 34: Setting Originals
3. SETTING ORIGINALS Acceptable Original Types and Sizes Sizes capable of Setting place Types of originals Maximum size Remarks automatic detection Glass Width:297mm Sheets Regular size Do not place any heavy Length:432mm Three-dimensional objects A/B format: object (4 kg or over) on Books A3, A4, A4-R, A5, A5-R, the glass. -
Page 35: When Placing An Original On The Glass
3. SETTING ORIGINALS (Cont.) When Placing an Original on the Glass Sheet Originals Raising the original cover or the reversing automatic document feeder (optional), place the original face down on the glass. Align the original against the left inner corner of the Original glass. -
Page 36: When Using The Reversing Automatic Document Feeder (Optional)
When Using the Reversing Automatic Document Feeder (optional) Precautions for Using the Reversing Automatic Document Feeder (optional) Do not use the following types of originals as they tend to misfeed or become damaged: (1) Badly wrinkled or folded originals; in particu- (4) Clipped or stapled originals lar, originals whose leading edge is curled may fail to be correctly fed. - Page 37 3. SETTING ORIGINALS (Cont.) When Using the Reversing Automatic Document Feeder (optional) (Cont.) In the Continuous Feed Mode Page 6-2 - Be sure to set only originals with the same width. Mixed-sized originals Page 6-4 - Align the originals in the order from the top. After aligning the edges of originals well, place them face up and align the slides to the width of the origi- nals.
- Page 38 In the Single-feed Mode Page 6-3 Align the slides to the desired original size. Slide Insert the original face up and straight along the slides; it will then be pulled in automatically. - When the original starts being pulled in, let go of it. 2-13...
-
Page 39: Auto Job Start (Job Preset)
4. AUTO JOB START (JOB PRESET) During Warming up While the copier is warming up (when the power switch is just turned on, etc.), you can preset the copy modes. Copying operation starts when warming up has been completed. Place paper in the drawer(s). Page 2-4 Place the original(s). -
Page 40: During Copying
During Copying You can preset the next copy modes during a copy run. You cannot preset the next copy modes during the scanning of the originals. Place the original(s). Page 2-9 Press the JOB PRESET key during a copy run. - The following message appears: JOB PRESETTING Select other copy modes as required. -
Page 41: During Printing (Optional)
4. AUTO JOB START (JOB PRESET) (Cont.) During Printing (optional) When the copier is being used as a printer (optional), you can interrupt it and make copies after the current printing job is completed. Place the original(s). Page 2-9 Press the COPY JOB REQUEST key during print- ing. -
Page 42: Interrupt Copying
5. INTERRUPT COPYING While multicopying is in progress, you can interrupt it and make copies from different originals. Only sheets that have already been set (in the drawer, optional large-capacity feeder or sheet bypass) are available in interrupt copying. *The following functions are not available: - duplex - book centre erase - dual-page... -
Page 43: Cancelling/Resuming A Copy Operation
6. CANCELLING/RESUMING A COPY OPERATION You can suspend or cancel a copy operation during multicopying including scanning, or resume the suspended copy operation. Suspending a Copy Operation Press the STOP key on the control panel during copying. After Suspending a Copy Operation To cancel the copy job Press the MEMORY CLEAR key (or the FUNCTION... -
Page 44: Setting Of Basic Copy Modes
3. SETTING OF BASIC COPY MODES 1. Paper selection ................- Automatic paper selection (APS) ..............3-2 - Manual paper selection ................. 3-3 2. Reduction and enlargement copying ......... - Using automatic magnification selection (AMS) ..........3-4 - Specifying both original size and copy size ............ 3-5 - Using the reduction/enlargement zoom keys or one-touch zoom keys .. -
Page 45: Paper Selection
1. PAPER SELECTION Automatic Paper Selection (APS) When you place regular-sized originals on the glass or in the reversing automatic document feeder (optional), the built-in sensors automatically work to detect the size of the originals, helping the copier select and copy on paper that is the same size as the original. * Depending on the condition of the original, automatic paper selection may not work correctly. -
Page 46: Manual Paper Selection
Manual Paper Selection It may not be possible for the device to perform Automatic Paper Selection with highly transparent originals such as OHP films and tracing paper, wholly dark originals or originals with dark borders, or irregular sized originals such as newspapers and magazines. For these types of originals, use manual paper selection. -
Page 47: Reduction And Enlargement Copying
2. REDUCTION AND ENLARGEMENT COPYING Using Automatic Magnification Selection (AMS) The built-in sensors automatically detect the size of the original(s) and calculate the reproduction ratio using the specified paper size. * It is not possible for the device to perform Automatic Magnification Selection with highly transparent originals such as OHP films and tracing paper, wholly dark originals or originals with dark borders, or irregular sized originals such as newspapers and magazines. -
Page 48: Specifying Both Original Size And Copy Size
Specifying both Original Size and Copy Size When the original size and copy size are specified, the reproduction ratio is automatically calculated to make copies. * Set the size for “the OTHER” key as required ( Page 6-16). When the set originals or paper are standard sizes other than A3, A4, B4 or B5, you will select the OTHER key on the screen of step 4 below. -
Page 49: Using The Reduction/Enlargement Zoom Keys Or One-Touch Zoom Keys
2. REDUCTION AND ENLARGEMENT COPYING (Cont.) Using the Reduction/Enlargement Zoom Keys or One-touch Zoom Keys Use the Reduction/Enlargement Zoom keys to set the desired reproduction ratio. The reproduction ratio is adjustable from 25% to 400% in increments of 1%. Use the one-touch keys, 400% , 200% , 100% (actual ratio), 50% or 25% for easier setting. Place paper in the drawer(s). -
Page 50: Reducing/Enlarging Photos To Standard Size (Photo Zoom Key)
Reducing/Enlarging Photos to Standard Size (Photo Zoom Key) Use the PHOTO ZOOM key for reduction/enlargement of photos as originals. There are four types of photo sizes as set items, however, the desired size other than these four can be set. - Place a photo on the original glass in a landscape direction. - Page 51 2. REDUCTION AND ENLARGEMENT COPYING (Cont.) Reducing/Enlarging Photos to Standard Size (Photo Zoom Key) (Cont.) Press the ORIGINAL SIZE key of the same size as the original (photo). - Setting the “OTHER” size key ( Page 6-16) If the photo size is other than ‘9x13cm’, ‘10x15cm’, ‘13x18cm’ or ‘20x30cm’, press the CUSTOM key to display the next screen.
-
Page 52: Duplex Copying (1-Sided, 2-Sided, Book-Type)
3. DUPLEX COPYING (1-SIDED, 2-SIDED, BOOK-TYPE) This function allows you to set the type of originals (1-sided, 2-sided or book-type) and the desired type of copying (1-sided or 2-sided). Original Copy -12- -15- -12- -13- -13- -15- require the optional reversing automatic document feeder to be installed. require the optional automatic duplexer to be installed. - Page 53 3. DUPLEX COPYING (1-SIDED, 2-SIDED, BOOK-TYPE) (Cont.) 1-Sided Originals 1-Sided Copies (default setting) Place paper in the drawer(s). Page 2-4 Place the original(s). Page 2-9 Confirm that the 1 1 mode is selected in the basic mode. - If the “1-SIDED 1-SIDED” mode is not selected, press the key (shaded) in the screen on the right, then press the 1 1 key on the next screen.
- Page 54 1-Sided Originals 2-Sided Copies The optional automatic duplexer must be installed. Duplex copying can be performed in the thin paper (64~79g/m ) and the plain paper (80~105g/m ) modes. Place paper in the drawer(s). Page 2-4 - When using this mode in bypass copying ( Page 6-5), be sure to specify the paper size.
- Page 55 3. DUPLEX COPYING (1-SIDED, 2-SIDED, BOOK-TYPE) (Cont.) 2-Sided Originals 2-Sided Copies The optional reversing automatic document feeder and the automatic duplexer must be installed. Du- plex copying can be performed in the thin paper (64~79g/m ) and the plain paper (80~105g/m ) modes.
- Page 56 On the basic screen, press the key (shaded) on the right. Press the 2 1 key. Select other copy modes as required. Press the START key. Book-Type Originals 2-Sided Copies The optional automatic duplexer must be installed. Duplex copying can be performed in the thin paper (64~79g/m ) and the plain paper (80~105g/m ) modes.
- Page 57 3. DUPLEX COPYING (1-SIDED, 2-SIDED, BOOK-TYPE) (Cont.) Press the BOOK 2 key. Select the book copying type. - Press the RIGHT RIGHT key if copying should start at a right-hand page and end at a right-hand page. By the same token, you can choose from among the RIGHT LEFT , LEFT...
-
Page 58: Copy Density Adjustment
4. COPY DENSITY ADJUSTMENT There are two types of image density adjustments: manual mode (default setting) and automatic mode. In the manual mode, you can select the desired level of image density. It is recommended that lighter- density originals be copied in the manual copy density mode. In the automatic mode, the sensors automatically detect the density of each original and select the optimum image density and background level. -
Page 59: Colour Mode
5. COLOUR MODE This function is to switch the colour copy mode and black-and-white copy mode. Press the desired colour mode selection key. - The lamp inside of the selected key lights. - FULL COLOUR : Regardless of colour, all originals are HELP colour-copied (default setting). -
Page 60: Original Mode
6. ORIGINAL MODE By selecting an original mode according to the type of your originals, you can make copies with the suitable image. - The Advance Image Enhancement mode can be used when the optional AI board is installed. * Be sure to select the original mode after having selected the colour mode. Place paper in the drawer(s). - Page 61 3-18 SETTING OF BASIC COPY MODES...
- Page 62 4. COLOUR EDITING AND ADJUSTMENT 1. Monocolour copying ..............2. Hue adjustment................3. Saturation .................. 4. Colour balance (YMCK adjustment) .......... 5. RGB adjustment ................ 6. One-touch adjustment ..............7. Background adjustment ............. 8. Sharpness adjustment ...............
-
Page 63: Colour Editing And Adjustment
1. MONOCOLOUR COPYING You can select one colour out of the 10 colours of the colour sample seal to make a monocolour copy. Place paper in the drawer(s). Page 2-4 Place the original(s). Page 2-9 Press the COLOUR key to enter the colour menu. Then press the MONOCOLOUR key. -
Page 64: Hue Adjustment
2. HUE ADJUSTMENT This function is available to allow you to adjust the hue by changing the hue circle. Place paper in the drawer(s). Page 2-4 Place the original(s). Page 2-9 Press the COLOUR key to enter the colour menu. Then press the HUE/SATURATION key. -
Page 65: Saturation
3. SATURATION This function allows you to adjust the saturation of copies. Place paper in the drawer(s). Page 2-4 Place the original(s). Page 2-9 Press the COLOUR key to enter the colour menu. Then press the HUE/SATURATION key. Press the SATURATION key, then the + or - key to adjust the saturation. -
Page 66: Colour Balance (Ymck Adjustment)
4. COLOUR BALANCE (YMCK ADJUSTMENT) This function allows you to adjust the colour balance of copies by changing the strength of the primary colours (Yellow(Y), Magenta(M), Cyan(C) and Black(K)). Place paper in the drawer(s). Page 2-4 Place the original(s). Page 2-9 Press the COLOUR key to enter the colour menu. -
Page 67: Rgb Adjustment
5. RGB ADJUSTMENT This function allows you to adjust the colour balance by changing the strength of Red(R), Green(G) and Blue(B). Place paper in the drawer(s). Page 2-4 Place the original(s). Page 2-9 Press the COLOUR key to enter the colour menu. Then press the RGB ADJUSTMENT key. -
Page 68: One-Touch Adjustment
6. ONE-TOUCH ADJUSTMENT You can make the image quality warm, cool, vivid or clear with just one touch. Place paper in the drawer(s). Page 2-4 Place the original(s). Page 2-9 Press the COLOUR key to enter the colour menu. Then press the ONE TOUCH ADJUSTMENT key. Press the WARM ( COOL , VIVID , or CLEAR ) key. -
Page 69: Background Adjustment
7. BACKGROUND ADJUSTMENT This function allows you to emphasize the background of light colour originals or to avoid copying the background of dark colour originals or rear side of originals. This function is available in the black or monocolour mode as well. *The automatic density mode is not available with this function. -
Page 70: Sharpness Adjustment
8. SHARPNESS ADJUSTMENT This function allows you to emphasize the letters and edges of images. This function is available in the black or monocolour mode as well. Place paper in the drawer(s). Page 2-4 Place the original(s). Page 2-9 Press the COLOUR key to enter the colour menu. Then press the SHARPNESS key. - Page 71 4-10 COLOUR EDITING AND ADJUSTMENT...
- Page 72 5. USING THE EDITING FUNCTIONS 1. Image shift ................2. Edge erase ................3. Book centre erase ..............4. Dual-page ................5. Full image ................6. 2 IN 1 / 4 IN 1 ................7. Magazine sort (from the editing menu) ........5-11 8.
-
Page 73: Using The Editing Functions
1. IMAGE SHIFT With this feature, a margin for binding is created on each copy. You can place a binding margin on either the right or left side of the copy. You can also create binding margins on copies of book originals if you use this mode in combination with the Dual-Page mode (double-sided) or duplex copying from book originals. - Page 74 Adjust the binding margin, then press the SET key. - The default width of the margin is 7 mm. - To adjust the width, press the 0mm or 30mm key to select the desired number, then press the SET key. - In duplex copying, margins on the back are created on the other side of those in the front.
-
Page 75: Edge Erase
2. EDGE ERASE If your original has a dirty or torn edge, it may be reproduced as a black stain on the copy. In that case, use Edge Erase Copying. A white border is created along the edges of the copy, eliminating those black stains. -
Page 76: Book Centre Erase
3. BOOK CENTRE ERASE This function allows you to erase the shadow in the centre of a book original. Before After the book centre has been erased Place paper in the drawer(s). Page 2-4 - When using this mode in bypass copying ( Page 6-5), be sure to specify the paper size. -
Page 77: Dual-Page
4. DUAL-PAGE Utilizing this feature allows the facing pages of a book or magazine to be copied page by page onto two separate sheets of paper or duplex-copied on one sheet. There is no need to move the original on the glass. - Page 78 Place the first page(s) to be copied on the glass, and press the START key. - If you do not copy your originals from the first page, the cop- ies will not be arranged in the same order as the original. - Centre the book on the yellow indicator line with the bottom toward you.
-
Page 79: Full Image
5. FULL IMAGE When the image occupies the entire original (to the edges), use Full Image Copying to reduce the ratio a little bit so that the edges of the image will not be missed. Place paper in the drawer(s). Page 2-4 - When using this mode in bypass copying ( Page 6-5), be... -
Page 80: In 1 / 4 In
6. 2 IN 1 / 4 IN 1 This feature allows multiple originals to be reduced and copied onto a single sheet of paper. There are two modes: 2 IN 1 copying, where two originals are copied onto a single sheet, and 4 IN 1 copying, where four originals are copied onto a single sheet. -
Page 81: In 1 / 4 In 1
6. 2 IN 1 / 4 IN 1 (Cont.) Place paper in the drawer(s). Page 2-4 - When using this mode in bypass copying ( Page 6-5), be sure to specify the paper size. To make copies onto paper which is not the same size as originals, press the ZOOM... -
Page 82: Magazine Sort (From The Editing Menu)
7. MAGAZINE SORT (FROM THE EDITING MENU) The magazine sort mode allows 1-sided originals to be copied and sorted so that they can be folded and bound along a centre line like typical magazines or booklets. A3, A4-R, B4, LD and LT-R are available. •... - Page 83 7. MAGAZINE SORT (FROM THE EDITING MENU) (Cont.) Adjust the binding margin and press the SET key. - The default width of the margin is 12 mm. - To adjust the width, press the 2mm or 30mm key to select the desired number, then press the SET key. - If the optional finisher (MJ-1020) equipped with the saddle stitcher is installed, copies can be automatically stapled along their centre line.
-
Page 84: X-Y Zoom
8. X-Y ZOOM You can make copies with different reproduction ratios set for the X (horizontal) and Y (vertical) direc- tions, respectively. 100% 200% 100% 200% Place paper in the drawer(s). Page 2-4 Place the original(s). Page 2-9 Press the EDIT key to enter the editing menu, and press the XY ZOOM key. -
Page 85: Image Editing
9. IMAGE EDITING Trimming/Masking You can select an area on an original and copy it with the area trimmed (only the inside of the area copied) or masked (only the outside of the area copied). One rectangular area can be specified on an original. - Page 86 Place an original on the glass to specify the area. - Set the original face up with the bottom toward you, fit its top left corner against the top left corner of the glass, and align it with the original scale. Using the original scale on the left and the inner (top) scale, read the position of the desired area as fol- lows:...
-
Page 87: Mirror Image
9. IMAGE EDITING (Cont.) Mirror Image Copies are made with images completely reversed in terms of right and left. Place paper in the drawer(s). Page 2-4 - When using this mode in bypass copying ( Page 6-5), be sure to specify the paper size. Place the original(s). -
Page 88: Negative/Positive Reversal
Negative/Positive Reversal In the full colour mode, this function allows you to reverse both the hue and the shading of the entire original when making copies. In the black mode or monocolour mode, only the shading of the entire original is reversed. -
Page 89: Centring
10. CENTRING You can trim all of or a part of an original and copy it out in the centre of a sheet. * Centring is only possible with standard sized originals. * If the settings of the original and copy sizes are not made appropriately, the image may not be copied completely. - Page 90 When centring a part of an original, place the origi- nal on the glass to specify the area. - Set the original face up with the bottom toward you, fit its top left corner against the top left corner of the glass, and align it with the original scale.
-
Page 91: Image Repeat
11. IMAGE REPEAT You can repeat the entire original or a part of the area of the original on the copy. * Image repeat is only possible with standard sized originals. However, a non-standard sized original can be copied if it is placed on a standard sized original and its area is specified. Non-standard size Standard size Place paper in the drawer(s). - Page 92 Enter the distance values read for the area to be re- peated. - Key in the value for X1 with the digital keys and press the upper SET key. - Similarly, set the values for X2, Y1 and Y2. Press the lower SET key. Select the repeat number.
- Page 93 5-22 USING THE EDITING FUNCTIONS...
- Page 94 6. USING THE SPECIAL FUNCTIONS 1. Continuous original feeding / Single original feeding ....2. Mixed-sized originals ............... 3. Bypass copying ................ - Bypass copying on standard size or A3-wide paper ........6-7 - Bypass copying on non-standard size paper ..........6-9 - Thin paper/Thick paper/OHP film/Special paper/Sticker label ....
-
Page 95: Using The Special Functions
1. CONTINUOUS ORIGINAL FEEDING / SINGLE ORIGINAL FEEDING When using the optional reversing automatic document feeder, you can select the continuous feed mode (default setting) where multiple (or single) originals are continuously fed in one by one, or the single-feed mode where if you insert an original, it is automatically pulled in and starts being copied. Continuous Feed Mode Place paper in the drawer(s). - Page 96 Single-feed Mode Place paper in the drawer(s). Page 2-4 Press the PROGRAM key to enter the programme menu, and press the ADF key. Press the SADF key. Select other copy modes as required. Place an original. Page 2-9 - The original is automatically pulled in and the screen changes as shown on the right.
-
Page 97: Mixed-Sized Originals
2. MIXED-SIZED ORIGINALS When the optional reversing automatic document feeder is used, different-sized originals can be cop- ied at the same time in this copying mode, if their widths are the same. * Do not set originals whose widths are different. Place paper in the drawer(s). -
Page 98: Bypass Copying
3. BYPASS COPYING When the desired size of paper is not set in any of the drawers, or when you want to make copies on A3- wide or non-standard sized paper, use the sheet bypass. The modes below are available even in bypass copying if the paper size is specified: - automatic paper selection - automatic magnification selection - duplex... - Page 99 3. BYPASS COPYING (Cont.) Bypass Copying The general procedure for making bypass copies (the paper size is not specified) is described below. Set sheets of paper on the bypass guide and align the slides with the size of the paper. - This message appears: Ready for bypass copying - The paper should be placed with the side to be copied...
-
Page 100: Bypass Copying On Standard Size Or A3-Wide Paper
Bypass Copying on Standard Size or A3-wide Paper Perform steps 1 to 2 on page 6-6. Set the “OTHER” size key as necessary. Page 6-16 If the paper that has been set is the standard size other than A3, A4, B4 or B5, you will select the OTHER key in step 4. In this case, you need to make the OTHER key recognize the same size as the paper that has been set. - Page 101 3. BYPASS COPYING (Cont.) Bypass Copying on Standard Size or A3-wide Paper (Cont.) Select the key of the same size as the paper that has been set. - For A3-wide paper, the selection is done in step 3. - For A4-R (or B5-R) size, press the A4 (or B5 ) key twice. - OTHER key Page 6-16 If the size of the sheets fed from the sheet bypass is not...
-
Page 102: Bypass Copying On Non-Standard Size Paper
Bypass Copying on Non-standard Size Paper The size of non-standard paper is within the following ranges: Length: 100 ~ 305mm Width: 148 ~ 457mm Page 6-5 (table) Perform steps 1 to 3 on page 6-7. Press the NON-STANDARD key. Key in each dimension (length and width) with the digital keys, or recall the data stored in the MEMORY. - Page 103 3. BYPASS COPYING (Cont.) Storing a Non-Standard Size in the MEMORY It is convenient if a frequently used non-standard size of paper is stored in the memory. Press the desired Memory Number key. - When the paper size is ‘0mm’, the selected Memory Num- ber key is vacant.
-
Page 104: Thin Paper/Thick Paper/Ohp Film/Special Paper/Sticker Label
Use the recommended thin paper/thick paper/Special paper/sticker labels if possible. Copy paper sold at stores is also acceptable, but paper of some brands may not be suitable to acquire a clear image. In this case, ask your authorized Toshiba dealer. Perform steps 1 to 2 on page 6-7. - Page 105 The image quality may be lowered as well and copies cannot be made in clear colour. If you want to use other kinds of OHP films, ask your authorized Toshiba dealer. * Set the OHP films on the sheet bypass vertically (the same as for A4 placement).
-
Page 106: Mode Memory
4. MODE MEMORY You can store and recall a combination of frequently used copy modes at any time. Up to eight such combinations of modes can be stored. * You cannot delete the copy modes that have already been stored in the memory, but you can rewrite new modes on the memory key in which some copy modes have already been stored. - Page 107 4. MODE MEMORY (Cont.) Press the desired Memory Number key. - The copy modes are stored in the selected Memory Num- ber key. - Memory Number keys where copy modes have been al- ready stored are shown in a half-tone shaded pattern. - The stored copy modes remain unchanged until different copy modes are entered.
- Page 108 Confirming Stored Copy Modes To confirm the copy modes stored in the Memory Number key, perform steps 3 to 5 on the previous page, then press the Set functions confirmation key. - The screen on the right is an example of modes that have been stored in “MEMORY 2”.
-
Page 109: Setting The "Other" Size Key
5. SETTING THE “OTHER” SIZE KEY When original or paper size is required to be specified and you need to specify it to ‘OTHER’ size (except for non-standard size), this function should be used. - This function allows the OTHER key on the screen on the right to recognize the size that will be used. -
Page 110: User Selection (Initial Settings)
6. USER SELECTION (INITIAL SETTINGS) You can change the initial setting (default setting) of each mode displayed on the User Selection screen. The following modes can be changed. • Energy saving level • Colour mode • Copy density (Exposure) mode •... - Page 111 6. USER SELECTION (INITIAL SETTINGS) (Cont.) - If you do not want to display the message “***** toner is low. Prepare new toner cartridge.”, select the DISABLE key for ‘Near Empty’. However, it returns to the ENABLE in the following case. 1.
-
Page 112: Weekly Timer
7. WEEKLY TIMER Using the built-in weekly timer, you can have the copier automatically turned ON and OFF at specified times. For instance, you can set the timer for the starting time and closing time of your office so that the copier will automatically turn itself ON and OFF at those specified times. - Page 113 7. WEEKLY TIMER (Cont.) Cancelling the Use of the Weekly Timer You can cancel the operation of the weekly timer so that the copier can be turned ON and OFF normally by the power switch. Press the PROGRAM key to enter the programme menu.
-
Page 114: Setting The Date And Time
8. SETTING THE DATE AND TIME The clock built in to the copier can be set by entering the date, day of the week and time using the digital keys. Also, you can easily change the clock to and from the daylight saving time system at the touch of a key. -
Page 115: Total Counter
9. TOTAL COUNTER This function displays the total number of copies. The total counter is a cumulative counter. You cannot clear this counter. Press the PROGRAM key to enter the programme menu, and press the TOTAL COUNTER key. - If the key for the desired function is not shown, press the Pre key or the Next key to switch the display. -
Page 116: Department Management
10. DEPARTMENT MANAGEMENT You can administer the copy quantity and print quantity (with the optional printer controller installed) of each department depending on your purposes by setting an access code. - Up to 120 codes can be set. * When you want to set the access codes or reset the counters, the administrator password is needed. Press the PROGRAM key to enter the programme menu, and press the DEPT . -
Page 117: Printing An Access Code List
10. DEPARTMENT MANAGEMENT (Cont.) Printing an Access Code List You can print out the number of copies output for each department. Press the PRINT OUT ACCESS CODES key in the department management menu. - Procedure to display the screen on the right Page 6-23 - Printing begins. -
Page 118: Setting Access Codes (Registration/Change/Deletion)
Setting Access Codes (Registration/Change/Deletion) This function registers, changes and deletes the access codes. You can also restrict the numbers of copies and prints (with the optional printer controller installed) for each department. The limit numbers of copies and prints can be set and administered in “TOTAL” and “COLOUR” respectively. * This setting is available when the administrator password has been entered in step 2 on page 6-23. - Page 119 10. DEPARTMENT MANAGEMENT (Cont.) Setting Access Codes (Registration/Change/Deletion) (Cont.) Registering New Access Code and Limit Number of Outputs Key in the desired access code (5 digits) into the fields of NEW ACCESS CODE and CONFIRM ACCESS CODE, and press the SET key. - You cannot key in the access code which has already been registered.
- Page 120 Changing an Access Code / Changing the Limit Number of Outputs by an Access Code Using the digital keys, enter the current access code (5 digits) of the department you want to change, and press the SET key. Press the ID CHANGE or LIMITATION key. - When the ID CHANGE key is selected, go to step 6 on the next page;...
- Page 121 10. DEPARTMENT MANAGEMENT (Cont.) Setting Access Codes (Registration/Change/Deletion) (Cont.) When the optional printer controller is installed, press the Next key in the screen of step 7, and then set the limit number of prints (7 digits). - The setting method is same as that for copies. Deleting an Access Code To delete all the registered access codes, press the ALL key, then the SET key.
-
Page 122: Resetting Counters
Resetting Counters This function resets all counters or a specific counter to “00000”. However, the total counter ( Page 6-22) cannot be reset. - When the optional printer controller is installed, each counter for “COPY” and “PRINT” can be reset respectively, or both counters can be reset at a time. -
Page 123: Automatic Calibration
If this does happen, the calibration cannot be finished appropriately. * Interrupt copying is not available during the calibration. Place the A3-size paper (recommended by Toshiba) in the drawer. Press the PROGRAM key to enter the programme menu, and press the CALIBRATION key. - Page 124 Press the CALIBRATION key. If you want to return the image quality level to the default setting, press the DEFAULT key. The chart is printed out. When the display on the right appears, place the chart face down on the glass and with its bottom toward you and its top left aligned against the original scale on the left side, in order that the black line be placed at the left side.
-
Page 125: Switching Between Languages
12. SWITCHING BETWEEN LANGUAGES The language used on the touch panel can be changed to a different one. Press the PROGRAM key to enter the programme menu, and press the CHANGE LANGUAGES key. - If the key for the desired function is not shown, press the Next key to switch the screen. -
Page 126: Setting The Energy Saving Mode
13. SETTING THE ENERGY SAVING MODE This function allows the copier automatically to go into the energy saving mode (unnecessary electricity is cut off at standby) if it is left inactive for a specified period of time. - Energy-saving functions Page 1-10 ENERGY SAVER key Page 1-4... -
Page 127: Setting The Off-Mode (Auto Shutoff)
14. SETTING THE OFF-MODE (AUTO SHUTOFF) This function allows the copier to automatically turn its power OFF when it is left inactive for a specified period of time. When the power is supplied to the optional printer controller, the copier will go into the sleep mode and it will stand by with the minimum power consumption. -
Page 128: Clearing Of Toner Counter
15. CLEARING OF TONER COUNTER The message “ ***** toner is low. Prepare new toner cartridge.” appears when the remaining toner becomes about 30%. For the proper timing of the appearance of this message, reset the number of toner counter to 0 (zero) after the replacement of the toner cartridge with a new one. (In case of the replacement with a new cartridge after the message “Install new ***** toner cartridge Press HELP”... - Page 129 6-36 USING THE SPECIAL FUNCTIONS...
-
Page 130: Selecting Finishing Modes (Using The Optional Finishers)
7. SELECTING FINISHING MODES (USING THE OPTIONAL FINISHERS) 1. Finishing modes and finishers (optional) ........2. Sort/group copying ..............3. Staple sorting ................4. Magazine sort & saddle stitching mode (booklet mode) .... 5. Hole punching mode .............. -
Page 131: Finishing Modes And Finishers (Optional)
1. FINISHING MODES AND FINISHERS (OPTIONAL) There are 2 types of optional finishers (MJ-1019 and MJ-1020). Functions available differ depending on whether the finisher is installed, or which type of the finisher is installed. - Press the key on the basic screen on the right (shaded), and confirm the finishing modes on the panel. -
Page 132: Sort/Group Copying
2. SORT/GROUP COPYING To make multiple copies, you can select the sort mode or group mode as necessary. The paper sizes available for sort/group copying are A3, A4, A4-R, B4, B5, FOLIO, LD, LG, LT, LT-R and COMP. Example of making 5 sets of copies from 5-page originals - Sort copying - Group copying Place paper in the drawer(s). -
Page 133: Staple Sorting
3. STAPLE SORTING When the optional finisher is installed, you can use a function that performs automatic stapling at one of the following three positions. The paper sizes that can be stapled are A3, A4, A4-R, B4, B5, FOLIO, LD, LG, LT, LT-R and COMP . - FRONT STAPLE is selected: Set on the Reversing Placed on the glass... - Page 134 Press the key on the basic screen as shown on the right (shaded). Press the FRONT STAPLE (or DOUBLE STAPLE or REAR STAPLE ) key. Select other copy modes as required. Press the START key. - If you set the staple mode and the number of sheets goes over 50 in the case of A4, B5 and LT, or over 30 in the case of A3, A4-R, B4, FOLIO, LD, LG, LT-R or COMP , the finisher automatically enters the sort mode.
-
Page 135: Magazine Sort & Saddle Stitching Mode (Booklet Mode)
4. MAGAZINE SORT & SADDLE STITCHING MODE (BOOKLET MODE) When the Magazine Sort mode is selected, 1-sided originals can be copied and bound like magazines or booklets. When a finisher with a saddle stitcher (optional, MJ-1020) is installed, you can select the saddle stitching mode which will automatically staple in the centre of the document. - Page 136 Press the key on the basic screen as shown on the right (shaded). Press the MAGAZINE SORT , ( or MAGAZINE SORT & SADDLE STITCH or SADDLE STITCH ) key. - If the key for the desired function is not shown, press the Next key to switch the screen.
-
Page 137: Hole Punching Mode
5. HOLE PUNCHING MODE With the optional punching unit attached to the optional finisher (MJ-1019, MJ-1020), you can have your copies punched with holes. * The paper weight should be in the range of 64 to 256 g/m . Special paper such as OHP films or labels is excluded. - Page 138 8. NETWORK SCANNING FUNCTION (USING THE OPTIONAL PRINTER CONTROLLER) 1. About the scanning function ............. 2. Procedure of scan setting ............3. About the setting before scanning ........... 8-18 - Setting by the user ................... 8-19 - Setting by the administrator ..............8-23 - Setting the administrator password ............
-
Page 139: Network Scanning Function (Using The Optional Printer Controller)
1. ABOUT THE SCANNING FUNCTION If the scanning function of the optional printer controller (GA-1121/1131) is used, originals set on the reversing automatic document feeder (optional) or the original glass can easily be scanned as image data. The scanned image data can be stored on the hard disc of your personal computer or printer controller (GA-1121/1131). -
Page 140: Procedure Of Scan Setting
2. PROCEDURE OF SCAN SETTING Perform the scan setting on the touch panel of the copier in the following procedure. It is recom- mended to perform the private scan setting to create a template in advance of the usual scan setting for effective scanning. - Page 141 2. PROCEDURE OF SCAN SETTING (Cont.) Press the SCAN key. * PRINT key Page 1-5 Press the SCAN key. Set the file name. - Press the area as shown on the screen on the right to switch to the file name input screen. Enter the file name within 31 letters using the alphabet (touch panel) and numbers (digital keys), then press the SET key.
- Page 142 Confirm the entered file name. - Perform steps 5 to 6 if any correction is required. Select the destination. - General description for ‘MAILBOX’, ‘E-MAIL’, ‘HOLDQUEUE’, ‘IFAX’ and ‘FTP’ Page 8-2 - After pressing the MAILBOX key Page 8-9 - After pressing the E-MAIL key Page 8-11 * The setting for ‘HOLDQUEUE’...
- Page 143 2. PROCEDURE OF SCAN SETTING (Cont.) Change the setting as required, then press the NEXT key. - Original type PRINTED IMAGE: Select this for an original with printed photos from gravure printing such as magazines or brochures. PHOTO: Select this for an original with photos printed on photographic paper.
- Page 144 - When Using the Optional Reversing Automatic Document Feeder Scanning starts. The screen is switched as shown on the right during scanning, and the number of pages that have already been scanned is displayed. The screen automatically goes back to the copy (basic) screen after scanning has been completed.
- Page 145 2. PROCEDURE OF SCAN SETTING (Cont.) Select your scan user name. - If you cannot find your scan user name, press the NEXT key to display the next screen. Key in the password (5 digits). Select the template to use from the templates which have been registered.
- Page 146 Press the Scan! key (or START key on the con- trol panel). - When Using the Optional Reversing Automatic Docu- ment Feeder Scanning starts. The screen is switched as shown on the right during scanning, and the number of pages that have already been scanned is displayed.
- Page 147 2. PROCEDURE OF SCAN SETTING (Cont.) Key in the mailbox ID (0-99999). You can delete the mailbox ID which has been keyed in by pressing the C CLEAR key on the control panel. Confirm the entered mailbox ID, then press the SET key.
- Page 148 Sending E-mail How to set the ‘E-mail’ after pressing the E-MAIL key is described in step 8 in page 8-5. Press the NEW key. Enter the E-mail address. - Enter the E-mail address within 80 letters using the alphabet (touch panel) and numbers (digital keys), then press the SET key.
- Page 149 2. PROCEDURE OF SCAN SETTING (Cont.) Confirm the entered E-mail addresses. - If 4 or more E-mail addresses are set, confirm them using key and key. - Press the RESET key to clear the setting. To delete the entered E-mail address - Select the E-mail address you want to delete, then press the DELETE key.
- Page 150 Change the setting as required, then press the SET key. - File format Select a file format ( PDF , JPEG or TIFF ). * When ‘Scan to IFax’ is also set, the file format is limited to TIFF. * When ‘Scan to E-mail’ and ‘Scan to FTP’ are set in combi- nation, the file formats of both become the same.
- Page 151 2. PROCEDURE OF SCAN SETTING (Cont.) Press the NEW key. Enter the IFax address. - Enter the IFax address within 80 letters using the alphabet (touch panel) and numbers (digital keys), then press the SET key. - Use the following keys as required..Press these keys to move the cursor.
- Page 152 - Press the DELETE key. The selected IFax address is de- leted from the IFax Address list. Press the SET key. The preparation to send the IFax to the set address is completed. - The IFAX key is highlighted. - If you want to select more than one destination, press the corresponding keys in destination continuously.
- Page 153 2. PROCEDURE OF SCAN SETTING (Cont.) Set the FTP server name. - To send to the FTP server at the default setting, press the NEXT key to skip to step 5. - The FTP server at the default setting is set by the adminis- trator in advance.
- Page 154 Confirm the contents filled in, then press the NEXT key. - Press the PREV key, then the screen goes back to the previous one. Change the file format setting as required. - To send to the FTP server at the default setting, press the SET key to step 10.
-
Page 155: About The Setting Before Scanning
3. ABOUT THE SETTING BEFORE SCANNING In advance of scanning, the administrator must set the administrator password to enable the ADMIN key under this password. (If this setting is not performed, anyone can perform each setting after pressing the ADMIN key, as a result, the administration of the scanning function becomes difficult.) After this setting, perform each setting of the FTP server (default setting) and scan user as required. -
Page 156: Setting By The User
Setting by the User Setting and Registration of Templates - Maximum 20 templates can be created for 1 scan user name. - Confirm your scan user name and password with the administrator before setting and registering the template. Press the PRINTER/NETWORK key on the control panel, then press the SCAN SETTING key on the touch panel. - Page 157 3. ABOUT THE SETTING BEFORE SCANNING (Cont.) Setting by the User (Cont.) Key in the password (5 digits), then press the SET key. Press the NEW key. Set the template. - Enter the file name as required, then press the DESTINATION key to set the destination.
- Page 158 Set the template name. - Press the area as shown on the screen on the right to switch to the template name input screen. Enter the template name within 20 letters using the alphabet (touch panel) and numbers (digital keys), then press the SET key.
- Page 159 3. ABOUT THE SETTING BEFORE SCANNING (Cont.) Confirming the FTP Server at the Default Setting The FTP default setup after pressing the USER key is only to confirm the setting contents of the FTP server at the default setting, not to perform the setup. Press the PRINTER/NETWORK key on the control panel, then press the SCAN SETTING key on the...
-
Page 160: Setting By The Administrator
Setting by the Administrator Setting and Registration of Templates Press the PRINTER/NETWORK key on the control panel, then press the SCAN SETTING key on the touch panel. Press the ADMIN key. Key in the administrator password (5 digits), then press the SET key. - If the administrator password is not set, this step is skipped. - Page 161 3. ABOUT THE SETTING BEFORE SCANNING (Cont.) Setting by the Administrator (Cont.) Press the NEW key. Set the template. - Enter the file name as required, then press the DESTINATION key to set the destination. Then press the SETTING key to set the scanning condition. See steps 5 to 13 in page 8-4.
- Page 162 Enter the template name within 20 letters using the alphabet (touch panel) and numbers (digital keys), then press the SET key. - Use the following keys as required..Press these keys to move the cursor. Backspace ...Press this key to delete a letter before the cursor. Space ...Press this key to enter a space.
- Page 163 3. ABOUT THE SETTING BEFORE SCANNING (Cont.) Setting by the Administrator (Cont.) Setting the FTP Server at the Default Setting Perform steps 1 to 3 in page 8-23. Press the FTP SETTING key. Set the FTP server name. - Press the area as shown on the screen on the right to switch to the letter input screen.
- Page 164 Set the FTP password and FTP path as in the same manner as FTP user name. - Enter the FTP password within 128 letters and enter the FTP path within 128 letters. - For the FTP path, specify the directory path on the FTP server to save the scanned data.
- Page 165 3. ABOUT THE SETTING BEFORE SCANNING (Cont.) Setting by the Administrator (Cont.) Set your scan user name. - Press the area as shown on the screen on the right to switch to the scan user name input screen. Enter the scan user name within 32 letters using the alphabet (touch panel) and numbers (digital keys), then press the SET key.
- Page 166 If you want to perform the additional registration, press the NEW key. To delete the entered scan user name - Select the scan user name you want to delete, then press the DELETE key. - Press the DELETE key. The selected scan user name is deleted from the list of the scan user names.
-
Page 167: Setting The Administrator Password
3. ABOUT THE SETTING BEFORE SCANNING (Cont.) Setting the Administrator Password The administrator sets the administrator password (5 digits). By this setting, the entry of the administrator password becomes necessary for setting after pressing the ADMIN key. Only the administrator can perform the setting with this key hereafter. - Page 168 Changing the Administrator Password Press the PRINTER/NETWORK key on the control panel, then press the SCAN SETTING key on the touch panel. Press the PASSWORD SETTING key. Key in the current password (5 digits) in the ‘CURRENT PASSWORD’ area, and key in the new password (the same number in 5 digits) in both ‘NEW PASSWORD’...
-
Page 169: Shutting Down The Power Supply To The Printer Controller
4. SHUTTING DOWN THE POWER SUPPLY TO THE PRINTER CONTROLLER If the optional printer controller (GA-1121) is installed, be sure to shut down the power supply to the printer controller before turning the power switch of the copier OFF. Press the PRINTER/NETWORK key. - Page 170 9. WHEN THE GRAPHIC SYMBOLS FLASH ON THE TOUCH PANEL 1. Description of the flashing graphic symbols ......2. Add paper symbol ..............- Adding paper to the drawers ................ 9-3 - Adding paper to the large-capacity feeder (optional) ........9-4 3.
-
Page 171: When The Graphic Symbols Flash On The Touch Panel
1. DESCRIPTION OF THE FLASHING GRAPHIC SYMBOLS The graphic display on the touch panel shows the status of the copier. When one of the graphic sym- bols flashes, take the appropriate action referring to the page shown. CHECK ORIGINALS symbol DUPLEXER MISFEED symbol Flashes when an original misfeed occurs inside... -
Page 172: Add Paper Symbol
2. ADD PAPER SYMBOL Adding Paper to the Drawers When the paper supply in the selected drawer or the large-capacity feeder (optional) runs out, the drawer or large-capacity feeder shown on the display flashes, and the following message appears: Add paper Add paper as follows. -
Page 173: Adding Paper To The Large-Capacity Feeder (Optional)
2. ADD PAPER SYMBOL (Cont.) Adding Paper to the Large-Capacity Feeder (optional) Open the cover of the large-capacity feeder (optional). If you want to add paper because the paper supply has be- come low, press the TRAY DOWN key before opening the cover. -
Page 174: Replace Toner Cartridge Symbol
( Page 6-35) At Toshiba we strive to provide you with the highest qual- ity images. Please use genuine Toshiba toner to ensure that you continue to receive high quality output that is environmentally safe. - Page 175 3. REPLACE TONER CARTRIDGE SYMBOL (Cont.) Grasping the holder of the toner cartridge, slide the cartridge along the rail toward you and remove it. - Please return the used toner cartridges to your service tech- nician. Caution NEVER attempt to incinerate toner cartridges. This could cause an explosion.
-
Page 176: Replace Toner Bag Symbol
4. REPLACE TONER BAG SYMBOL When the toner bag becomes full of used toner, the REPLACE TONER BAG symbol flashes, and this message appears: Dispose of used toner Press HELP Open the front covers in the order of Remove the used toner bag from the copier in the direction of the arrow. - Page 177 4. REPLACE TONER BAG SYMBOL (Cont.) Set the new toner bag in the copier. Close the covers in the order of WHEN THE GRAPHIC SYMBOLS FLASH ON THE TOUCH PANEL...
-
Page 178: Clear Paper Symbol
5. CLEAR PAPER SYMBOL When a paper misfeed occurs in the copier, the CLEAR PAPER symbol flashes in the positions where the paper is misfed. If symbol of flashes, the following message will appear: Misfeed in copier Press HELP If any of flashes, the following message will appear: Misfeed in finisher Refer to the diagram shown on the right and remove the misfed... -
Page 179: Paper Misfeed In The Drawer Feeding Area
5. CLEAR PAPER SYMBOL (Cont.) Open the exit-side cover and remove any misfed origi- nals. Raise the automatic document feeder and remove any misfed paper. Paper Misfeed in the Drawer Feeding Area Open the cover. - Holding the handle, open the cover slowly. Remove any misfed paper. -
Page 180: Paper Misfeed In The Large-Capacity Feeder (Optional)
Paper Misfeed in the Large-Capacity Feeder (optional) Open the large-capacity feeder. - Holding its handle as shown, lift it to unlock it and open the feeder slowly away from the copier. Remove any misfed paper. Close the large-capacity feeder slowly and fully. Open the large-capacity feeder cover slowly. -
Page 181: Paper Misfeed On The Bypass Guide
5. CLEAR PAPER SYMBOL (Cont.) Paper Misfeed on the Bypass Guide Pull out any misfed paper on the bypass guide. - Reset the sheets of paper on the bypass guide. Paper Misfeed inside of the Copier Remove the copy receiving tray. - If a finisher (optional) is attached, first pull it away slowly from the copier by pushing the release lever. - Page 182 Open the exit cover. Remove any misfed paper. Open the bypass guide. - Open the bypass guide cover, press the blue button and Blue open the bypass guide. button - Remove any misfed paper. Bypass guide cover Turn the knob near the entrance of the transfer belt unit in the direction of the arrow (anticlockwise) to send any paper to the transfer belt.
- Page 183 5. CLEAR PAPER SYMBOL (Cont.) If the CLEAR PAPER symbol flashes as shown on the right, be sure to carry out step 6. If this action is not sufficient, the paper may be torn or be left in the copier. Turn the knob in the direction of the arrow (clock- wise) and pull out the transfer belt unit.
-
Page 184: Paper Misfeed In The Automatic Duplexer (Optional)
Paper Misfeed in the Automatic Duplexer (optional) Remove the copy receiving tray. - If a finisher (optional) is attached, first pull it away slowly from the copier by pushing the release lever. Caution Be careful not to let your fingers be caught between the equip- ment and the finisher (optional). - Page 185 5. CLEAR PAPER SYMBOL (Cont.) Pull out the automatic duplexer slowly until it comes to a stop. Caution DO NOT touch the metal portion of a guide plate as it could burn you. Guide plate Holding the handle of the upper guide plate, lift it slowly until it comes to a stop.
-
Page 186: Paper Misfeed In The Hole Punch Unit (Optional)
Paper Misfeed in the Hole Punch Unit (optional) Push the release lever and pull out the finisher slowly away from the copier. Caution Be careful not to let your fingers be caught between the equip- ment and the finisher (optional). This could injure you. -
Page 187: Paper Misfeed In The Finisher (Optional)
5. CLEAR PAPER SYMBOL (Cont.) Paper Misfeed in the Finisher (optional) Open the upper finisher cover. Lift knob or knobs , then remove any misfed paper. Remove any misfed paper in the paper exit area. 9-18 WHEN THE GRAPHIC SYMBOLS FLASH ON THE TOUCH PANEL... -
Page 188: Paper Misfeed In The Saddle Stitch Unit (Optional)
Paper Misfeed in the Saddle Stitch Unit (optional) Push the release lever and move the finisher away from the copier. Caution Be careful not to let your fingers be caught between the equip- ment and the finisher (optional). This could injure you. Open the entrance cover of the saddle stitcher and remove any misfed paper. - Page 189 5. CLEAR PAPER SYMBOL (Cont.) Remove any paper misfed on the exit side of the saddle stitcher. Open the exit cover of the saddle stitcher and remove any misfed paper. 9-20 WHEN THE GRAPHIC SYMBOLS FLASH ON THE TOUCH PANEL...
-
Page 190: Adding Staples (Optional)
6. ADDING STAPLES (OPTIONAL) When the staple cartridge runs out of staples, the following message appears: Set staple cartridge Add staples to the cartridge according to the procedure below. Finisher Open the front cover of the finisher. Close the front cover of the finisher, and about 10 seconds later, open it again. - Page 191 6. ADDING STAPLES (OPTIONAL) (Cont.) Push down the green lever and take out the empty staple case. Push in a new staple case into the staple cartridge completely inside until a click is heard. - Do not remove the seal holding the staples before the staple case is set in the cartridge.
- Page 192 Reinstall the stapler unit in its previous position and turn the blue lever 90 to the right to latch the stapler unit. Confirm that the finisher is attached to the copier, and that the paper size is set to any size other than A5-R or B5-R.
- Page 193 6. ADDING STAPLES (OPTIONAL) (Cont.) Slide out the saddle stitch unit carefully toward the front. Pull out the grip of the saddle stitch holder ( ) to- ward you and turn it ( ) 90 clockwise in the direc- tion of the arrow. Remove the empty staple case and set a new one.
-
Page 194: Removing Jammed Staples (Optional)
7. REMOVING JAMMED STAPLES (OPTIONAL) When copies have not been stapled in the staple mode, and if the following message is shown on the display: Examine stapler staples have been jammed. Remove them as described below. Finisher Perform steps 1 to 5 of the procedure for “6. ADDING STAPLES Finisher ”... - Page 195 7. REMOVING JAMMED STAPLES (OPTIONAL)(Cont.) Saddle Stitch Unit (MJ-1020 only) Perform steps 1 to 3 of the procedure for “6. ADDING STAPLES Saddle Stitch Unit ”( Page 9-23). Remove the empty staple case. While pushing down on the lever , pull up the knob Remove any jammed staples, and then return the knob to its original position.
-
Page 196: Clearing Accumulated Punched Paper Bits (Optional)
8. CLEARING ACCUMULATED PUNCHED PAPER BITS (OPTIONAL) When paper bits punched from copies have accumulated to a certain level, the following message appears. Please Dispose of Hole Punch Dust Dispose of the paper bits as described below. Open the cover of the hole punch unit. Holding the black handle, slide out the case contain- ing the paper bits, and dispose of them properly. -
Page 197: Call Service Symbol
9. CALL SERVICE SYMBOL When the CALL SERVICE symbol flashes, the following message appears and copying is no longer possible. Call your service technician. Call for service When the CALL SERVICE or CLEAR PAPER symbol is flashing, if you press the c Clear key and the digital key 8 together, the corresponding error code will appear on the copy quantity display only while both keys are held down. -
Page 198: Periodic Maintenance Message
10. PERIODIC MAINTENANCE MESSAGE When the following message has appeared on the display panel: Time for periodic maintenance (Colour) Time for periodic maintenance (Black) this indicates that assistance from a qualified service technician is required. Call your service techni- cian for assistance. 9-29... - Page 199 9-30 WHEN THE GRAPHIC SYMBOLS FLASH ON THE TOUCH PANEL...
-
Page 200: Maintenance
10. MAINTENANCE 1. Daily inspection ................ 10-2 2. Simple troubleshooting ............. 10-4 10-1... -
Page 201: Daily Inspection
1. DAILY INSPECTION Items for Daily Check Power switch ON/OFF status We recommend turning the power switch ON at the startup everyday so that copies can be made when- ever you want. Also, be sure to turn the power switch OFF when you leave the office. In the following cases, do not turn the power switch OFF. - Page 202 Cleaning the Reversing Automatic Document Feeder (optional) If the scanning area is dirty, it may cause an original jam or result in dirty copies. Also, if the original transport belt is dirty, the copies may become solid or the original size may be incorrectly detected.
-
Page 203: Simple Troubleshooting
2. SIMPLE TROUBLESHOOTING Check the following items, and if the problem still occurs, call service for assistance. Caution NEVER attempt to repair, disassemble or modify the equipment by yourself. You could cause a fire or get an electric shock. ALWAYS contact your Service representative for maintenance or repair of the internal parts of the equipment. - Page 204 Copy density is too low Items to be checked Countermeasure Reference page Has the message “Install new Replace the toner cartridge. Page 9-5 *** toner cartridge” appeared on the screen? Is the copy density or the back- Use the manual density keys or the background Page 3-15, 4-8 ground adjustment set lighter adjustment function to set the copy density prop-...
- Page 205 2. SIMPLE TROUBLESHOOTING (Cont.) Copy images are blurred Items to be checked Countermeasure Reference page Does the entire original lie prop- Place the original firmly on the glass and close erly on the surface of the glass? the original cover. Is the copy paper moist? Replace with new paper.
- Page 206 11. SPECIFICATIONS & OPTIONS 1. e-STUDIO211c/311c specifications ........11-2 2. Specifications of options ............11-5 3. Packing list ................11-10 4. Copying function combination matrix ........11-11 5. Image quality adjustment combination matrix ......11-12 6. Index ..................11-13 11-1...
-
Page 207: Specifications & Options
1. e-STUDIO211c/311c SPECIFICATIONS Model Name FC-211/311 Type Console type Original Glass Fixed Copying System Laser electronic copying Developing System Dry developing (2-component) Fixing Method Belt fusing Photosensor Type OPC (organic photoconductive) drum Original Scanning System Linear CCD sensor Resolution Read: 600dpi x 600dpi Write: 600dpi x 600dpi(primary scanning direction: 256 division smoothing) Acceptable Originals Sheets, books and three-dimensional objects (up to A3 size) - Page 208 *3 Independent scaling (X-Y ZOOM) is also possible. *4 The optional automatic duplexer is required to be installed. *The paper mentioned above is Toshiba-recommended paper. Specifications and appearance are subject to change without notice in the interest of product improvement.
- Page 209 Note 3:Copying speeds of THICK2, THICK3, THICK4 and SPECIAL vary depending on the user’s environment (environmental temperature) and the paper type. * The paper mentioned above is Toshiba-recommended paper. Specifications and appearance are subject to change without notice in the interest of product improvement.
-
Page 210: Specifications Of Options
Approx. 9kg Power Source 5V, 24V (supplied from the copier) Power Consumption 2.0kW max. (with the copier) * The paper mentioned above is Toshiba-recommended paper. Specifications and appearance are subject to change without notice in the interest of product improvement. 11-5... -
Page 211: Specifications Of Options
Maximum Capacity 600 sheets (90g/m Dimensions 636mm(W) x 626mm(D) x 110mm(H) Weight Approx. 5kg * The paper mentioned above is Toshiba-recommended paper. Specifications and appearance are subject to change without notice in the interest of product improvement. 11-6 SPECIFICATIONS & OPTIONS... - Page 212 Power Consumption 170W max. *1 Thick paper 4 (257-280g/m ) and special paper is out of specification. * The paper mentioned above is Toshiba-recommended paper. Specifications and appearance are subject to change without notice in the interest of product improvement. 11-7...
- Page 213 (6.5 mm dia; 70, 21 mm pitch) *1 Thick paper 4 (257-280g/m ) and special paper is out of specification. * The paper mentioned above is Toshiba-recommended paper. Specifications and appearance are subject to change without notice in the interest of product improvement. 11-8...
- Page 214 Network Scanning Function ( the optional GA-1121/GA-1131 is required to be installed) * See the Operator’s Manual for the Printer Controller (User Document CD-ROM) for the specifications of the printer controller (GA-1121/GA-1131). Scanning Method Original glass: Single-sided Reversing Automatic Document Feeder (optional): Single, Double Scanning Size A3 at maximum (excluding 2mm of circumferential margin) Original Type...
-
Page 215: Packing List
3. PACKING LIST Photoconductive Drum Copy Receiving Tray Packing List DF Level-up Kit Unpacking Instructions Operator’s Manual Pocket Set-up Instructions Detachable Cord(s) 11-10 SPECIFICATIONS & OPTIONS... -
Page 216: Copying Function Combination Matrix
4. COPYING FUNCTION COMBINATION MATRIX 11-11... -
Page 217: Image Quality Adjustment Combination Matrix
5. IMAGE QUALITY ADJUSTMENT COMBINATION MATRIX 11-12 SPECIFICATIONS & OPTIONS... -
Page 218: Index
6. INDEX Booklet mode 7-6 Numbers Bypass copying 6-5 1-Sided Originals to 1-Sided Copies 3-10 Bypass guide 1-2, 9-12, 9-13 1-Sided Originals to 2-Sided Copies 3-11 2 IN 1/4 IN 1 Copying 5-9 2-Sided Originals to 1-Sided Copies 3-12 CALIBRATION key 6-30 2-Sided Originals to 2-Sided Copies 3-12 Call Service symbol 9-2, 9-28 2IN1 Duplex Copying 5-10... - Page 219 6. INDEX (Cont.) Copy paper FUNCTION CLEAR key 1-5 maximum capacity 2-4 Fuser unit 1-2, 9-14 types and sizes 2-4 Copy receiving tray 9-12, 9-15 Copying function combination matrix 11-11 Group copying 7-3 Copying procedure 2-2 Copying speed 11-4 Handling and storing paper 2-5 HELP key 1-4 Daily Inspection 10-2 HOLDQUEUE 8-2, 8-5...
- Page 220 MEMORY key 6-10, 6-13 Paper type 1-6 Memory Number key 6-14 PDF 8-13, 11-9 Message display 1-6 Periodic maintenance message 9-29 Mirror Image mode 5-16 PHOTO mode 3-17 Mixed-sized originals 6-4 Photo size 3-8 Mode Memory 6-13 Photo zoom 3-7 Monocolour copying 4-2 PLAIN 6-5 Plain paper 2-4, 2-5...
- Page 221 6. INDEX (Cont.) copy paper 2-4 Transparency film OHP Film Date and Time 6-21 Trimming 5-14 Daylight Saving Time 6-21 Turning ON the power switch 1-8 drawer for special uses 2-6 Types and sizes of originals 2-9 ON/OFF times 6-19 originals 2-9 other size 6-16 URL 8-13, 11-9...
- Page 222 MEMO 11-17...
- Page 223 MEMO 11-18 SPECIFICATIONS & OPTIONS...
Need help?
Do you have a question about the e-studio 211c and is the answer not in the manual?
Questions and answers