Table of Contents
Advertisement
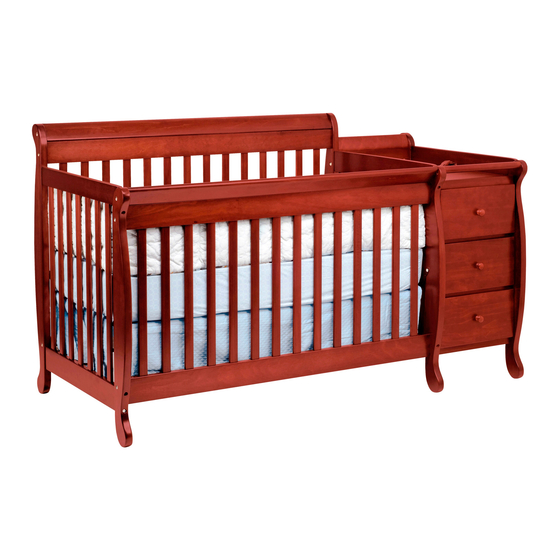
Crib + Changer Combo (5591) -
Congratulations on purchasing a
you adhere to the following guidelines for assembly, maintenance and operation. This product is for
residential use only. Any institutional use is strictly prohibited.
Please be sure to follow the instructions for proper assembly. Use a Phillips head screwdriver for assem-
bling the crib in addition to the Allen wrench included in the hardware box. Do not use power screwdrivers.
All of our products are made from natural woods. Please understand that natural woods have color
variations which are the result of nature and not defects in workmanship.
DO NOT SUBSTITUTE PARTS. ALL MODELS HAVE THE SAME QUANTITY OF PARTS AND HARD-
WARE. YOUR MODEL MAY LOOK DIFFERENT FROM THE ONE ILLUSTRATED DUE TO STYLISTIC
VARIATIONS.
WARNING!
!
READ ALL INSTRUCTIONS BEFORE USE OF THE CHANGING TABLE, ADD-ON
CHANGING UNIT, OR CONTOURED CHANGING PAD.
!!PLEASE READ!!
Assembly of this furniture is easier with two people. Assemble furniture on debris free carpets or on the enclosed
foam sheets to prevent scratching of finish. Using any power tools to assemble this furniture may potentially strip
the wood. DO NOT OVERTIGHTEN SCREWS. DO NOT USE THE CHANGING TABLE IF IT IS DAMAGED OR
BROKEN.
* The crib can later be converted
into a toddler bed or a full-size
bed. To convert to a toddler bed,
turn to page 16. To convert to a
full-size bed, turn to page 17.
Revised 08JUL2011
product. This product will provide many years of service if
MDB Family
Assembly and Operation Manual
page 1
Advertisement
Table of Contents

Related Manuals for MDB 5591


Summary of Contents for MDB 5591
- Page 1 Crib + Changer Combo (5591) - Assembly and Operation Manual Congratulations on purchasing a product. This product will provide many years of service if MDB Family you adhere to the following guidelines for assembly, maintenance and operation. This product is for residential use only.
- Page 2 PARTS B. Front Panel A. Back Panel F-1. Right C. Right Side Panel E. Center Panel D. Left Side Panel Back Post H. Crib Top Panel X 2 F-2. Left F-3. Back G-1. Right G-2. Left G-3. Front K. Spring Frame Back Post Post Front Post...
- Page 3 S. Dresser Back T. Dresser Front U. Dresser Center V. Dresser Middle W. Dresser Top Panel Top Bar Bar (2) Bar (2) AA-2. Dresser AA-1. Dresser Tools Needed Shelf (with pre-drilled X. Dresser Bottom Shelf (not included) screw holes) Bar (2) Y.
- Page 4 STEP 1. Assemble all drawers O. Left Drawer Panel N. Right Drawer Panel DO NOT OVERTIGHTEN. H19. Left Drawer Glide H17. Right Drawer Glide page 4...
- Page 5 STEP 2. Attach posts to center panel F-1. Right Back Post G-1. Right Front Post DO NOT OVERTIGHTEN. STE P 3. Attach panel glides and metal pins to center and right side panel H18. Left Panel Glide H16. Right Panel Glide page 5...
- Page 6 STEP 4. Attach dresser panels and bars to right side panel C. Right Side Panel DO NOT OVERTIGHTEN. STEP 5. Attach dresser bars to right side panel page 6...
- Page 7 STEP 6. Attach dresser boards to the dresser STEP 7. Attach center panel to DO NOT OVERTIGHTEN. the dresser page 7...
- Page 8 STEP 8. Attach posts to left side panel F-2. Left Back Post G-2. Left front post DO NOT OVERTIGHTEN. STEP 9. Attach the crib top panel and back panel DO NOT OVERTIGHTEN. page 8...
- Page 9 STEP 10. Attach spring frame FLAT SIDE Swing out four hangers at corner of the spring frame (K) carefully. Attach spring frame Choose the height of the spring frame. Start at the highest level and adjust accordingly. Bolt the spring frame (K) to legs using Allen head bolts (H5), washers (H26), lock washers (H25) and Allen wrench (H24).
- Page 10 STEP 11. Attach the crib top panel and front panel DO NOT OVERTIGHTEN. STEP 12. Place dresser shelves into the dresser AA-1 AA-2 AA-2 Fix the dresser shelf (with pre- drilled screw holes) (AA-2) using two 7/8" wood screws (H27). page 10...
- Page 11 STEP 13. Slide drawers to the dresser STEP 14. Attach the strap DO NOT OVERTIGHTEN. page 11...
- Page 12 STEP 15. Place the pad onto the changer BB. Pad KEEP THIS MANUAL IN A SAFE PLACE FOR FUTURE REFERENCE. The recommended maximum weight of the occupant is 30 lbs on changing table. Be sure to tighten the cross bar screws now that you have installed to the stationary side. Recheck all screws and bolts to be sure they are fastened securely.
- Page 13 DO NOT substitute parts. Contact a soft rag. Rinse and dry thoroughly. If you ever MDB FAMILY for replacement parts and instructional literature if needed. refinish this furniture, be sure to use only a non-toxic •...
- Page 14 • Only use the pad provided by MDB FAMILY . • The maximum weight of the child for which the chang- ing table is intended is 30 lbs.
- Page 15 Restraint System WARNING: During the diaper changing process, be sure always to keep one hand on the baby to prevent the baby from falling off the changing pad. Falling from the changing pad could cause severe injury or even death to the baby. Step 2.
- Page 16 Crib + Changer Combo (5591)-Toddler Bed Conversion Assembly * All of the parts and hardware you will need are supplied with the crib at the time of purchase. STEP 1. STEP 2. Unscrew the Allen head bolts and Move the spring frame to the lowest level.
- Page 17 Crib + Changer Combo (5591) - Full Size Conversion Assembly * For all 4 in 1 cribs, please contact a retailer to order your full size adult wooden bed rails for your full size bed conversion. 3” Phillips Head Bolt X 8 Barrel Nut X 8 STEP 1.
Need help?
Do you have a question about the 5591 and is the answer not in the manual?
Questions and answers