Table of Contents
Advertisement
Quick Links
Congratulations on purchasing a MDB Family product. This crib will provide many years of service if you
adhere to the following guidelines for assembly, maintenance, and operation. This crib is for residential
use only. Any institutional use is strictly prohibited.
Please be sure to follow the instructions for proper assembly. Use a Phillips head screwdriver for
assembling the crib in addition to the Allen wrench included in the hardware box. Do not use power
screwdrivers. All of our cribs are made from natural woods. Please understand that natural woods have
color variations which are the result of nature and not defects in workmanship.
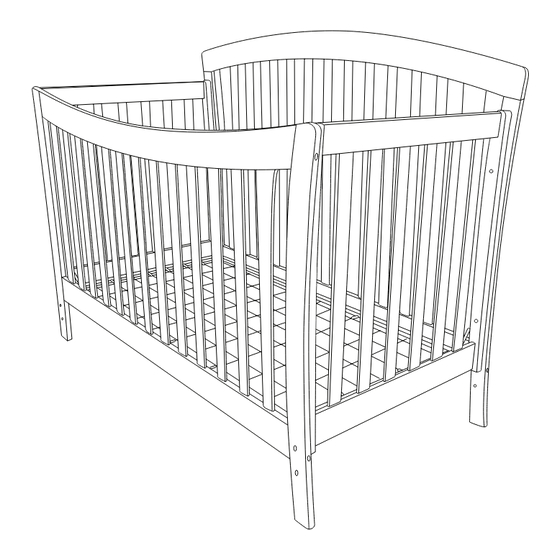
DO NOT SUBSTITUTE PARTS. ALL MODELS HAVE THE SAME QUANTITY OF PARTS AND HARD-
WARE. YOUR MODEL MAY LOOK DIFFERENT FROM THE ONE ILLUSTRATED DUE TO STYLIS-
TIC VARIATIONS.
* The crib can later be converted
into a toddler bed or a full-size
bed. To convert to a toddler bed,
turn to page 7. To convert to a
full-size bed, turn to page 8.
revised 20MAR2012
Crib (2701) -
Assembly and Operation Manual
page 1
Advertisement
Table of Contents

Related Manuals for MDB Crib 2701


Summary of Contents for MDB Crib 2701
- Page 1 Crib (2701) - Assembly and Operation Manual Congratulations on purchasing a MDB Family product. This crib will provide many years of service if you adhere to the following guidelines for assembly, maintenance, and operation. This crib is for residential use only. Any institutional use is strictly prohibited.
- Page 2 HARDWARE A. 3 1/2” Allen Tools Needed head bolts (6) (not included) B. 1 1/2” Allen head bolts (8) C. 1” Allen head E. Barrel Nuts(6) Phillips bolts (4) screwdriver F. Washers (4) G. Lock washers (18) H. Allen wrench J.
- Page 3 STEP 1.) Attach legs (R and O, Q and P) to left and right sides (L and M) L. Left side with 4 Allen head bolts (B). Do not overtighten. M. Right side STEP 2.) Attach headboard to the two side rails. Right side Left side Do not overtighten.
- Page 4 STEP 3.) Swing out four hangers at corner of the spring frame (U) carefully to avoid scratching the crib finish. Attach spring frame FLAT SIDE UP. Choose the height of the spring frame. Start at the highest level and adjust accordingly. Bolt the spring frame (U) to headboards using Allen head bolts (C), washers (F), lock washers (G) and Allen wrench (H).
- Page 5 KEEP THIS MANUAL IN A SAFE PLACE FOR FUTURE REFERENCE. Recheck all screws and bolts to be sure they are fastened securely. Do not overtighten. Before using your crib, please read all cautionary statements on the insert sheet. CAUTION: ANY MATTRESS USED IN THIS CRIB MUST BE AT LEAST 27 1/4 INCHES (69CM) BY 51 5/8 INCHES (131CM) WITH A THICKNESS NOT EXCEEDING 6 INCHES (15CM).
- Page 6 DO NOT substitute parts. Contact a soft rag. Rinse and dry thoroughly. If you ever MDB FAMILY for replacement parts and instructional literature if needed. refinish this furniture, be sure to use only a non-toxic •...
- Page 7 Crib (2701) - Daybed conversion assembly * All of the parts and hardware you will need are supplied with the crib at the time of purchase. STEP 1.) Detach the front rail by removing 4 A bolts. And move the spring frame to the lowest level.
- Page 8 The intended user’s minimum age must be at least 15 months old and maximum weight must not exceed 50 lbs (22.7 kg). WARNING : Failure to follow these warnings and the assembly instructions could result in serious injury or death from entrapment or strangulation. DO NOT place bed near windows where cords from blinds or drapes may strangle a child.
Need help?
Do you have a question about the Crib 2701 and is the answer not in the manual?
Questions and answers