Table of Contents
Advertisement
Quick Links
Advertisement
Table of Contents

Related Manuals for Docomo L-02E Optimus life


Summary of Contents for Docomo L-02E Optimus life
- Page 1 L-02E INSTRUCTION MANUAL ’12.11...
- Page 2 Thank you for purchasing "L-02E". Before or while using, be sure to thoroughly read this manual to ensure its correct use. Download the latest information of this manual from DOCOMO website. Also you can check the latest information from this terminal.
-
Page 3: Supplied Accessories
Back Cover L34 Supplied Accessories About other optional accessories and related equipment → P258 L-02E (with warranty) Contents / Precautions... - Page 4 Quick Start Guide Battery Pack L20 (2) Battery charger L02 (including warranty and USB cable (sample)) Desktop Holder L14 (with warranty) microSDHC card (16GB) (sample) * The card is attached to this terminal at the time of purchase. Contents / Precautions...
-
Page 5: How To Use This Manual
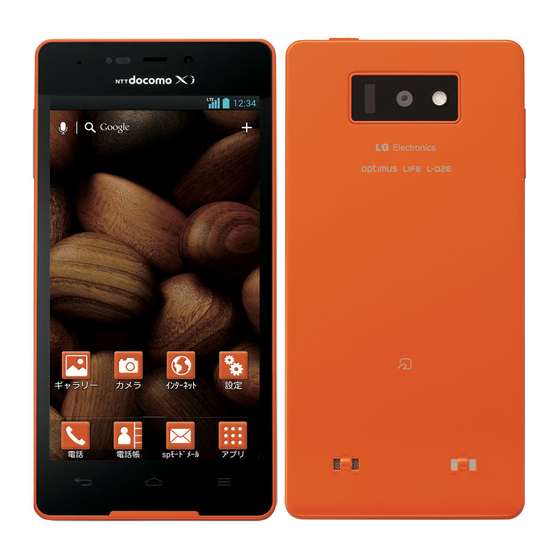
"Home" and the Home "Apps" : "Phone" screen is in default state are provided. : "docomo phonebook" And color arrangement and icons are : "sp モードメール shown in default for terminal color "carrot (sp-mode mail)"... -
Page 6: Table Of Contents
Using ……………………………… 44 Installing "Recommends" Application ……… 114 Part Names and Functions ……………………… 44 Home Application Information ……………… 115 docomo mini UIM card …………………………… 46 microSD Card ……………………………………… 47 Calling …………………………………… 116 Battery Pack ………………………………………… 49 Charging ……………………………………………… 50 Making a Call ………………………………………... - Page 7 SYSTEM …………………………………………… 174 iD アプリ (iD application) ……………………… 240 Dictionary ………………………………………… 240 File Management ……………………… 177 ドコモバックアップ (docomo backup) ……… 242 File Operation …………………………………… 177 7notes with mazec-T …………………………… 244 Folder and File Operations …………………… 179 Infrared Communication ……………………… 180 Bluetooth Communication ……………………...
- Page 8 Using Overseas ……………………… 248 Overview of International Roaming (WORLD WING) ……………………………………… 248 Available Services ……………………………… 249 Confirming before Using ……………………… 249 How to Make and Receive Calls at your Destination………………………………………… 252 Setting for overseas network connection … 255 Appendix / Index ……………………… 258 Introduction of Options and Related Devices …………………………………………………………...
-
Page 9: Before Using This Terminal
Xi or FOMA services may not be available on stored on this terminal and store the copies high upper floors of high-rise apartments or in a safe location. DOCOMO assumes no buildings, even if you can see no obstructions responsibility for the loss of any of your data around you. - Page 10 OS is old. • Depending on applications or services you • This terminal uses only docomo mini UIM use, packet communication charges may card. Bring your UIM/FOMA card to a docomo occur even when using Wi-Fi.
-
Page 11: Safety Precautions (Always Follow These Precautions)
• This terminal does not support service Safety Precautions (ALWAYS providers other than sp-mode, mopera U or FOLLOW THESE PRECAUTIONS) Business mopera Internet. • This terminal does not support 64K data ■ Before using this terminal, read these communication. "Safety Precautions" carefully so that you •... - Page 12 ■ The following symbols indicate special General Precautions for Terminal, warnings regarding product usage. Battery Pack, Adapter, Battery charger, Desktop Holder, and docomo mini UIM card …………………………………………………… P11 Denotes things not to do Precautions for Terminal ………………… P14 (prohibition).
-
Page 13: General Precautions For Terminal, Battery Pack, Adapter, Battery Charger, Desktop Holder, And Docomo Mini Uim Card
General Precautions for Terminal, Battery accessories wet with water, drinking Pack, Adapter, Battery charger, Desktop water, pet urine, etc. Holder, and docomo mini UIM card Fire, burns, injury, or electric shock may result. • For waterproofness, refer to P37 "Waterproofness". - Page 14 Keep conductive materials (metal Immediately perform the following pieces, pencil lead, etc.) away from operations, if the equipment starts coming in contact with the microUSB giving off strange smells, overheats, connection terminal or earphone/ discolors, or deforms during use, microphone terminal. Do not put those while charging, or in storage.
- Page 15 Do not store this terminal and its Be careful especially when using this accessories in humid, dusty places, terminal with the adapter connected or in hot areas. continuously for a long time. Fire, burns, or electric shock may If you use an application or watch result.
-
Page 16: Precautions For Terminal
Do not get liquids such as water or Precautions for Terminal foreign objects such as metal pieces or flammable materials into the docomo mini UIM card slot or microSD card slot of this terminal. Fire, burns, injury, or electric shock Do not aim the Infrared Port toward may result. - Page 17 When talking on the phone with Turn off this terminal in places near speaker on or when this terminal is high precision electronic devices or ringing, keep it away from your ear. devices using weak electronic signals. And, when connecting the earphone/ Electronic devices may be adversely microphone etc.
- Page 18 When the display or camera lens is When using the motion sensor, ensure accidentally broken, be careful of the safety of you and those around broken glass or exposed internal parts you, hold this terminal firmly, and avoid of this terminal. extreme movements.
-
Page 19: Precautions For Battery Pack
Itching, rash or eczema may be caused Precautions for Battery Pack depending on your physical conditions or predisposition. If an abnormality occurs, ■ Confirm the battery type referring to the stop using this terminal immediately, label on the battery pack. and then seek medical attention. - Page 20 Do not discard it as combustible waste. Ignition, and environmental pollution may result. Bring this terminal to a docomo Shop after insulating the battery pack by wrapping terminal with tape or follow the local disposal Do not use this terminal when regulations.
-
Page 21: Precautions For Adapter, Battery Charger And Desktop Holder
If battery fluid or another substance Precautions for Adapter, Battery leaks from the battery pack, do not charger and Desktop Holder allow it to get on the skin of your face, hands, etc. It may cause loss of sight or skin problems. - Page 22 Do not make the charging terminal Only use with the specified power short out while being connected to source and voltage. the outlet or cigar lighter socket. Do If incorrect voltage is used, this may not touch the charging terminal with a cause fire, burns or electric shock.
-
Page 23: Precautions For Docomo Mini Uim Card
Fire, burns, or electric shock may result. Be careful not to touch the edge of Always remove the power plug from docomo mini UIM card when removing the outlet or cigar lighter socket when not using the adapter for an Injury may result. -
Page 24: Precautions On Using Near Electronic Medical Equipment
Turn off this terminal in crowded Precautions on Using near trains or other public places where Electronic Medical Equipment implanted cardiac pacemaker or defibrillator wearers could be nearby. ■ The description below meets "Guideline on Operation of an implanted cardiac the Use of Radio-communication Equipment pacemaker or implanted defibrillator may such as Cellular Telephones - Safeguards... -
Page 25: Material List
Patients using electronic medical Material List equipment other than implanted cardiac pacemakers or implanted defibrillators Part Material Surface (using outside medical facilities for Treatment treatment at home, etc.) should check the influence of radio waves upon the Outer Display Hardened -... - Page 26 - - (Battery compartment) copper plate Loudspeaker grill - Metal Phosphor Nickel + contacts Bronze Gold Screws Mild steel plating docomo Guide Stainless Nickel mini UIM steel Earphone/microphone Phosphor Nickel + card slot terminal Bronze + Gold Fixing - Stainless...
- Page 27 Part Material Surface Part Material Surface Treatment Treatment Desktop Front Corrosion Battery Front Corrosion Holder cover treatment charger cover treatment Protecting Corrosion Supporting Corrosion cover treatment cover treatment Bottom Bottom cover coating cover coating Back Charging Acrylate cover coating light resin coating Connector...
-
Page 28: Precautions For Sample (Microsdhc Card (16Gb), Usb Cable)
Do not disassemble or remodel the Precautions for sample (microSDHC equipment. card (16GB), USB cable) Fire, burns, injuries, electric shock may result. Do not let the equipment get wet with water, drinking water, urine of pet ■ microSDHC card (16GB)/USB cable animals, etc. - Page 29 ■ USB cable When you disconnect the USB cable, do not pull the USB cable with Keep conductive materials (metal excessive force. Instead, hold the pieces, pencil lead, etc.) from coming connector unit to disconnect. in contact with external connection Fire, burns, electric shock may result.
-
Page 30: Handling And Care
Battery pack, adapter, battery charger, Desktop Holder and docomo mini UIM card are not waterproof. Do not use them in places with high humidity such as a bath or where rain may get it wet. - Page 31 Also, if an external connection device is in a safe location. connected to a microUSB connection DOCOMO assumes no responsibility for the terminal or earphone/microphone connection loss of any of your data. terminal, damage on connector or ■...
- Page 32 ■ Do not insert a microUSB connection ■ Do not bring strong magnetic objects close terminal, earphone/microphone terminal to this terminal. crookedly or pull them strongly. Strong magnetism may cause malfunction. Damage or malfunction may result. Notes about the Battery Pack ■...
-
Page 33: Battery Charger
■ Always keep the IC portion of docomo mini ■ It is normal that the adapter becomes warm UIM card clean. while being charged. You can continue using ■ Clean docomo mini UIM card with a dry, soft without problems. cloth (lens cleaning cloth), etc. Contents / Precautions... - Page 34 Bluetooth function. Data loss or malfunction may result. ■ Note that DOCOMO is not responsible for ■ Do not drop or give force to docomo mini data or information leakage when making UIM card. data communications using Bluetooth.
- Page 35 "another station", promptly change the location or stop radio wave emission by turning off the power, etc. 3. If you have further questions, contact "docomo Information Center" provided on the last page of this manual. Contents / Precautions...
- Page 36 - For using WLAN overseas, point of use etc. Notes about Wireless LAN may be restricted depending on country. (WLAN) In that case, confirm conditions such as available frequency or regulations of the Wireless LAN (WLAN) uses radio waves to country to use it.
- Page 37 Also, make change the frequency band or stop use, sure that there is no radio station using the and contact "docomo Information Center" same frequency band nearby. on the last page of this manual for crosstalk avoidance, etc. (e.g. partition Handling the Samples (microSDHC setup).
-
Page 39: Waterproofness
■ Be careful when using this terminal while Waterproofness driving. Using the mobile phone in your hand while This terminal provides waterproofness of driving is subject to punishment. IPX5 * , IPX7 * with firmly closing the back However, absolutely necessary cases such cover. - Page 40 We will replace the parts by keeping this terminal, and this will be done at user's expense. Please bring your terminal to a specified DOCOMO repair center. Contents / Precautions...
- Page 41 ■ Attaching Note Check the direction of the back • Be sure to confirm whether docomo mini cover and attach it to this terminal UIM card, the microSD card and the (a). Press parts to close it firmly battery pack are securely attached when you attach the back cover.
- Page 42 <Example> • Do not wash with washing machine etc. • This terminal does not float on water. • Do not put directly on beach. - Sand etc. may get inside of earpiece (receiver), microphone, speaker, microUSB connection terminal or earphone/ microphone terminal.
-
Page 43: Draining Water
Do not use in such case. Turn off this terminal and remove the battery pack. Contact a specified DOCOMO repair center. ■ Others • The supplied accessories and optional accessories have no waterproofness. - Page 44 Shake this terminal approximately Gently press this terminal to a dry 20 times, firmly holding it, until there and clean cloth to wipe off water is no more water splattering remaining in the gap such as earpiece (receiver), microphone, • Visually confirm if no water drops are on this terminal.
- Page 45 Use only after removing the moisture completely • Even after following above mentioned procedures, there might be moisture remaining in this terminal. Dry it naturally for a while before use. • In case water drops are remaining inside of this terminal after wiping off, the water may come out.
-
Page 46: Confirmation And Settings Before Using
GPS/Xi antenna Part Names and Functions area * Infrared port Sub microphone Main camera • Use the sub Flash microphone docomo mini UIM when using the card slot speaker phone. Bluetooth/Wi-Fi Notification LED light antenna area * Proximity microSD card slot... - Page 47 There are three keys on the front of this Earphone terminal. The roles of these keys are shown microphone below. terminal Back key Power key/ Screen lock Tap this key to return to the previous screen. It also closes a dialog box, an options menu, 1Seg/mobacas the Notification panel, or the on- antenna...
-
Page 48: Docomo Mini Uim Card
Inserting docomo mini UIM card docomo mini UIM card docomo mini UIM card is an IC card that stores Remove the back cover (P38) information such as phone number, etc. of each Remove the battery pack (P49), customer. and insert docomo mini UIM card into •... -
Page 49: Microsd Card
(P49), • This terminal supports a microSD card of up then gently press docomo mini UIM to 2 GB, a microSDHC card of up to 32 GB (as card with your fingertip and slide it of November 2012). -
Page 50: Inserting A Microsd Card
Inserting a microSD Card Removing a microSD Card Remove the back cover (P38) Remove the back cover, gently press the microSD card with your Insert the microSD card into the slot fingertip, slide it to the arrow with the metal contacts facing down direction to remove •... -
Page 51: Battery Pack
Removing the Battery Pack Battery Pack Remove the back cover (P38) Attaching the Battery Pack Put your fingertip into the groove, and pushing it to the direction of the Remove the back cover (P38) arrow (a), lift out the battery pack Face up the CE mark printed on the in the direction of the arrow (b) battery pack and insert it in the... -
Page 52: Charging
• Make sure to unplug the power plug of AC Charging adapter after finishing charging. Do not charge for a long time Battery Pack Life (several days) • The battery pack is a consumable accessory. • If you carry on charging this terminal after it The usage time of the battery per one charge has been fully charged, the battery pack will decreases gradually each time the battery is... -
Page 53: Charging With The Desktop Holder
Usage Time (estimate) Charging with the Desktop Holder A list of the charging time (estimate) of a fully charged battery is shown below. The usage This section describes how to charge the time varies depending on the usage conditions battery using the attached Desktop Holder and the battery pack condition. - Page 54 Insert the microUSB connector of When charging is complete, hold microUSB cable into the connection Desktop Holder and tilt this terminal terminal on the back of Desktop Holder in the direction a, then lift it out in the direction as shown to remove •...
- Page 55 Insert the USB connector of the Charging with the AC Adapter microUSB cable into the USB How to use the optional AC adapter 03 * to connection terminal of AC adapter charge this terminal is described below. * AC adapter 03 consists of AC adapter and Insert the AC adapter plug into the microUSB cable.
- Page 56 ■ DC adapter 03(optional) The DC adapter supplies power to charge this terminal from a cigar lighter socket (12V/24V) in a vehicle while the battery pack is attached. For details, see the operating manual of the DC adapter 03. With the CE mark facing up, fit the Charging with Battery tabs of the battery pack into Battery Charger L02...
- Page 57 Put your fingertip in the groove Removing Battery Pack from Battery of the Battery Charger and press Charger the battery pack in the direction of Put your fingertip in the groove of the arrow (a), then lift it up in the the battery cover to lift it up in the direction of the arrow (b) direction of the arrow (a)...
- Page 58 Insert microUSB connector of Charging Battery Pack L20 the USB cable into the connector How to use USB cable (sample) and AC terminal of Battery Charger L02 adapter 03 (optional) to charge this terminal is • Insert microUSB plug of the USB cable described here.
-
Page 59: Charging With A Pc
Remove the microUSB connector Charging with a PC from Battery Charger L02 Connect this terminal to a PC with the USB cable (sample) to charge. Open the microUSB connection terminal cover and insert the microUSB connector of USB cable into the microUSB connection terminal of this terminal •... -
Page 60: Turning On/Off The Power
Turning ON/OFF the Power Note • Depending on the condition of PC, the charging Turning ON the Power may take time or the charging is not possible. Press and hold the power key for over 1 second • Lock screen appears after a short time. Turning OFF the Power Press and hold the power key for over 1 second... - Page 61 Turning on Backlight Unlock the Screen Lock To prevent unintended operation and to save power, the backlight turns off when a certain • In case "Lock screen" is set, unlock with period of time elapses. If you then turn on the method you have set beforehand.
-
Page 62: Basic Operations
• Sticking a protective sheet or seal on the screen • Touching the screen when it is wet • Touching the screen with wet fingers by sweat or water • Operating while charging with an adapter other than designated adapter by docomo Confirmation and Settings before Using... -
Page 63: Checking Or Unchecking Options
Touch Screen Operations Checking or Unchecking Options You can perform the following actions on the Tap an item that has a checkbox touch screen. • If the checkbox was unmarked, a check • Tap : Touch the screen lightly mark now appears in it. •... -
Page 64: Using Motion Gesture
Zooming In or Out Using Motion Gesture Depending on the used application, you can Various functions can be operated simply by enlarge the screen and reduce the enlarged moving this terminal. screen. • To use motion gestures, from the Home screen, tap u "System settings"... - Page 65 Muting ringtone Stopping alarm To operate, mark "Silence incoming calls". To operate, mark "Snooze or stop alarm". When an incoming call arrives, flip Flip this terminal while alarm is this terminal ringing • The ringtone is muted. • Alarm stops. If "Snooze duration" is set to an item other than OFF, snooze function remains.
-
Page 66: Changing Screen Orientation
Changing Screen Orientation Note • From the Home screen, u "System This terminal screen automatically rotates to settings" u "Gestures" u "Tilt sensitivity" horizontal (landscape) or vertical (portrait) and unmark "Default sensitivity" to set views, depending on the direction in which it is the tilt sensitivity. - Page 67 Capturing Screen Shot : Change the background. : Undo/Redo. You can capture the display on screen and : Select the type of pen and the save it as an image. color. Hold down the power key and : Use eraser. Tap "Clear all" to volume key (down) for over 1 delete all the created memos.
-
Page 68: Character Entry
● On-screen QWERTY keyboard Character Entry The array is the same as the PC's keyboard. This terminal has an on-screen keyboard that is displayed in the touch screen for character entry. Character Entry Using the Onscreen Keyboard If you tap a text box on the screen, the onscreen keyboard appears in the touch panel. - Page 69 Left cursor key/Arrow key Space key/" 変換 (convert)" key The cursor moves to the left. It can also Enter half space. " 変換 (convert)" is narrow the conversion range to convert. displayed during Hiragana input and a list of Touch and hold down this to change arrow conversion candidates is displayed.
- Page 70 ● On-screen 10-key keyboard (arrow key Cut key mode selected) Cut the selected characters. Paste key Paste the copied/cut text. Copy key Copy the selected text. Close Switch to the on-screen keyboard that has been displayed before the arrow key mode was displayed.
- Page 71 ● mazec-T Conversion keyboard Line feed key Execute entered text box function (run/ linefeed/search). Note • The key display varies depending on the entry screen or character mode. • For information on switching the type of on-screen keyboard, refer to "Switching keyboard"...
- Page 72 Flick input Switching keyboard Flick input makes it easier to input when using Touch and hold down on on- 10-key keyboard. screen keyboard Tap the key where the text to input • "LG Japanese Keyboard" menu is is allocated displayed. •...
-
Page 73: Changing Character Entry Settings
Entering pictograms/symbols/ Changing character entry settings emoticons/pictogram-D Touch and hold down on a character entry screen to display "LG Japanese Keyboard" in a character entry screen to switch to menu. Tap "LG Japanese Keyboard Settings" pictogram/symbol/emoticon/pictogram-D input to change the character entry settings. mode, and display available pictograms on the display. - Page 74 Auto Space Mark this checkbox to 10-KEY KEYBOARD Input automatically insert half- Flick Input Mark this checkbox to change width space after selecting the input method on the a character when inputting onscreen 10-key keyboard alphabet. to flick input. Unmark this Auto Double tap space key checkbox to change it back to...
- Page 75 CONVERSION DICTIONARY Input If you mark this checkbox, Japanese Tap this to display the Word the phrase confirmed by the User "Japanese User Dictionary" Learning conversion process is learned by Dictionary screen. Tap to register, edit iWnn IME. or delete words, or to delete the entire Japanese User Word Mark this checkbox to display...
-
Page 76: Initial Settings
"Set" on the "docomo apps を始めましょう (Set following to the password settings" screen u input guide)" screen to select "English" a docomo apps password u "OK" u Tap "Next" on the "Welcome to input new docomo apps password u Startup Wizard" screen "OK"... - Page 77 "Location providing ON"/"Location Configuring Wi-Fi Settings providing OFF"/"Unknown blocking" This terminal connects to the Internet via on the "Location providing setting" access points for Wi-Fi networks or public screen u "Next" wireless LAN services. To connect, you must configure the access "OK"...
- Page 78 Connecting to a Wi-Fi network Note From the Home screen, • Packet communication can be connected, even when Wi-Fi function is ON. However, "System settings" u "Wi-Fi" while Wi-Fi is available, Wi-Fi is prioritized. • The "Wi-Fi" screen appears. When the Wi-Fi network is disconnected, Turn "Wi-Fi"...
- Page 79 • To use docomo services via Wi-Fi when Note Wi-Fi network is used, set "Wi-Fi option • Open network and protected network are password". From the Home screen, two types networks that are available. "System settings" u "docomo service" u The network type is indicated by an "Wi-Fi settings for docomo apps".
- Page 80 Notifying when Wi-Fi network with no Adding a Wi-Fi network security protection is detected From the Home screen, From the Home screen, "System settings" u "Wi-Fi" "System settings" u "Wi-Fi" • The "Wi-Fi" screen appears. • The "Wi-Fi" screen appears. Turn "Wi-Fi"...
- Page 81 Changing the Wi-Fi network password Setting Wi-Fi connection while the screen is OFF From the Home screen, Disconnect Wi-Fi while the screen is OFF and "System settings" u "Wi-Fi" specify the timing of switching this terminal to • The "Wi-Fi" screen appears. data communications.
- Page 82 Ignoring unavailable radio waves Adding an online service account This function enables re-connection with the From the Home screen, available access point when the access point "System settings" u "Accounts & is recognized as an unavailable one by Internet sync" due to no reply is received from your desired access point.
- Page 83 "Remove account" u "OK" data appears. • The selected account is deleted. Mark the data that you want to Note synchronize • docomo account cannot be added or • The data with a check mark is synchronized. deleted. Confirmation and Settings before Using...
-
Page 84: Notification Led
Setting Notification LED Notification LED From the Home screen, Notification LED "System settings" u "Display" u "Notification flash" Notification LED lights or flashes to notify of status of this terminal. Operations of Mark "Use LED light for notification LED are as follows: notifications"... -
Page 85: Screen Display/Icons
Main status icons Screen Display/Icons Signal strength Status Bar Out of service area The status bar is displayed at the top of the screen. This terminal status and notifications Bluetooth Function ON (White) are displayed in the status bar. Notification icons are displayed on the left side, and this Connected to Bluetooth device terminal status icons are displayed on the right... - Page 86 New SMS message The battery is charging Problem with an SMS message Airplane mode activated New Google Talk message docomo mini UIM card locked or Receiving a call not inserted Missed call Silent mode is set (no vibration) New voicemail message...
- Page 87 Free space on memory of this USB tethering and Wi-Fi tethering terminal is getting low available Using Wi-Fi Direct During Omakase Lock Uploading data Note Data Upload completed • appears when the terminal is charged without the optional AC adapter (e.g. Downloading data when charged with a PC).
- Page 88 Notification Panel Notification icons are displayed in the Notification panel. You can open notifications, such as messages, reminders, or event notifications, directly from the Notification panel. Opening the Notification panel Drag or swipe the status bar downwards • The Notification panel appears. Icons are displayed at the top of the Notification panel.
- Page 89 Icon Switch GPS between on and off. Touch Drag to right and left to display the non and hold down to display the "Location displayed icon. services" screen. Launch QMemo. Adjust the brightness of screen in 4 levels. Touch and hold down to display Switch Airplane mode between on and the "Display"...
- Page 90 Delete notification Closing the Notification panel Delete notification information and icons. Drag or swipe the bottom of the Some notification cannot be deleted. Notification panel upwards Setting button Display the setting memu. Note • You can also close the Notification panel Viewing notification details by tapping Tap the notification message on the...
-
Page 91: Home Screen
Using Home Screen Home Screen You can add/move application shortcuts, widgets, etc. on the Home screen or change wallpaper. Up to 7 home screen pages for adding shortcuts and widgets can be added. Google Search Tap to activate Google Search. Settings Open the edit screen to add shortcuts/ widgets or change wallpaper. -
Page 92: Adding Shortcuts And Widgets
Wallpaper Adding Shortcuts and Widgets Wallpaper is shown. shortcuts/widgets/ folders can be added. From the Home screen, Shortcuts • The editing screen appears. Tap to activate applications and functions. • Thumbnails of home screen pages appear at the top of the editing screen and items Location indicator belonged selected tab (Applications/ Indicates home screen page where you are... -
Page 93: Adding Folders
Changing Name or Color of Folders Note From the Home screen, tap a folder • Touch and hold down a shortcut icon and drag it to Launcher to move the icon to • Folder window opens. Launcher (up to 5 icons). Drag an icon to Tap title bar a shortcut of Launcher and lift your finger Tap "Folder name"... -
Page 94: Home Screen
Tap "Wallpapers" tab u Select Deleting Shortcuts etc. from "Gallery"/"Live wallpapers "/image in Home Screen Wallpaper gallery From the Home screen, touch and • When you tap "Gallery", select an image to use as wallpaper, drag the frame to hold down a shortcut icon etc. to set range you want to use as a wallpaper, delete then tap "OK"... -
Page 95: Customizing Icons
Adding Home Screen Note • To set the start screen shown when the Home screen pages can be added. power is on, etc. tap "Set default home From the Home screen, u "Edit screen" and tap a thumbnail of home home screens"... - Page 96 – b" Home" and select "Home" to use this feature. You cannot customize icons Tap preferred icon when using the docomo Palette UI. • Shortcut icons added from the Changing to photo icon Application screen to the Home screen You can use photos from camera and gallery can be customized.
- Page 97 & settings for applications/ Theme Select the theme on the restore widget and theme. Home screen. You cannot change on docomo Palette Animation Select "No animations" or "All animations". Wallpapers cannot be backed up. Screen swipe Select screen swipe effect.
-
Page 98: Application Screen
Using Application Screen Application Screen Application screen is shown when "Apps" is tapped on the Home screen. Icons of applications installed to this terminal and function icons are shown on the Application screen. Tap them to activate them. Also, widget list can be shown. Drag or swipe from side to side to switch application screen pages. -
Page 99: Application List
"Widgets" tab Camera An application for Widget list appears. shooting still images Settings (photos) or videos. (P213) Open the edit screen to sort applications or uninstall applications. Calendar View calendar and Application/Widget list manage schedule. Items in the selected tab (applications/ (P236) widgets) are listed. - Page 100 Application of guide ル (sp-mode and receive emails using (co-trip) book popular among mail) a docomo email address women in their 20s (@docomo.ne.jp). It and 30s, which has a allows you to use circulation of over 7 pictograms and Deco- million copies.
- Page 101 Local Search for the nearest docomo phonebook restaurant, cafe, data. For information on Japanese style bar, travel spot, ATM or gas docomo backup (save station. (P233) to microSD card), see P242. Chrome Browse web page. Navigation Voice guidance is...
- Page 102 dmenu This is a shortcut NOTTV You can watch application for "dmenu" mobacas. Broadcast to easily find fun and programs and contents convenient contents for such as "NOTTV" are smart phones including available. (P198) contents used in i-mode. Play Store Access applications (P190) and games directly via...
- Page 103 YouTube. and videos. You can view pictures and Search Search for a docomo automatically group phonebook entry, an pictures by identifying application in the faces and scenes on the terminal or web page.
- Page 104 iD アプリ (iD This is the application Dictionary Use English-Japanese appli) for setting e-money iD dictionary, Japanese- for using etc. (P240) English dictionary, and Japanese language 遠隔サポー Use " スマートフォン dictionary. (P240) ト (Remote あんしん遠隔サポート support) (Smartphone Anshin * For instructions on redownloading the Remote Support)"...
-
Page 105: Moving Applications
Drag it to the location to move to Searching Appilcations/ and lift your finger Widgets • Application is moved. Tap "Apps"/"Downloads"/"Widgets" Note tab on the Application screen • To reset icons to the default state, tap u "Search" u Enter name of on the Application screen u "Reset"... -
Page 106: Uninstalling Applications
Uninstalling Applications Adding Shortcuts etc. to the Home Screen Tap "Apps"/"Downloads" tab on the Application screen u Tap "Apps"/"Downloads"/"Widgets" tab on the Application screen Tap an application icon with shown Touch and hold down an application icon or a widget "Uninstall"... -
Page 107: Docomo Palette Ui
Palette UI The docomo Palette UI is a home application Viewing the Home Screen that allows you to quickly find and operate what you want such as access to the Web and You can customize the Home screen by applications. -
Page 108: Home Screen Management
You can select the background and icon design. Wallpaper You can choose the wallpaper for the Home screen. Group You can create a shortcut for group. Home Home screens are displayed. screens You can move or add screen. docomo Palette UI... -
Page 109: The Home Screen
• You can also drag the icon to one of the From the Home screen, touch and Home screen’s extended screens to the hold down the application or widget left or right. you want to uninstall u "Uninstall" • The "Uninstall application" screen appears. docomo Palette UI... -
Page 110: Changing Folder Names
From the Home screen, tap a folder that you like from a website. you want to change name • A pop-up menu appears. "Edit name" Enter a new name of the folder and tap "OK" • The name of the folder is changed. docomo Palette UI... - Page 111 "Live wallpapers". Tap to select one of the live wallpaper, then tap "Set wallpaper". You can sort the scroll order for Home screens. Touch and hold down the Home screen • "select an action" menu appears. "Home screens" • The "Home screens" screen appears. docomo Palette UI...
-
Page 112: Viewing The Application Screen
• It is also possible to delete by touching and holding down the thumbnail, and then tap "Delete" in pop-up menu. Note • You can also operate from the Home screen, u "Home screens" to add, sort, and delete the Home screen. docomo Palette UI... -
Page 113: Managing Applications
"Move" on a pop-up menu u select a Touch and hold down the application destination. icon you want to uninstall u "Uninstall" • "Uninstall application" screen is displayed. The confirmation screen appears, then tap "OK" u "OK" • The application is deleted. docomo Palette UI... -
Page 114: Group Management
"Add group" • The group name is changed. Enter a group name and tap "OK" Note • The group is added on the Application • The names of groups "Recently"/"DOCOMO screen. Services"/"Download Application" cannot be changed. Sorting Groups From the Home screen, "Apps"... -
Page 115: Searching Applications On This Terminal And Website
Voice Input to search. Home screen. Deleting Groups From the Home screen, "Apps" Touch and hold down the group name u "Delete" "OK" • The group is deleted. Note • The names of groups "Recently"/"DOCOMO Services"/"Download Application" cannot be deleted. docomo Palette UI... -
Page 116: Switching Application Screen Display
Tap an application to install • Follow the guidance on the screen and install the application. Note • Recommended applications from DOCOMO is displayed on "Recommends" tab. • Tap the application icon and move to the downloading screen. • The downloaded application is displayed on "Download Application"... -
Page 117: Home Application Information
Information You can view the operation guide for the docomo Palette UI. From the Home screen, u "Help" • An explanation for the docomo palette UI operation is displayed. Version Information of Home Application From the Home screen, "Apps" u "Application info"... -
Page 118: Calling
Calling Making a Call From the Home screen, "Phone" u "Dial" tab • The Dial screen appears. Enter the phone number u • If you enter a wrong number, tap delete the number. Calling... -
Page 119: Entering A Pause
• The Dial screen appears. "Koe-Taku" button For details on the Koe-no-Takuhaibin, refer to Enter the phone number u tap the DOCOMO website. "Add 2-sec pause" "Phonebook" button • A comma "," is displayed after the phone The phonebook is displayed. (P127) number. -
Page 120: Emergency Call
Adding Wait “;” Emergency call After dialing, a message for confirming dialing Emergency call Phone number service number appears. From the Home screen, "Phone" u Police "Dial" tab Fire department or • The Dial screen appears. ambulance service Enter the phone number u Japan Coast Guard "Add wait"... -
Page 121: Making An International Call
118 are not available to dial from phone number necessary for important PIN code input screen or from the PIN purposes, such as life saving, the agency unblocking key input screen if docomo can retrieve them regardless of your mini UIM card is not inserted. settings. -
Page 122: Receiving A Call
Calls to fixed-line telephone Receiving a Call From the Home screen, "Phone" u When there is an incoming call, "Dial" tab • You can stop the ringtone and vibration • The Dial screen appears. by pressing the volume keys (up and "010"... -
Page 123: Operations During A Call
Name, phone number, and area Operations during a Call End call During a call, you can adjust the volume, turn Add call * the speaker ON/OFF and put the call on hold, Hold call * depending on the usage conditions. Duration of call Display dialpad * Send DTMF. - Page 125 Calling back a Missed Call Calling from Recent calls When you have missed calls, a missed call You can make a call to a phone number notification appears in the status bar. recorded in Recent calls. If you see in the status bar, drag From the Home screen, "Phone"...
-
Page 126: Call Log
Registering Phone Numbers from Deleting the Call Log the Call Log to the Phonebook You can delete a call log or all call logs. You can register unregistered items from the Deleting a desired call log call log to the Phonebook. On "Recent calls"... -
Page 127: Call Settings/Other
Setting network services Call Settings/Other Set the docomo network services. Set each setting related to call. From the Home screen, "Phone" u From the Home screen, "Phone" u u "Call settings" u "Network service" u "Call settings" Koe-no- Use the service, confirm or... - Page 128 (in a hospital, on an airplane, Remote Configure the remote near a priority seat of train, operation operation from docomo etc.) is heard on the caller's settings mobile phone, fixed line terminal and then the call telephone or NTT pay ends automatically.
-
Page 129: Docomo Phonebook
Using advanced call settings docomo phonebook Set details for call. In docomo phonebook, you can enter information From the Home screen, "Phone" u about your personal contacts, such as their phone numbers, email addresses and web service u "Call settings" u "Advanced accounts. - Page 130 "Contacts" tab Display the list of contacts. List of contacts Tap the displayed icon after selecting an image to call, create mail or use services on the Internet etc. Groups Tap to select a group and display the contacts in groups. Register Register new contacts.
-
Page 131: Editing Contacts
Contacts. On "Contacts" tab, "Search" Note Enter the word(s) that you are • Contacts registered in docomo account looking for can be synchronized with cloud. • Search candidates and search results in this terminal are displayed. - Page 132 Making Calls/Sending Viewing map for contact Emails/Chatting via Contacts address You can make a call directly from Contacts. You can view a location on the map if the If you have added an email address or chat address is registered in a contact. account to the Contacts entry, you can also On "Contacts"...
-
Page 133: Deleting Contacts
Deleting Contacts Sharing Contacts You can share the Contacts saved in this On "Contacts" tab, tap a contact terminal with other applications. • The profile screen appears. On "Contacts" tab, tap a contact u "Delete" u "OK" • The profile screen appears. •... -
Page 134: Adding A Contact To Favorites
You can set display/non-display the phonebook tab allows you to quickly display a specific that is included in specific account or group of contact. Google account. • You can only add docomo/Google account to On "Contacts" tab, u "Others" u Favorites. "Accounts to display"... - Page 135 On "Contacts" tab, "Groups" u touch Note and hold down a group • Group function is only available for "Delete group" u "OK" contacts created on docomo/Google account. Registering a contact to group On "Contacts" tab, "Groups" Touch and hold down a contact to...
- Page 136 "Phonebook" u "My profile" tab Image and name Profile information • Registered information such as phone number, email address, address, birthday, nickname etc. are displayed. • When docomo mini UIM card is inserted, phone number of docomo mini UIM card is displayed automatically. Calling...
- Page 137 Bluetooth and Gmail, and back up to a profile. microSD card. You can also load phonebook data stored in a docomo mini UIM card or Name card exchange button microSD card into this terminal. • Tap this button to exchange name cards created by "Name card creator"...
- Page 138 "Import from SIM card" or "Import from SD card" Select the selection method for • If you are importing from docomo mini Contacts u "OK" UIM card, tap "Import from SIM card". • If "Export all contact data" is selected, go Tap the account you want to import to Step 6.
- Page 139 Note • When importing from docomo mini UIM card, names and phone numbers only can imported. Information such as groups and mail addresses cannot be imported. Calling...
-
Page 140: Mail / Web Browser
70 double-byte characters (or sp-mode mail allows you to send and receive 160 single-byte alphanumeric characters) to emails using an i-mode mail address (@docomo. phone number as address. ne.jp). It allows you to use pictograms and Deco-mail, and also supports auto receive. - Page 141 /compatible overseas network operators, screen, reply, discard, view thread, select refer to "Mobile Phone User's Guide from Quick messages can be performed. [International Services]" or the DOCOMO "International Services website". • To send SMS messages to users of overseas network operators, enter "+"...
-
Page 142: Email
"Manual" or "Next" Email • Follow the instruction on the screen. Using email is available by setting an account • Select account type when you tap of mopera U or general provider. "Manual". Follow the instructions shown on the screen to make the settings. For Setting Mail Account information about the settings, contact your service provider. -
Page 143: Opening Email
Opening Email Displaying a Received Email From the Home screen, "Apps" u Tap an email on the "Inbox" screen "Email" • The email is displayed. • The "Inbox" screen is displayed. Note • New message is automatically checked and received. •... -
Page 144: Creating And Sending An Email
Creating and Sending an Adding an Account Email You can add multiple accounts on "Email" application. on the "Inbox" screen From the "Inbox" screen, • The "Compose" screen is displayed. "Accounts" Input recipient's address in "To" box • The "Email" screen is displayed. Input subject in the "Subject"... -
Page 145: Account Settings
Changing the Setting of Email Account Entire Set default account, settings notification of receiving From the "Inbox" screen, new message, Notification sound/ "Account settings" vibrator* when receiving • The account setting screen is displayed. emails etc. Change settings as necessary Change login Set receiving/sending Account... -
Page 146: Gmail
Creating and Sending a Gmail Gmail Gmail is online email service of Google. You From the "Inbox" screen, can send and receive emails by using Gmail in • The "Compose" screen appears. this terminal. Enter email address in the "To" box Opening Gmail Enter a subject in the "Subject"... -
Page 147: Early Warning "Area Mail
Receiving Early Warning Early Warning "Area Mail" "Area Mail" You can receive Earthquake Early Warnings etc. provided by the Japan Meteorological When an Area Mail is received, dedicated Agency. buzzer or ringtone sounds and text of Area • Area Mail is a free service that does not Mail is displayed in a pop-up. -
Page 148: Browser
Setting Early Warning "Area Mail" Browser From the Home screen, "Apps" u Browser allows you to view web pages in the same way that you can from a PC. "Disaster kit" u "Early Warning "Area Mail"" • The "Early warning "Area Mail" Inbox" screen appears. - Page 149 Search box Opening Browser Tap to display the search box. Enter the text you want to search or URL to display a list of From the Home screen, "Internet" web page candidates and search candidates • The home page appears. that match the entered characters.
- Page 150 Bookmark button * Searching for a web page by voice The "Bookmarks" tab appears. entry * In case the icon is not displayed, drag the lower part of the browser screen up to display. Tap the search box Note • "Speak now" appears. •...
-
Page 151: Changing Browser Settings
Using Bookmark and History Changing Browser Settings Bookmarking a web page allows you to quickly From the Browser screen, access that web page. "Settings" You can also view previously visited web Change the settings if required pages by displaying your browsing history. Adding a bookmark General Configure the home page and... -
Page 152: Google Chrome
Google Chrome Google Talk With Google Chrome, you can view Web pages, Google Talk is a Google instant messaging and synchronize tabs open in Chrome on your service. It allows you to chat (text chatting) PC, bookmarks, address bar data between the with friends who have Google accounts. -
Page 153: Starting Chat
Starting Chat Tap a friend's account on the "Talk" screen • The Chat screen appears. Tap the "Type message" box u Enter your message and • The text that you entered in the "Type message" box is sent. Mail / Web Browser... -
Page 154: Settings
Settings Settings Menu WIRELESS & NETWORKS u "System settings" on the Home Set whether to enable/disable networks and screen on this terminal to display the configure the network connection settings. "Settings" screen that allows you to configure Wi-Fi Turn the Wi-Fi function ON/OFF. various settings. -
Page 155: Data Usage
More... Note Airplane ON/OFF this terminal's • If you tap "Search networks" while using mode emission of radio waves. data communication over a LTE network, the message, "Please disable data Wi-Fi Direct Directly connect to a device access and retry later." appears. supporting Wi-Fi Direct without •... - Page 156 Setting tethering Note • You can enable internet access via the Tethering is a function for using mobile devices mobile network by setting "Mobile data" such as smartphones as modems to allow USB to ON. devices or Wireless LAN devices to access the •...
- Page 157 Settings Wi-Fi tethering Note • Hardware requirements of a PC for USB Connect wireless LAN compatible device up to tethering are as follows: 8 devices to the Internet simultaneously using - OS*: Windows 7/Windows Vista/ this terminal as a Wi-Fi hotspot. Windows XP (Service Pack 3 or later) On the Home screen, u "System...
-
Page 158: Connecting To Vpn
"Security" Connecting to VPN • The "Security" menu appears. (Virtual Private Network) Select appropriate one from "Open", "WPA PSK" and "WPA2 PSK". VPN (Virtual Private Network) is a technique • The password entry is necessary to set to to access to the information protected in local "WPA PSK"... - Page 159 Connecting to a VPN Setting the Access Point In VPN list, tap a VPN name to The access points (sp-mode, mopera U) required for connecting to the Internet are connect preset. You can not delete or change them. But Enter the necessary authentication you may add or edit them if necessary.
- Page 160 "Save" sp-mode Note sp-mode is an ISP for NTT DOCOMO smartphones. In addition to Internet • Do not change MCC to anything other connection, this also provides an email service than 440, or change MNC to anything that uses the same email addresses as i-mode other than 10.
-
Page 161: Device
U DEVICE mopera U is an NTT DOCOMO ISP. If you have subscribed to mopera U, you can use Sound the Internet after making the simple settings. This allows you to configure various sound mopera U is a paid service that requires subscription. - Page 162 Display Quiet time Turn off all sound except alarm and media sound. Time and a This allows you to configure display settings, day of the week can be set for such as screen brightness and animation. sound OFF. You can also set whether to use vibration.
- Page 163 Palette UI. restore theme*. Select Switch home applications. * Wallpapers cannot be backed up. Home Choose "docomo Palette UI" or "Home". Theme Select the theme on the Home screen. Animation Select "No animations" or "All animations". Screen Select screen swipe effect.
-
Page 164: Lock Screen
Lock screen Select Enter a numeric PIN to screen unlock screen. Follow the This allows you to configure whether to use lock instruction shown on the lock screen and the necessary settings. screen to enter a 4 to • The display or setting items vary depending 16-digit number. - Page 165 〈On-Screen Unlock〉 selected. • If you enter incorrect screen-unlock • Not available on the docomo patterns 5 times, a message prompting Palette UI. you for reentry will appear after 30 Tilt Run a tilt test for the Home seconds.
-
Page 166: Power Saver
Storage Power saver Display free space in internal storage and free This allows you to set to reduce the function space of the microSD card, operate mount and usage when the battery power gets low. format. Turn Power Set the timing (battery level) to saver on turn the power saver on. - Page 167 Apps BATTERY INFORMATION Battery The battery level is displayed Configure the settings for applications. level icon in percent figure. Also display Downloaded List/delete installed applications. whether it is charging or not. Running List/stop the active services. Battery Configure whether to display percentage the battery level (%) on the List/delete all the applications.
-
Page 168: Personal
Tap the application you want to re- Application Configure the settings for enable manager regular update confirmation, etc. "Enable" Wi-Fi Set to use docomo apps in a settings Wi-Fi network. for docomo apps docomo Set a password for docomo apps applications. -
Page 169: Location Services
Accounts & sync docomo Configure to use docomo Wi- Wi-Fi Easy Fi or Wi-Fi at home easy and This allows you to configure the settings of Connection convenient. accounts and their synchronization. データ量確 Set measuring interval, to Add or delete an account used in this 認アプリ... - Page 170 SIM CARD LOCK secure certification and other certification information. Set up SIM Set whether to lock the SIM card lock card (docomo mini UIM card) Install from Install encrypted certificates and configure its settings. storage from the internal storage. PASSWORDS...
-
Page 171: Network Security Code
(driver's license, etc.) and network services. You can make better use docomo mini UIM card to a docomo Shop, of this terminal by using different codes or contact "General Inquiries" provided on depending on the purposes. - Page 172 • If you enter the PUK incorrectly ten times in PIN code is a 4- to 8-digit number that is a row, docomo mini UIM card will be locked. If entered to check the user when docomo mini this happens, please contact a docomo Shop.
- Page 173 PIN code when this terminal is "System settings" u "Security" powered on. "Set up SIM card lock" Enter the PIN code of docomo mini "Change SIM PIN" UIM card, and tap "OK" • You are asked to enter the PIN code.
-
Page 174: Language & Input
Language & input to make each setting. Japanese This allows you to configure this terminal's Keyboard language and keyboard settings. You can also to make each setting. configure settings for voice input and output. Keyboard Language Select the language used on mazec-T to make each setting. - Page 175 Backup & reset Initializing Terminal From the Home screen, Operate initialization. "System settings" u "Backup & BACKUP & RESTORE reset" Back up my Configure whether to backup "Factory data reset" u "Reset data on the Google server. phone" u "Erase everything" u "OK" Backup Configure the account for •...
-
Page 176: System
SYSTEM Note • Remove check mark from "Automatic Date & time, Accessibility, Connectivity, date and time", "Automatic time zone" to Developer options, About phone are configured. set date, time, time zone manually. Date & Time Accessibility This allows you to configure the date and time settings. - Page 177 Connectivity Touch & Select the touching sensitivity hold delay from "Short", "Medium", or Configure the settings for USB connection "Long". mode. Install web Configure whether to install the USB CONNECTION scripts script for easier access to Web contents from applications via The default USB connection Google.
-
Page 178: Developer Options
Developer options Software Display the Android version, information baseband version, kernel Configure the settings for developing version, build number and applications. software version of this terminal. About phone Legal Display Open source license or information the Terms of use of Google. This allows you to display various informations of this terminal. -
Page 179: File Management
File Management • Sharing some data may not be permitted due File Operation to copyright. If you connect this terminal with a PC via Note the supplied USB cable (sample), you can synchronize music with "Windows Media • Operating environment of a PC for file Player"... - Page 180 Folder Structure in this terminal Note • Shot photos and videos are saved in When you connect this terminal with a PC, the "DCIM" folder in the internal storage of internal storage in this terminal and the this terminal or in the microSD card. microSD card are recognized as "L-02E".
-
Page 181: Folder And File Operations
Synchronizing Data with Folder and File Operations Windows Media Player Transferring Data with a PC You can synchronize music and videos with Windows Media Player's library on a PC. In Connect this terminal with a PC via this way, music and videos with copyright protection can be synchronized as well as the the USB cable (P187) copyright information. -
Page 182: Infrared Communication
Disconnecting this terminal from a PC Infrared Communication Confirm that data is not transferring, You can send and receive data to or from pull out the USB cable from this another terminal or mobile phone etc. which has infrared communication function. terminal and a PC •... -
Page 183: Infrared Communication
Sending My profile via Infrared Communication From the Home screen, "docomo phonebook" u "My profile" u "Send via infrared" Make the recipient to waiting state "OK" u "OK" Sending a Single Data <Example> Sending a contact From the Home screen, "docomo Phonebook"... -
Page 184: Bluetooth Communication
10 m with no obstructions in sight. When • Receiving all: "Receive all" u enter there are obstructions between this terminal docomo apps password u "OK" u enter and a Bluetooth device or depending on the the same authentication password as the environment (wall, furniture, etc.) or structure... - Page 185 liable to be adversely affected by a microwave ■ Reception interference caused by wireless oven, so keep it 3 m or more away from the LAN devices microwave oven while using it. Otherwise, • As this terminal's Bluetooth device and normal connection cannot be performed when wireless LAN devices use the same nearby electric devices are powered on.
- Page 186 Turning ON Bluetooth Function to Pairing/Connecting with Other Make this terminal Discoverable Bluetooth Device To transfer data via Bluetooth connection, From the Home screen, perform pairing (pairing setting) with the "System settings" u "Bluetooth" device in advance and register it to this Turn "Bluetooth"...
- Page 187 When the other device requests for Note pairing • Even for devices requiring pass code When a screen asking for pairing for Bluetooth (PIN) when pairing, once pairing is connection appears, tap "Pair" or enter pass performed, entering pass code (PIN) code (PIN) if required and tap "OK".
- Page 188 Receive the data by following the Sending/Receiving Data via instruction on the screen of the Bluetooth Function recipient • Set the Bluetooth function to on beforehand to make this terminal discoverable. Receiving data via Bluetooth Sending data via Bluetooth Set this terminal to be discoverable You can send data of Phonebook (name card Tap "Accept"...
-
Page 189: External Device Connection
Open the microUSB connection External Device Connection terminal cover and insert microUSB connector of the USB cable to the Connecting this terminal with microUSB connection terminal a PC • Insert the microUSB connector horizontally with the USB mark facing up. Make sure that Windows Media Player 11 or later and dedicated driver are installed on a PC. - Page 190 Insert the USB connector of USB • The following operations are available from the "USB connection type" screen. cable to the USB port of a PC • This terminal is recognized automatically Charge Select to charge only. by PC. only (P57) •...
- Page 191 "Charge only" / "Media sync (MTP)" / "LG software" / "Camera (PTP)" Note • While connecting to a PC, drag or swipe the status bar down to open the Notification panel, and then tap "USB connection" to display the "USB connection type"...
-
Page 192: Application
Application dmenu dmarket This allows you to access easily to docomo's This allows you to get convenient and fun recommended sites or convenient applications. contents. From the Home screen, "Apps" u From the Home screen, "Apps" u "dmenu" "dmarket" The browser launches, and "dmenu" is •... -
Page 193: Play Store
• If the application needs to access data Play Store and functions on this terminal, the functions used by the application are Google Play enables you to access applications displayed. and games you like and download them to "Accept & download" (for free install into this terminal. -
Page 194: Purchasing An Application
The application is deleted, and it will not be • NTT DOCOMO is not liable for any charged. Requesting a refund is available only disadvantage brought to you or any third once for the first time of purchasing each party due to an application you installed. -
Page 195: Osaifu-Keitai
Uninstalling an Application Osaifu-Keitai From the Google Play screen, You can use "Osaifu-Keitai compatible service" for payment or coupon by just "My Apps" u tap the application that holding over the store reader, or " かざしてリ you want to uninstall ンク対応サービス... - Page 196 Keitai IC card to a new Osaifu-Keitai when Configure service settings you change a new model or when malfunction occurs. Contact your local docomo Shop to get • Make necessary settings from the iC transfer service. service site or application.
- Page 197 Hold mark over a reader to Using " かざしてリンク対応サービ communicate ス (Kazashite-Link services)" To use かざしてリンク (Kazashite-Link) compatible services, application may be needed. With "C Tag/Barcorde reader" application (P101), use by holding the mark over IC chip built-in device, smart poster, etc.
- Page 198 Locking Osaifu-Keitai Note • The lock is not canceled even if the power Use "Osaifu-Keitai lock setting" to restrict is turned off. Osaifu-Keitai function or services. Osaifu-Keitai • The password used in Osaifu-Keitai lock lock is different from the screen lock on this setting is required when unlocking or terminal and SIM card lock.
- Page 199 ToruCa Note • Packet communication fee may incur when ToruCa is an electronic card that can be loaded acquiring, displaying or updating ToruCa. to your mobile. It can be acquired from readers • You may not be able to acquire, display and websites as the shop information or or update the ToruCa provided for i-mode coupons.
-
Page 200: Mobacas
■ Using mobacas • A separate subscription (paid) to the mobacas broadcasting station (NOTTV) is required. • When docomo mini UIM card is not inserted to this terminal, you cannot receive/view programs. • mobacas is a broadcast service provided within Japan. - Page 201 ■ Broadcast signal areas • When changing the orientation of 1Seg/ mobacas is a broadcasting service that mobacas antenna, hold around the root. operates on radio waves (airwaves) different • To store 1Seg/mobacas antenna, once from those for FOMA services and 1Seg. turn it straight up and then set in.
- Page 202 Viewing via mobacas Note • You cannot use mobacas when mock Viewing programs/content locations setting is enabled. You can disable the setting by following From the Home screen, "Apps" u procedure. "NOTTV" From the Home screen, u "System settings" u "Developer options" u confirm •...
- Page 203 Viewing the viewing screen Image • Swipe it to the right/left to switch program/content. * Displayed content layout depends on the program/content. Social button • A program/content-related timeline is displayed. Application...
- Page 204 Searching for programs/ Content Scheduling content From the NOTTV home screen, Search for programs/content in a variety of " すべて (All)" ways from within the application. " コンテンツ予定表 (Content List)" Searching from a program listing "<" / ">" on either side of date (Realtime) •...
- Page 205 mobacas settings Note • During the broadcasting time of contents, From the NOTTV home screen, the contents may not be received in u " 設定 (Settings)" situations such as, when the device is turned off, when it has low battery, when Change the settings if required it is out of the mobacas broadcasting area, when a microSD card is not inserted...
- Page 206 番組・コンテンツ Set time to obtain ペアレンタル Set a restriction on 情報取得 program/content listing コントロール programs/content geared (Program & information via broadcast. (Parental to certain ages. Content Info Control) Retrieve) ブラウザ (Browser) 自動コンテンツ Set data to be Cookie Set whether to accept 補完...
-
Page 207: 1Seg
● Broadcast wave 1Seg 1Seg is one of broadcast services, and receives radio waves (broadcast waves) that 1Seg is a digital terrestrial TV broadcasting are different from FOMA/Xi service. Therefore, service for mobile devices that allows you to it is not possible to receive at locations where receive data programs along with video and audio. - Page 208 ● About 1Seg/mobacas antenna How to use the 1Seg viewing screen For details on 1Seg/mobacas antenna, see "1Seg/mobacas antenna" (P199). Note • 1Seg audio cannot be output by Bluetooth devices that are not compatible with SCMS-T. • 1Seg is not compatible with the following functions due to copyright protection - Screenshot - QMemo...
- Page 210 Caption area TV broadcast area Display caption when viewing a close- Swipe up/down to switch channels. captioned program. Tap to display the 1Seg viewing screen. Caption area Viewing the data broadcast screen Display caption when viewing a close- captioned program. Tapping "TV broadcast area"...
-
Page 212: Viewing Reservations
Viewing Reservations Note • The start of a program cannot be notified If you make a reservation for a program, an if this terminal power is OFF at the alarm is notified before the program begins. reservation time. From the 1Seg viewing screen, •... -
Page 213: Using Tv Link
Confirming or editing reservation Using TV Link contents Some data broadcasts may show link From the "Reservation list" screen, information (TV link) to related sites. By registering a TV link, it is possible to connect tap a viewing reservation to related sites later. •... - Page 214 1Seg Settings Switching the viewing area From the 1Seg viewing screen, From the 1Seg viewing screen, u "Change area" u "TV Settings" • The "TV Settings" menu appears. Change the settings if required Select the area The viewing area changes. Brightness Adjust the screen brightness.
-
Page 215: Camera
Please be considerate of the privacy of Camera individuals around you when shooting and sending photos using camera-equipped This terminal has a built-in camera that can mobile phones. shoot photos and videos. Before Shooting All photos and videos shot on your terminal are saved to the internal storage or a microSD card. -
Page 216: Notes For Capturing Images
• Shooting a fast moving object may result in Notes for capturing images an image slightly distorted from the image • The Camera employs high precision displayed on the screen at the time of technology, but some pixels or lines may shooting, or the image may be blurred. - Page 217 Time catch shot Shooting a Photo Switch to mode that starts to shoot several photos one second before pressing the You can shoot photos with both horizontal and shutter button. vertical screen. Scene mode Viewing shooting screen Set the scene mode (Normal/HDR/ Panorama/Continuous shot).
- Page 219 Switching cameras Shooting Videos Switch between the front and main cameras. You can shoot videos by switching modes. Switching image quality Videos are shot horizontally. Switch the shooting resolution. Live effect Viewing shooting screen Set visual effects used during shooting. The meanings of marks (icons and others) on Flash the video shooting screen are as follows:...
-
Page 221: Gallery
Gallery Note • The following operations are available on You can display photos or play back videos the photos/videos screen. stored in the terminal that have been obtained :Launch camera to shoot photos or by shooting with the camera or downloading videos. - Page 222 Synchronizing Picasa Album - "Slideshow": Display the photos saved in this terminal in slide show order. You can synchronize Picasa album saved on - "Details": Confirm the details of the shot Google account with Gallery of this terminal. photo or video. From the Home screen, "Gallery"...
-
Page 223: Media Player
Copying Music Files and Media Player Videos to this terminal The "Media Player" application plays music files and video files saved in the internal storage From Media Player, you can play music files or a microSD card. Media Player supports the and video files of your own after copying them following file formats. - Page 224 "Thumbnail"/"Playlist" to switch the list display format between thumbnail display and list display. • From the "Media Player" screen/Music screen/Video screen, u "Exit" to close the Media Player. • For details about MUSIC store, VIDEO store, refer to the DOCOMO website. Application...
- Page 225 Play progress bar Playing Music Drag to play a song from a desired point within the song. In the song list, tap a song you want Cover flow to play Tap to switch between display/not display • The Music screen appears and the song elapsed time, play progress bar, and song is played.
-
Page 226: Playing Videos
Volume bar Playing Videos Adjust the volume by dragging it. From the "Media Player" screen, tap Note • While a song is playing, is displayed in • A list of playable videos saved on the the status bar. internal storage and the microSD card •... -
Page 227: Using Playlists
Note Tap to return to video list. • Tilt this terminal to the side while displaying Elapsed time the Video screen to switch to horizontal Play progress bar screen display so that videos can be Drag to play a video from a desired point displayed on the whole screen. - Page 228 Displaying playlists Creating a playlist From the "Media Player" screen, In the Playlists, "Create new" "Play list" Enter the playlist name u "OK" • Current playlists are displayed. "Add songs to playlist" • The following quick playlists are available. • Tap the "All songs", "Artists", and "Albums" tabs to switch the display list.
- Page 229 Editing playlists Deleting/sorting a playlist In the list of Playlists, tap the In the Playlists, "Edit" playlist that you want to edit • Tap "Delete all playlists" to delete all playlists. • The songs contained in the playlist are • Tap on a playlist to make turn red and displayed.
- Page 230 Setting the Media Player Update Update the Media Player database database. From the "Media Player" screen, Reset Return the Media Player to u "Settings" settings its initial settings. • The "Settings" menu appears. Change the settings if required Audio effect Set effects for when settings playing music.
-
Page 231: Gps/Navigation
In Using GPS conditions caused by the locations of the satellites. • NTT DOCOMO is not liable for any damage • Wireless communication products (mobile caused by failure of GPS system etc. phone or data detector etc.) may intercept •... - Page 232 From the Home screen, terminal "System settings" u "Location • Please check the websites of the GPS services" service provider and DOCOMO for news regarding the usage of positioning provisions Mark a detection method and current locations notifications. Also using Google's Identify location these functions may incur charges.
-
Page 233: Opening Map
Using Map Note • It may take up to ten minutes to determine current locations when the Opening Map GPS functions are used for the first time. You can display present location, search • This terminal is equipped with a GPS another place, or search route by using Google receiver that uses satellite signals to map. -
Page 234: Using Latitude
Search for Route on Map Using Latitude You can view a detailed route to your destination. Google Latitude enables you and your friends From the Home screen, "Apps" u to check each other's locations on maps and "Maps" share status messages with each other. It also enables you to send emails, make calls and search for routes to friend's locations. -
Page 235: Using Navigation
• "STARRED": Search a place with star on Using Navigation Google Map. Google Maps Navigation (beta) is route Note guidance software with voice guidance. • Any operation during driving should be From the Home screen, "Apps" u performed by a passenger. "Navigation"... -
Page 236: Alarm / Clock
Alarm / Clock Alarm Set the alarm sound. sound From the Home screen, "Apps" u Alarm Set the alarm volume. "Alarm/Clock" volume Select either "Dismiss" or "Turn on" when Auto App From "None", "Calendar" or the "Gesture guide" screen appears. Starter "Email", select an application that starts up when the... -
Page 237: Using The Timer
Using the Timer Note • The alarm functions at the time set for "Timer" on the Alarm Clock screen the alarm. Tap "Stop" to stop the alarm. • The Timer screen is displayed, and the Tap "Snooze" to make the alarm function following settings are available. -
Page 238: Calendar
Using the World Clock Calendar You can confirm the date and time for This terminal has a calendar for managing your registered cities in a list. schedule. You can synchronize with scheduler "World clock" on the Alarm Clock constructed by Microsoft Exchange Server or Google calendar if you have Google account. -
Page 239: Changing Calendar Settings
Switching Calendar Display Changing/Deleting Schedule Tap "Day"/ "Week"/ "Agenda" in the Tap "Agenda" of switching display change display box box on the Calendar screen • Swipe left or right in Day or Week view to Tap the schedule to change/delete display the previous or next day or week. -
Page 240: Calculator
Calculator SmartWorld From the Home screen, "Apps" u From the Home screen, "Apps" u "Calculator" "SmartWorld" • Drag or swipe to right and left the • The "SmartWorld" screen opens. part where key is displayed to switch • For the first time activation, tap "Start LG "Advanced panel"... -
Page 241: Polaris Office
.ppt * , .pptx * , 検索 (Search) Input a keyword and tap Microsoft PowerPoint "検索 (Search)" to search (Power Point 97 to PowerPoint .pps, .ppsx, application or video. 2010) .pot, .potx マイアプリ Display downloaded Adobe PDF (Version 1.2 to 1.7) .pdf (My application) applications or video list. -
Page 242: Id アプリ (Id Application)
iD アプリ (iD application) Dictionary "iD" is a convenient electronic money by credit Searching a word clearance scheme. You can enjoy shopping simply and conveniently only by holding Osaifu- From the Home screen, "Apps" u Keitai with credit information set or the iD- compatible card over the IC card reader in "Dictionary"... -
Page 243: Searching From Search Log
Tap a dictionary • Word is registered to word list. On the dictionary screen, • Dictionary is changed. "Wordbook" Searching from search log • "Wordbook" screen appears and registered words are displayed by a list. On the dictionary screen, Tap any of words "History"... -
Page 244: ドコモバックアップ (Docomo Backup)
"Start backup" "OK" This is an application for using " ケータイデー タお預かりサービス (Data security service)" or Enter the docomo apps password u "SD card backup" service. You can back up or "OK" restore data such as phonebook entries. - Page 245 Tap "Add"/ "Overwrite" on "Restore "OK" settings" screen u "Start restore" "OK" Enter the docomo apps password u "OK" • "Restore results" screen is displayed. • Tap "Back to top" to return to "SD card backup". • The imported phonebook is saved on the docomo account.
-
Page 246: 7Notes With Mazec-T
7notes with mazec-T Note • Do not remove the battery pack or You can input characters by handwriting. When microSD card during backing up or you are inputting on the other application, restoring. The data may get broken. you can input with handwriting by changing •... - Page 247 • Touch and hold down on on-screen Save input. Undo the input. keyboard u "Input Method" u "mazec-T Create new memo. Conversion" to switch to mazec-T Select types of character, set details on Conversion screen. mazec. Change input panel. Move cursor position. Insert space.
- Page 248 Sharing/Backing up Memo Setting Memo Format You can send the created memo to mail, You can set the font size, margin of memo, line Twitter, Facebook, or backup by link with space etc. Evernote or Storage. On the memo creating screen, On the memo creating screen, "...
- Page 249 Changing title of memo Setting alarm on memo On the memo creating screen, On the memo creating screen, " メモ情報 (Memo information)" " メモ情報 (Memo information)" • The " メモ情報の編集 (Edit memo • The " メモ情報の編集 (Edit memo information)" screen is displayed. information)"...
-
Page 250: Using Overseas
DOCOMO, with the same phone number and international network operators, and email address. Calls and SMS can be used refer to "Mobile Phone User's Guide with no settings changes. -
Page 251: Available Services
Available Services Confirming before Using Main Confirming before Departure communication 3G850 (GPRS) service Before using this terminal overseas, check the following in Japan. Calls ○ ○ ○ ● Contract ○ ○ ○ Check whether you have applied for WORLD WING. For more details, contact "General Email * ○... -
Page 252: Confirming Overseas
For detail, refer to the "Mobile Phone User's cancellation are available. Guide [International Services]" and in DOCOMO "International service website". ● About screen display • The type of network you are using is indicated by an icon in the status bar on the screen. -
Page 253: After Returning To Japan
● About date & time ● Inquiries If the "Automatic date & time" and "Automatic • If your terminal or docomo mini UIM card is time zone" checkboxes in "Date & time" lost or stolen overseas, contact DOCOMO are marked, the time and time zone of this... -
Page 254: How To Make And Receive Calls At Your
When the call is finished, tap "End" How to Make and Receive Calls at your Destination Note • To call someone in Japan with "Automatic conversion function" in "International Making Calls to Other dial assist" marked, enter area number Countries (including Japan) and phone number u u tap "Converted number". - Page 255 Change the settings if required Making Calls to WORLD WING Users Restricting Activate restricting incoming Deactivate restricting When the other party that you are making calls * a call to is a WORLD WING user, make an Confirm settings international call to Japan even if the other Incoming Activate notification party is in the country in which you are staying.
-
Page 256: Receiving Calls
Receiving Calls Network Remote operation (charged) service* 1, 4 Caller ID notification You can receive calls in the same way as in request service (charged) Japan. Roaming call notification Note (charged) • When you receive a call while using the Roaming guidance (charged) international roaming service, the call Voice mail (charged) -
Page 257: Setting For Overseas Network Connection
Making a Call from Other Setting for overseas Parties network connection ● To have the other party in Japan call to the When you use this terminal overseas, it is country you stay necessary to switch to a network available in Have the other party call you by dialing your the country you stay phone number in the same way as when you... - Page 258 Searching Available Network Note and Setting Manually • If you manually set a network operator to connect, this terminal will not From the Home screen, automatically switch to an available "System settings" u "More..." u network operator when you move out of the service area.
-
Page 259: Automatically Selecting An Available Network
Automatically Selecting an Available Network From the Home screen, "System settings" u "More..." u "Mobile networks" u "Network operators" "Select automatically" Activating Data Roaming From the Home screen, "System settings" u "More..." u "Mobile networks" Mark "Data roaming" checkbox Confirm the content of a caution message, and "OK"... -
Page 260: Appendix / Index
For details, contact a sales outlet such as a • The specifications and appearances are docomo Shop. For details on optional devices, subject to change without notice for upgrade. refer to the related instruction manuals. microSDHC card (16GB) •... -
Page 261: Usb Cable
• Damages caused by using or unavailability USB cable of this product, lost earnings, and third party claims. ■ How to connect • Damages caused as a result of not Insert the microUSB connector following the instructions manual when of USB cable into the microUSB using this product. -
Page 262: Troubleshooting (Faqs)
"Repairs" (in Cord - Japanese only) on the or the last page of USB connector SPCC NIckel this instruction manual or a repair counter (plug/metal) specified by DOCOMO. USB connector - (plug/resin) USB connector - Appendix / Index... -
Page 263: Power Supply
■ Power supply ■ Charging Symptom Check item Symptom Check item Power does • Is the battery pack inserted Cannot • Is the battery pack inserted not turn ON correctly? charge correctly? → P49 • Is the adapter plug and cigar •... - Page 264 Symptom Check item Symptom Check item Cannot • Any call or data Battery • Has this terminal been out usage time is charge communication while charging, of the network service area short or using other functions for for a long time? As this a long time may result in this terminal searches for radio terminal getting hot and the...
- Page 265 • An application that was terminal and microSD card. installed to this terminal docomo • Is docomo mini UIM card after purchasing may mini UIM inserted in the right be causing a problem. If card is not...
- Page 266 (cannot be application. → P166 the power key for 1 activated or error occurs) second or more. 2. After the docomo logo appears, keep pressing the volume key (down) until the vibrator vibrates. When Safe mode starts, "Safe mode"...
- Page 267 • Turn the power off and on, connected or remove and reinsert the Calls cannot • Is this terminal in Airplane (The out of battery or docomo mini UIM be made mode? → P153 service area card. by tapping icon does not •...
- Page 268 ■ Screen ■ Mail Symptom Check item Symptom Check item The display • Has the screen backlight Email is not • Check if "Retrieve interval" is dim timeout been set? → P160 received is set to "Manual" in the • Has the screen brightness automatically account settings.
- Page 269 ■ 1Seg ■ Osaifu-Keitai Symptom Check item Symptom Check item 1Seg cannot • Are you at a location that Osaifu-Keitai • When the battery pack is be viewed is outside of the digital cannot be removed or Omakase Lock terrestrial broadcast used is started, the Osaifu- service area, or where the...
-
Page 270: Overseas Use
Use "Mobile using overseas service (WORLD WING)", Phone User's Guide [International the approximate limit Services]" or DOCOMO of usage fee is set in "International Services website" advance. If the limit is to check whether a service area exceeded, all services or network operator is available. -
Page 271: Bluetooth Function
Symptom Check item Symptom Check item The other party's • Even if the other party has When trying • may appear if image data number is not made a call with notification to view an has been destroyed. displayed/A of the Caller ID set, you may image, different number not be notified of the Caller... - Page 272 ■ Map and GPS Function Symptom Check item Symptom Check item Cannot make • If you call somebody calls from this several times when he or AUTO-GPS • Is AUTO-GPS function terminal when she does not answer or service deactivated due to low connected to is out of the service area, information...
-
Page 273: Error Message
Error Message Description a while communications are not Please available due to network • Service docomo mini UIM card is wait for a congestion. disabled not working properly. If the while(packet) • No SIM card problem is not resolved by... -
Page 274: Smartphone Anshin Remote Support
DOCOMO. (in Japanese only) Warranty and After- • This service is not available when docomo Sales Service mini UIM card is not inserted, when using the international roaming, or in the Airplane mode. -
Page 275: After-Sales Service
(earphone/microphone terminal), Bring your terminal to a repair counter specified by LCD, or cracked body could be the case as DOCOMO. Repairs are accepted during business well). hours of a repair counter. Also, you must bring the * Since these conditions are outside the warranty. - Page 276 • Glued decorations on this terminal using adhesion bond, etc. • Change the parts such as exterior to other than DOCOMO standard parts. - Malfunction and damage due to modifications will be repaired at the owner's expense even during the warranty period.
- Page 277 • When the repair is executed, MAC address of downloaded or created by you may be Wi-Fi/Bluetooth address in this terminal may changed or lost. DOCOMO shall have no be changed regardless of repaired part. liability for any change or loss of any kind.
-
Page 278: Updating Software
For updating software, both LTE/3G software. Connecting the charging cable is connection and Wi-Fi connection are available. recommended while updating. The NTT DOCOMO website provides • Software cannot be updated in the following information when updating software is required. circumstances. -
Page 279: Updating Software Automatically
(model name and manufacturing numbers) are automatically sent to a software update server managed by DOCOMO. DOCOMO shall not use this information for any purpose other than software update. • If the software update fails, you cannot turn "Automatic Update" / "Manual on this terminal. - Page 280 Select an action When software update is required • "OK" : Return to the Home screen. Start is displayed on the status bar when update the update at a preset time. file is automatically downloaded. • "Set time" : Scheduled update → •...
-
Page 281: Updating Software Now
Start installing automatically after Updating Software now approximately 3 seconds of "Ready Start software update immediately. for update. Please keep application To start software update, you can start from clear." the notice screen or from menu. • Tap "OK" to start the installation From the Home screen, immediately. - Page 282 Scheduled Update of Software Note • All key operations are disabled during the If you want to schedule the installation of the update. The update cannot be stopped either. update file for a different time, you can set the • In case installing the software is not operated software update time in advance.
-
Page 283: Updating Lg Software
Confirming Update Updating LG Software LG Software update is a function that connects Confirming update automatically to the network to check whether software needs to be updated, downloads and updates Automatically check if there is a new software. LG Software when required. "Check automatically"... -
Page 284: Downloading Software
Confirming update manually Downloading Software Check if there is a new software manually. From the Home screen, Downloading now "System settings" u "About phone" Tap "Download" in "Software update u "LG Software update" available" pop-up menu "Check now for update" •... -
Page 285: Software Installation
Software Installation Note • If "Pause" in "Downloading" pop-up menu is tapped, download pauses. Tap Installing now "Resume" to restart download. Tap "Install now" in "Install software update" pop-up menu Downloading later • LG Software update starts. Tap "Later" in "Software update •... - Page 286 Installing later Note • LG Software update is not available Tap "Install later" in "Install software during roaming. update" pop-up menu "1 hour later"/"4 hours later"/"8 hours later"/"24 hours later"/"Install now" in "Set reminder" pop-up menu • Postponement of installation can be conducted only once.
-
Page 287: Main Specifications
Main Specifications Charging AC Adapter Approx. 240 minutes time (Desktop Holder: ■ Terminal Approx. 270 minutes) Model name L-02E DC Adapter Approx. 240 Dimensions Approx. 132 mm minutes × 66 mm (H × W × D) × 9.9 mm 1Seg watching time Approx. - Page 288 Effective pixels Main camera : Bluetooth Compatible Bluetooth standard Approx. 8,200,000 Ver.4.0 * Bluetooth pixels version Front camera : Approx. 1,400,000 Output Bluetooth standard pixels version Power Class 1 Recorded pixels Main camera : Line-of-sight Within approx. 10 Approx. 8,100,000 (maximum) communication meters...
- Page 289 • Continuous call time is an estimate of the ■ Battery pack battery life during a continuous call with Battery type Lithium-ion battery normal signal reception. • Continuous standby time is an estimate of the Nominal voltage 3.8 V battery life during a continuous standby with Nominal capacity 2,100 mAh normal signal reception.
-
Page 290: Specific Absorption Rate (Sar) Of Mobile
Estimate number of photos and video Specific Absorption Rate (SAR) of Mobile Phones ■ Number of shooting photos (estimate) Number of shooting photos This model L-02E mobile phone complies Resolution saved in microSD card with Japanese technical regulations and (1GB) international guidelines regarding exposure to radio waves. - Page 291 Association of Radio Industries and Businesses with a carrying case or a wearable accessory Website : approved by NTT DOCOMO, INC. * In case http://www.arib-emf.org/index02.html you are not using the approved accessory, (in Japanese only) please use a product that does not contain NTT DOCOMO, INC.
-
Page 292: Radio Frequency (Rf) Signals
Technical regulations are defined by the Radio Frequency (RF) Ministerial Ordinance Related to Radio Signals Law (Article 14-2 of Radio Equipment Regulations). THIS MODEL PHONE MEETS THE U.S. Regarding the method of measuring SAR GOVERNMENT'S REQUIREMENTS FOR when using mobile phones in positions EXPOSURE TO RADIO WAVES. - Page 293 power level, the actual SAR level of the phone The FCC has granted an Equipment while operating can be well below the maximum Authorization for this model phone with all value. This is because the phone is designed to reported SAR levels evaluated as in compliance operate at multiple power levels so as to use with the FCC RF exposure guidelines.
-
Page 294: Declaration Of Conformity
Declaration of Wi-Fi This device is capable of Caution operating in 802.11a/n mode. Conformity For 802.11a/n devices operating in the frequency range of 5.15 - The product "L-02E" is declared to conform 5.25 GHz, they are restricted for with the essential requirements of European indoor operations to reduce any Union Directive 1999/5/EC Radio and potential harmful interference for... - Page 295 European Union Directives The SAR limit for mobile phones used by the public is 2.0 watts/kilogram (W/ Conformance Statement kg) averaged over ten grams of tissue, recommended by The Council of the Hereby, LG Electronics Inc. European Union. The limit incorporates declares that this product is a substantial margin of safety to give in compliance with :...
-
Page 296: Important Safety Information
PETROL STATIONS Important Safety Obey all posted signs with respect to the use Information of wireless devices or other radio equipment in locations with flammable material and AIRCRAFT chemicals. Switch off your wireless device Switch off your wireless device when boarding whenever you are instructed to do so by an aircraft or whenever you are instructed to do authorized staff. -
Page 297: Export Administration Regulations
Hearing Aids Export Administration Some digital wireless phones may interfere Regulations with some hearing aids. In the event of such interference, you may want to consult Japan Export Control Regulations ("Foreign your hearing aid manufacturer to discuss Exchange and Foreign Trade Law" and relevant alternatives. -
Page 298: Intellectual Property Right
Bluetooth SIG, INC. and any use Refrain from taking portraits of other people of such marks by NTT DOCOMO, INC. is under and uploading such portraits to websites using license. Other trademarks and trade names this product without their consent, as this are those of their respective owners. - Page 299 • Microsoft ® , Windows ® , Windows Vista ® , and Others Windows Media are trademarks or registered ® trademarks of Microsoft Corporation in the • Rovi, G-GUIDE, G-GUIDE MOBILE and G-Guide United States and/or other countries. related logos are trademarks or registered •...
-
Page 300: Unlocking Sim
- Recording videos that are compliant with telecommunication carriers to be used. the standard of MPEG-4 Visual (hereinafter • Unlocking SIM is available at a docomo Shop. referred to as MPEG-4 Video) • A fee is required to unlock the SIM. -
Page 301: Index
About phone ……………………………………… 176 Backing up ……………………………………… 242 Accessibility ……………………………………… 174 Copying contacts from Google account to Access Point ……………………………………… 157 docomo account ……………………………… 243 Checking ………………………………………… 157 Restoring ……………………………………… 243 Initializing ……………………………………… 158 Backlight ……………………………………………… 59 Setting an additional access point ……… 158 Backup &... - Page 302 Bluetooth …………………………………… 32, 182 Calling ……………………………………………… 116 Connecting ……………………………………… 184 Call Log ………………………………………… 122 Notes on using ………………………………… 182 docomo phonebook ………………………… 127 ON/OFF ………………………………………… 184 Emergency call ………………………………… 118 Pairing …………………………………………… 184 Entering a pause ……………………………… 117 Pass code (PIN) ……………………………… 183 Making a Call ……………………………………...
- Page 303 …………………………………………… 190 Deleting ………………………………………… 131 dmenu ……………………………………………… 190 Editing …………………………………………… 129 docomo backup ………………………………… 242 Making Calls/Sending Emails/Chatting docomo mini UIM card ………… 21, 31, 46, 169 …………………………………………………… 130 Inserting …………………………………………… 46 Registering……………………………………… 129 Removing ………………………………………… 47 Searching ……………………………………… 129 docomo Palette UI ………………………………...
- Page 304 Electronic Medical Equipment ………………… 22 FAQ ………………………………………………… 260 Email ………………………………………………… 140 File formats ……………………………………… 287 Adding an Account …………………………… 142 File Management ………………………………… 177 Changing the Setting of Email Account File Operation ………………………………… 177 …………………………………………………… 143 Folder and File Operations ………………… 179 Creating and Sending an Email ……………...
- Page 305 Home screen ……………………………… 105, 161 Changing Wallpaper ………………………… 109 Customizing icons ……………………………… 93 Main Specifications …………………………… 285 How to Use this Manual ………………………… 3 Making an international call ………………… 119 Calls to fixed-line telephone ……………… 120 Calls to mobile phone ……………………… 120 Managing Applications …………………………...
- Page 306 mobacas …………………………………………… 198 Onscreen Keyboard ……………………………… 66 mobacas antenna ……………………………… 45 10-key keyboard ………………………………… 66 Scheduling ……………………………………… 202 Arrow key mode ………………………………… 68 Searching for programs/content ………… 202 Changing character entry settings ………… 71 Settings ………………………………………… 203 Flick input ………………………………………… 70 Viewing programs/content …………………...
- Page 307 PIN code …………………………………………… 170 Related Devices ………………………………… 258 Changing ………………………………………… 171 Remote operation settings …………………… 126 Enabling ………………………………………… 170 Enter ……………………………………………… 171 PIN locked ………………………………………… 171 Safe mode ………………………………………… 263 PIN unblocking key (PUK) …………………… 170 Safety Precautions ………………………………… 9 Play Store …………………………………………...
- Page 308 Switching Application Screen Display …… 114 Using Motion Gesture …………………………… 62 Switching Home Application ………………… 105 Moving Home screen items ………………… 62 Symbols ……………………………………………… 71 Muting ringtone ………………………………… 63 System ……………………………………………… 174 Stopping alarm …………………………………… 63 Using Overseas ………………………………… 248 After Returning to Japan ……………………...
- Page 309 Wi-Fi Tethering …………………………………… 155 Setting timeout ……………………………… 156 Setting Wi-Fi access point ………………… 155 VPN ………………………………………………… 156 Windows Media Player ………………………… 177 Adding …………………………………………… 156 Connecting ……………………………………… 157 Wireless LAN (WLAN) ……………………… 34, 75 Deleting ………………………………………… 157 WIRELESS & NETWORKS …………………… 152 Editing ……………………………………………...
- Page 310 * When using pc, You need your docomo ID/password in order to access this page. * If you do not have or you have forgotten your network password and "docomo ID/password", contact "General Inquiries" on the last page of this manual.
- Page 311 Forwarding Service (P125) . We collect mobile phones and related equipment that you no longer need even if it is not a docomo product. Please bring them to your local docomo Shop. * Acceptable Products: Mobile phones, PHS terminals, battery packs, battery...
- Page 312 ● If you lose your terminal or have it stolen, immediately take the steps necessary for suspending the use of this terminal. ● If this terminal you purchased is damaged, bring your terminal to a repair counter specified by DOCOMO after returning to Japan.
- Page 313 '12.11 (1st Edition) MFL67694102...
Need help?
Do you have a question about the L-02E Optimus life and is the answer not in the manual?
Questions and answers