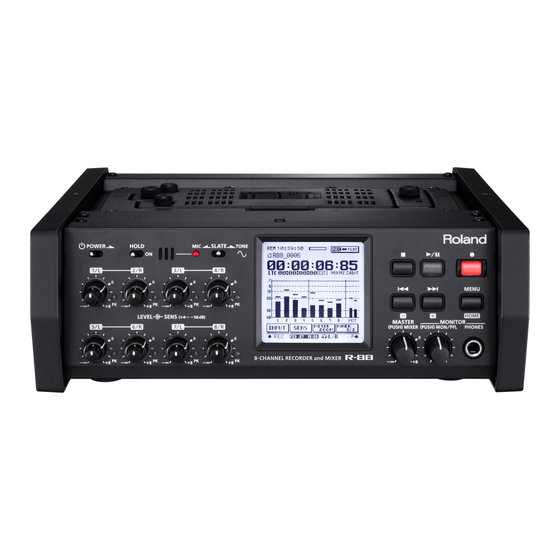
Roland R-88 Owner's Manual
8-channel recorder and mixer
Hide thumbs
Also See for R-88:
- Specification (3 pages) ,
- Brochure & specs (3 pages) ,
- Midi implementation (3 pages)

Related Manuals for Roland R-88


Summary of Contents for Roland R-88
- Page 1 Copyright © 2013 ROLAND CORPORATION All rights reserved. No part of this publication may be reproduced in any form without the written permission of ROLAND CORPORATION.
-
Page 2: Using The Unit Safely
Roland Service Center, or an Do not repair or replace parts by yourself authorized Roland distributor, as listed Use only the included power cord on the “Information”... - Page 3 AC adaptor and all cords coming country, consult with your retailer, the from external devices. • If fluid has leaked from a battery, nearest Roland Service Center, or an make sure not to touch it with your authorized Roland distributor, as listed bare hands.
-
Page 4: Important Notes
Roland assumes no liability (musical work, video work, broadcast, live power on all your equipment before you concerning such loss of data. -
Page 5: Table Of Contents
Using the R-88 as an Audio Interface ........ -
Page 6: Overview
You can You can specify which controls to disable by using <SYSTEM do this during playback or while stopped. When making various settings on the R-88, this button increases the value of the selected SETUP>Ú<HOLD> (p. 66). parameter. -
Page 7: Side Panel (Left)
You can connect a commercially available USB flash drive to this port. A project recorded on the R-88 can be copied to your USB NOTE flash drive as a backup. A backup from your USB flash drive can also be loaded into the R-88. -
Page 8: Side Panel (Right)
Overview Side Panel (Right) Analog input (IN 1/L–IN 8/R) jacks [PHANTOM] switch These are analog audio input jacks equipped with mic preamps. These switches turn on/off the phantom power that is supplied to each XLR input jack. Each of the XLR input jacks 1-8 can be used as a monaural input, providing a total of 8 input channels. -
Page 9: Top Panel
When the unit is grounded, a slight hum may occur, depending on the particulars of your installation. If you are unsure of the connection method, contact the nearest Roland Service Center, or an authorized Roland distributor, as listed on the “Information” sheet * Unsuitable places for connection •... -
Page 10: Items In The Screen
Overview Items in the Screen Home Screen The screen that appears when you turn on the power is called the home screen. The home screen will switch in tandem with record or playback operations. If you want to switch screens while stopped, touch in the upper right of the screen. - Page 11 Overview Buttons in the home screen By touching the buttons in the bottom of the record/stop or playback home screens, you can edit the various input settings, specify how the level meters will be displayed, and assign markers within the project. During recording <INPUT>...
-
Page 12: Menu Screen
Overview MENU Screen This screen will appear when you press the [MENU] (HOME) button. In this manual, operations starting from the MENU screen are expressed as follows. <Example> Select <REC/PLAY SETUP>, and then select <REC FILE>. [MENU]Ú<REC/PLAY SETUP>Ú<REC FILE> MENU This is the main menu screen. - Page 13 OUTPUT SETUP USB SETUP p. 28 p. 32 p. 60, p. 63 Make input settings. Make output settings. Make settings for using the R-88 as a USB audio interface. TIMECODE/TIME MENU MEMORY MENU SYSTEM SETUP p. 66 p. 47, p. 26 p.
-
Page 14: What Is A Project
BWF and iMXL The WAV files recorded by the R-88 are in BWF (Broadcast Wave On the R-88, the data that you record and play back are handled in Format). The recording start time and the following iXML metadata units called “projects. ”... -
Page 15: Quick Guide
Quick Guide Getting Ready This Quick Guide explains basic operation. For details, refer to the pages shown by the page XX symbol. Preparing an SD Card page 26 Insert a commercially available SD card. Open the rubber flap located on the left side panel . Label facing upward * The cover may break if you use excessive force. - Page 16 Formatting will begin. When formatting is finished, the display will indicate “COMPLETED!. ” Specifying the Date and Time page 26 Here’s how to set the date and time of the R-88’s internal clock. Choose [MENU] <TIMECODE/TIME> . Specify the date and time .
- Page 17 This section explains the basic settings for recording, and the procedures for recording and playback. Connections page 28 Connect your recording mics or recording sources to the R-88’s input jacks. CD player or other audio source Dynamic Mic Condenser Mic...
- Page 18 Quick Guide Settings for the Audio File to be Recorded page 35 Choose the type of audio file to be recorded (mono/stereo), and choose the sampling rate and bit depth. Choose [MENU] <REC/PLAY SETUP> . Touch the <SAMPLE RATE> item . Ú...
- Page 19 Ú Touch the name of the project or folder that you want to Use a commercially available USB cable to connect the delete . R-88 to your computer . The recorded project will blink. Touch <STORAGE> . Touch <DELETE> .
- Page 20 Mixer The R-88 allows you to create a two-channel stereo mix of the audio from the IN 1–IN 8 and DIGITAL IN inputs during recording, or from the audio of the tracks of a previously recorded project. This section explains basic operation of the mixer functionality.
- Page 21 Quick Guide Pan Settings page 44 Here’s how to adjust each input’s pan during recording, or the pan of each track during playback. Touch to access the pan adjustment screen . This will adjust “MS-MIC WIDE” on channels for which the MS mic decoder (p.
- Page 22 . 46 page 35 Here’s how to adjust the output level to achieve the You can record a separate two-channel stereo mix appropriate level when the R-88 is connected to an project simultaneously while recording a multitrack external device. project.
-
Page 23: Setup
Removing the battery case Preparing the Power Supply Although it is possible to replace the batteries without removing The R-88 can operate using an AC adaptor, batteries, or an external the battery case, battery replacement will be easier if you remove power device. -
Page 24: Connecting The Ac Adaptor
If you are using an AC adaptor, you must set the external power settings can be changed. supply select switch to “AC ADAPTOR. ” * Read the following to set the final voltage for the R-88. Setting the final voltage Choose [MENU] <SYSTEM SETUP>... -
Page 25: Turning The Power On/Off
Setup Turning the Power On/Off Preventing the Power from * Once everything is properly connected (p. 28, p. 32), be sure to Automatically Turning Off (AUTO OFF) follow the procedure below to turn on their power. If you turn on equipment in the wrong order, you risk causing malfunction or equipment failure. -
Page 26: Setting The Date And Time
When you’ve finished setting all items, touch <OK> . Switch on the power (p . 25) . MEMO If an unformatted SD card is inserted in the R-88, the screen will indicate “SD Unformatted. ” By touching <CANCEL> you can return to the previous screen without making settings. -
Page 27: Formatting An Sd Card
• Never insert or remove an SD card/SDHC card while this unit’s power is on. Doing so may corrupt the unit’s data or the data on the SD card/ SDHC card. • Some memory card types or memory cards from some manufacturers may not record or play back properly on the R-88. • Carefully insert the SD card/SDHC card all the way in—until it is firmly in place. -
Page 28: Input Settings
Input Settings The R-88’s right side panel provides eight analog XLR input jacks, while its left side panel provides one digital input jack; you can record from up to eight inputs simultaneously. Connections CD player or other audio source Dynamic Mic... -
Page 29: Audio Input From A Digital Device
Input Settings Input level and sensitivity link on/off Low Cut Filter Settings The input level and sensitivity settings can be linked for each pair When using a mic, you can use a low cut filter to reduce unwanted IN 1 and IN 2, IN 3 and IN 4, IN 5 and IN 6, and IN 7 and IN 8. This is low-frequency noise. -
Page 30: Limiter Settings
Input Settings Threshold and release time settings Touch the input whose cutoff frequency you want to specify . You can adjust the level at which the limiter will be applied (“threshold”), and the time over which the compression effect disappears after the signal has fallen below the threshold level (“release time”). -
Page 31: Input Level And Input Sensitivity Settings
The R-88 lets you create four such groups. Here’s how to adjust the sensitivity and input level of each input. -
Page 32: Output Settings
Output Settings The R-88 provides a DIGITAL OUT jack and analog output jacks (MIX L/OUT 1, MIX R/OUT 2) on the left side panel, and analog output jacks (OUT 3– OUT 8) on the rear panel. You can adjust the output audio and output level for each jack. -
Page 33: Switching The Maximum Output Level Of The Mix Out (Stereo)
Output Settings Select the audio (track) that you want to output . Switching the Maximum Output Level of the MIX OUT (STEREO) jack You can switch the maximum output level (2 Vrms/-30 dBu) of the left side panel’s MIX OUT (STEREO) jack. Choose [MENU] <OUTPUT SETUP>... -
Page 34: Monitor Settings
REFERENCE The audio being input from IN 1–IN 8 can be monitored individually without passing through the mixer section. “R-88 Block Diagram” (p. 74) Touch one of the buttons below “PFL” to select the input MEMO that you want to monitor . -
Page 35: Recording/Playback
Recording/Playback Recording Settings Choosing the Project Naming Method Here you can choose whether to name the project by date or by a You can specify the type of file that will be recorded, the recording specified scene name and sequential number. source, the sampling rate, and recording format. -
Page 36: Pre-Recording
To confirm the edited name, touch <OK>. If you decide to cancel, touch <CANCEL>. MEMO • On the R-88, you can only rename file names that consist of ASCII characters (single-byte alphanumeric characters). Choose the number of seconds that will be captured prior •... -
Page 37: Bit Depth
Recording/Playback Touch the desired sampling rate . Basic Operation for Recording Stop Play/Pause Record Bit Depth Here you can select the bit depth of the recorded data. Press [ ] (REC) button . Choose [MENU] <REC/PLAY SETUP> <BIT DEPTH> . Ú... -
Page 38: Marker
Recording/Playback Assigning a marker to a previously recorded project Marker In the playback home screen (p . 10), touch <MARK> . Here’s how to assign a marker within the project. If you’ve assigned markers, you can quickly move to a previously marked location during playback. -
Page 39: Basic Operation For Playback
Recording/Playback Basic Operation for Playback Playback Settings You can specify the order in which projects will play, and how Stop Play/Pause Record repeat playback will occur. PLAY MODE You can specify how the projects will be played. In addition to playing projects consecutively from the first project, you can play just the selected project. -
Page 40: Play Repeat
Recording/Playback PLAY REPEAT AB REPEAT Here’s how to make the project play repeatedly for the selected play The AB Repeat function lets you repeatedly play a specified portion mode. of a project. Choose [MENU] <REC/PLAY SETUP> <PLAY REPEAT> . Play the project . Ú... -
Page 41: Ms Mic Settings
Recording/Playback Touch the pair whose level you want to adjust, and move MS Mic Settings the slider left or right . You can use MS mics that can directly output the mid and side signals. An MS mic creates stereo sound by combining sound from a main microphone (unidirectional) that records central sounds (mid-signal: M) and a bidirectional microphone that records lateral sounds (side signal: S). -
Page 42: Using A Footswitch To Remotely Control Recording Or Playback
Recording/Playback Using a Footswitch to Remotely Control Recording or Playback If a footswitch (BOSS FS-6 or FS-5U; sold separately) is connected, you can use your foot to control operations such as playback, recording, and rewind. Side Panel (Left) CONTROL 1,2 jack One of these can be connected. -
Page 43: Mixer
Mixer The MIXER screen allows you to create a two-channel stereo mix, Adjusting the MIX LEVEL during recording from the audio coming into each input, or during playback from the audio recorded on each track. Here’s how to adjust the level of each channel. MIXER Screen In the MIXER (EDIT) screen, touch a slider and drag it up or down to adjust the level . -
Page 44: Pan
Mixer Touch the slider and drag it left or right to adjust the pan . Here’s how to adjust the pan of each channel. Touch to switch to the pan adjustment screen . Pan settings will have the following effect on the volume that is output to master. -
Page 45: Link On/Off
Mixer Touch <EQ> for the channel whose setting you want to LINK ON/OFF turn on/off . Here’s how to turn stereo link on/off. If link is on, fader values, mute on/off, and EQ settings will be linked. Touch Editing the EQ Touch <PRM>... -
Page 46: Master Limiter
Mixer MASTER LIMITER Adjusting the Output Level Here’s how to make settings for the master limiter. Here’s how to adjust the output level so it’s appropriate for the external device that’s connected. Touch the MST area on the level meter . Activate the slate tone (p . -
Page 47: Timecode
* Recording will start immediately when valid timecode is received. EXT SYNC REC * The R-88 will also respond to the [ ] (REC) button and the [ ] (STOP) button. * If external timecode stops being input, automatically jammed internal timecode will be recorded. -
Page 48: Frame Rate
TIMECODE FRAME RATE TIMECODE OUTPUT Here’s how to specify the frame rate. Here’s how to specify the timecode mode to be output from the TIMECODE OUT jack Choose [MENU] <TIMECODE/TIME> <TIMECODE Ú Ú Choose [MENU] <TIMECODE/TIME> <TIMECODE SETUP> <FRAME RATE> . Ú... -
Page 49: Internal Timecode
TIMECODE Internal Timecode Manually Jamming to External Timecode Here’s how to set the time of the internal timecode. Choose [MENU] <TIMECODE/TIME> <SET INT TC> . Ú Ú Here’s how you can read the timecode being output from a device connected to the TIMECODE IN jack, and apply it to the <CURRENT> Touch the number that you want to edit, and use (current time) of the internal timecode. -
Page 50: Slate
• If the slate mic’s track setting is ON, it will be output to all destinations (recorder, OUTPUT jacks, and USB). Output • For details about slate mic and slate tone routing, refer to ”R-88 Explanation destination Block Diagram” (p. 74). -
Page 51: Project And Folder Operations
Project and Folder Operations Folder operations The R-88 stores recorded projects on the SD card. The “Finder” screen provides various functions for listing, deleting, or copying these projects. You can also create folders and move Choose [MENU] <FINDER> . Ú... -
Page 52: Opening A Project
Project and Folder Operations Opening a Project Copying a Project Here’s how to select and play a project from the list of recorded Choose [MENU] <FINDER> . Ú projects. When you select a folder, the current location will change to the Touch the name of the project that you want to copy . -
Page 53: Moving A Project
Project and Folder Operations Moving a Project Deleting a Project or Folder Choose [MENU] <FINDER> . Choose [MENU] <FINDER> . Ú Ú Touch the name of the project that you want to move . Touch the name of the project or folder that you want to delete . -
Page 54: Renaming A Project Or Folder
To confirm the edited name, touch <OK>. If you decide to cancel, touch <CANCEL>. MEMO • On the R-88, you can only rename file names that consist of ASCII characters (single-byte alphanumeric characters). • You cannot rename a file name that contains double-byte characters such as Japanese. -
Page 55: Repairing A Project
Project and Folder Operations Repairing a Project Creating a Folder/Sorting Projects If you inadvertently disconnect the adaptor or remove the SD card You can create folders on the SD card to manage your projects. You during recording, the project will be damaged and unplayable. can also sort the projects in the root directory or in a folder. -
Page 56: Creating A Folder Within A Folder
Project and Folder Operations Creating a Folder Within a Folder Sorting Projects Here’s how to create a new folder within an existing folder. Here’s how to sort the files alphabetically or in order of their date. Choose [MENU] <FINDER> . Choose [MENU] <FINDER>... - Page 57 Project and Folder Operations Choose the desired sort mode . Mode Explanation NAME Sort by name. DATE (FROM OLDEST) Sort from the oldest project. DATE (FROM NEWEST) Sort from the newest project. MEMO If you sort by name, the files will be sorted according to the following rules.
-
Page 58: Backing Up And Loading The R-88'S Settings
Backing Up and Loading the R-88’s Settings You can back up the R-88’s settings to a USB flash drive or SD card. Loading a Backup into the R-88 Backed-up settings also can be restored to the R-88, or loaded into a different R-88 unit. -
Page 59: Drive
Copying a Project to USB Flash Drive / Loading from USB Flash Drive Specify the copy-destination media . In the [MENU]Ú<MEMORY>Ú<USB MEMORY> menu, you can copy a project from the SD card to a USB flash drive, or load a project from a USB flash drive into the SD card. -
Page 60: Connecting To Your Computer Via Usb
Connecting to Your Computer via USB If you use an USB cable to connect the R-88 to your computer, you’ll USB Connection Mode Setting be able to do the following things. Storage When the R-88 is connected to your computer via a USB cable, you can specify whether it will operate as a storage device or as an audio interface. -
Page 61: Exchanging Files With Your Computer (Storage)
USB cable to connect the R-88 to your computer. WAV files can be copied from the R-88 to your computer, or from your computer to the R-88. To copy files, use your computer to drag and drop them. -
Page 62: Disconnecting From Your Computer
NOTE Do not switch off the R-88’s power, disconnect the USB cable, Stop the connection . or remove the SD card while the R-88 is connected to your When the “NO NAME” or “Unnamed” icon disappears from the computer. desktop, you can disconnect the USB cable that’s between the R-88 and your computer. -
Page 63: Using The R-88 As An Audio Interface
Connecting to Your Computer via USB Using the R-88 as an Audio Interface The audio input from the R-88 can be recorded via USB into software on your computer. At the same time, recording and playback can be carried out on the R-88. -
Page 64: Installing The Usb Driver
Installing the USB Driver Listening to the Computer’s Playback Through the R-88 In order to use the R-88’s AUDIO I/F mode, you must first install the USB driver in your computer. Audio played back by your computer can be heard via USB through Install the USB driver in your computer . -
Page 65: Parameter List
Parameter List MENU Screen (p. 12) Category Menu item / Effect Value (default value: bold) page REC FILE MONO, STEREO p. 35 Selects the type of file to be recorded. MIX REC OFF, ON p. 35 Specifies whether a separate two-channel mix project will also be recorded when recording a multitrack project. - Page 66 Specifies the response speed of the [STOP] button. IMMEDIATE, HOLD 2 Sec − By setting this to “HOLD 2 Sec, ” it lets you prevent the R-88 from stopping in the event that your hand accidentally brushes against the [STOP] button.
- Page 67 PANEL CALIBRATION − – Calibrates the response position of the touch panel. FACTORY RESET − – Resets the R-88 to the factory-set condition. Home Screen (p. 10) Category Menu item / Effect Value (default value: bold) page DIGITAL IN: OFF, ON INPUT SW IN 1–IN 2: OFF, ON...
- Page 68 Parameter List MIXER Screen (p. 43) Category Menu item / Effect Value (default value: bold) page LINK 1/2, 3/4, 5/6, 7/8 OFF, ON p. 45 Turns stereo link on/off. MUTE OFF, ON p. 44 Turns mute on/off for each channel. OFF, ON p.
-
Page 69: Error Messages
The SD card is locked. Remove the SD card and turn off the Lock setting. Writing to the SD card could not be performed fast enough. Please use an SD card that is known to work with the R-88. In some... -
Page 70: Troubleshooting
USB. Make sure that the file name is assigned correctly. The R-88 cannot use files that have a name that begins with a “. ” (period). p. 35, p. 54 Can’t play back... - Page 71 The display will be dimmed if no operation is performed during the specified Display Timer interval. p. 66 When you reset the R-88 to its factory settings, all settings made using the “MENU” screen or the like will return to their p. 12, p. 65 original values.
-
Page 72: Specifications
Specifications Roland R-88: 8-CHANNEL RECORDER and MIXER Recorder Part 44.1, 48, 88.2 and 96 kHz 8 channels + 2 channels (stereo mix from built-in mixer) Channels Sampling Frequency 192 kHz 4 channels Format BWF (mono, stereo) Data Type Sampling Frequency 44.1, 48, 88.2, 96, 192 kHz... - Page 73 Owner’s Manual, AC adaptor Options (sold separately) R-88 carrying (CB-R88), Footswitch (BOSS FS-5U), Dual Footswitch (BOSS FS-6), Footswitch cable (PCS-31L) * 0 dBu = 0.775 Vrms * In the interest of product improvement, the specifications and/or appearance of this unit are subject to change without prior notice.
-
Page 74: R-88 Block Diagram
R-88 Block Diagram Detailed block diagram INPUT p. 28 INPUT 1-8 PFL 1-8 DIGITAL Digital In Input SW Peak SENS PEAK MS (REC) Level Input SW IN 1 Sens Level Link 1/2 IN 2 IN 3 Sens Level Link 3/4... - Page 75 R-88 Block Diagram RECORDER p. 35 SLATE MIC, TONE Input Rec SW (=Input SW) Meter Track 1 Track 2 Track 3 Track 4 Track 5 Track 6 Track 7 Track 8 2MIX L, R p. 35 MIX REC p. 76 p.
- Page 76 R-88 Block Diagram RECORDER SELECTOR block diagram SLATE TONE ROUTING p. 50 TRACK 1 SLATE SW: /REC MIC SW /OUT /OFF /REC+OUT from SLATE MIC /TONE to RECORDING TRACK 1 from INPUT 1 from SLATE TONE OUTPUT SELECTOR block diagram OUT 1/2 MODE: p.
-
Page 77: Index
Index <A-B> button ........11 <MARK>... - Page 78 Compliance Information Statement Model Name : R-88 Type of Equipment : Portable Recorder Responsible Party : Roland Corporation U.S. Address : 5100 S. Eastern Avenue, Los Angeles, CA 90040-2938 Telephone : (323) 890-3700 Model Name : V-STUDIO 20 (Model Number: VS-20)
- Page 79 For EU Countries For China...
Need help?
Do you have a question about the R-88 and is the answer not in the manual?
Questions and answers