Table of Contents
Advertisement
Advertisement
Table of Contents

Related Manuals for Simrad RS90


Summary of Contents for Simrad RS90
- Page 1 RS90 Installation Manual ENGLISH simrad-yachting.com...
- Page 3 Simrad Electronics. Any unauthorized commercial distribution of this manual is strictly prohibited. Simrad Electronics may find it necessary to change or end our policies, regulations, and special offers at any time. We reserve the right to do so without notice. All features and specifications subject to change without notice.
- Page 4 MMSI and license information You must obtain a user Maritime Mobile Service Identity (MMSI) and enter it into your RS90 radio in order to use the DSC functions. Similarly for the Automatic Terminal Information Service (ATIS) MMSI. Contact the appropriate authorities in your country. If you are unsure who to contact, consult your Simrad dealer.
-
Page 5: Fcc Statement
Simrad recommends that you check the requirements of your national radio communications authorities before operating DSC functions. RF emissions notice This equipment complies with FCC radiation exposure limits set forth for an uncontrolled environment. This device’s antenna must be installed in accordance with provided instructions; and it must be operated with minimum 96 cm spacing between the antennas and all person’s body (excluding extremities of hands, wrist and feet) - Page 6 This ISM device complies with Canadian ICES-001. Maintain a minimum separation of 2.5 cm (1 inch) from the face. Cet appareil ISM est conforme à la norme NMB-001 du Canada. Maintenir une distance minimum de 2,5 cm (1 inch) de la surface. RS90 Installation Manual...
- Page 7 Important safety information Read carefully before installation and use Warning: Indicates a potentially hazardous situation that could result in death or serious injury. Caution: Indicates a potentially hazardous situation that could result in minor or moderate injury. RS90 Installation Manual...
-
Page 8: Table Of Contents
Installing a wired handset cradle Installing a handset cable connector External speakers installation options Transceiver external connectors Transceiver internal connectors Setting up the radio NMEA 2000 Network NMEA 2000 Network Diagram Appendix 1 - Accessories Contents | RS90 Installation Manual... -
Page 9: About This Manual
Installation Describes the mounting instructions and electrical connections. ¼ Notes • Different setups of the RS90 marine VHF radio are provided for different countries, depending on the VHF radio regulations of each country. • Diagrams in this manual are not to scale. -
Page 10: System Overview
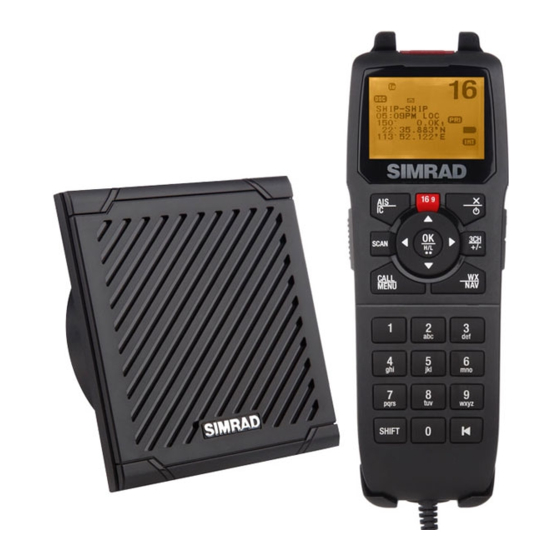
System Overview Introduction The Simrad RS90 VHF radio is a comprehensive solution for marine VHF radio applications. The radio comprises: • RS90 VHF transceiver • One wired handset as standard, and optionally up to 3 more wired handsets. (Maximum of 4 wired handsets in total) •... -
Page 11: System Overview Diagram
System overview diagram 12 VDC | 11 System Overview | RS90 Installation Manual... -
Page 12: Preparation
Digital Selective Calling (DSC) function of this radio. Consult your local maritime authority or radio spectrum authority to obtain your MMSI. Checklist The following items are included in the RS90 radio package: Wired handset • HS90 wired handset with cradle •... - Page 13 • Installation Manual • Warranty Card • DSC Warning Label • Declaration of Conformity document (where applicable) ¼ Note: A VHF antenna is not provided by Simrad. An antenna with a PL259 plug is required. Consult your Simrad dealer for advice if required. | 13 Preparation | RS90 Installation Manual...
-
Page 14: Installation
Hold the transceiver at the chosen location and mark the 4 hole positions onto the mounting surface. Drill the 4 holes where marked (maximum diameter 3.5 mm). Attach the transceiver using screws or pan head machine screws. 14 | Installation | RS90 Installation Manual... - Page 15 211.2 mm (8.31”) 195.1 mm (7.68”) | 15 Installation | RS90 Installation Manual...
-
Page 16: Installing A Wireless Handset Cradle
Attach the handset cradle using screws or pan head machine screws. Connect the wire to a 12 VDC source via a 1 A fuse: • Red wire to 12 VDC positive • Black wire to negative. 16 | Installation | RS90 Installation Manual... -
Page 17: Installing A Wired Handset Cradle
1 x M3 x 40 mm machine screw, nut and washers, or 1 x 3 mm x 40 mm self-tapping screw. 69.0 mm 20.0 mm (2.72”) (0.79”) 2 x 5.0 mm (0.20”) holes 1 x 3.5 mm (0.14”) hole | 17 Installation | RS90 Installation Manual... -
Page 18: Installing A Handset Cable Connector
Each wired handset cable includes a connector assembly that must be installed in a bulkhead, dashboard or other suitable panel. Socket body Mounting surface Bezel Drill 24 mm diameter hole to clear socket body Connector cover 18 | Installation | RS90 Installation Manual... -
Page 19: External Speakers Installation Options
Refit the plastic trim pieces. Fastenerss • 4 x M3 x 10 mm machine screws, spring washers, flat washers and M3 nuts, or • 4 x 3 mm x 10 mm self tapping screws. | 19 Installation | RS90 Installation Manual... - Page 20 Replace the plastic trims. Fasteners • 4 x M3 x 40 mm machine screws, spring washers, flat washers and M3 nuts, or • 4 x 3 mm x 40 mm self tapping screws. 20 | Installation | RS90 Installation Manual...
-
Page 21: Transceiver External Connectors
Always mount the VHF antenna as high as possible and at least 1 m (39 inches) from the transceiver. NMEA 2000 (N2K) connector The RS90 radio can be connected to an NMEA 2000 network using a cable (not supplied). For further information, see “NMEA 2000 Network” on page 26. - Page 22 22 | Installation | RS90 Installation Manual...
- Page 23 All the necessary wires are included in the handset cable supplied. • The wired handset cable includes a connector assembly that must be installed in a bulkhead, dashboard or other suitable panel. See page 18. | 23 Installation | RS90 Installation Manual...
- Page 24 Balanced, RS422, GPS data input TX GPSO NMEA0183 Output+ Connect to ship’s NMEA0183 input NMEA0183 Output- Single end, GND Wire to horn button HORN Wire to horn button ¼ Note: Use a normally-open horn button. 24 | Installation | RS90 Installation Manual...
- Page 25 Use a 4-8 ohm speaker or loud hailer horn rated at no less than 30 W. Higher impedance will reduce audio output volume. Connector 11 - programming connector This is a Micro-USB receptacle used for factory diagnostic purposes. | 25 Installation | RS90 Installation Manual...
-
Page 26: Setting Up The Radio
¼ Note: You must enter your User MMSI before the DSC functions of this radio will work. See the Setup section in the RS90 Operating Manual for full setup details. NMEA 2000 Network The radio can be connected to an NMEA 2000 network using an NMEA 2000 compliant cable (not supplied). -
Page 27: Nmea 2000 Network Diagram
NMEA 2000 Network Diagram SIMRAD STBY AUTO MARK GOTO MENU PAGES NSS 7 12 VDC | 27 Installation | RS90 Installation Manual... -
Page 28: Appendix 1 - Accessories
Appendix 1 - Accessories Part number Description 000-11226-001 HS90 handset and speaker kit 000-11227-001 RS90 transceiver 000-11228-001 HS90 handset 000-11229-001 External speaker 000-10791-001 HS35 wireless handset 000- 20 m extension cable for handset 28 | Installation | RS90 Installation Manual... - Page 29 1177...
Need help?
Do you have a question about the RS90 and is the answer not in the manual?
Questions and answers