Table of Contents
Advertisement
Quick Links
Advertisement
Table of Contents

Related Manuals for Euro Kitchen Appliances Spagna Vetro 3388C-IM


Summary of Contents for Euro Kitchen Appliances Spagna Vetro 3388C-IM
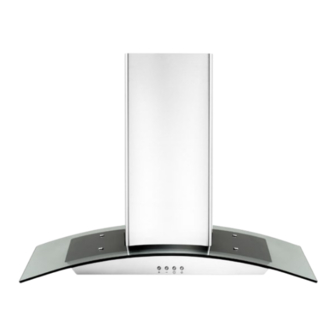
- Page 1 Installation Guide and Users Manual Spagna Vetro Range Hood Model 3388C-IM IMPORTANT: Read and save these instructions. NOTICE: Installer: Leave this guide with the homeowner Homeowner: Keep this guide for future reference Island Type Range Hood...
-
Page 3: Important Safety Notice
Important Safety Notice Read all Instructions before Installing and operating this appliance • The installation in this manual is intended for qualified installers, service technicians or persons with similar qualified background. Installation and electrical wiring must be done by qualified profession- als and in accordance with all applicable codes and standards, including fire-rated construction. - Page 4 Important Safety Notice Read all Instructions before Installing and operating this appliance • Clean ventilating fan frequently. • Always use appropriate cookware and utensils size. • Always use cookware appropriate for the size of the surface element. To reduce the risk of injury to persons in the event of a stove top grease fire: •...
-
Page 5: Table Of Contents
Table of Contents INSTALLATION USE AND CARE Tools needed............3 Troubleshooting...........14 Venting requirements........5 Use and care information.......15 Mount heights & clearance......5-6 Specifications..........15 Calculating vent system length.......6 Measurements & Diagrams......15-17 Venting methods..........7 MAINTENANCE Electrical requirements........8 Cleaning..........16 Preparation............9 Replacing the filter & light bulb.....17 Installation..........10-11 Contact Us............19 Range hood operations......12-13... - Page 6 Page 4...
-
Page 7: Venting Requirements
Venting Requirements Height & Clearance • Vent system must terminate to the outside (roof or side wall). • DO NOT terminate the vent system in an at- tic or other enclosed area. • DO NOT use 4” (10.2 cm) laundry-type wall caps. -
Page 8: Calculating Vent System Length
IMPORTANT: • A minimum of 6” round (standard for this range hood) or 3-1/4 x 10” rectangular duct (purchased separately) must be used to maintain maximum airflow efficiency. • Always use rigid type metal/aluminium ducts if available to maximize airflow when connecting to provided duct. -
Page 9: Venting Methods
Venting Methods • This range hood is factory set for venting through the roof or wall. • Vent work can terminate either through the roof or wall. To vent through a wall, a 90° elbow is needed. IMPORTANT: • NEVER exhaust air or terminate duct work into spaces between walls, crawl spaces, ceiling, attics or garages. -
Page 10: Electrical Requirements
Electrical Requirements IMPORTANT: Observe all governing codes and ordinances. It is the customer’s responsibility: • To contact a qualified electrical installer. • To assure that the electrical installation is adequate and in conformance with National Electrical Code. If codes permit and a separate ground wire is used, it is recommended that a qualified electrician determine that the ground path is adequate. -
Page 11: Preparation
Preparation Advanced Preparations: • Be familiar with the controls of the range hood by reading through Range Hood Operations, Page 12. • Place the range hood on a flat, stable surface. Connect the range hood to a designated standard outlet (120- Volt, 60Hz, AC only) and turn on the range hood. -
Page 12: Installation
Use 4 ST4*8 screws to secure the inner duct cover to the mounting plate, then fix the outer duct cover to the angel irons with two hooks. See Pic④. f) Use 4 ST4*8 screws to secure the metal air outlet, see Pic⑤. Euro Kitchen Appliances Inc. 7272 Buller Ave, Burnaby BC www.KitchenHoods.ca... -
Page 13: Installation
Connect power cable to house wiring inside of electrical outlet box. Black to Black, White to White, and Green to Green or Bare wires. Secure power cable to wiring box with appropriate connector and re-attach outlet box cover. See Pic⑩ Euro Kitchen Appliances Inc. 7272 Buller Ave, Burnaby BC www.KitchenHoods.ca... - Page 14 Volt, 60Hz, AC only) or cut off the plug and connect three wires (black, white and green) to house wires and cap with wire connectors. Connect according to colors (i.e. black to black, white to white, and green to green). Again qualified electrician should do any modifications and electrical connection. Euro Kitchen Appliances Inc. 7272 Buller Ave, Burnaby BC www.KitchenHoods.ca...
-
Page 15: Range Hood Operations
Pressing the Power Control (On/Off) button or activating the delay function will not turn halogen lights ON or OFF. The lights have 2 settings: ON/OFF. CAUTION: DO NOT touch the lights until switched OFF and cooled. Euro Kitchen Appliances Inc. 7272 Buller Ave, Burnaby BC www.KitchenHoods.ca... -
Page 16: Troubleshooting
Check if all joints are properly connected, sealed, and taped. • Make sure the power is on high speed for heavy cooking. NOTE: For all other inquiries, please contact us at sales@kitchenhoods.ca or call 1-800-315-0359 Euro Kitchen Appliances Inc. 7272 Buller Ave, Burnaby BC www.KitchenHoods.ca... -
Page 17: Use And Care Information
Use and Care Information Operations: • Read and understand all instructions and warnings in this manual before operating the appliance. Save these instructions for future reference. • Always leave safety grills and filters in place. Without these components, operating blowers could catch on to hair, fingers and loose clothing. -
Page 18: Cleaning
DO NOT allow salt solutions, disinfectants, bleaches, or cleaning compounds to remain in contact with stainless steel for extended periods. Many of these compounds contain chemicals, which may be harmful. Rinse with water after exposure and wipe dry with a clean cloth. Euro Kitchen Appliances Inc. 7272 Buller Ave, Burnaby BC www.KitchenHoods.ca... -
Page 19: Replacing The Filter & Light Bulb
Push gently but securely into light socket. NOTE: DO NOT push too hard as bulb “legs” may break off. 4. Replace light cover. • Turn ON breaker and range hood to test for operation. Euro Kitchen Appliances Inc. 7272 Buller Ave, Burnaby BC www.KitchenHoods.ca... - Page 20 To obtain warranty service, you may contact Euro Kitchen Appliances Inc. its dealer or distributor from which you purchased the our product. Please confirm the terms of your dealer’s or distributor’s policies prior to contacting. Typically, must include product identification information, including model number and batch number (if applicable) with a detailed...
-
Page 21: Contact Us
Euro Kitchen Appliances Inc. 7272 Buller Ave, Burnaby, BC V5J 4S3, Canada Tel: 604 430 5252 Euro Kitchen Appliances Inc. 7272 Buller Ave, Burnaby BC www.KitchenHoods.ca...
Need help?
Do you have a question about the Spagna Vetro 3388C-IM and is the answer not in the manual?
Questions and answers