Advertisement
Quick Links
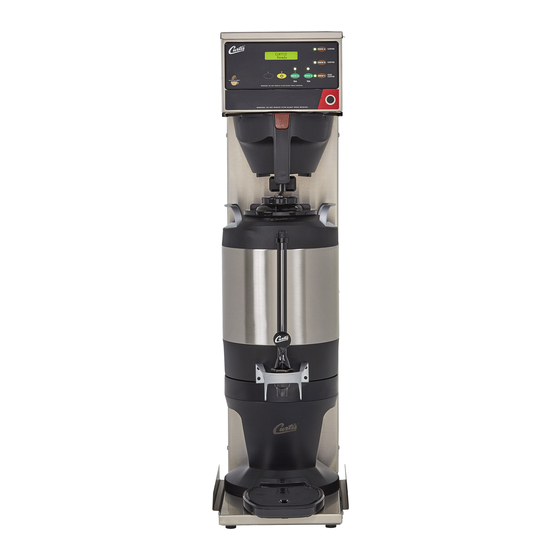
Model:
CBHS
CAUTION: Please use
this setup procedure
before attempting to use
this brewer. Failure to follow the
instructions can result in injury or the
voiding of the warranty.
IMPORTANT: Equipment to
be installed to comply with
applicable federal, state, or
local plumbing/electrical codes having
jurisdiction.
CAUTION: DO NOT connect
this brewer to hot water. The
inlet valve is not rated for
hot water.
ISO 9001:2008 REGISTERED
WILBUR CURTIS CO., INC.
6913 West Acco Street
Montebello, CA 90640-5403
For the latest information go to
www.wilburcurtis.com
Tel: 800-421-6150
Fax: 323-837-2410
Service Manual – Combo Brewer Single
Important Safeguards/Symbols
This equipment is designed for commercial use. Any servicing other than cleaning and routine maintenance
should be performed by an authorized Wilbur Curtis Company Service Technician.
• DO NOT immerse the unit in water or any other liquid
• To reduce the risk of fire or electric shock, DO NOT open service panels. There are no user serviceable
parts inside.
• Keep hands and other items away from hot areas of the unit during operation.
• Never clean with scouring powders or harsh chemicals.
Symbols:
WARNINGS – To help avoid personal injury
Important Notes/Cautions – from the factory
Sanitation Requirements
This Curtis Generation 3 Unit is Factory Pre-Set and Ready to Go Right from the Box.
Following are the Factory Settings for your G3 Coffee Brewing System:
• Brew Temperature = 204°F
• Brew Volume = Set to Vessel Requirement.
System Requirements:
• Water Source 20 – 90 PSI (Minimum Flow Rate of 1 GPM)
• Electrical: See attached schematic for standard model or visit www.wilburcurtis.com for your model.
SETUP STEPS
1. The unit should be level (left to right - front to back), on a secure surface.
2. Connect the water line to the water inlet fitting on the rear of the unit. Water volume flow to the machine should
be consistent. Use tubing sized sufficiently to provide a minimum flow rate of one gallon per minute.
NOTE: A water filtration system must be used to help maintain trouble-free opera-
tion. Air must be purged from the cartridge prior to connection to equipment.
In areas with extremely hard water, we recommend the use of a Curtis approved
water filter. For our full line of filters, please log on to www.wilburcurtis.com.
NSF International requires the following water connection:
1. A quick disconnect or additional coiled tubing (at least 2x the depth of the unit) is required so
that the unit can be moved for cleaning.
2. This unit must be installed with adequate backflow protection to comply with applicable federal,
state and local codes.
3. Water pipe connections and fixtures directly connected to a portable water supply shall be sized,
installed and maintained in accordance with federal, state, and local codes.
3. Connect the unit to electrical outlet with appropriate amperage rating (see serial tag on machine).
4. Once power has been supplied to the unit, flip the toggle switch to the 'ON' position (located on the rear of
the unit), the water tank will begin to fill. When the water level in the tank reaches the probe, the heating
element(s) will turn on.
5. Water in the heating tank will require approximately a half hour before reaching operating temperature (factory
setting of 204°F). Where applicable, turn on the Universal Control Module (UCM). When the unit reaches
operating temperature, it will display "READY TO BREW".
Technical Support: 1-800-995-0417 M-F 5:30am-4:00pm PT
W
C
C
ilbur
urtis
o
• Water Bypass = On for LARGE Brew Only
Email: techsupport@wilburcurtis.com
., i
.
nC
1
Advertisement

Related Manuals for Curtis CBHS


Summary of Contents for Curtis CBHS
- Page 1 Important Notes/Cautions – from the factory Sanitation Requirements This Curtis Generation 3 Unit is Factory Pre-Set and Ready to Go Right from the Box. Following are the Factory Settings for your G3 Coffee Brewing System: • Brew Temperature = 204°F •...
-
Page 2: Coffee Brewing Instructions
Coffee Brewing Instructions 1. Brewer should be ON (Confirm at rear toggle switch, then press the ON/OFF button). Ready-to-Brew should be on the display. 2. Place an empty coffee container under the brewcone. Make sure the container is open at the top and it is centered under the brew- cone. - Page 3 Your Curtis G3/Gold Cup Series is Factory Pre-Set for Optimum Performance. After connection to water and power; the rear toggle switch must be on. You will hear a beep sound, indicating power is available to the controller. The control displays CURTIS .
- Page 4 Press to display number and change number, (the number can be changed 1 to 4) or < to move place and EX to exit when complete. Banner Name (Factory set to Curtis) Banner Name Press to display letters and change letters or < to move place and EX to exit when complete This feature allows up to 14 letters to be programmed for company name or regional name.
- Page 5 Brew by Time (Factory settings: LARGE 5min-25sec. SMALL 1min-52sec.) Brew By Time Next item in the sequence is Brew by Time. Press to Select to change the brew time. Display will now show the current time. By pressing < or > you can toggle back and forth from minutes to seconds to exit (ex). Change the time or set and exit by press- ing the ...
- Page 6 Sweetener Time (Factory set to Full 48 sec, Iced Coffee Full Brew N/A) Sweetener Time Sweetener Time is only for brewers with the optional tea sweetening system. Press to Select. Press < or > to toggle between minutes, seconds or exit. Pressing select to choose minutes will increase the minutes.
-
Page 7: Illustrated Parts
O-RING, .426 ID X .562 OD X .070 WALL WC-390061 LABEL, UCM OVERLAY CBHS WC-895-105* VALVE, INLET DUAL 120V 10W 2 GPM X .5 GPM WC-37556* KIT, UCM & LABEL CBHS 3-BATCH WC-103* SWITCH, TOGGLE NON-LIT DPST 25A 125/250VAC RST WC-29050* SPRAYHEAD, AMBER ADVANCED FLOW WC-8559*... - Page 8 Illustrated Parts – Heating Tank ITEM № PART № DESCRIPTION ITEM № PART № DESCRIPTION WC-5310* TUBING, 5/16” ID x 1/8”W SILICONE WC-4394* SHOCK GUARD, HEATING ELEMENT WC-5853-102 COVER, TOP HEATING TANK WC-522* THERMOSTAT, HI LIMIT HEATER CNTRL DPST 277V 40A WC-43062* GASKET, TANK LID WC-43055*...
- Page 9 Illustrated Parts – Sweet Tea Option* ITEM № PART № DESCRIPTION ITEM № PART № DESCRIPTION WC-37405 KIT, UCM & LABEL CBHV SWEET TEA WC-2452 VALVE, CHECK 3/8 OD TUBE x 3/8 OD TUBE JOHN GUEST WC-800 VALVE, TRANSFER FLOJET SWEET TEA OPTION WC-2445 STEM, 3/8 BARB x 3/8 STEM WC-8653...
-
Page 10: Electrical Schematic
Electrical Schematic... - Page 11 Electrical Schematic...
- Page 12 Sweetener Schematic Layout DAILY Cleaning The Brewer 1. Wipe any spills, dust or debris from the exterior surfaces with a damp cloth. The outside surfaces of the brewer should be cleaned with stainless steel polish only, to IMPORTANT: Clean out prevent scratches.
- Page 13 WEEKLY CLEANING & SANITIZING Sweet Tea Mixing System Cleaning Use a concentrated cleaning solution to simplify the cleaning procedure. This procedure requires a one gallon bucket of a cleaning solution of hot water (minimum & Sanitizing 160ºF) and a granulated concentrated cleaner (a cleaner like Coffee Dispenser Cleaner Corporation JavaClean3), diluted at 1.5 oz per gallon and a one gallon bucket of clean hot water (minimum 165ºF).
-
Page 14: Rough-In Drawing
TEA TIPS WARNING DO NOT • Store tea bags in a dark, cool and dry place away from strong odors and moisture. Do not refrigerate. refrigerate unused tea overnight for later • Do not hold brewed tea overnight. consumption. • Make sure your equipment is clean at all times. Clean tea-brewing equipment at least once a day. •... - Page 16 The warranty covers original equipment at time of purchase only. The Wilbur Curtis Co., Inc., assumes no responsibility for substitute replacement parts installed on Curtis equipment that have not been purchased from Wilbur Curtis Co., Inc. The Wilbur Curtis Co., Inc. will not accept any responsibility if the following conditions are not met.
Need help?
Do you have a question about the CBHS and is the answer not in the manual?
Questions and answers