
Related Manuals for EverFocus ED2250S/P


Summary of Contents for EverFocus ED2250S/P
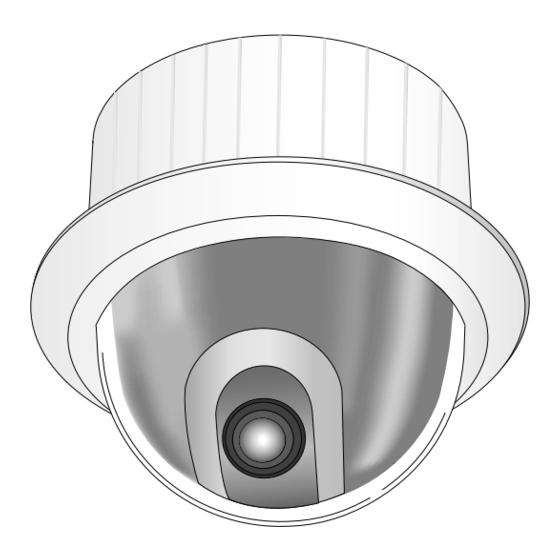
- Page 1 Combi Dome Camera ED2250S/P Owner’s Instructions Benutzerhandbuch Manuel d’instruction Manual del usuario Istruzioni per l’uso Part : AB68-00411A Printed in Korea...
-
Page 2: Safety Precautions
Safety Precautions 6. Do not place conductive objects (e.g., screwdrivers, coins, and metal things) or containers filled with water on top of the camera. (Doing so may cause personal injury due to fire, electrical shock, or falling objects.) The purpose of this information is to ensure proper use of this product to prevent danger or damage to property. -
Page 3: Before Usage
Before Usage This is a basic instruction manual for the ED2250S/P user. It contains all the instructions needed to use the ED2250S/P from a simple introduction of the control locations and functions of the ED2250S/P to installation methods in the set up menu. -
Page 4: Table Of Contents
Table of contents Before Usage --------------------------------------------------------------------------------------1-1 - AGC ----------------------------------------------------------------------------3-10 - S.S ------------------------------------------------------------------------------3-10 Chapter 1 ED2250S/P Overview ------------------------------------------------------------1-5 ED2250S/P Introduction----------------------------------------------------------1-6 - SLOW --------------------------------------------------------------------------3-11 ED2250S/PLocations of Control -----------------------------------------------1-7 - NORMAL ----------------------------------------------------------------------3-11 ED2250S/P FRONT ---------------------------------------------------------------1-7 - FAST ---------------------------------------------------------------------------3-11 ED2250S/P BACK -----------------------------------------------------------------1-8 - F.F ------------------------------------------------------------------------------3-11... -
Page 5: Chapter 1 Ed2250S/P Overview
The ED2250S/P is the best performing zoom lens integrated surveillance camera. It can be used with CCTV in banks or In this chapter we will briefly introduce the ED2250S/P and show companies to provide high level of security. main functions, locations of control and Switch Setting. - Page 6 Locations of Control FRONT BACK COVER BODY COVER DOME ZOOM LENS...
-
Page 7: Adapter Connection
INITIAL SETTING CAMERA ADDRESS SETUP Dip Switch setting is same as the following example: EX) CAMERA ADDR: When it's number 1, set as follows. ED2250S/P Adapter BOARD SW500 Setting communication Protocol Use number 5~8 PIN of SW501 to set communication Protocol. -
Page 8: Setting Rs-422A/Rs-485 Termination
Setting RS-422A/RS-485 termination SWITCH SETTING Receiver Address SW500-1 SW500-2 SW500-3 SW500-4 SW500-5 SW500-6 SW500-7 SW500-8 As it is shown in the structure map, when Controller and RS-422A/RS-485 is connected it should be terminated according to the Cable feature of impedance on the each end of the transmitting line to transfer the signals in long distance by controlling the reflection of the signals to the lowest. - Page 9 Receiver Address SW500-3 SW500-4 SW500-5 SW500-6 SW500-7 SW500-8 Receiver Address SW500-1 SW500-2 SW500-3 SW500-4 SW500-5 SW500-6 SW500-7 SW500-8 SW500-1 SW500-2 1-13 1-14...
- Page 10 Receiver Address SW500-1 SW500-2 SW500-3 SW500-4 SW500-5 SW500-6 SW500-7 SW500-8 Receiver Address SW500-1 SW500-2 SW500-3 SW500-4 SW500-5 SW500-6 SW500-7 sw500-8 1-15 1-16...
-
Page 11: Chapter 2 Ed2250S/P Installation
Please check that all components listed below are included in the package: In this chapter, we will check the contents of the package before installing the ED2250S/P, and prepare a power adapter suitable for the power supply system. (Power Consumption: 18W; Voltage: 24VAC, 1.5A) Then, we will install the ED2250S/P and connect the cables. -
Page 12: Preparing The Cables
Video Output Terminal (VIDEO OUT) Power Adapter Cable 2. Then, connect the other end of The cable that plugs into the ED2250S/P power input receptacle has the the connector to the Video Input rated voltage of 24VAC, 1.5A. Terminal of the monitor. -
Page 13: Installing Ed2250S
1) Make sure that the installation site can sufficiently support a minimum of wall or a ceiling. four times the net weight of the ED2250S/P Combi Dome Camera and other accessories. 2) Install in an area where the space above the ceiling board is over 18 cm (7 in.) high. -
Page 14: Installing The Camera
Installing the Camera 1. [Figure 1] Install the structure on the ceiling. 5) CEILING MOUNT ADAPTOR (SADT-100CM) (Refer to Installation reference for the Length of the structure) This adaptor is used for installing the indoor housing or the outdoor housing for the Combi Dome Camera to a concrete ceiling. * Built in by the builder of the structure [Figure 1] Length of... -
Page 15: Chapter 3 Setup Menu Overview
Chapter 3 Setup Menu Overview CAMERA ADAPTER In this chapter, we will look over the Setup Menu of the ED2250S/P, First we'll look over the overall structure of the Setup Menu, and then we'll look at the functions of each menu. -
Page 16: Structure Of The Setup Menu
CAM RESET LANGUAGE ENGLISH EXIT QUIT/SAVE The diagram shown above illustrates the overall structure of the Setup Menu. In this section, a description of the Setup menu features will enable users of the ED2250S/P to tailor it to their personal needs. -
Page 17: Camera Set Menu
ZOOM SPEED CAMERA ID to ON and press [Enter]. You will see the sub screen for [Enter] MOTION DET deciding on the ID of the ED2250S/P. The Camera ID can have up to 12 PHASE ( 000) ---- ---- alphanumeric characters, along with several special characters. -
Page 18: Zoom Speed
Alarm signal of the Controller. EXIT The EXIT menu is used to quit the CAMERA SET (MOTION DET) (CAMERA SET) (CAMERA SET) ➜ menu of the ED2250S/P and return to the MAIN CAMERA ID CAMERA ID MENU. V-SYNC V-SYNC Press... -
Page 19: Alc
In the SHUTTER menu, the high-speed Electric shutter and AUTO low speed If the AREA menu is set to USER and [ENTER] is pressed, the user can shutter of the ED2250S/P and the FIX low speed shutter can be set. select the applied area of the backlight compensation function. -
Page 20: Agc
SLOW If your press the left/right keys continuously, the speed will appear in the This enhances the resolution of a still image by selecting a low value for AGC GAIN and a slow speed for SHUTTER SPEED. following order. (This is used mainly to monitor inanimate objects in dark places.) Order ©... -
Page 21: White Bal
WHITE BAL WHITE BAL Lights are generally denoted as color temperatures and expressed in The WHITE BAL menu insures that white is calibrated normally under any Kelvin (°K) units. color temperature condition. The general light color temperatures are shown below. When the WHITE BAL menu is set to the ATW mode, the white balance is automatically specified according to the color temperature. -
Page 22: Special
- ONEAF : The ONEAF Mode performs Auto-focusing only when the ED2250S/P - Mirror: Reverse the video output signal horizontally. stops after moving and when the ED2250S/P is not moving it is same - H-DTL: Adjust Horizontal Detail Level. as MF mode. -
Page 23: Preset
3. PRESET POSITION SET... PRESET NO.0 From "POSITION SET..." press [ENTER] to get SET PAN/TILT into the PAN/TILT, FOCUS/ZOOM SET screen This is the menu that user sets the PAN/TILT location, Zoom/Focus, and SET ZOOM/FOCUS to set the PAN/TILT location and FOCUS/ZOOM screen condition, so the camera can monitor the presetting area on demand. -
Page 24: Auto Mode
4. AUTO MODE DIRECTION This sets up the movement direction of the START to END location (PAN location standard) AUTO PAN and PATTERN functions are in AUTO MODE. "RIGHT " : "LEFT " : AUTO PAN After selecting the locations of two points (PAN/TILT) of START and END, it loops continuously in the set up SPEED. -
Page 25: Alarm Set
PATTERN can be set upto 3. Choose 1, 2, or 3 with the left or right key in the ALARM OUT ALARM OUT "PATTERN SET" and press [ENTER] to get into the PATTERN set up screen. Each ALARM input corresponds to one of the ALARM1 From the moment "PATTERN 1 SET"... -
Page 26: Other Set
6. OTHER SET PRIVACY ZONE Pan/Tilt position and the size of Masking area can be set for up to 8 HOME RETURN privacy zones. When shooting the areas where privacy zones are set, the When there is no KEY input or other movement for a certain time, the relevant areas will be concealed from view to protect privacy. - Page 27 PRIVACY ZONE SET 1 PRIVACY ZONE SET 1 ➜ SET PAN/TILT ... SET PAN/TILT ... ➜ SET AREA SET AREA ED2250S/P [Enter] KEY Entering the Items Contents [Down] KEY AREA Setup Zoom lens single body COMBI DOME CAMERA Product Type...
- Page 28 Cautions • The copyright of the manual belongs to Samsung Electronics Co., Ltd. • Without the permission of Samsung Electronics it cannot be reproduced electronically, mechanically, audibly, or by any other method. •This manual will be modified according to product enhancements. 3-26...
Need help?
Do you have a question about the ED2250S/P and is the answer not in the manual?
Questions and answers