Table of Contents
Advertisement
Quick Links
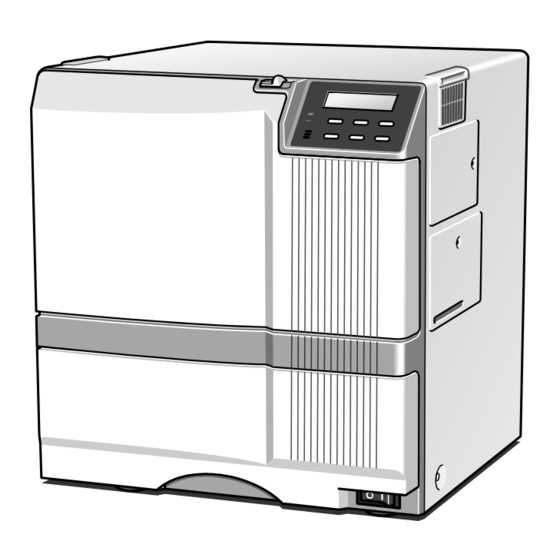
Sublimation type retransfer printer
XIDi Printer
Connection
See p.11~13,22
Operation and Setting the various modes
> I n k >
> C l e a n i n g
> C o u n t e r R e s e t
> D i s p l a y >
MENU
R e a d y
* * *
See p.23~35
• Thank for purchasing this product.
• Please read this manual carefully before use to ensure correct operation.
It is particularly important to read the Safety Precautions for safe operation. After
reading, retain this manual carefully for future reference.
• The product number is important for quality control. Upon purchase, check the back of
the unit to make sure that the product number is correctly displayed.
Notes about this manual
(1) This manual may not be reprinted in any way without permission.
(2) The contents of this manual, as well as the specifications and design of this product,
may change without notice.
(3) The illustrations used in this manual may differ slightly from the actual product.
Instruction Manual
Ink replacement
See p.15~19
Care
See p.36~40
Setting the cards
See p.19~21
Error codes
J a m ( T u r n O v e r )
J a m ( H o p p e r )
H R i s t o o h o t .
P l e a s e r e m o v e
M E D I A F I L M
P l e a s e ,
P o w e r O f f .
See p.42~43
KAT- T230-003
Advertisement
Table of Contents

Subscribe to Our Youtube Channel
Related Manuals for Digital Identification Solutions XIDi


Summary of Contents for Digital Identification Solutions XIDi
-
Page 1: Error Codes
Instruction Manual Sublimation type retransfer printer XIDi Printer Connection Ink replacement Setting the cards See p.11~13,22 See p.15~19 See p.19~21 Error codes Operation and Setting the various modes Care > I n k > J a m ( T u r n O v e r ) >... -
Page 2: Declaration Of Conformity
EN301 489-03:V1.4.1 Manufacture: Victor Company of Japan, Limited. 2969-2, Ishikawa-cho, Hachioji-shi, Tokyo, 192-8620, Japan Importer and distributer: Digital Identification Solutions Group of Companies Teckstraße 52 , D73734 Esslingen, Germany Year to begin affixing CE Marking: 2005 Hachioji-shi, June, 2006 Place, Date Toru Shimizu Manager-Quality Control Victor Company of Japan, Limited. - Page 3 Information for USA NOTE: This equipment has been tested and found to comply with the limits for a Class B digital device, pursu- ant to part 15 the FCC Rules. These limits are designed to provide reasonable protection against harmful interference in a residential installation. This equipment generates, uses and can radiate radio frequency energy and, if not installed and used in accordance with the instructions, may cause harmful interference to radio communications.
-
Page 4: Table Of Contents
Contents Notes for safe operation ........ 5 Operation ..............25 Turning on the power ........... 25 Before use ..............7 Turning off the power ........... 26 Product features ............ 7 About the RESET button ........26 Checking accessories ..........7 On Initialization when the retransfer film cassette Handling of transfer film, ink ribbons and cards .. -
Page 5: Notes For Safe Operation
Notes for safe operation Before you use Read these notes on safety thoroughly before operating your printer in order to use the unit properly. Once you start using the unit, this manual should be put aside the unit, or at a convenient place where you can look up the manual any time as you need. - Page 6 Notes for safe operation (continued) Ground the machine with the attached electric cord Do not use the machine while it has a fault. when connecting it to the utility outlet. • Do not use the machine while it has a fault, as this may cause a fire or electric shock.
-
Page 7: Before Use
Before use Product features Handling of transfer film, ink ribbons and cards • This card printer allows printing of high-quality, full- color images equivalent to photographic quality onto Handling standard size (ISO 7810 compliance) plastic cards using sublimation type transfer printing. Take note of the following points when handling print •... -
Page 8: Storing And Handling Cards After Printing
Before use (continued) Storing and handling cards after printing Escape Clause Avoid storing the cards in locations exposed to direct We do not provide compensation for any malfunction sunlight or with high temperature and high humidity. during card printing caused by breakdown of the Furthermore, avoid contact with the following chemicals and stationery, as they can cause discoloration or machine, ink ribbon defects or card characteristics. -
Page 9: Installation
Before use (continued) Installation Installation diagram The performance of the card printer is strongly influenced by the installation location.Be careful of the Ventilation holes are provided for the cooling fan on the following items as for installation location. bottom and sides of the unit. Avoid inserting any object •... -
Page 10: Names Of Parts
Names of parts Front When the printer door is open Control panel Slide knob Printer door Card tray Retransfer film cassette Power switch Ink ribbon cassette (Accessory) (Accessory) Rear External connection Power input jack terminals External connection terminals USB cable connection terminals... -
Page 11: Set-Up
Set-up Connecting the IC unit (sold separately) Large and compact size IC units are sold separately, as Connect the printer and IC unit. are specialized optional devices for the printer. Consult your dealer for more details. Connect the cable which comes with the IC unit to the OPTION 1 terminal. -
Page 12: Compact Ic Unit (Sold Separately)
Set up the unit joint plate which comes with the laminator (optional). Mount the printeron to joint plate. 9 pin 9 pin Connecting cable Tight the screw after connecting XIDi Printer CAUTION Make sure to tighten the screws of the interface cables. Joint Plate... -
Page 13: Connecting The Power Cord
Set-up (continued) Connecting the power cord Check the plug. • For AC 120V type • For AC220-240V type (North America) (Europe) * The detached power cords vary according to model and country of purchase. Plug the power cable into the printer. Plug the power cable of the laminator if it is installed. -
Page 14: Installing The Card Stacker
Set-up (continued) Discharging the card Installing the card stacker When correctly printed, the cards are discharged from Hang the stacker claw on the stacker receptacle. the left side. If a card jam or a write error on magnetic stripes occurs on the way, results differ depending on the areas. -
Page 15: Setting The Ink Ribbon
Set-up (continued) Setting the ink ribbon Remove the head pad. CAUTION Do not touch the surface of the ink ribbon with your hands. Activate the slide knob and open the printer door. When the slide knob is moved, the printer door opens downwards. - Page 16 Set-up (continued) Close the printer door. Wind the ribbon, taking up the slack. If you want to mount the retransfer film, keep the door Turn the knob in the arrow direction to wind a small open and go to the next page. portion of the ink ribbon.
-
Page 17: Setting The Retransfer Film
Set-up (continued) Setting the retransfer film Insert the retransfer film into the cassette. CAUTION Do not touch the retransfer film Stretch the retransfer film along three shafts with the surface with your hands. retransfer face of the film facing outside and insert the bobbins into the bobbin holders firmly. - Page 18 Set-up (continued) Setting the number of frames to be used. Wind the retransfer film to take up the slack. Turn the knob in the arrow direction to wind a small The number of frames of the retransfer film being used portion of the retransfer film.
-
Page 19: Caution When Loading The Retransfer Film Cassette And/Or The Ink Ribbon Cassette
Set-up (continued) Caution when loading the retransfer film Setting cards cassette and/or the ink ribbon cassette Please use cards specified by your dealer. This unit can take both 0.76 mm(0.03inches)-thick and 0.25 mm The following caution shall be kept when the retransfer (0.01inches)-thick cards. - Page 20 Set-up (continued) Pull the card bracket back. Close the card tray. The card bracket locks when it reaches the hole. Push the card tray back into the printer until it no longer moves. Insert the cards and move the bracket back into position.
-
Page 21: When Using Magnetic Cards
Set-up (continued) When using magnetic cards Loading cards When using cards with magnetic strips, set the cards in Load cards when the printer’s LCD panel shows the the following manner. message “Ready” or “No Card”, and not when printer operations have stopped due to an error. Cards can also be loaded when the power supply is not switched on. -
Page 22: Connecting With A Host Computer
Set-up (continued) Connecting with a host computer Connecting Multiple Printers When connecting a host computer to multiple printers, CAUTION Do not switch off the power of the set different Unit Numbers from 1 to 7 for each printer. host computer during printing. Refer to see the page 35 of the instruction manual Do not use the sleep or the stand-by function on the host computer. -
Page 23: Before Use
Before use Names of parts on the operation panel Operation display LED LCD panel READY LED (green) : unit ready, printer in operation Flashing : receiving image data : unit stopped due to error, or unit being set, initialized or preheated. READY ERROR LED (red) RESET... -
Page 24: Operation Display Led Contents And The Lcd Panel
Before use (continued) Operation display LED contents LCD operation display content and the LCD panel OS booting up B o o t U p . . Printer status READY ERROR LCD panel Mechanism set Initializing.. period Preheating.. Preheat period Ready period V e r . -
Page 25: Operation
Operation Turning on the power Before turning on the power, check the following: Making settings in the user modes Make sure that the printer door is completely When the LCD panel displays Ready or Preheating, closed. Make sure that the card tray is completely closed. R e a d y P r e h e a t i n g . -
Page 26: Turning Off The Power
Operation (continued) On Initialization when the retransfer film CAUTION cassette and/or the ink ribbon cassette When the printer was occured an error during printing operation caused by above- is loaded mentioned operation or others, the retransfer film was rewinded about 3 panels. If the printer is turned off and on Dust or foreign particles may attach on the surface of the power or is initialized, the printer occur the printing an error which is “INK RUNOUT”... -
Page 27: User Modes
Operation (continued) User modes CAUTION When you change settings for the underlined submenu on the next page, (Setting the The settings for printing media, card, etc. can be made retransfer film, Setting the retransfer roller temperature in the User mode. and Bend remedy roller temperature setting),the message “Please Reset”... -
Page 28: User Mode Settings
Operation (continued) User mode settings Factory setting Submenu Main menu > > C o u n t e r > D i s p l a y > Total 4 counter type settings: [Total, Head, Free, Rollers] To t a l Display mode >... -
Page 29: Display Mode Settings
Operation (continued) Display mode settings CAUTION • The beep sounds when pressing the Enter button to save the settings in the user setting mode. The unit has the following three settings for the display • The beep will not sound if the buzzer mode setting (see mode. -
Page 30: Clearing The Free Counter
Operation (continued) Clearing the free counter Cleaning mode Reset the free counter. The printer is provided with an operation mode for The [Total] counter and [Head] counter cannot be reset. cleaning the card feed roller and the magnetic head to keep the printer in the best condition. -
Page 31: Ink Mode Setting
Operation (continued) Ink mode setting Change settings according to the ink ribbon used. EXIT > I n k > Exit user mode ENTER Display the ink ribbon type.(YMCK:0, YMCKK:4 etc) Display only because of automatic setting by RF-ID > > I n k T y p e (Setting is not possible) Y M C K : 0 •... -
Page 32: Retransfer Mode Setting
Operation (continued) Retransfer mode setting Change settings according to the retranfer film and card used. EXIT > R e t r a n s f e r > Exit user mode. ENTER Set retransfer film Set film type Two types of frame settings (1000 or 750 frames per film) •... -
Page 33: Buzzer Mode Setting
Operation (continued) Buzzer mode setting Power saving mode settings The buzzer indicating errors can be turned on or off. The printer enters into the power save mode after a specified period of time if none of operation buttons are touched in the Ready state. The heat roller for retransfer, bend remedial roller, and back-light of the EXIT >... -
Page 34: Setting The Bend Remedy Mode
Operation (continued) Setting the bend remedy mode CAUTION Single-sided printing may cause a bend depending on the When printing on both sides is done cards. Adjust the setting to get rid of the bend. with “Remedy roller temperature setting” set to a high temperature, the cards may show a large deformation. -
Page 35: Coercivity Setting Mode
Operation (continued) Coercivity setting mode Test print Test print is provided for printing a test pattern Set coercivity for writing data on the ISO compatible contained in the printer (there is only one pattern). magnetic stripe card. Operating the printer independent of the host computer enables you to find out the source of trouble if there is a EXIT >... -
Page 36: Care And Cleaning
Care and cleaning Always make sure that the printer is turned off before cleaning. (However, cleaning of the card feed rollers and magnetic head should be carried out with the power turned on.) To achieve the best performance from the printer, always check each part before use for dust and dirt and clean if necessary. The following explains the main rollers that require cleaning. -
Page 37: Cleaning The Thermal Head
Care and Cleaning (continued) Cleaning the thermal head Cleaning the fan filter When the thermal head gets dirty, defects such as When the fan filter gets dirty, partial omissions may unwanted lines appearing on the printed card may occur on the printed cards, or the printing result looks occur. -
Page 38: Cleaning The Card Feed Rollers And Heat Rollers
Care and Cleaning (continued) Cleaning the card feed rollers and heat Remove dirt on the fan filter using a vacuum rollers cleaner or other cleaning equipment. Hold the sponge with your hand so that it is not sucked into the cleaner. Dirty rollers are the major cause of jamming of the cards. -
Page 39: Cleaning The Magnetic Head
Care and Cleaning (continued) Cleaning the magnetic head Set a cleaning card. Peel off the protective paper of the cleaning card and Dirty magnetic head will cause a write/read error. It is insert it into the NG card discharge slot. The card will be recommended to clean the magnetic head after printing drawn into the unit by the rollers and cleaning will then about 1,000 cards. -
Page 40: Cleaning Of He Bobbin Holders
Care and Cleaning (continued) Cleaning of the bobbin holders Set the card on the card tray. Place the card in right direction. See p.21. Dirt on the bobbin holders may appear on the card or the film, cause defects on the card. Clean the bobbins when replacing ink ribbon or retransfer film. -
Page 41: Troubleshooting
Troubleshooting Layout of rollers inside the printer Below is a diagram of the layout of rollers inside the printer. Refer to this diagram in the event of card jams and when cleaning the rollers. Retransfer film cassette Ink ribbon cassette Thermal head Magnetic head Card turnover table... -
Page 42: Error Code Listing
Troubleshooting (continued) The meaning of “reset → enter buttons” in the list is, Error code listing after pressing the Reset button, press the Enter button to initialize the unit. Error code Description of error Remedy The power must be turned off so Turn off the power and then on again. - Page 43 Troubleshooting (continued) Should your printer require servicing, turn it off and unplug it and make inquiries at the outlet where it was purchased. Error code Description of error Remedy Hardware error Turn off the power and then on again. Call for service if the H a r d w a r e problem persists.
-
Page 44: Stopping When Printing
Troubleshooting (continued) Stopping when printing About printing errors The printer may stop with no error messages If some If blurring or color shifts occur in your print results, clean failure with the connection to the host computer occur all rollers starting with the cleaning rollers. or the not proper ink ribbon is set. -
Page 45: Removing Card Jams
Troubleshooting (continued) Removing card jams If you cannot hold the jammed card: Pull out a small portion of the cleaning unit. To determine the part of the machine affected by a card jam refer to the error code on the operation panel LCD panel on the printer and the relevant page in this manual. -
Page 46: Turnover Section [Jam (Turnover)]
Troubleshooting (continued) Turnover section [Jam (turnover)] Retransfer section [Jam (transfer)] Open the printer door and remove the ink ribbon Open the printer door and remove the retransfer cassette. film cassette. See p.17 in this manual. See p.15 in this manual. A jog lever are supplied as standard. -
Page 47: Specifications
Specifications CX21ICL Series (Large-type IC unit) Main specifications Power supply : Fed from the printer. DC 5V±5%, DC 12V±5%, DC 24V±5% Recording method : Sublimation type retransfer Current dissipation : 500mA, 300mA, 1A Feed format : Automatic feed Mass : 3.5kg : 11(W) ×... - Page 48 Specifications (continued) External appearance and dimensions 34.3 34.7 Side view Front view unit/cm...
- Page 49 MEMO...
- Page 50 MEMO...
- Page 51 MEMO...
- Page 52 Digital Identification Solutions Group of Companies Teckstraße 52, D73734 Esslingen, Germany Phone : +49 711 341 689 - 0 Facsimile : +49 711 689 - 550 Printed in Japan 2006 Digital Identification Solutions Group of Companies KAT-T230-003 0606VP)
Need help?
Do you have a question about the XIDi and is the answer not in the manual?
Questions and answers