Table of Contents
Advertisement
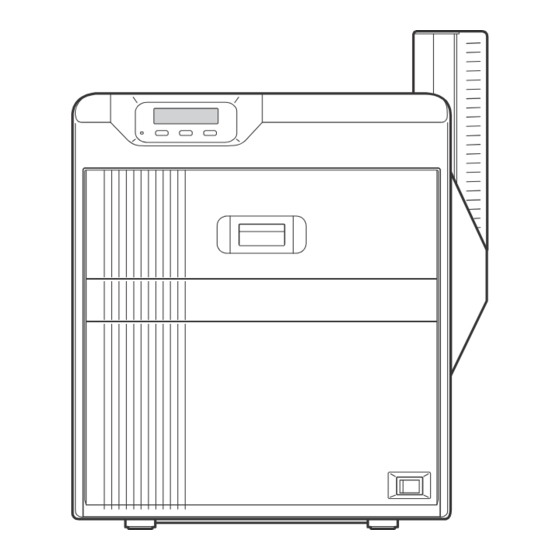
X ID
8300 Retransfer Printer
Instruction Manual
• Thank for purchasing this product.
• Please read this manual carefully before use to ensure correct operation.
It is particularly important to read the Safety Precautions for safe operation. After
reading, retain this manual carefully for future reference.
• The product number is important for quality control. Upon purchase, check the back of
the unit to make sure that the product number is correctly displayed.
Notes about this manual
(1) This manual may not be reprinted in any way without permission.
(2) The contents of this manual, as well as the specifications and design of this product,
may change without notice.
(3) The illustrations used in this manual may differ slightly from the actual product.
Advertisement
Chapters
Table of Contents

Related Manuals for Digital Identification Solutions EDIsecure X ID 8300


Summary of Contents for Digital Identification Solutions EDIsecure X ID 8300
- Page 1 X ID 8300 Retransfer Printer Instruction Manual • Thank for purchasing this product. • Please read this manual carefully before use to ensure correct operation. It is particularly important to read the Safety Precautions for safe operation. After reading, retain this manual carefully for future reference. •...
-
Page 2: Table Of Contents
Before Use About this Manual Contents "Contents of this manual" A page 3 ● Before Use "How to read this manual" A page 3 ● Contents .................. 2 Precautions About this Manual ..............3 "Safety precautions" A page 3 ● Precautions ................ -
Page 3: How To Read This Manual" A
Before Use About this Manual Precautions Contents of this manual Safety precautions The copyright of this manual belongs to DIS. Reprint and duplicate of ● Please read through all the following items before using the ● this manual in part or full without the prior consent of DIS is strictly pro- printer. -
Page 4: Precautions During Use" A
Before Use Caution Precautions during use Please read through all the following items before using the ● printer. Handling instructions Pay careful attention of the following when handling a printing media ● (retransfer film or ink ribbon) or card. - Page 5 Before Use Using a deformed or scratched card may cause card feed er- ● When retransfer film/ink ribbon is dismantled rors. Touching the printing surface of the printing media or card di- ● Winding misalignment may occur. If an improperly wound re- ●...
-
Page 6: Disclaimer" A
Before Use Disclaimer Name and functions of parts Internal mechanism diagram ① Card feeder unit This is the roller for feeding cards. Each of the feed rollers needs to ● be cleaned daily. ② Warpage correction heating roller Some types of cards may warp. Adjust accordingly until warpage is ●... -
Page 7: Front" A
Before Use Front Right ① NG card outlet If a card is left inside the printer when the power is turned on or re- ● ① Operation buttons set, the card will be automatically discharged. For selecting and confirming information on the operation panel. ●... -
Page 8: Ink Ribbon Cassette" A
Before Use For attaching the ink ribbon. ● ④ Jog dials When there is card jam in the cleaning unit, turnover unit, or retrans- ● fer unit, detach the jog dial from the printer body, and attach it ac- cordingly to turn the rollers of the corresponding parts. ⑤... -
Page 9: Main Specifications" A
Before Use Specifications Main specifications Item Description Recording system Dye sublimation retransfer Paper feed mode Automatic Recording density 300 dpi Reproduction gradation 256 levels each for Y, M and C: 2 levels for Bk Interface USB 2.0 (Hi-Speed/Full-Speed) Interface Ethernet(100BASE-TX/10BASE-T) Operating environment conditions Temperature between 15 7C and 30 7C Temperature between 17 7C and 28 7C (When using peel-off ink) -
Page 10: Functions" A
Before Use Options Operation Panel Name and functions of parts Functions Double-sided printer ● Printer that supports double-sided printing. Single-sided printer ● Printer that supports single-sided printing. Options ① Operation panel Warpage correction ● Displays the mode settings, operating status, and error messages. ●... - Page 11 Operation Initializing Scrolls to the next displayed character on the left. Preheating Scrolls to the next displayed character on the right. Ready Operation Panel Display USB connection IP address established ● Printer information can be viewed through the network. However, printing Printing is performed through USB connection.
-
Page 12: Setting Mode
Operation Setting Mode For setting the UV ink concentration level. Selecting a larger value increases the concentration level. During UV printing, card warpage may increase if the card has a Settings can be viewed on the printer’s operation panel. ● low heat resistance or under an environment with high tempera- Settings can be changed on the status monitor of the computer. -
Page 13: Setting Mode Flow
Operation For setting whether to standby the printer by lowering the retrans- [@TREX[OSD::]IPv4: ● fer heat roller temperature if cards are not issued for 30 minutes DHCP: On, Off or longer. Setting: IP Address, Subnet Mask, Gateway The printer will automatically restored to the original mode during Efective IP: IP Address] the next card issuance, but it may take a longer time before the For setting IPv4. - Page 14 Operation...
- Page 15 Operation...
-
Page 16: Setting Using The Operation Panel
Operation Setting using the operation panel Initializing printer when attaching the cassette Memo: When detaching the ink ribbon cassette or retransfer film cassette from ● Initialization the printer body, dust may adhere to the ink ribbon or retransfer film. Printing errors such as discoloring and retransfer error may occur de- Whenever the power is turned on, cue (initialization) is per- ●... - Page 17 Operation A [Next Panel, OK?] message appears. ● Firmware update Press [Menu] A [Cleaning] message appears. ● ② Press B Press [Next] to set to [Down load] An [Initializing] message appears, and the printer is initialized ● after feeding the ink ribbon and retransfer film by one image. Pressing the [Next] button each time displays the next screen.
- Page 18 Operation Counter setting This is used for setting the type of counter displayed on the operation ● panel. Counter types Total Cnt: total counter ● Displays the total number of cards that are correctly printed. Press [Exit] Head Cnt: Head counter ●...
- Page 19 Operation Press [Next] A [Counter] message appears. ● Press [Change] A setting change screen appears. ● Press A and select a setting value. Press B to confirm the setting value. ● Pressing B confirms the setting and returns you to the previous screen.
- Page 20 Operation A [Cleaning] message appears. ● Resetting the counter Resets the free counter and error counter. ● Press [Menu] A [Cleaning] message appears. ● Press [Next] to display [Test Print] Press [Next] to set to [Counter Reset] Press [Change] A [Test Pattern] message appears. ●...
- Page 21 Operation Press B to confirm the setting value. Pressing B confirms the setting and returns you to the previous ● screen. Press [Exit] Pressing [Exit] each time returns you to the previous screen. ● Press [Enter] A [Display] message appears. ●...
- Page 22 Operation Buzzer sound setting This is used for setting the buzzer sound when an error occurs. ● Setting values On: turns on buzzer sound, Off: turns off buzzer sound Press [Menu] A [Cleaning] message appears. ● Press A and select a setting value. Press B to confirm the setting value.
- Page 23 Operation Unit number setting For setting the printer’s unit number according to the USB environment. ● Setting values No.1 ~ No.10 Press [Menu] A [Cleaning] message appears. ● Press A and select a setting value. Press B to confirm the setting value. ●...
- Page 24 Operation Check to ensure that [Film Search] is displayed on the operation Transport mode setting panel of the printer. Note: Press [Menu] Make sure that you set to the transport mode when transporting or ● A [Cleaning] message appears. ● moving the printer.
-
Page 25: Printing A Card
Operation Printing a Card Precautions on cards Note: If you see an [Initializing...] or [Preheating..] message on the LCD panel Card has run out ● of the printer, this means the printer is not ready yet. Printing cannot be Loads the cards. ●... -
Page 26: Ink Ribbon
Replacement Ink Ribbon Magnetic cards Set the card with the magnetic stripe facing upward and toward ● Ink ribbon has run out the printer, or facing downward and toward you. Replace with a new ink ribbon. ● Print this page Note: If the security lock function is turned on, turn off the function from the ●... - Page 27 Replacement ① With the inked surface facing outward, align the yellow side of the unused ribbon with the arrow on the cassette, and unwind it along the three shafts. ② Insert the ink ribbon firmly into the bobbin holders with the ribbon set to the far end of the guides.
- Page 28 Replacement Do not perform work on the printer door. Do not place heavy objects or ● apply load on the printer. Doing so may damage it. During replacement, clean the four bobbin holders on the printer. Burrs ● generated by friction between the bobbins and bobbin holders may be adhered to the ink ribbon or retransfer film, causing printing errors.
-
Page 29: Retransfer Film
Replacement Retransfer Film Retransfer film has run out Replace with a new retransfer film. ● Print this page Note: If the security lock function is turned on, turn off the function from the ● computer to unlock the printer. After closing the door, turn on the func- tion again from the computer. - Page 30 Replacement Press [Reset]DB to reset the printer. Install a new retransfer film. Install while referring to the indication on the label of the cassette. ● ① When installing the retransfer film, make sure that at least three black lines are wound onto the take-up side. ②...
- Page 31 Replacement Do not touch the retransfer face (the side that faces outward when in- ● stalled) with your hand. Touching it may cause printing errors. Put on the supplied gloves when handling the retransfer film. When handling the cassette, hold it with both hands. Accidentally drop- ●...
-
Page 32: Maintenance
Maintenance Servicing of Parts Cleaning roller The function of the cleaning roller is to remove any dirt or dust attached ● to the card. Card jams may occur if the cleaning roller is dirty. ● The color of the printed card may appear faded or dirt may appear con- ●... - Page 33 Maintenance Fan filter The color of the printed card may appear faded or dirt may appear con- ● spicuous if the fan filter is dirty. Perform cleaning after printing about 10,000 cards. ● Print this page Note: After cleaning is complete, check to ensure that all dismantled parts ●...
- Page 34 Maintenance Set the filter cover. Card feed roller/heating roller The color of the printed card may appear faded or dirt may appear con- ● spicuous if the card feed roller/heating roller is dirty. Perform cleaning after printing about 1,000 cards. ●...
- Page 35 Maintenance Press B A [Cleaning...] message appears. Turn on the power. ● Note: If the retransfer heating roller is hot, a[HR is too hot]message will be ● displayed. Turn off the power, and perform cleaning after the retransfer Press [Menu] to set to [Cleaning] heating roller has cooled down completely.
- Page 36 Maintenance Magnetic head Writing/Reading errors may occur if the magnetic head is dirty. ● Perform cleaning after printing about 1,000 cards. ● Print this page Note: If the security lock function is turned on, turn off the function from the ●...
- Page 37 Maintenance Press [Menu] to set to [Cleaning] Note: ● Insert the card within 20 seconds after pressing B. After pressing B, the buzzer sounds upon a lapse of 20 seconds, and ● [Enter]D Press [Next] to set to [MG] a [Jam (Hopper)] error message appears 10 seconds later. Press [Reset]DB to cancel the error.
- Page 38 Maintenance Bobbin holders The color of the printed card may appear faded or dirt may appear con- ● spicuous if burrs are attached to the bobbin holders. Print this page Note: If the security lock function is turned on, turn off the function from the ●...
- Page 39 Maintenance Thermal head Lines may appear on the card after printing if the thermal head is dirty. ● Print this page Note: If the security lock function is turned on, turn off the function from the ● computer to unlock the printer. After closing the door, turn on the func- tion again from the computer.
- Page 40 Maintenance Apply alcohol to a cotton swab (large), and use it to wipe the thermal head. (Cotton swab and alcohol: sold separately) Wipe the thermal head with care in the horizontal direction. ● Insert the retransfer film cassette along the guide rail until a “click” sound is heard.
-
Page 41: Servicing Based On Print Output
Maintenance Servicing Based on Print Output When an Error Message is Displayed Colors appear faded or dirt is conspicuous Identifying errors using the error code "Clean the cleaning roller." A page 32 ● List of error codes "Clean the fan filter." A page 33 ●... - Page 42 Troubleshooting? MG Test Err A8 Cam Error C1 MG writing error occurred during MG self-diagnosis. Reset the printer. Heating roller operation failure. Turn off and on the power. If the same ● ● problem recurs, turn off the power and consult our authorized dealers. Ink Error B0 HR Overheat C2 An incorrect printer ink is installed.
-
Page 43: Precautions On Cards
Troubleshooting? Warpage correction roller thermister failure. Turn off and on the power. ● Precautions on cards If the same problem recurs, turn off the power and consult our author- ized dealers. Card jams Overcool F6 Check the error code on the operation panel. ●... - Page 44 Troubleshooting? ③ Close the printer door, and press[RESET] DB to reset the printer. Error code 91 Card jam in the turnover unit. ● Remove the card hopper. Open the printer door, and remove the cleaning unit. When the cleaning unit cannot be detached ①...
- Page 45 Troubleshooting? Move the card to the turnover unit. Turn the turnover unit and cleaning unit in opposite directions. ● ② Open the card hopper cover, and remove the card if this is possible. Close the printer door, and press [RESET]DB to reset the printer. Use the jog dial to turn the turnover unit slightly in both the left and right directions.
-
Page 46: Troubleshooting
Troubleshooting? Restore the card to the magnetic encoder unit. Use the jog dial to turn the cleaning unit. ● Turn the jog dial at the turnover unit to adjust the unit to a vertical posi- tion. While doing so, make use of the printer’s label as a reference. ●... - Page 47 Troubleshooting? The card is discharged from the NG card outlet or card stacker. ● Error code 93 Card jam in the retransfer unit. ● Press [RESET]DB to reset the printer. Error code 94 Card jam in the discharge unit. ● Open the printer door.
- Page 48 Troubleshooting? Remove the retransfer film cassette (on the left), and check the printer interior. If the card is found adhered to the retransfer film, remove the card. ● Note: If the card cannot be removed from the retransfer film cassette (on the ●...
-
Page 49: Ink Ribbon
Troubleshooting? Ink Ribbon Retransfer Film "Ink ribbon has run out" A page 26 "Retransfer film has run out" A page 29 ● ● "Ink ribbon is broken" A page 27 "Retransfer film is broken" A page 30 ● ● Unable to fit retransfer film cassette into printer With the printer door closed. -
Page 50: Unable To Produce Desired Printing Results
Troubleshooting? Unable to produce desired printing results Printer not operating as desired Lines appear on card after printing Card is not fed into the printer "Clean the thermal head." A page 39 Is the card feed path dirty? ● ● Clean the card feed roller/heating roller. -
Page 51: Before Sending Printer For Repair
Troubleshooting? Before sending printer for repair Installation and Connection Enter the symptoms into the troubleshooting sheet. Printer Installation Printing the troubleshooting sheet Note: Using the printer in an environment beyond the operating ambient tem- ● perature range may result in retransfer or printing errors. Check the Clicking the Print icon displays a PDF file. -
Page 52: Printing Media
Setup Power Cord Connection Printing Media Insert the power cord (supplied) to the power input terminal at the rear of the printer. Installing the ink ribbon Note: Stand the cassette on a flat surface as illustrated in the diagram. Avoid ●... - Page 53 Setup Do not touch the retransfer face (the side that faces outward when in- ● stalled) with your hand. Touching it may cause printing errors. Put on the supplied gloves when handling the retransfer film. Remove any slack in the ink ribbon. When handling the cassette, hold it with both hands.
-
Page 54: Setting Cards" A
Setup Remove any slack in the film. ① Hold the retransfer film cassette. ② Turn the knob in the direction indicated by the arrow. Insert the cassette all the way in along the guide rail until a “click” sound is heard. Close the printer door. Memo: When attaching a new retransfer film, it is recommended that you for- ●... - Page 55 Setup Set the card hopper knob to [OPEN]. Install the card hopper cover. Lift to remove the card hopper cover. Adjusting Card Thickness This printer can print cards with a thickness between 0.25 mm ● and 1.00 mm. This is adjusted to a thickness of 0.76 mm by default. ①...
-
Page 56: Printer And Computer Connection
Setup Printer and Computer Connection Connecting with a USB Cable Note: While printing is in progress, do not turn off the power of the host com- ● puter, or switch it to the sleep or standby mode. Doing so may stop the movement of the cards inside the printer. -
Page 57: Printer Setting
Setup Printer Setting "Operation Panel" A page 10 ● "Setting using the operation panel" A page 16 ● Operation Panel "Name and functions of parts" A page 10 ● "Operation buttons" A page 10 ● "Operation Panel Display" A page 11 ●... -
Page 58: List O Error Codes
Setup List of Error Codes Printer (Error Code:0x01000000-0x01040000) Error Code Description Actions (Reference Page No.) 0x0102D000 Cards have run out. Replenish the cards. (A page 25) The card hopper is detached. Install the card hopper. (A page 56) 0x0102D100 The printer door is open. Close the door, and press K N B to reset the printer.(A page The cleaning unit is detached. - Page 59 Setup Printer (Error Code:0x01040000-0x02000000) Error Code Description Actions (Reference Page No.) 0x01044400 A hardware error has occurred. Turn off and on the power again. If the same problem recurs, turn off the power and consult our authorized dealers. 0x0104AB00 An error has occurred in the mechanical component of the magnetic encoder.
- Page 60 Setup Printer Driver (Error Code:0x02000000-) Error Code Description Actions (Reference Page No.) 0x02RRRRRR Printer is not found. Check the printer connection. 0x0300274D Printer is not found. Check the printer connection. Printing using a USB-connected printer cannot To print via Ethernet (LAN) connection, disconnect the USB cable from be performed via Ethernet (LAN) connection.
- Page 61 Copyright 2009 Digital Identification Solutions Group. All rights reserved. Information in this document is subject to change without prior notice. IDExpert® and EDIsecure® are registered trademarks of Digital Identification Solutions AG. All other trademarks, tradenames, service names are trademarks or registered trademarks of...
Need help?
Do you have a question about the EDIsecure X ID 8300 and is the answer not in the manual?
Questions and answers