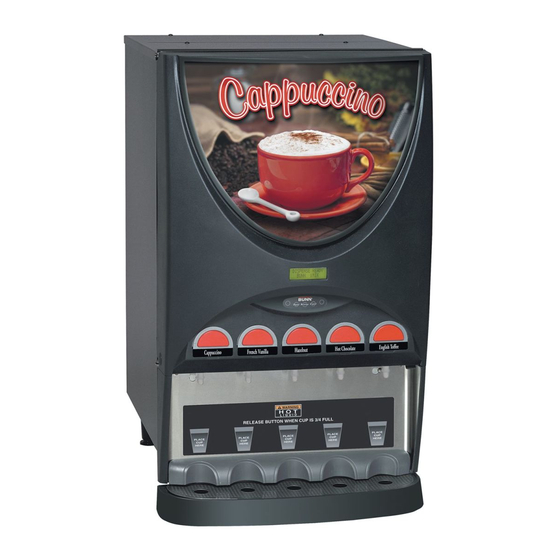
Bunn IMIX-3 Installation & Operating Manual
Hide thumbs
Also See for IMIX-3:
- Illustrated parts catalog (27 pages) ,
- Installation & operating manual (17 pages) ,
- Service & repair manual (52 pages)
Table of Contents
Advertisement
IMIX
-3
®
IMIX
-4
®
IMIX
-5
®
INSTALLATION & OPERATING GUIDE
BUNN-O-MATIC CORPORATION
POST OFFICE BOX 3227
SPRINGFIELD, ILLINOIS 62708-3227
PHONE: (217) 529-6601
FAX: (217) 529-6644
To ensure you have the latest revision of the Operating Manual, or to view the Illustrated Parts
Catalog, Programming Manual, or Service Manual, please visit the Bunn-O-Matic website, at
www.bunn.com. This is absolutely FREE, and the quickest way to obtain the latest catalog and
manual updates. For Technical Service, contact Bunn-O-Matic Corporation at 1-800-286-6070.
37510.0000M
05/13 ©2004 Bunn-O-Matic Corporation
Advertisement
Table of Contents

Summary of Contents for Bunn IMIX-3
- Page 1 To ensure you have the latest revision of the Operating Manual, or to view the Illustrated Parts Catalog, Programming Manual, or Service Manual, please visit the Bunn-O-Matic website, at www.bunn.com. This is absolutely FREE, and the quickest way to obtain the latest catalog and manual updates. For Technical Service, contact Bunn-O-Matic Corporation at 1-800-286-6070.
- Page 2 AS SPECIFIED HEREIN, TO REPAIR, REPLACEMENT OR REFUND. In no event shall BUNN be liable for any other damage or loss, including, but not limited to, lost profits, lost sales, loss of use of equipment, claims of Buyer’s customers, cost of capital, cost of down time, cost of substitute equipment, facilities or services, or any other special, incidental or consequential damages.
-
Page 3: User Notices
READ THE ENTIRE OPERATING MANUAL 28328.0011 BEFORE BUYING OR USING THIS PRODUCT THIS APPLIANCE IS HEATED WHENEVER CONNECTED TO A POWER SOURCE H O T 00831.0000F 3/98 ©1998 BUNN-O-MATIC CORPORATION L I Q U I D 00831.0000 PLACE PLACE PLACE... -
Page 4: Initial Setup
INITIAL SET-UP 1. Apply the four non-skid pads from the parts box to the bottom of the legs. 2. Remove the drip tray assembly, drip tray bracket, and splash panel assembly from the parts box. 3. Place a set of key holes in the drip tray bracket over the lower two screws in the panel below the hopper access door;... -
Page 5: Plumbing Requirements
90 psi to reduce it to 50 psi. The water inlet fitting is 1⁄4” flare. NOTE - Bunn-O-Matic recommends 1⁄4” copper tubing for installations of less than 25 feet and 3⁄8” for more than 25 feet from the 1⁄2”... -
Page 6: Preventive Maintenance
PREVENTIVE MAINTENANCE Bunn-O-Matic Corporation recommends that preventive maintenance be performed at regular intervals. Maintenance ® should be performed by a qualified service technician. For Technical Service, contact Bunn-O-Matic Corporation at ® 1-800-286-6070. NOTE: Replacement parts or service caused by failure to perform required maintenance is not covered by warranty. - Page 7 CLEANING The use of a damp cloth rinsed in any mild, non-abrasive, liquid detergent is recommended for cleaning all sur- faces on Bunn-O-Matic equipment. Do NOT clean this equipment with a water jet device. 1 x 24h 1. Rinse out Whipper Chambers by placing RINSE/RUN 1.
-
Page 8: Draining The Hot Water Tank
5. Pull the clamped end of the silicone tube out of the dispenser and direct it into a drain or a container large enough to hold the volume of water in the tank (7.3 gal for iMIX-4/5 and 4.4 gal for iMIX-3). - Page 9 GLOSSARY Adjust tank temperature Allows password to be set to pre- TANK TEMP XXX° SET PASSWORD ? (190° F maximum) vent altering setup functions EXIT XXXX Turns on audio alarm Adjust minimum tank ready temper- AUDIBLE ALARM ? READY TEMP XXX° ature for lockout (185°...
- Page 10 GRAM HOME SCREEN. PROGRAM HOME SCREEN DISPENSE READY BUNN iMIX P3057 The screen above will be shown when the dispenser is ready for use. While the tank is heating, the water temperature will be displayed until the ready temperature is reached.
- Page 11 Place the “NORMAL/PROGRAM/RINSE” switch in the “PROGRAM” position. Press button A (page 10) be- low the BUNN logo on front of the door until the “SET CUP SIZE” menu is reached. (Refer to menu J, page 14) Press button D (page 10) to select programming by “EXAMPLE”. Place proper cup under dispense tip for station you desire to set.
- Page 12 PROGRAMMING THE DISPENSER (cont.) Press and release right switch (advance to next menu), “TANK TEMP XXX°” appears on screen. Adjust tank TANK TEMP XXX° EXIT temperature Adjust minimum tank READY TEMP XXX° ENTER ASSET # ? EXIT EXIT ready temperature for lockout ENABLE SERVICE ? Portion control...
- Page 13 PROGRAMMING THE DISPENSER (cont.) SET FLAVOR 1 BY TASTE RECIPE Auger Delay SELECT UNITS .XX sec EXIT METRIC Goes to next station. Returns to (A) (page Returns to (E) CAL HOPPER 1 ? 12) after last station. (page 12) Adjust hopper motor speed for station for station selected DRINK STRENGTH 1...
- Page 14 PROGRAMMING THE DISPENSER (cont.) LOW POWDER LOCK ? TEST SWITCHES ? SET CUP SIZE EXIT EXMPL TIME Use Switch To Test DISPENSE LOCKOUT DISPENSE UNTIL HEAD 1 SM TIME TEST HEATER ? CUP IS 3/4 FULL (-) 6.40 SEC (+) EXIT EXIT Press and release...


Need help?
Do you have a question about the IMIX-3 and is the answer not in the manual?
Questions and answers