Table of Contents
Advertisement
Advertisement
Table of Contents

Related Manuals for Pittasoft BlackVue DR400G-HD


Summary of Contents for Pittasoft BlackVue DR400G-HD
- Page 1 DR400G-HD User manual Ver 1.40 www.pittasoft.com...
-
Page 3: Table Of Contents
Contents Getting Ready Before Using This User Manual Safety Instructions BlackVue Features Checking the BlackVue Package Content Checking the main body of the BlackVue Using the Installing the BlackVue BlackVue Recording Playing a Recorded File BlackVue Running BlackVue Software Software The Screen Organization Playing a Recorded File Saving as an Image File / Printing Configuring Your BlackVue Set-up Other Information Installing the BlackVue Software Upgrading the Firmware Product Specifications... -
Page 4: Getting Ready 2 Before Using This User Manual
Before Using This User Manual Getting Ready Thank you for purchasing Pittasoft’s BlackVue. This product is a vehicle drive recorder. MakeXsureXtoXreadXthisXmanualXthoroughlyXinXorderXtoXuseXtheXBlackVueXcorrectly. PittasoftXwillXcontinueXtoXaddXnewXfunctionsXandXenhancementsXandXapplyXnewX technologiesXtoXthisXproduct.XAnyXinformationXandXspecificationsXcontainedXinXthisX manualXcanXbeXchangedXwithoutXpriorXnoticeXtoXusers.X TheXscreenshotsXandXfiguresXpresentedXinXthisXmanualXmayXdifferXfromXtheXactualX appearancesXofXtheXproduct. Conventions IconX Name Meaning IndicatesXthatXtheXaccompanyingXfunctionXmayXnotXoperateXorXbeX Caution disabled. IndicatesXaXtipXorXsupplementaryXdescriptionXtoXhelpXyouXoperateXtheX Note accompanyingXfunction. Warranty PittasoftXco.,XLtdXshallXnotXbeXheldXresponsibleXforXanyXaccidentalXlossXorXdamageXtoXtheX productXdueXtoXmisuseXbyXtheXuser. ThisXproductXisXdesignedXtoXrecord/storeXtheXsceneXofXaXvehicleXaccident.XHowever,XitX doesXnotXguaranteeXthatXitXisXanXexactXrecordingXofXallXaccidents.XAXminorXimpactXthatX doesXnotXtriggerXtheXimpactXsensorXmayXfailXtoXrecordXanXeventXscene. ThisXproductXisXaXdeviceXthatXassistsXyouXtoXworkXoutXtheXcircumstancesXofXtheX accident.XPittasoftXco.,XLtdXshallXnotXbeXheldXresponsibleXforXanyXdamageXorXlossX (financial,XbusinessXorXindirect)XoccurringXfromXanXaccident. -
Page 5: Safety Instructions
Safety Instructions Getting Ready The following instructions are given to ensure your safety and prevent the loss of property. Read them thoroughly and use the product correctly. Do not disassemble, repair, or remodel the product. This may result in electrical shock, fire or damage to the product. Contact a service center when your product needs to be repaired. Your warranty will be voided if you have disassembled, repaired, or remodeled the product yourself. When cleaning the product, do not spray water directly onto the main body of the product. Be careful that water does not enter the product and that it is not wet. This may result in electric shock, fire or a product malfunction. Do not spray cleaner directly onto the surface of the product. This may result in discoloration or cracks and may cause a product malfunction. Do not impart any force to the product. Be careful that no foreign material enters the product. This may result in a product malfunction. Never operate the product while you are driving. You may be distracted, resulting in a car accident. Make sure to operate the product after stopping your car in a safe location. Do not install the product in a location that hinders your driving or visibility. This may result in an accident. The recorded scenes may be displayed faintly or distorted if the front window of your car is tinted excessively. The optimal temperature range for guaranteed quality is between 0°C and 50°C. In the mid-summer or winter seasons, the video quality may deteriorate a little. This product uses a camera. The quality of the recorded scenes may be degraded in extreme situations, such as when the brightness changes rapidly, when entering or exiting a tunnel, or when the light is too strong at high noon, or when there is no light source at midnight. If the power to the product is disconnected due to a big accident, no scenes will be recorded. - Page 6 Safety Instructions Getting Ready ] Precautions for Using GPS PoorXGPSXsignalXreceptionXdoesXnotXaffectXtheXvideoXrecordingXperformance.XTheX coordinatesXandXtravelXspeedXinformationXmayXbeXunavailable,XbutXvideoXrecordingXisX activatedXimmediately. MaintainXtheXambientXtemperatureXtoXwithinXtheXrecommendedXrange.X TheXidealXambientXtemperatureXrangeXforXtheXGPSXoperationXisXbetweenX0°CXandX 50°C.XInXsummerXorXwinter,XtheXGPSXsignalXreceptionXmayXbecomeXunstableXorXitXmayX takeXlongerXtoXestablishXaXsatelliteXconnection. TheXGPSXrequiresXsomeXtimeX(1XtoX5Xminutes)XtoXdetermineXitsXcurrentXlocationXwhenX theXunitXisXturnedXonXforXtheXfirstXtimeXorXafterXanXextendedXperiodXofXnon-useXX (3XdaysXorXmore). AvoidingXGPSXsignalXinterferenceXandXre-checkXtheXGPSXsignalXstrength.. •X IfXandXobjectXisXplacedXonXtopXofXtheXGPSXmodel. •X IfXaXmetallicXtintingXfilmXhasXbeenXappliedXtoXtheXvehicle’sXwindshield. •X IfXthereXareXelectromagneticXinterference-generatingXdevicesXinsideXtheXvehicle.X (CertainXtypesXofXremoteXstartupXandXalarmXsystemsXandXMP3/CDXplayers) •X IfXotherXGPSXunitsXareXinXuse. •X IfXtheXweatherXisXcloudy. •X IfXyouXareXdrivingXunderneathXorXthroughXanXoverpass,XinsideXaXtunnelXorXundergroundXparkingX facility,XinXanXareaXwithXaXhighXconcentrationXofXlargeXbuildingXstructures,XnearXanXelectricalX powerXplant,XnearXaXmilitaryXbase,XorXnearXaXbroadcastingXsignalXtower. ] Caution When Installing the BlackVue InstallingXorXoperatingXtheXproductXwhileXyouXareXdrivingXmayXcauseXanXaccident.XStopX yourXcarXatXaXsafeXlocationXandXinstallXorXoperateXtheXproduct. IfXyouXsmellXanyXstrangeXsmellsXorXtheXcigaretteXjackXemitsXsmoke,XstopXusingXtheX productXandXcontactXyourXlocalXproductXdistributor. DustXinXtheXcigaretteXjackXmayXcauseXexcessiveXheatXorXfire.XCleanXitXperiodically. FrequentlyXcheckXwhetherXtheXmainXbodyXofXtheXproductXisXinstalledXsecurely.XTheX BlackVueXmayXfallXdueXtoXvibrationsXandXresultXinXpersonalXinjuryXorXdamageXtoXtheX product. PittasoftXisXnotXliableXforXanyXproductXdamageXorXpersonalXinjuriesXthatXoccurXdueXtoXanX accidentXorXcarelessness.
-
Page 7: Blackvue Features
BlackVue Features Getting Ready High-definitionXVideo TheXproductXisXequippedXwithXaXdedicatedXIRXlensXthatXsupportsXmegapixels,X whichXcontributesXtoXtheXreproductionXofXaXsharpXandXnaturalXimageXinXFullXHDX (1920x1080@30fps). SmartXphoneX/XPCXviewer TheXproductXcomesXwithXaXBlackVue-dedicatedXPCXviewerXandXaXsmartXphoneX specificX(forXtheXAndroidXOS)Xapplication.XItXalsoXprovidesXvariousXwaysXtoXcheckXtheX videoXorXchangeXsettingsXaccordingXtoXyourXpreferences. NormalXRecordingX RecordsXallXcircumstancesXwhileXdrivingXinXhighXqualityXvideo.X ParkingXRecordingX AutomaticXparkingXmodeXisXprovided.XIfXtheXmovementXofXtheXvehiclesXisXnotXdetectedX forXaXpre-determinedXperiodXofXtimeX(byXG-sensor),XtheXmodeXautomaticallyXswitchesX toXparkingXmode.XIfXtheXmovementXofXtheXvehicleXcontinues,XtheXparkingXmodeXisX automaticallyXcancelled.XInXtheXparkingXmode,XrecordingsXareXmadeXonlyXwhenXaX movementXisXdetectedXbyXtheXcameraX(motionXdetection)XorXanXimpactXisXimpartedX (G-sensor).X(CreatedXbyXPittasoft’sXadvancedXsecurityXandXsafetyXtechnologies.)X EventX(G-Sensor)XRecordingX WhenXanXimpactXisXimpartedXtoXyourXcarXwhileXyouXareXdriving,XtheXBlackVue’sXbuilt- inXG-sensorXdetectsXthisXautomaticallyXandXstartsXrecordingXtheXevent.X SoundXRecordingXFunction SinceXtheXBlackVueXhasXaXbuilt-inXmicrophone,XtheXsurroundingXsoundsXareXalsoX recordedXwhenXtheXvideoXscenesXareXrecorded. VideoXanalysisXusingXmultipleXexternalXdevicesX YouXcanXrecordXtheXvideoXinXtheXcommonXMP4XformatsXandXplayXitXusingXmultipleX players. StylishXandXConvenientXDesign TheXsoftXandXcylindricalXdesignXmakesXtheXinsideXofXyourXcarXmoreXstylish.XInXaddition,X youXcanXeasilyXadjustXtheXangleXofXtheXcameraXandXcaptureXtheXinsideXofXyourXcar. VoiceXGuideXFunction YouXcanXeasilyXuseXtheXBlackVueXasXitXguidesXyouXwithXvoiceXinstructionsXforXtheX operationsXyouXshouldXperform. GPSXDataXRecording PowerfulXsensitiveXGPSXthatXisXembeddedXinXtheXdeviceXrecordsXtheXvehicle’sXspeedX andXcoordinatesXwheneverXrecordingXisXinXprogress.XInXaddition,XitXisXpossibleXtoXuseX theXGPSXdataXinXconjunctionXwithXtheXBlackVueXsoftwareXandXGoogleXMapsXtoXplotX theXvehicle’sXnavigationXpathX(whenXconnectedXtoXtheXInternet). -
Page 8: Checking The Blackvue Package Content
Checking the BlackVue Package Content Getting Ready Check the product and the accompanied accessories contained in the product package. N IfXthereXisXanyXproblemXwithXtheXaccessories,XcontactXyourXlocalXproductXdistributor. N TheXaccompaniedXaccessoriesXcanXbeXchangedXwithoutXpriorXnotice. BlackVue UserXmanual VideoXOUTXCableX VideoXINXCableX PowerXcable CableXholders Double-sidedXtapeXX (AXspareXunitXforXmountingXX theXBlackVueXontoXtheXvehicle.) MicroXSDXcard MicroXSDXcardXreader (IncludingXtheXBlackVueXSoftware) -
Page 9: Checking The Main Body Of The Blackvue
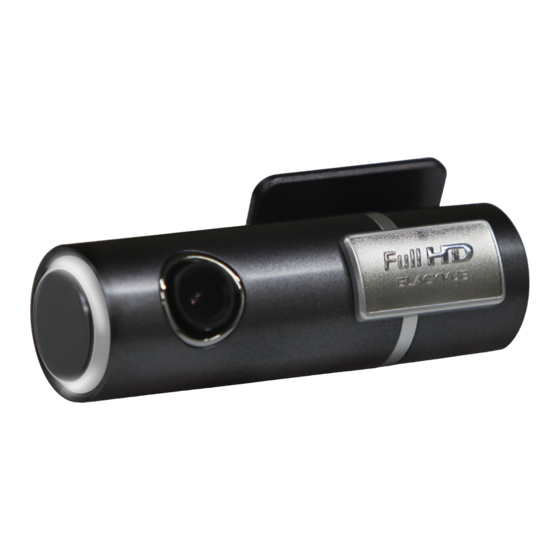
Checking the main body of the BlackVue Getting Ready Check the main body of the BlackVue. N ForXmoreXinformationXonXtheXuseXofXeachXpart,XreferXtoXtheXrelevantXpage. RecordingXLEDXindicator CameraXlens Holder GPSXSignalXLED HolderXlockXbuttonX Microphone (XSeeXpageX11) [DCXIN]XterminalX( XSeeXpageX9) MicroXSDXcardXslot ButtonsXonXtheXmainXbodyX (ParkingXRecordingXButton) [VIDEOXOUT]Xterminal ( XSeeXpageX12) ( XSeeXpageX11) -
Page 10: Using The
Installing the BlackVue Using the BlackVue Inserting / Removing a Micro SD Card Press the Micro SD card lightly and slide it into the BlackVue in the direction shown in the figure. N ToXremoveXtheXMicroXSDXcard,XpressX itXlightlyXandXitXwillXeject.X N BeforeXyouXinsertXanXSDXcardXintoX theXBlackVue,XturnXtheXBlackVueXoff. ] Caution When Using a Micro SD Card •X Insert/RemoveXtheXMicroXSDXcardXwhileXtheXBlackVueXisXturnedXoff.XX (EnsureXthatXallXtheXLEDsXofXtheXBlackVueXareXturnedXoff.) •X DoXnotXremoveXtheXMicroXSDXcardXwhileXtheXBlackVueXisXreadingXorXwritingXdata.XX ThisXmayXcorruptXtheXdataXorXresultXinXaXproductXmalfunction. •X CheckXtheXdataXstoredXonXtheXMicroXSDXcardXperiodicallyXtoXensureXthatXtheXproductX operatesXnormally. •X UseXaXMicroXSDXcardXprovidedXbyXPittasoft.XUsingXaXcardXfromXotherXcompaniesXmayXresultX inXdataXcorruptionXorXaXproductXmalfunction. •X TheXMicroXSDXcardXisXanXexpendableXitem.XReplaceXitXwithXaXnewXoneXifXitXhasXbeenXusedXforX anXextendedXperiodXofXtime. •X MakeXsureXtoXbackXupXimportantXdataXtoXanotherXstorageXmedium.XWeXdoXnotXprovideXaX warrantyXforXanyXcorruptedXdataXthatXoccursXwhileXusingXtheXproduct. - Page 11 Installing the BlackVue in a vehicle Stop the engine and remove the key from the ignition. N InstallXtheXBlackVueXinXaXwell-litXandXsafeX location.X Insert a Micro SD card into the BlackVue. N ForXmoreXinformationXonXusingXtheX MicroXSDXcard,XreferXtoXpageX8. Attach the BlackVue to a windshield of your car using double-sided tape. N WeXrecommendXthatXyouXinstallXtheX BlackVueXbehindXtheXrearXviewXmirror.XX TheXlensXofXBlackVueXshouldXbeXlocatedX onXtheXcenterXofXtheXvehicle. N InstallXitXinXaXlocationXthatXdoesXnotX hinderXyourXvisibility.X N WipeXallXforeignXmaterialXandXmoistureX fromXtheXsurfaceXtoXwhichXtheXdouble- sidedXtapeXwillXbeXattachedXusingXaXsoftX andXdryXcloth. N IfXtheXproductXisXinstalledXonXaXwindowX hotXwire,XthisXmayXcauseXtheXhotXwireX toXbeXdamagedXwhenXremovingXtheX productXlater. N IfXtheXBlackVueXhappensXtoXbeXremovedX fromXtheXholder,XreferXtoXpageX11. Connect the [DC IN] terminal of the BlackVue and the cigarette jack of your car using the power cable. N ForXparkingXmode,XconnectingXtheX POWERXMAGICX(aXbatteryXpowerX controller)XisXrecommended. N UseXaXmultiXpowerXleads,XinXcaseX BlackVueXisXusedXwithXotherXcarXdevice.
- Page 12 Installing the BlackVue Using the BlackVue Tie the power cable. N UseXtheXprovidedXcableXholder,XifX necessary. A djust the position of the camera lens of the BlackVue. N TheXBLACKVUEXlogoXshouldXbeX slightlyXfurtherXdownXthanXhorizontal. N CheckXtheXdataXsavedXduringXaXtestX drive.XAdjustXtheXlensXposition,XifX necessary. N IfXyouXconnectXaXmobileXvideoXdeviceX (smartXphone/navigation),XyouXcanX adjustXtheXangleXofXtheXlensXviewingX theXvideo.X( XSeeXpageX11.) S tart the engine. Check whether the BlackVue is installed correctly. N WhenXtheXBlackVueXisXinstalledX correctly,XitsXLEDXwillXturnXon.
- Page 13 Connecting the BlackVue to an AV Product VideoXOUTXCable VideoXINXcable* Connect the BlackVue’s [VIDEO OUT] terminal to the AV unit using the Video OUT/IN cable (accessory). N YouXcanXviewXtheXreal-timeXvideoXofXtheXBlackVueXthroughXtheXconnectedXAVX product. N YouXcannotXplayXtheXfilesXrecordedXbyXBlackVue. N IfXyouXuseXtheX[VIDEOXOUT]XportXofXBlackVue,XtheXframeXrateXdecreases. N However,XsomeXnavigationXsystemsXareXnotXcompliantXwithXtheXprovidedXVideoX In*Xcable.XReferXtoXtheXuserXmanualXforXtheXnavigationXsystemXtoXcheckXtheX compatibilityXwithXtheXprovidedXVideoXInXcable. Removing the BlackVue from the Holder While pressing the [LOCK] button for the holder, pull the main body of the BlackVue as shown in the figure. The main body of the BlackVue is easily removed from the holder. N AssemblingXitXintoXtheXholderX:XAlignXtheXgroovesXofXtheXmainXbodyXofXtheX BlackVueXwithXthoseXofXtheXholderXandXslideXtheXmainXbodyXintoXtheXholderXuntilX youXhearXaXclick.X...
- Page 14 Recording Using the BlackVue Using the Normal Recording Function Start the engine. BlackVue turns on and starts the Normal Recording function. BlackVue records all the videos while the power is on. N IfXyouXconnectXBlackVueXwithXPOWERXMAGICX(aXbatteryXpowerXcontroller),XitXisX alwaysXon. N IfXyouXselectX[NormalXRecordXOff]XinXtheX[NormalXRecord]XinXtheXSet-upXscreen,XthisX functionXwillXbeXdisabled.X( XSeeXpageX25) Using the Parking Recording Function Using the Parking Recording Function [Auto Switching to Parking Mode] is set by default. ( See page 26) N IfXtheXmovementXisXnotXdetectedXforX10X minutesX(byXG-sensor),XitXautomaticallyX switchesXtoXparkingXmode.X N IfXtheXmovementXisXdetectedXforX30XsecondsX inXsuccession,XtheXparkingXmodeXisXautomaticallyXcancelled.X To immediately activate or deactivate the parking mode, press the BlackVue main body’s button. In the parking mode, recordings are made only when a motion is detected by the camera (motion detection) or an impact is imparted to your car (G-sensor). For parking mode, connecting the power of the BlackVue to the POWER MAGIC (a battery power controller) is recommended. Motion Detection Algorithms •X ThisXtechnologyXisXforXcameraXtoXdetectXmovements.X •X TheXproprietaryXsecurityXsolutionXtechnologyXofXtheXIPXsecurityXcameraXspecializedXcompany,X PITTASOFTXisXadoptedXforXmotionXdetection.
- Page 15 Using the Event Recording Function When the vehicle is running or parked, if the BlackVue detects an impact over a pre-determined threshold, the video of the before and after is automatically recorded. N GoXtoXtheXsetupXscreenXandXadjustXtheXsettingsXforX[G-Sensor]XunderXSensitivity.X ( XSeeXpageX27).XItXisXpossibleXtoXconfigureXdifferentX[G-Sensor]XsettingsXforXtheX normalXrecordingXandXparkingXrecordingXfunctions. G-Sensor (3 axis acceleration sensor) •X BlackVueXdetectsXimpactXwithXtheXG-sensorXandXrecordingXtheXvideo. •X G-sensorXisX3-axisXgravityXaccelerationXsensorXthatXdetectsXanXimpactXinXXX(forwardXandX backward),XYX(leftXandXright)XandXZXaxisX(upwardXandXdownward). •X YouXcanXplayXtheXG-sensorXinformationXofXtheXrecordedXfileXbyXusingXtheXBlackVueXsoftware. •X TheXG-sensorXvalueXmeasuredXbyXBlackVueXcannotXbeXusedXasXanXevidenceXforXtrafficX accident. Turning off the BlackVue Stop the engine. The BlackVue will turn off after about 5 seconds. All LED indicators of the BlackVue will turn off. N WhenXtheXPOWERXMAGICX(aXbatteryXpowerX controller)XisXconnected,XseparateXtheXpowerX cableXconnectedXtoXtheXBlackVue.
-
Page 16: Playing A Recorded File
Playing a Recorded File Using the BlackVue BlackVue recordings are saved in MP4 format so that you can easily play the recorded files using a general video player (PC, smart phone or navigation) without file format conversion. N BlackVueXrecordingXfilesXareXsavedXinXtheX ‘Record’XfolderXofXtheXSDXcard.X Playing Recorded Files with a smart phone Downloading BlackVue applications •X PittasoftXprovidesXusefulXBlackVueXspecificXapplicationsXforX yourXreference.XUserXcanXuseXthisXfeatureXonlyXwithXsmart- phoneXsupportingXtheXSDXcardXsection.X •X AccessXAndroidXMarketXXSearchXforXBlackVueXX SelectXanXapplicationXXDownload Turn off your BlackVue product and remove the SD card from it. Insert the SD card into your smart phone. N YouXcanXplayXtheXrecordedXvideoXinXaXsmartXphoneX supportingXtheXmicroXSDXcard. From the main menu on your smart phone, select the BlackVue application. The BlackVue viewer will be opened. N TheXvideoXcanXbeXplayedXusingXyourXsmartXphone’sX videoXplayer. Tap on a video clip. The video clip will be played. N IfXthereXareXaXnumberXofXfilesXinXtheXSDXcard,XfileX loadingXmayXtakeXsomeXtime. - Page 17 Playing Recorded Files with a Navigation Insert the SD card into the SD card adaptor. Then insert the adaptor (with the SD card inserted) into the SD card reader. Connect the SD card reader to the navigation system. Tap a play-related icon and select the removable disk that contains the video clips. Tap on a video clip. The video clip will be played. N PlayingXaXvideoXclipXmayXdifferXdependingXonXtheXdeviceXmodel.XForXmoreX information,XreferXtoXtheXuserXmanualXofXtheXnavigationXsystem. N IfXthereXareXaXnumberXofXfilesXinXtheXSDXcard,XfileXloadingXmayXtakeXsomeXtime.
-
Page 18: Playing A Recorded File
Playing a Recorded File Using the BlackVue Playing Recorded Files with a PC Insert the SD card into the SD card adaptor. Then insert the adaptor (with the SD card inserted) into the SD card reader. Connect the SD card reader to the PC. Double-click the “BlackVue.exe” file in the “Applications” folder of the SD card. The BlackVue software will be launched. Tap on a video clip to play it. N ForXPCXvideoXplayer,XyouXhaveXtoXinstallXH.264XvideoXcodecXandXAACXaudioX codecXforXnormalXplayback. N WhenXyouXplayXtheXfilesXonXaXPC,XusingXBlackVueXsoftwareXisXrecommended.XX (XSeeXpageX17) XXXX... - Page 19 Running BlackVue Software BlackVue Software When playing a BlackVue recording file on a PC, use the BlackVue player software. BlackVue software enables convenient playing and management of BlackVue recording files. N YouXcanXuseXtheXBlackVueXplayerXdirectlyXwithoutXinstallingXtheXprogram. Insert the SD card into the SD card adaptor. Then insert the adaptor (with the SD card inserted) into the SD card reader. Connect the SD card reader to the PC. Double-click the “BlackVue.exe” file in the “Application” folder of the SD card. BlackVue software runs. N ToXinstallXtheXBlackVueXsoftwareXontoXtheXPC,XreferXtoXpageX30. XXXXXX...
- Page 20 The Screen Organization BlackVue Software PlayingX ZoomXIn/OutX G-SensorX BlackVueX ScreenX View (AdjustXusingXtheX VersionXinformation View mouse’sXscrollXwheel) MyWayXViewer (XSeeXpageX22)X/ SaveXImageX/ PrintX/XX Set-up GPSXInformationX Window FileXListX/XMap Timeline 1 X X F ullXScreenX/XFlipXImage 3 X C ontrolXtheXPlayingXSpeedX/X (XSeeXpageX20) ControlXtheXVolume 2 PlayXControlXbuttons 4 PlayXTime TypesXofXRecordedXFiles :XX X I ndicatesXaXNormalXRecordingXfile.XThisXisXshownXinXgreenXinXtheXtimeline. :XX X I ndicatesXanXEventXRecordingXfile.XThisXisXshownXinXamberXinXtheXtimeline.
- Page 21 Playing a Recorded File BlackVue Software C lick the [ Browse] button and select the folder in which the file is located. N TheXfilesXcontainedXinXtheXselectedX folderXareXdisplayedXinXtheXlist. D ouble-click the file you want to play. (Alternatively, select the file and click the button.) The selected file starts to be played. N ToXviewXtheXvideoXinXfullXscreen,X double-clickXtheXplayingXscreen.X PressXtheXESCXkeyXtoXreturnXtoXtheX basicXplayingXscreenXsize. N ScrollXmouseXwheelXtoXZoomXIn/OutX inXPlayingXScreenXView.XX (Min.X0.5XX~XMax.X2.0X)X N YouXcanXcontrolXtheXplayingXspeedX fromX0.5xXtoX2.0xXspeed. N ToXlistXonlyXtheXfilesXwithXtheXtypesX youXspecify,XselectXorXdeselectXtheX buttonsXinXtheX[SelectXTypes]Xsection.XX (AllXtypesXareXselectedXbyXdefault.) N SelectXtheXcheckboxXinXtheXdate,XtheX filesXofXselectedXdateXinXtheXTimelineX appearsXinXtheXlist. The recorded file is MP4 format. •X BlackVueXsavesXrecordedXfilesXinXtheXMP4Xformat.XYouXcanXcheckXtheXvideoXclipXwithXanXX MP4X-compliantXvideoXplayerXorXBlackVue-dedicatedXplayer.
- Page 22 Playing a Recorded File BlackVue Software Adjusting the Screen X(FullXScreenXbutton) DisplayXtheXvideoXinXfullXscreen. X(Flip) FlipsXtheXdisplayXvertically. Using the timeline By using the timeline, you can view the recordings for each hour of the selected date at a single glance. In addition, you can easily search/play a file for the hour you require. XSelectXtheXdate.XX XSelectXtheXhour.X(YouXcanXonlyXidentifyXtheXtypesXofXrecordedX files.)XX XSelectXtheXminutes.XX XSelectXtheXseconds.XXViewXtheXrecordingXmadeX atXtheXselectedXtime. N RedXcircle:XIndicatesXthatXthereXisXatXleastXoneXfileXrecordedXduringXtheXdate.X YellowXcircle:XIndicatesXtheXselectedXdate.
- Page 23 Deleting/Exporting the file From the player file list, select a file and right-click it to display the context menu. Select Delete to delete the selected file or select Export to save it in a different location. Video export setting SetXtheXfileXnameXandXsaveXlocationXandX exportXtheXvideoXfile. OnlyXtheXselectedXsectionXofXtheXvideoXisX exported.X WhenXaXvideoXfileXisXexported,XtheXaudioXisXremoved. Checking the Map When playing back a recording file, select the Map tab. This plots the vehicle coordinate data from the GPS onto Google Maps. N ToXuseXtheXGoogleXMapsXservice,XfirstXconnectXtoXtheXInternet. N OnlyXdataXfromXrecordingXfilesXthatXcontainXGPSXdataXisXdisplayed. GPSXSignalXStrength TravelXSpeedXandXCoordinates X:XChangesXtheXspeedXdisplayXunits. -Green:XGPSXDataXAvailable -XRed:XGPSXDataXNotXAvailableZoom MapXDisplayXOptions ZoomXIn/Out (AdjustXusingXtheXmouse’sX VehicleXLocation scrollXwheel)
- Page 24 Playing a Recorded File BlackVue Software Opening the MyWay Viewer Press the button. The MyWay Viewer appears. The driving path appears on the map. Double-clickXtheXmap.XAXvideoXofXtheXdrivingXrouteXnearXtheXclickedXpointXisXplayed. TravelXSpeedXandXCoordinates X:XChangesXtheXspeedXdisplayXunits. Latitude/Longitude FindXMyXPosition PanXbutton MapXDisplayXOptions ZoomXIn/Out StartXpointXofXtheXrecordings -XRed:XTheXcurrentXfileX -XBlue:XTheXprevious/nextXfile VehicleXLocation DrivingXpath -XCurrentXfileX/X2XpreviousXfilesX/X2XnextXfiles...
-
Page 25: Saving As An Image File / Printing
Saving as an Image File / Printing BlackVue Software Saving the Selected Screen as an Image File P ause the file by clicking the button while it is being played. Select the scene you want to save. N ToXselectXtheXsceneXyouXwant,XselectXtheXsecondsXinXtheXtimelineXorXseekXtheX sceneXbyXusingXtheX Xbuttons.X Click the button. Check the path in which the file will be saved and then click the Save button. The selected scene is saved as an image (jpeg or bmp) file. Printing the Selected Screen P ause the file by clicking the button while it is being played. Select the scene you want to save. N ToXselectXtheXsceneXyouXwant,XselectXtheXsecondsXinXtheXtimelineXorXseekXtheX sceneXbyXusingXtheX Xbuttons.X Click the button. The selected scene is printed. -
Page 26: Configuring Your Blackvue Set-Up
Configuring Your BlackVue Set-up BlackVue Software Insert the micro SD card into the PC. ( See page 16) Click the button. The Set-up screen is displayed. N IfXtheXSDXcardX(whereXtheXBlackVueXfirmwareXisXinstalled)XisXnotXconnectedXtoXtheX PC,XyouXcannotXconfigureXtheXsettingsXasXintended. Configure your BlackVue Set-up. Click the [Save & Close] button. N IfXtheXsettingsXareXnotXsavedXonXtheXMicroXSDXcard,XyourXconfigurationXofXtheX BlackVueXSet-upXwillXnotXbeXperformed.X N ToXresetXtheXsettingsXtoXtheirXdefaultXvalues,XclickXtheX[Reset]Xbutton. Remove the micro SD card of your configuration from the PC and insert it into your BlackVue product. They are applied to the BlackVue automatically. - Page 27 Setting the Basic 1 Time Zone SelectXtheXtimeXzoneXwhereXyouXareXusingXtheXBlackVue.XThisXsettingXisXusedXforXtheX timeXinformationXforXrecordedXfiles. 2 Image Setting Image Quality :XSetXtheXimageXqualityXforXrecordedXfiles.XTheXhigherXtheXimageXquality,X theXlargerXtheXfile. Brightness :XControlsXtheXbrightnessXofXtheXrecording. N RecordingXTimesXX TheXactualXrecordingXtimeXinXContinuousXRecordingXmodeXmayXvaryXslightlyXfromXtheXinformationXprovidedXabove. ImageXQuality FullXHDX FullXHDX HDXX HDXX D1XX (30fps) (15fps) (30fps) (15fps) (30fps) MemoryXCapacity 4hrsX37mins 6hrsX54mins 6hrsX54mins 11hrsX29mins 17hrsX09mins 16GB 9hrsX24mins 13hrsX59mins 13hrsX59mins 23hrsX18mins 35hrsX48mins 32GB 3 Recording Setting N ormal Record •X Normal Record On :XRecordsXallXsituationsXwhileXyouXareXdriving.
- Page 28 Configuring Your BlackVue Set-up BlackVue Software Voice Record :XSelectXwhetherXtoXuseXtheXVoiceXRecordingXfunction. Date and Time Display :XAddsXtheXdateXandXtimeXtoXtheXbottomXleftXofXtheXrecording. Speed Display :XAddsXtheXspeedXtoXtheXbottomXleftXofXtheXrecording. N IfX[DisplayXOff]Xselected,XspeedXwillXnotXbeXdisplayed. Record File Unit :XSetsXtheXRecordingXFileXUnitXwhenXaXfileXisXsaved. Recording Storage Setting :XStorageXAllocation:XWhenXtheXstorageXisXfull,XtheXoldestX fileXisXautomaticallyXdeletedXtoXrecordXaXnewXvideo. •X Time :XWhenXtheXstorageXisXfull,XtheXoldestXfileXisXautomaticallyXdeletedXregardlessXofX itsXtype. •X Type :XYouXcanXallocateXstorageXspaceXtoXeachXfileXtypeXseparately.XWhenXtheX storageXisXfull,XaXnewXvideoXfileXisXrecordedXafterXdeletingXtheXoldestXfileXofXtheXsameX type.XEvenXinXthisXmodeXtheXeventXfileXcanXbeXdeleted,XsoXpleaseXbeXcareful. ] If the event recording limit is full •X EventXrecordingXfilesXareXalsoXdeletedXfromXtheXoldestXone.XTakeXcareXsoXthatXnecessaryXfilesX areXnotXdeleted.XBackupXthoseXfilesXontoXanotherXstorageXdevice.X Auto Switching to Parking Mode :XIfXnoXmovementXisXdetectedXbyXG-sensorXforX10X minutes,XtheXproductXautomaticallyXswitchesXtoXparkingXmode.XIfXtheXG-sensorXdetectsX theXmovementXofXtheXvehiclesXforXatXleastX30Xseconds,XtheXproductXautomaticallyX switchesXtoXnormalXrecordingXmode. N TheXtimeXandXfunctionXtoXswitchXtoXtheXparkingXmodeXmayXbeXaffectedXbyXtheXlevelX ofXtheXimpactXofXtheXvehicle.
- Page 29 Setting the sensitivity 1 Sensitivity for Normal Recording DeterminesXtheXsensitivityXthresholdXofXtheXG-sensorXforXtheXeventXrecordingXfunctionX inXpermanentXrecordingXmode.X 2 Sensitivity for Parking Mode DeterminesXtheXsensitivityXthresholdsXofXtheXG-sensorXandXtheXmotionXdetectorXforX theXeventXrecordingXfunctionXinXparkingXmode.
- Page 30 Configuring Your BlackVue Set-up BlackVue Software Advanced sensitivity setting Click the Advanced button for each of the settings. You can configure the sensitivity while watching a recorded video. Open a recorded video (1). Play the video (2). While watching the video, specify the sensitivity as appropriate. Move the control lever up or down to adjust the sensor area.(3) The wider the sensor area, the less sensitive the sensor is; the narrower the sensor area, the more sensitive it is. ToXrecordXtheXcurrentXstatus ToXnotXrecordXtheXcurrentXstatus MakeXtheXsensitivityXareaXsmallerXsoX WidenXtheXsensitivityXareaXsoXthatX thatXtheXcurrentXG-sensorXgraphXisX theXcurrentXG-sensorXgraphXisXinXtheX outsideXtheXsensorXarea. sensorXarea. N DependingXonXtheXuser-configuredXsensitivity,XifXanXeventXtoXbeXrecordedXbyXtheX eventXrecordingXfunctionXisXdetected,XtheXborderXofXtheXvideoXplayXscreenXblinks. Click the [Save & Close] button.
- Page 31 Other LED On :XYouXcanXselectXanXindicatorXtoXturnXonXorXoff. Button LED Color :XYouXcanXchangeXtheXcolorXofXtheXindicator. Voice Alarm :XTheXBlackVueXproductXplaysXvoiceXmessagesXduringXcertainXevents.X ThisXoptionXallowsXyouXtoXselectivelyXenable/disableXtheXvoiceXmessages.X Alarm Volume :XAllowsXyouXtoXadjustXtheXvolumeXofXtheXvoiceXmessages. Video Out Option :XYouXcanXselectXaXvideoXsourceXtoXoutputXifXtheXvideoXsourcesXareX connected.
-
Page 32: Other Information 30 Installing The Blackvue Software
Installing the BlackVue Software Other Information Insert the micro SD card(accessory) into the PC. ( See page 16) Double-click the ‘BlackVueSetup(HD)_E. exe’ file on the Micro SD card. Follow the directions presented by the Setup program until you finish the installation. Check that a shortcut to the BlackVue Software is created on the Windows Desktop. N Double-clickXtheXshortcutXtoXtheX BlackVueXSoftwareXtoXrunXtheX program. -
Page 33: Upgrading The Firmware
Upgrading the Firmware Other Information Firmware upgrade refers to upgrading the product by downloading a new version of firmware. By upgrading the firmware to the latest version, you can use BlackVue in better environment. Insert the micro SD card into the PC. ( See page 16) Go to the http://eng.pittasoft.com webpage and download the firmware upgrade file. Double-click the firmware upgrade file. Perform upgrade according to the instructions on the screen. N UpgradeXtheXSDXcardXtoXtheXnewX firmware.X N WhenXtheXupgradeXisXcomplete,XtheX BlackVueXsoftwareXisXinstalled.XIfXyouX don’tXwantXtoXinstallXtheXsoftware,X pressXtheXCancelXbutton.X Insert the micro SD card containing updated firmware into the turned-off BlackVue. Turn the BlackVue on. The BlackVue automatically updates the firmware. Take care not to cut the power off while updating the firmware. ] Formatting the Micro SD card •X ItXisXrecommendedXthatXyouXformatXtheXMicroXSDXcardXonceXaXweek. •X IfXtheXrecordedXvideoXdoesXnotXplayXsmoothly,XformatXtheXMicroXSDXcard.X •X ToXensureXtheXstableXoperationXofXtheXcard,XformatXtheXMicroXSDXcardXusingXtheXofficialX programXrecommendedXbyXtheXSDXcardXassociation.XForXmoreXinformationXaboutXformatting,X referXtoXtheXPittasoftXwebsiteX(http://eng.pittasoft.com).X •X BackupXanyXimportantXdataXstoredXonXtheXMicroXSDXcardXtoXyourXPC.X •X WhenXformattingXisXcomplete,XupgradeXtheXfirmware.XIfXaXMicroXSDXcardXwithoutXtheXbasicX fileXisXconnectedXtoXtheXmainXbody,XtheXMicroXSDXcardXisXautomaticallyXinitializedXandXtheX firmwareXisXautomaticallyXinstalledXonXtheXMicroXSDXcard. -
Page 34: Product Specifications
Product Specifications Other Information Camera CMOS sensor / 2,073,600 pixels Resolution FULL HD(1920x1080) / Max 30fps Compression Format H.264 Audio AAC LC View Angle Diagonal: 120° / Horizontal: 98° / Vertical: 55° Memory or Storage Device Micro SD card (Maximum 32GB) Built-in Normal Recording, Recording... - Page 35 Warranty • The warranty of this product is 1 year from the purchase date. (The warranty period for accessories such as the battery and Micro SD card: 6 months) • Pittasoft provides the following warranty for our product in accordance with the Consumer Dispute Resolution Criteria (announced by the Korean Fair Trade Commission). When a service is requested, Pittasoft or an authorized partner will provide the service. • When a non-commercial product is used as a commercial product, the warranty period is reduced to 1/2 the original period. ProductXNameX(ModelXName) SerialXNo. PurchaseXDate XXXXXXXXXXXXXYYXXXXXXXXMMXXXXXXXXDD LocalXProductXDistributor CustomerXInformation AddressX/XPhone AppliedXWarranty TypeXofXdamagesXtoXconsumers WithinXtheXwarrantyXperiod AfterXtheXwarrantyXperiod PerformanceX WhenXanXimportantXrepairXisXrequiredXwithinX ReplaceXtheXproductXorX NotXapplicable orXfunctionalX 10XdaysXofXtheXpurchase refundXtheXpurchaseXprice malfunctionsX WhenXanXimportantXrepairXisXrequiredXforX thatXoccurXwhileX anXreplacedXproductXwithinX10XdaysXafterXaX RefundXtheXpurchaseXprice NotXapplicable usingXtheXproductX replacement normally WhenXtheXsameXfailureXoccursXthreeXorX FreeXrepair...
- Page 36 PittasoftX(HeadXOffice) Address #1113,XNewticastle,X429-1,XGasan-dong,XGeumcheon-gu,XSeoul,X153-779,XKorea Hompage http://eng.pittasoft.comX Email sales@pittasoft.comX 82-2-2626-8800(#2) 82-2-2626-8805...
Need help?
Do you have a question about the BlackVue DR400G-HD and is the answer not in the manual?
Questions and answers