
Subscribe to Our Youtube Channel
Related Manuals for MIRKA RANDOM ORBITAL SANDER


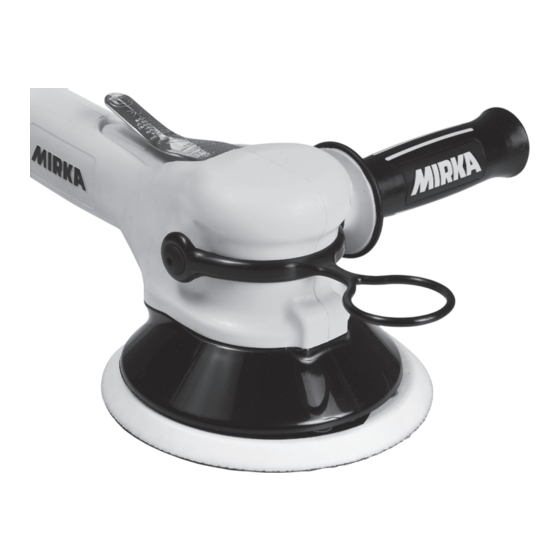
Summary of Contents for MIRKA RANDOM ORBITAL SANDER
- Page 1 MIRKA® Two-handed Random Orbital Sander 150 mm (6 in.) & 125 mm (5 in.) Operating Instructions...
- Page 2 Parts Page TO VACUUM SYSTEM FOR CENTRAL VACUUM ITEM NO. TORQUE SETTINGS N-m (in.-lbs) 6.2 - 7.3 (55 - 65) 2.4 - 3.4 (21 - 30) 3.0 - 3.4 (27 - 30) 3.3 - 3.7 (29 - 33) 6.8 - 8.1 (60 - 72) Part numbers for ordering Spare Part Assemblies, labeled A through H, are located on page 3.
-
Page 3: Parts List
MPA0516 TUBING CLAMP (NV & CV Machines) MPA0511 INLET TUBING MPC0153 125/150 mm (5/6 in.) BUFFER/NV SHROUD MPC0145 125 mm (5 in.) MULTI-HOLE/LP SHROUD MPC0138 150 mm (6 in.) MULTI-HOLE/LP SHROUD MPA1981 SIDE HANDLE - MIRKA MPB0394 LH HOUSING MPA1398 SCREW MPA1430 SCREW MPA0043 O-RING... - Page 4 REVISION RECORD DESCRIPTION / DATE -RELEASE FOR PRODUCTION r o f i h c RAG 01/30/08 PWH 02/13/08 V r i Sander Spare Parts Kits X'POLE PRECISION TOOLS INC. PROPRIETARY AND CONFIDENTIAL THE INFORMATION CONTAINED IN THIS DRAWING IS THE SOLE PROPERTY OF X'POLE PRECISION TOOLS INC.
-
Page 5: Warranty
The warranty period commences at the date of purchase. The warranty only covers imputable material and manu- facturing defects. Parts replacement or repair during the warranty period is free of charge if carried out by an official KWH MIRKA service center. -
Page 6: Putting The Tool Into Service
Please Read and Comply with Putting the Tool into Service Use a clean lubricated air supply that will give a measured air 1) General Industry Safety & Health Regulations, Part 1910, pressure at the tool of 6.2 bar (90 psig) bar when the tool is run- OSHA 2206, available from: Superintendent of Documents;... - Page 7 KWH Mirka, Ltd. cannot be held responsible for the consequences of using declared values instead of actual exposure values for any individual risk assessment.
-
Page 8: Troubleshooting Guiide
Ring groove. Remove Motor Assembly and Re-In- stall the Motor Assembly. See “Motor Disassembly” and “Motor Assembly”. Motor Parts Worn Overhaul Motor. Contact authorized Mirka Service Center. Worn or broken Spindle Bearings Replace the worn or broken Bearings. See “Shaft Balancer and Spindle Disassembly”... - Page 9 RANDOM ORBITAL SANDERS SERVICE INSTRUCTIONS NOTICE: To receive any expressed or implied warranty, tool must be repaired by an authorized Mirka Service Center. The following general service instructions provided are for use after completion of the warranty period. DISASSEMBLY INSTRUCTIONS 6a.
- Page 10 thread sealant. Screw the Bushing Assembly into the inlet Pressing Tool Top. port on the (61 or 62) End Cap until hand tight. Torque set- Take the (14) Filter and center it on the small bore that the ting to be 6.8-8.1 N-m (60-72 in-lbs). original Filter was in before removal.
- Page 11 Place the (4) Cylinder Assembly over the (6) Rotor with the Lightly grease the (5) O-Ring and place in the air inlet of the shorter end of the spring pin engaging the blind hole in the (4) Cylinder Assembly. (9) Front Endplate. Note: The spring pin must project 1.5 10.
- Page 12 Mirka Italia s.r.l. Italy Tel. +39 0733 207511 info@mirkaitalia.com www.mirkaitalia.com KWH Mirka Ibérica S.A.U. Spain Tel. +34 93 682 09 62 mirkaiberica@mirka.com KWH Mirka Mexicana S.A. de C.V. México Tel. +52 55 5148 3212 ventas.mx@mirka.com www.mirka.com.mx Quality from start to finish...
Need help?
Do you have a question about the RANDOM ORBITAL SANDER and is the answer not in the manual?
Questions and answers