Table of Contents
Advertisement
Quick Links
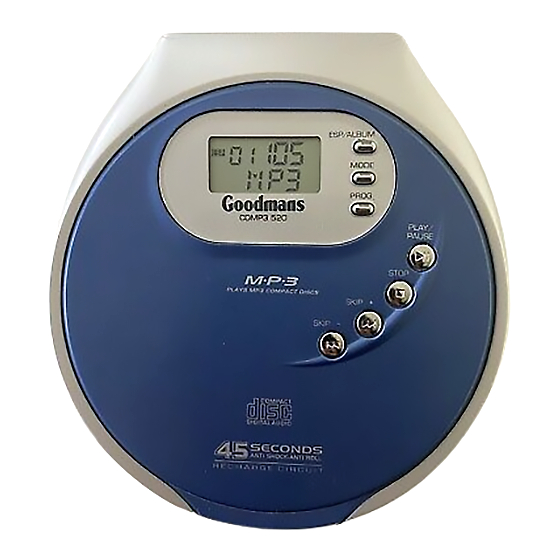
Compact Disc Player
CDMP3 520
Instruction Manual
Performance Note
Whilst this unit has been designed to provide the best possible anti shock protection when
on the move, it cannot provide completely uninterrupted playback whilst running or
Jogging.
SPECIFICATIONS
Programme Play....................................................................................Up to 64 tracks
Line output....................................................................................................0.6V RMS
Earphone output.................................................................................................18mW
Power requirement.....................................................DC 4.5V external and battery 3V
Dimension.....................................................................130(W) x 28(H) x 140(D) mm
Weight..............................................................180g not including battery (Main Unit)
For improvement purposed, specification and design are subject to change without
notice.
Goodmans Product Information Helpline 02392-391100
( "AA" Cell x 2) (IEC R6. JIS SUM-3
or Ni-MH rechargeable battery)
IMPORTANT NOTES
Your hearing is very important to you and to us so please take care when operating this
equipment. It is strongly recommended that you follow the listed guidelines in order to
prevent possible damage or loss of hearing:
ESTABLISH A SAFE SOUND LEVEL
Over time your hearing will adapt to continuous loud sounds and will give the
impression that the volume has in fact been reduced. What seems normal to you
may in fact be harmful. To guard against this BEFORE YOUR HEARING ADAPTS
set the volume at a low level.
Slowly increase the level until you can hear comfortably and clearly and without
distortion.
Damage to your hearing is accumulative and is irreversible.
Any ringing or discomfort in the ears indicates that the volume is too loud.
Once you have established a comfortable listening level, DO NOT INCREASE THE
SOUND LEVEL FURTHER.
The following list of typical sound levels may assist you in recognizing just how loud you
have set the volume level.
DECIBEL
Level dB
Example
30dB
Quiet Library, soft whispers
40
Living room, fridge freezer bedroom away from traffic.
50
Normal conversation, quiet office, light traffic.
60
Electric sewing machine.
70
Vacuum cleaner, hair dryer, noisy restaurant.
THE FOLLOWING NOISES CAN BE HARMFUL UNDER CONSTANT EXPOSURE
80dB
Average city traffic, alarm clock buzzer at 2 feet, food mixer.
90
Motorcycle, heavy goods vehicle, petrol lawn mower.
100
Pneumatic drill, chain saw, garbage truck, discotec / night - club.
120
Rock band concert, thunderclap.
PERMANENT LOSS OF HEARING
140
THRESHOLD OF PAIN Gunshot 2 feet away.
180
Rocket Launching pad.
1
Advertisement
Table of Contents

Related Manuals for Goodmans CDMP3 520


Summary of Contents for Goodmans CDMP3 520
- Page 1 PERMANENT LOSS OF HEARING Dimension..............…130(W) x 28(H) x 140(D) mm Weight............…..180g not including battery (Main Unit) THRESHOLD OF PAIN Gunshot 2 feet away. For improvement purposed, specification and design are subject to change without Rocket Launching pad. notice. Goodmans Product Information Helpline 02392-391100...
-
Page 2: Location Of Controls
1. LOCATION OF CONTROLS This product does not contain a separate Power On / Off switch. After inserting a disc and installing batteries / AC adaptor, simply press the Play button to switch on and play a disc. In order to maximise battery life and provide optimum playing time this product incorporates an Auto Power Off function. -
Page 3: Power Sources Normal Batteries/Ac Adaptor
2. POWER SOURCES NORMAL BATTERIES/AC ADAPTOR 3. DIGITAL ANTI SHOCK / RECHARGEABLE BATTERY OPERATION This player incorporates the latest digital anti shock circuit, which prevents interruption of Battery Power Operation AC Operation the sound output if the unit is subjected to shock or vibration during disc playback. The anti shock system will automatically start when a disc is player, is shown in the display 1. -
Page 4: Earphone And Hi-Fi Connection
4. EARPHONE AND HI-FI CONNECTION 5. BASIC DISC PLAY Ensure the hold switch is off. Connecting to component Listening with the earphone audio systems 1. Connect the earphones to the PHONES socket. Connect the plug of the stereo 2. Slide the OPEN switch to open the Connect the stereo connection cable Earphone (supplied) into CD compartment lid. -
Page 5: Lcd Display Information
6. LCD DISPLAY INFORMATION 7. REPEAT/PLAY MODES Every time the CD MODE button is pressed. When the is pressed at initial start up The corresponding mode appears in the display window. The display will briefly show NORMAL REPEAT 1 REPEAT 1 ALBUM REPEAT ALL ALBUM then proceed to start playback. -
Page 6: Random Play
8. INTRO SCAN AND PROGRAMMED TRACK PLAY 8. INTRO SCAN AND PROGRAMMED TRACK PLAY INTRO (Continued) Press to select the desired ALBUM ES P number. Play the first 10 seconds of each track on the disc. Press the PROGRAM button to enter the ALBUM number into the memory. -
Page 7: Player Maintenance
10. SKIP AND SEARCH FUNCTIONS 11. MP3 DISC OPERATION Playing MP3 DISC Locating a Particular track Place an MP3 CD(Pre or home recorded) into the player and ensure it is locked in place on the center spindle. To skip back to the beginning of the Press the button to start playback. - Page 8 13. MP3-CD PLAYBACK (Continued) 13. MP3-CD PLAYBACK Single session / Multi session To play MP3-CDs The following chart is an example of a Windows Explorer display for a single IMPORTANT INFORMATION session MP3 CDR-R/W disc. Check the added Notes to help you understand the MP3 CD unit display, the playback sequence of albums and tracks on single session Use mp3 as the file extension when creating audio files onto CDR-R/Ws.
-
Page 9: Troubleshooting Guide
14. DISC CLEANING AND TROUBLESHOOTING GUIDE Cleaning the disc When a disc becomes dirty, clean it with a cleaning cloth. Wipe the disc from the centre out. Note Do not use solvents such as benzine petrol, thinner, commercially available cleaners or anti-static spray intended for analogue discs.
Need help?
Do you have a question about the CDMP3 520 and is the answer not in the manual?
Questions and answers