
Related Manuals for Goodmans GPS185DAB


Summary of Contents for Goodmans GPS185DAB
- Page 1 COMPACT DISC PLAYER & CASSETTE RECORDER WITH DAB, FM/MW RADIO MODEL: GPS185DAB Instruction Manual Please Read these Instructions prior to first use and retain for future reference.
-
Page 2: Table Of Contents
Product Specifications .....................26 What's in the Box On unpacking the unit the following should be located within the packing. GPS185DAB Main Unit 1 x Remote control 1 x Detachable mains power cord with 3 pin plug. 1 x Digital radio questionaries... -
Page 3: Important Notes
Important Notes Your hearing is very important to you and to us so please take care when operating this equipment. It is strongly recommended that you follow the listed guidelines in order to prevent possible damage or loss of hearing: ESTABLISH A SAFE SOUND LEVEL Over time your hearing will adapt to continuous loud sounds and will give the impression that the volume has in fact been reduced. -
Page 4: Important Safeguards
Important Safeguards PRE FITTED MAINS PLUGS For your convenience a mains plug has been fitted to this appliance. For your safety please observe the following information. 1. Should the fuse in the plug remove the plug from the wall socket and replace the fuse with a 3 Amp ASTA approved to BS 1362 fuse. -
Page 5: Important Safeguards
Important Safeguards (Continued) CAUTION CLASS 1 LASER PRODUCT Use of Controls or adjustments or performance of procedures other than those specified herein may result in hazardous radiation exposure. LASER SAFETY This unit employs a laser, only qualified service personnel should attempt repair. DANGER: INVISIBLE LASER RADIATION WHEN OPEN AND INTERLOCK FAILED OR DEFEATED. -
Page 6: Power Supply
Power Supply BATTERY OPERATION Remove the battery compartment cover by gently pushing the clips downward and outwards. Install 8 x "C" size batteries (UM-2 or equivalent) and ensure the correct polarities are observed. Replace the battery compartment cover. NOTE: The batteries will only operate when the mains power lead is removed. -
Page 7: Player Maintenance
Player Maintenance CLEANING THE CABINET Wipe with a soft cloth. If the cabinet is very dirty, dampen the cloth with a weak solution of neutral detergent and water, and then wipe clean. CLEANING THE UNIT To clean the unit, simply wipe off with a soft clean cloth moistened with plain lukewarm water. -
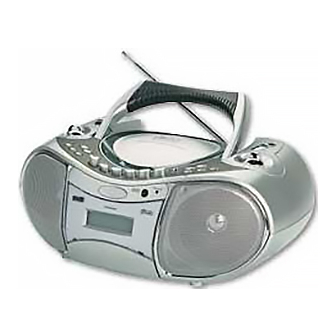
Page 8: Location Of Controls
Location of Controls 1. EARPHONES SOCKET 2. VOLUME CONTROL 3. DAB&CD SELECT BUTTONS FM/DAB TELESCOPIC AERIAL 5. FOLDING HANDLE 6. CD DOOR 7. TAPE&RADIO SELECT BUTTONS 8. TUNING CONTROL 9. DIAL SCALE 10. MUTE BUTTON 11. EQ BUTTON 12. DBBS BUTTON 13. -
Page 9: Location Of Controls (Remote Control)
Location of Controls (Remote control) 1. STAND BY BUTTON 2. TUNER BUTTON 3. CD BUTTON 4. DAB BUTTON 5. TAPE BUTTON 6. 10 BUTTON 7. VOLUME UP BUTTON 8. DOWN/SKIP BUTTON 9. CD PLAY/PAUSE&DAB AUTO SCAN BUTTON 10. VOLUME DOWN BUTTON 11. -
Page 10: Listening To The Radio
Listening to the Radio Press STANDBY button to turn the unit on then press the Radio button or the TUNER button on the remote controller. Select the desired band with the BAND button. MW tuner or FM tuner will show in the display. -
Page 11: Listening To A Compact Disc
Listening to a Compact Disc COMPACT DISC OPERATION HANDLING A DISC Although built to withstand a the effects of dust, dirt and scratches, discs should be treated with care and according to rules applicable to conventional analog discs. Always protect a disc against scratches, dirt and dust etc. It is recommended that during non-use periods the discs should be retained in the original case. -
Page 12: Listening To A Compact Disc
Listening to a Compact Disc (Continued) If the CD Backward Skip ( ) Button is pressed twice or more in rapid succession, play will go BACK one track per press. Whilst in the pause mode, it is also possible to select the beginning of a track by using the CD Forward Skip ( ) Button and CD Backward Skip ( ) Button to reach the... -
Page 13: Cassette Operation
Cassette Operation CASSETTE TAPE SELECTION 1. The quality and condition of the cassette tapes used will have a direct effect on the performance of this unit. Low quality tapes tend to stretch, and a stretched tape can easily become entangled in the drive mechanism, causing major damage. Stretched tapes will run at uneven speeds and will distort anything recorded on them. - Page 14 Cassette Operation (Continued) RECORDING FROM THE BUILT - IN MICROPHONE 1. Press TAPE button. 2. Load a blank cassette tape into the Cassette Compartment with full spool to the right. 3. Press the Play and Record keys simultaneously. Both keys will remain in the down position.
-
Page 15: Dab Operation
DAB Operation DAB or Digital Audio Broadcasting represents a New age in broadcasting technology and as with all new technologies it is significantly different to traditional Analogue FM/AM broadcast methods. The new system no longer relies on the user tuning to a given frequency but instead allows the DAB receiver to provide an active service list of all available radio programmes/stations at the touch of one button. - Page 16 DAB Operation (Continued) DAB Operation (Continued) The additional functions of this unit in DAB mode are as follows. TUNING FOR THE FIRST TIME When you switch on your unit for the first time an auto-scanning process will be performed automatically. A progress indicator on the display shows that auto-tuning is underway. If stations are found during the auto-scanning The stations will be stored in alphanumeric order and the first station on the list will be selected and it will be heard.
- Page 17 DAB Operation (Continued) GUIDE TO DIGITAL RADIO This unit enables you to receive and listen to DAB radio programmes. Digital Audio Broadcast (DAB) uses digital signals rather than traditional analogue signals, the result of which enables near CD-quality audio and virtually interference-free reception. DAB also enables broadcasters to transmit additional data along with the audio including other audio channels, text and in the future , perhaps computer data and images.
- Page 18 DAB Operation (Continued) KEY FUNCTION INFO BUTTON Pressing the INFO button changes the information displayed on the bottom line of the LCD screen. Continue to press the INFO button to scroll through the options available. Press Info CLASSIC FM How will that be? Press Info CLASSIC FM Classical music...
- Page 19 DAB Operation (Continued) POWER ON AND TUNING On first power up or if a factory reset has been initiated, the display will show "welcome to DAB" while it is scans to find all available stations. "Now Tuning" will briefly show in the display the unit will tune to the first station found in the alphanumeric list.
- Page 20 DAB Operation (Continued) STATION SELECTION AND NAVIGATION Selecting a station Once t his unit has been tuned a digital radio station can be selected by using the Up and Down button followed by the select button . If stations have been assigned to presets they can be selected directly by pressing the relevant numbered button(1-10).
- Page 21 DAB Operation (Continued) AUTO SCAN The AUTO button has two function. 1. If the button is pressed quickly (2 seconds or less ) the radio will rescan only UK Band III (11B to 12D) for available stations. A scanning screen appears and a progress bar is displayed. Audio is suspended. On completion the radio will tune and return to play the station being listened to.
- Page 22 DAB Operation (Continued) TUNING AND PLAYING Once the station list is available and playing, the station name will appear on the top line. On the line below a scrolling line of text will be seen called DLS. Pressing the Info button changes the information displayed on the bottom line. See the INFO function for the options available.
- Page 23 DAB Operation (Continued) SET UP BUTTON Pressing the Set up key will bring a menu that allows access using the UP and DOWN buttons to a number of system settings. Press UP and DOWN buttons to locate a required option and press select to access it. Use the UP and DOWN buttons and SELECT to navigate within the sub menus.
- Page 24 DAB Operation (Continued) MANUAL TUNE Use Up/Down buttons to select a DAB channel. When a channel is selected the radio tunes to this frequency. Once tuned, the signal strength will be displayed using the signal strength meter. This function can be used to check for the best position for the antenna. As the antenna is moved the indicator will fluctuate according to the change in signal strength.
- Page 25 DAB Operation (Continued) Current selecttion Fav station Classic FM Fav station Scrolling DLS Alphanumeric Press Setup Press Active station Up/Down or Select Prune station Press Select Station Order Manual Tune Alphanumeric DRC value Fav station Press Language Alphanumeric Up/Down or Select Sw version Prune stations V 1.7.2-2...
- Page 26 DAB Operation (Continued) PRESETS There are 10 DAB presets available Presets are assigned using the remote control as follows:. — Listen to the station to be stored . Press and hold a Preset button (1-10) for two seconds. — Alternatively the station you wish to assign can be displayed in the second line of the display when you are browsing stations.
- Page 27 DAB Operation (Continued) Presets can also be made using the DAB controls on the main unit as follows: — Listen to the station to be stored . Press Preset button briefly. — Use UP or DOWN button to select a preset memory position. —...
-
Page 28: Product Specifications
Product Specifications PICK-UP System Compact disc digital audio system Laser diode material: GaAIAs Properties Wavelength: =780nm Emission Duration: continuous Laser output: <44.6 W Error correction Cross-interleave Reed-solomon code AUDIO 1-bit DAC 8 times oversampling D/A conversion Frequency response 20-20,000Hz (+1/-3 dB) Wow and flutter Below measurable limits 2 channels (stereo)
Need help?
Do you have a question about the GPS185DAB and is the answer not in the manual?
Questions and answers