Table of Contents
Advertisement
Advertisement
Table of Contents

Related Manuals for ELNA eXperience 660


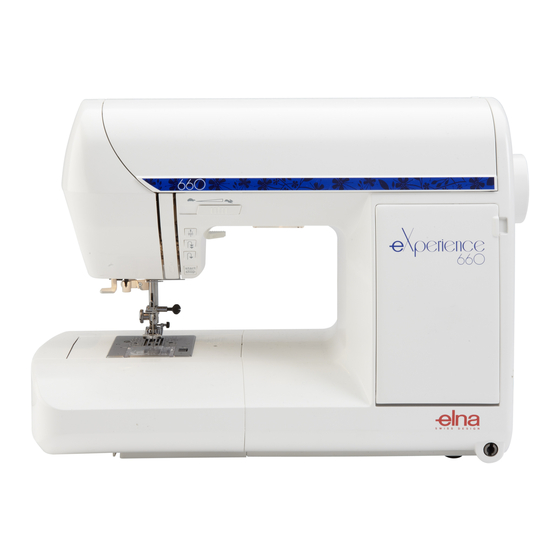
Summary of Contents for ELNA eXperience 660
- Page 1 660 | Instruction Manual |...
-
Page 3: Important Safety Instructions
IMPORTANT SAFETY INSTRUCTIONS T his appliance is no t in t ended f or use by persons (including children) wi t h reduced physical , sensory o r mental capabilities, or lack of experience and knowledge, unless they have been given supervision o r instruction concerning use of the appliance by a person responsible for their safety. -
Page 4: Table Of Contents
OPTIONAL ACCESSORIES ..........45 WARNING MESSAGES ........... 46- 47 TROUBLESHOOTING ............INDEX ................49-50 NOTE: In formation found in this instruction manual is current at the time of printing. Elna reserves the right to change and update specifications and information as needed. -
Page 5: Section I -Machine Parts And Functions Part Names
SECTION I - Machine Parts and Functions Part Names Top cover (lift up and back) Stitch chart Top storage compartment Bobbin winder spindle Bobbin winder stop Selection keys LCD screen Side storage compartment Knee lifter insert channel 10. Light panel 11. -
Page 6: Standard Accessories
Standard Accessories Top Cover (Lift up and back) Seam ripper Set of needles Quilt guide B: Buttonhole foot (4-step) Scant 1/4 inch foot Bobbins (8 + 1 in machine = 9 total) Side Cover (Pull down Side Cover to open) D: Hemmer foot E: Zipper foot F: Satin stitch foot... -
Page 7: Presser Foot And Accessory Definitions
Machine Box 25. Instruction book 26. Power supply cord 27. Foot control 28. Knee lifter 29. Carrying bag 30. Quilt table Presser Foot and Accessory Definitions A: Standard Metal Foot This foot comes attached to your machine. It is mainly used for straight stitches and zigzag stitches longer than 1.0. - Page 8 F: Satin Stitch Foot The cutout on the underside of the foot is designed to accommodate dense stitch formation. Ideal when sewing satin and decorative stitches. G: Blind Hem Foot The guide on the foot helps ensure that the needle catches only one or two fibers of the hem, resulting in an invisible hemline.
-
Page 9: Extension Table And Free Arm
Extension Table and Free Arm Extension Table The extension table provides more sewing space to make sewing easier. The extension table can be easily removed for free arm sewing. To Remove: Pull the end of the extension table away from the machine, as shown. -
Page 10: Knee Lifter
Knee Lifter The knee lifter allows you to raise or lower the presser foot without using your hands. This is especially beneficial when pivoting corners or sewing patchwork pieces. Insert knee lifter aligning the slots with the notches. The presser foot rises equal to the amount of pressure applied to the knee lifter. -
Page 11: Connecting Machine To Power Supply
Connecting Machine To Power Supply Before connecting the power cord, make sure the voltage and frequency shown on the machine are identical to your electrical power. To connect machine to power supply, turn off the power switch . Insert the foot control plug and machine plug into the machine and the power supply plug... -
Page 12: Main Function Of Keys
Main Function of Keys 1. START/STOP Key Press this key to start the machine. The first few stitches will be sewn at a slow speed and then machine sews at the speed set by the speed control lever. Press key again to stop machine. Press and continue to hold key to sew at slow speed, release key to sew at set speed. -
Page 13: Keyboard Selection Keys
Keyboard Selection Keys 10 11 12 13 14 1. AUTO tension LED The “AUTO” LED indicates the needle thread tension setting. Green Light – Needle thread tension is set on “AUTO” AUTO No Light – Needle thread tension is manually set between 0 and 9. Flashing Light –... - Page 14 7. Select Mode Key When you switch on the machine, the Direct Select Mode is active. You can select the first ten stitches (illustrated on the keyboard) with a single touch of the key. Touch the “MODE” key to activate the 3 Digit Mode. You can select all stitches by entering the 3 digits for the desired stitch.
- Page 15 Recommended setting for needle thread tension dial. (If the dial is not set on “AUTO”, a numerical value is shown.) Elna recommends using this presser foot for best sewing results. Stitch width or needle position – computer automatically sets width or needle position after a stitch is selected.
-
Page 16: Setting Quick Resumption, Sound And Language Modes
Setting Quick Resumption, Sound and Language Modes These three modes/functions can be set according to your preferences. Each new setting requires you to turn OFF the power switch. Turn ON the power switch while pressing “ENTER” key. Message screen appears. Press “1” key to change quick resumption or “2”... -
Page 17: Controlling Sewing Speed
Reset to Factory Default It is possible to reset the machine to the factory defaults with English language as default. Turn OFF the power switch. Press “ENTER” key while turning power switch ON. Message screen appears. Press “0” key. Message screen appears. Press “ENTER”... -
Page 18: How To Drop The Feed Dog
How To Drop the Feed Dog The feed dog can be dropped out of position for special sewing techniques: free motion embroidery, stippling, button sewing, etc. The feed dog must always be up for regular sewing. Locate the feed dog lever on the back of the free arm. Slide the lever either to the right (down) or to the left (up) -
Page 19: Attaching And Removing Presser Feet
Attaching and Removing Presser Feet Press the “Up/Down Needle” key until the needle is in the raised position. Turn OFF the power switch. Raise the presser foot and press the red button q on back of the shank. The presser foot will drop off. Place the selected presser foot so the pin e on the foot lies just under the groove w of the shank. -
Page 20: Adjusting Needle Thread Tension
Adjusting the Needle Thread Tension Choosing the Correct Tension - Straight Stitch The ideal straight stitch will have threads locked between the two layers of fabric, as shown left (magnified to show detail). The “AUTO” setting on the needle thread tension dial should be aligned with the setting mark q. -
Page 21: Using The Fine Adjustment Screw
Using the Fine Adjustment Screw Choice of fabrics and threads may affect the stitch formation. The fine adjustment screw can be used to either lengthen or shorten the stitch. Fine adjustment screw Standard mark Setting mark To fine tune, use a screwdriver to move the setting mark. •... -
Page 22: Section Ii -Getting Ready To Sew Selecting The Correct Needle And Thread
SECTION II - Getting Ready to Sew Selecting the Correct Needle and Thread Weight Fabric Needle Type Needle Size Very Chiffon, Fine Lace, Universal 9 (65) There are many kinds of fabrics, threads and needles. It Light Organdy Ball Point 9 (65) is important to use the correct ones together. -
Page 23: Needle Definitions
Needle Definitions The illustration identifies the main parts of a sewing machine needle. Body Shaft Long groove (round side of needle) Short groove (flat side of needle) Point Universal – an all-purpose needle that handles most woven and knit fabrics. Ball point –... -
Page 24: Winding A Bobbin
Winding a Bobbin To remove bobbin, slide bobbin cover plate release button q to the right and lift away the bobbin cover plate Lift out the bobbin e. Turn ON the power switch. q Lift up the spool pin. Place the spool of thread on the spool pin with the thread coming off the spool as shown. -
Page 25: Additional Spool Pin
t Push bobbin winder spindle to the right. The computer display screen will show a bobbin winding message. y Holding the free end of the thread, press the foot control or Start/Stop key. Stop machine after the bobbin has made a few turns. Cut the thread tail close to the hole in the bobbin. -
Page 26: Inserting The Bobbin
Inserting the Bobbin Place the bobbin in the bobbin case with the thread running counterclockwise. Guide the thread into notch on the front side of the bobbin case. Hold the bobbin with your right hand and pull the thread to the left, through the tension spring blades. Continue pulling the thread lightly until the thread slips into notch Pull out about 15 cm (6˝) of thread. -
Page 27: Threading The Machine
Threading the Machine Raise the presser foot. Press the “Up/Down Needle” key q until the needle is in an up position. Pull the thread under the hook and around upper thread guide w. Guide the thread down right channel and around the checkspring holder e. -
Page 28: Built-In Needle Threader
Built-in Needle Threader Press the “Up/Down Needle” key q until the needle is in an up position. Turn OFF the power switch. Lower the presser foot. START STOP Lower the needle threader lever w as far as it will go. Hook e is automatically inserted into the needle eye. -
Page 29: Drawing Up The Bobbin Thread
Drawing Up the Bobbin Thread Turn ON the power switch. Raise the presser foot and hold the needle thread lightly with your left hand. Press the “Up/Down Needle” key q twice to pick up the bobbin thread. Draw up the needle thread together with a loop of bobbin thread. -
Page 30: Buttonhole Variations
Buttonhole Variations All buttonholes should use interfacing that is the same weight as the fabric. Interfacing is especially important when sewing on stretch fabrics. Classic Buttonhole (Sensor or 4 Step Memory) The most common buttonhole, found on blouses, shirts, pants, etc. It 9 or 019 consists of a bartack at each end and a compact zigzag stitch along each side. - Page 31 9Test sew the buttonhole on a sample swatch of the same fabric. Include the interfacing and any seam allowances that will be in the actual garment. This is very important to ensure the buttonhole style and fabric are compatible. Sensor Buttonholes (Totally Automated Buttonholes) Select a buttonhole style - 9 through 018.
- Page 32 Mark the buttonhole area on the fabric. Place both threads to the left under the foot. Insert the garment under the foot and hand turn the flywheel to lower the needle at the starting point. Then lower the buttonhole foot. Begin sewing.
- Page 33 4-Step Memory Buttonholes – Classic and Bound 019 Classic Buttonhole (4 Step Memory) This buttonhole is especially suited for oversized novelty buttons or larger decorative openings. All buttonholes should use interfacing suitable for the fabric weight. Test sew buttonhole on sample swatch. Select 019.
- Page 34 Start sewing – front bartack, lockstitch. Machine will automatically stop when buttonhole is completed. Sewing Additional Buttonholes To sew another buttonhole the same size - raise foot, move fabric, lower foot and sew. Reset Buttonhole Size To sew a buttonhole a different size (or to adjust stitch length), reset the machine by pressing “ENTER”...
-
Page 35: Section Iii -Programming Combinations
SECTION III - Programming Combinations (Must have 3 Digit Mode Activated) Single Repeat with Lockstitch Select 035. (Machine automatically converts to show selected stitch image and information after third digit is pressed.) Press “ Mi r r o r I ma g e ” key. Press “... -
Page 36: Combining A Sequence
Combining a Sequence Select 177. (Press “ Mi r r o r I ma g e ” key and change stitch width or length if desired.) Press “ E N T E R ” key to memorize. A blinking cursor will appear to indicate where next selected and entered stitch will be memorized within the sequence. -
Page 37: Reset Combined Sequence To Beginning
Change thread color. Select 102. Press key. “ E N T E R ” S elect 200. Press key. “ E N T E R ” Place fabric and stabilizer under foot and sew over straight stitch, placing flower between leaves. Cut connecting threads. -
Page 38: Combining Letters
Combining Letters There are 3 font styles: Block letters (300 stitch numbers) Gothic letters (400 stitch numbers) Script or Monogram letters (500 stitch numbers) Select 315. Press “ E N T E R ” key. Select 348. Press “... -
Page 39: How To Preview The Combined Sequence
How to Preview the Combined Sequence (Utility, Satin, Decorative or Letters) Program the following stitches using the “ E N T E R ” key: 519, 178, 367, 423, 435, 315, 348, 350 and 337. The LCD screen will show a maximum of 8 stitches at one time. -
Page 40: Individually Adjusting Stitch Width Or Length
Individually Adjusting Stitch Width or Length If the cursor is positioned under a stitch in the programmed sequence, the stitch width or length adjustment is applied only to that stitch. Program 046 two times. Press “Review Memory Left” key to move cursor. Press “–”... -
Page 41: Permanent Memory
Permanent Memory It is possible to retain a sequence for future use even if the machine is turned off. Simply save the sequence in one of the three permanent memories. Each memory has a capacity of 50 stitches. Saving Memory Program 130, 177 and 129. - Page 42 Recalling Memory Press “M” key. Press “Mirror Image” key. Deleting an Individual Memory Press “M” key. Press “C” key to delete. (An hourglass will briefly appear.)
-
Page 43: Section Viii -Taking Care Of Your Machine
SECTION IV - Taking Care of Your Machine Your machine has been meticulously designed and manufactured to give you a lifetime of sewing pleasure. Do not store the machine in a high humidity area, near a heat radiator or in direct sunlight. The machine is selflubricating, however, the area around the bobbin and hook must be cleaned each time the machine has had extensive use. -
Page 44: Replacing The Bobbin Case
Clean the feed dog and hook area with the lint brush. Wipe out gently with soft, dry cloth. (You can also use a small vacuum cleaner.) Replacing the Bobbin Case r Insert the bobbin case so the knob fits next to the stopper in the hook area. -
Page 45: Stitch Chart
Stitch Chart 001 002 003 004 005 006 007 008 009 010 011 012 013 014 015 016 017 018 019 020 AUTO AUTO 021 022 023 024 025 026 027 028 029 030 031 032 033 034 035 036 037 038 039 040 041 042 043 044 045 046 047 048 049 050 051 052 053 054 055 056 057 058 059 060 061 062 063 064 065 066 067 068 069 070... - Page 46 Block Letters 301 302 303 304 305 306 307 308 309 310 311 312 313 314 315 316 317 318 319 320 321 322 323 324 325 326 327 328 329 330 331 332 333 334 335 336 337 338 339 340 341 342 343 344 345 346 347 348 349 350 351 352 353 354 355 356 357 358 359 360 361 362 363 364 365 366 367 SPACE...
-
Page 47: Optional Accessories
Optional Accessories Elna is pleased to offer the following optional accessories for your machine. This listing is current at time of printing but we are always developing new accessories to make sewing easier. Contact your authorized Elna dealer or service center to learn more about the latest innovations OR visit us at our website: www.elna.com. -
Page 48: Warning Messages
Warning Messages Three beep sounds will alert you to machine problems. The LCD screen will show one of these messages. Message What to Do Reason Release the foot control. Power switch is turned on while foot control is pressed. Presser foot is up when sewing is Lower presser foot. - Page 49 Remove tangled thread. The machine is malfunctioning because of Contact your authorized the item indicated. Example: “E1 init error” Elna dealer or service – error in initialization of stepping motor. center where you purchased your machine. The LCD screen is abnormal.
-
Page 50: Troubleshooting
2. Lint has built up in the bobbin holder or hook area. 41-42 the message Lo 3. The machine is not threaded properly. appears. 4. The fabric is too heavy. 1. Machine needs servicing. Contact Machine stops and Elna service center message E1 appears. -
Page 51: Index
I N D E X Icons ..................13 Accessories ..............4-5, 45 Incomplete Stitches, Resetting ..........35 Accessory Storage ..............3, 4 Interfacing ................48 Add Stitches ................37 Alignment of Stitches Within a Sequence ....... 38 Auto-Lock Key ..............3, 10 Keys ................... - Page 52 Recalling Memory ..............40 Reset Combination ..............35 Reset Mode ................15 Reverse Key ................ 3, 10 Review Memory Left Key ............12 Review Memory Right Key ............12 Satin Stitches –Elongation ............. 11 Saving Memory ..............12, 39 Scallop Border, Large ..............7 Scallop Edges ................