Advertisement
Quick Links
Advertisement

Subscribe to Our Youtube Channel
Related Manuals for RODE Microphones Classic II


Summary of Contents for RODE Microphones Classic II
- Page 1 Classic II Instruction Manual www.rodemic.com ( EMC, LVD )
- Page 2 We know that it will serve you well for many years and provide you with a performance you will be extremely proud of. The Classic II has been developed from the original Classic, both of which are the preferred valve microphone of a huge number of professional engineers and musicians.
-
Page 3: Specifications
Specifi cations Acoustic Pressure gradient Principle: Directional Switchable Omnidirectional/ Pattern: Cardioid / Figure-8 in nine steps (see graph) Frequency 20 Hz-20 kHz Range: (see graph) Output 200Ω Impedence: Sensitivity: -37dB re 1V/Pa (14mV @ 94dB SPL) +/-2dB Equivalent Noise: <18 SPL (A - weighted per IEC651) Maximum +2dBu... -
Page 4: Frequency Response
Specifi cations Frequency Response 2 0 Hz 1 00 1000 10 0 00 20 000 Cardioid 2 0 Hz 1 00 1000 10 0 00 20 000 Omni Polar Response 250 Hz 1 kHz 4 kHz Cardioid 250 Hz 1 kHz 4 kHz Omni - 4 -... - Page 5 Specifi cations 250 Hz 1 kHz 4 kHz Figure 8 Features • Custom spec 1” dual diaphragm capsule • Vintage twin triode GE JAN-6072 valve • Nine polar patterns • Jensen output transformer • Variable Pad & Filter • Machined from solid brass •...
- Page 6 Accessories • RM2 Stand Mount • Transformer (variable polar/pad/fi lter) • RCCLII fl ight case • SM2 Shock Mount • Double-shielded, oxygen free premium cable - 6 -...
- Page 7 • To select for 220-240V use, set the voltage selector to 240V and use a 160mA slow blow fuse. • The back panel of the Classic II power supply has a microphone output socket, a ground (earth) lift, a microphone input socket, a voltage selector, and a mains power socket which also incorporates a fuse.
- Page 8 • Having ensured that the power supply is set to the correct voltage you can begin to connect the Classic II to the power supply. Do not connect the power to the mains or switch on the microphone before connecting it to the power supply.
- Page 9 • Now you can connect the power supply to the mains supply and begin using the Classic II microphone. • It is recommended to allow several minutes to allow the microphone to stabilise.
- Page 10 Setting the Polar Pattern Your Classic II can be adjusted to any of nine polar patterns from omni, through cardioid to fi gure of eight. This fl exibility allows recording of most instruments and/or voices with absolute control. • Select the preferred polar pattern. This is done with the middle dial on the front of the Classic II Power Supply.
- Page 11 Setting the Polar Pattern (Proximity Effect is an increase in lower frequencies when the sound source is ‘close’ to the microphone). The omni pattern is commonly used for room (ambient) miking or to record a more natural sound when close miking instruments. Front is picked up 250 Hz 1 kHz...
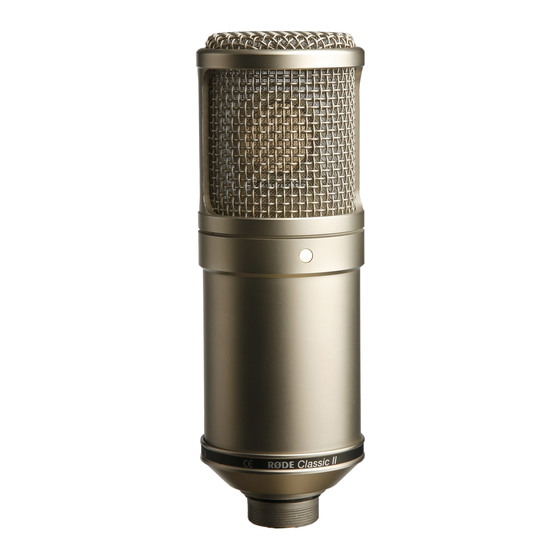
- Page 12 Using the Classic II • The gold dot on the face of the Classic II indicates the front of the microphone, and the pick-up area of the cardioid pattern. Please be sure to have the side with the dot facing the sound source you wish to record.
- Page 13 Storage .• After use the Classic II should be removed from its mount, wiped with a dry, soft cloth and placed in its protective case. • Be sure to place the moisture-absorbent crystals (supplied) at the head of the microphone, so as to absorb any moisture present.
-
Page 14: Important Notice
IMPORTANT NOTICE DO NOT DISCONNECT THE MICROPHONE CABLE WHILE THE SYSTEM IS POWERED AS THIS MAY RESULT IN DAMAGE TO THE MICROPHONE NEVER REMOVE THE MAINS EARTH DOING SO CAN HAVE LETHAL CONSEQUENCES ACHTUNG: LEBENSGEFAHR ENTFERNE NIEMALS DEN SCHUTZLEITER NON SCOLLEATE IL FILO DI TERRA POTREBBE ESSERE MOLTO PERICOLOSO PER IL RISCHIO DI SCOSSE ELETTRICHE RELIEZ IMPERATIVEMENT L’ALIMENTATION A LA PRICE TERRE... - Page 15 Vous ne devez sous aucun prétexte ouvrir I’alimentation vous-même! NOTA: No manipule internamente la fuente de alimentacion del Classic II, puesto que el alto voltaje puede ser perjudicial en caso de sufrir una descarga. Si se apreciara un functionamiento incorrecto de la fuente de...
-
Page 16: Warranty
Warranty microphones are warranted for one year from date of purchase. You can extend that to a full ten years if you register online at www.rodemic.com. The warranty covers parts and labour that may be required to repair the microphone during the warranty period.
Need help?
Do you have a question about the Classic II and is the answer not in the manual?
Questions and answers