Table of Contents
Advertisement
Quick Links
Advertisement
Table of Contents

Related Manuals for RODE Microphones M3


Summary of Contents for RODE Microphones M3
- Page 1 Instruction Manual www.rodemic.com ( EMC, LVD )
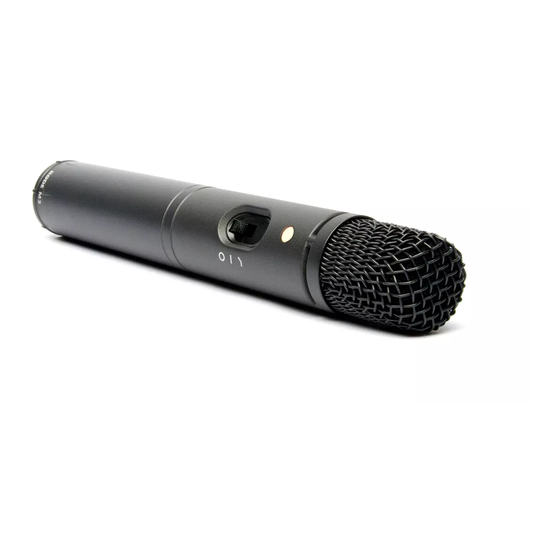
- Page 2 Introduction Congratulations on purchasing the microphone. The M3 was created to allow you to achieve the very best results from both live performance and in the studio. One of the key features of the M3 is that it has been designed with a switchable PAD and high pass fi...
-
Page 3: Specifications
Specifi cations Acoustic Principle: Permanently Polarised Condenser Cardioid Directional Pattern: Frequency Range: 40Hz ~ 20,000Hz selectable High Pass Filter (HPF) @ 80Hz 12dB/octave (see graph) 200Ω Output Impedence: -40dB ±3dB re 1V/Pa @ 1kHz Sensitivity: (6.3mV/Pa @ 94dB SPL) 21dBA SPL Equivalent Noise: (A - weighted per IEC651) Maximum Output: +9.22dBu (@ 1% THD into 1kΩ) -
Page 4: Frequency Response
Specifi cations Frequency Response 20H z 10 00 10 000 20 000 Polar Responses 0˚ +5.0 -2.0 -2.0 -4.0 -6.0 -8.0 -10.0 -10.0 -12.0 -14.0 -16.0 -18.0 -20.0 -20.0 -22.0 -24.0 -25.0 90˚ 270˚ dB rel. 1V/Pa Frequency: 500 Hz: –... - Page 5 Contents M3 Microphone Carry Case Pop Shield RM3 Mic Clip Powering the M3 M3 is suitable for a wide range of applications. Recording, stage, and location work are all well within the capabilities of this microphone. Its low noise and full frequency response ensure the sound quality is at a standard that is expected by today’s musicians and engineers.
- Page 6 To connect an XLR cable; 1. Before you connect your mic, ensure that the XLR cable you are using is wired correctly to match the output pins on the M3. The M3 offers a balanced microphone level output and is wired as follows: Pin 1 (earth), Pin 2 (+) and Pin 3 (-).
- Page 7 Battery power (9 volt) If phantom power is not available on your equipment, you will need to use battery power. To use battery power, a 9 Volt (PP3) battery should be fi tted into the cavity within the microphone body ensuring correct polarity (+ to + and - to -).
- Page 8 Figure 4 - Inserting the battery 4. Push the battery into place so that it is parallel with the top of the cavity. Secure the battery in place by fl ipping the battery clip over so that it sits on the battery.
- Page 9 Operating the M3 The M3 may be connected to a mixer (recording or live), and battery power will only be required if the mixer does not have an in-built phantom P48 or P24 supply. Connection may also be made direct to a portable DAT or other tape machine enabling fi...
- Page 10 L.E.D. SINGLE FLASH – When the L.E.D. fl ashes (illuminates for around one second), the battery power is ‘good’. This indicates that the microphone has just been powered. L.E.D. STAYS ON – When the L.E.D. light illuminates continuously the battery power is getting low. Please replace the battery as soon as possible, as the microphone’s sensitivity is greatly compromised when operated with a low battery.
- Page 11 0dB selected fi rst and assess the sound quality before making further adjustments. Figure 7 - PAD switch selection M3 has been designed with a special recessed slide switch that is placed inside the microphone to reduce the possibility of unauthorised or mistaken activation.
- Page 12 Mounting the M3 A stand mount clip (RM3) is included with your M3 and should be used to connect the M3 fi rmly and safely to a stable microphone stand. How to attach the stand mount 1. Before placing the M3 into the RM3 stand mount, remove all cables and connectors to eliminate the possibility of damaging the connectors.
-
Page 13: Initial Setup
Recommended Initial Setup Now that you have the M3 securely fastened to a mic stand or tripod, and the audio output XLR connected, you are ready to fi ne tune your setup. 1. When fi rst switching the mixer on and phantom power is applied to the M3, or when the microphone battery power is switched ON, several seconds should be allowed for the microphone to... - Page 14 The best way to assess your recording environment is to listen to the sound you wish to record acoustically fi rst. Remember that no amount of EQ can correct a ‘bad’ recording environment. Any further desired modifi cation of sound can then be undertaken with the EQ and effects.
-
Page 15: Care And Maintenance
Care and Maintenance 1. Like all electret condenser microphones, the M3 should be kept dry at all times. The capsule will be potentially subject to moisture during vocal use, and we strongly recommend the use of the foam windscreen (supplied with your M3) during all vocal applications. - Page 16 Warranty *All products are warranted for one year from date of purchase. You can extend that to a full ten years if you register online at www.rodemic.com. The warranty covers parts and labour that may be required to repair the microphone during the warranty period.
Need help?
Do you have a question about the M3 and is the answer not in the manual?
Questions and answers