Table of Contents
Advertisement
Advertisement
Table of Contents

Related Manuals for RODE Microphones NT1


Summary of Contents for RODE Microphones NT1
- Page 1 World’s Quietest 1” Cardioid Condenser Microphone www.rodemic.com/nt1...
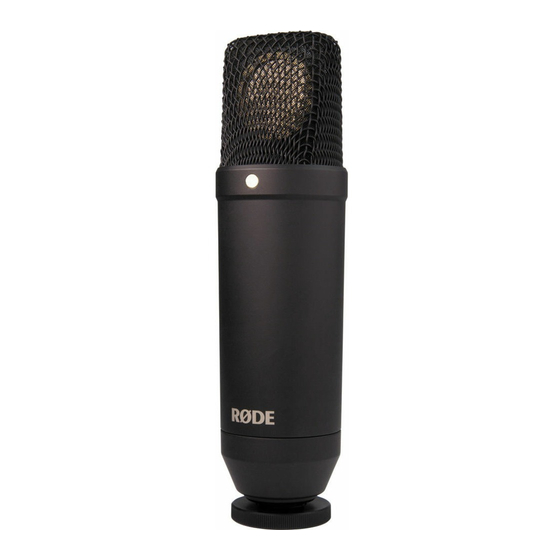
- Page 2 The NT1 is not only ideal for recording music, but is a fantastic microphone for podcasting and voiceovers, as well as sound design.
- Page 3 Internal Rycote • Ultra-low noise transformerless circuitry • State-of-the-art surface mount electronics • Heavy-duty matte black fi nish • Gold plated output connectors • Designed & manufactured in Australia • Free 10 year extended warranty when you register online at www.rodemic.com/warranty...
- Page 4 Warranty The NT1 is covered by a limited warranty for one (1) year from the date of purchase. This can be extended free of charge to a full ten (10) year warranty by registering your microphone online by visiting our website as above.
-
Page 5: Frequency Response
Specifi cations 0˚ +5.0 -2.0 -2.0 -4.0 -6.0 -8.0 -10.0 -10.0 -12.0 -14.0 -16.0 -18.0 -20.0 -20.0 -22.0 -24.0 Polar Response -25.0 90˚ 270˚ dB rel. 1V/Pa Frequency: 500 Hz: 1000 Hz: 4000 Hz: 180˚ 8000 Hz: 14000 Hz: Frequency Response... - Page 6 Specifi cations Pressure Gradient Acoustic Principle JFET impedance converter with Active Electronics bipolar output buffer Cardioid Directional Pattern 20Hz ~ 20kHz Frequency Range 100 Ω Output Impedence Equivalent Noise 4.5 dBA SPL (as per IEC651) Maximum Output +8 dBu (1kHz, 1% THD into 1K Ω load Sensitivity -29 dB re 1V/Pa (35mV @ 94dB SPL)
- Page 7 132 dB SPL Maximum SPL 90 dBA SPL (as per IEC651) Signal / Noise 24V phantom power Power Requirements 48V phantom power 3 Pin XLR Output Connection Balanced output between pin 2 (+), pin 3 (-) and pin 1 (ground) Net Weight 395g Accessories...
- Page 8 The NT1 requires 48V DC (P48) or 24V DC (P24) phantom power. If the mixer or preamp does not contain this phantom power requirement, then an external phantom power supply is needed.
- Page 9 If your equipment doesn’t have a phantom power supply, an external one can be purchased and used in-line between the preamp and the NT1. Be sure to check that your phantom power supply is either P48 (48V DC) or P24 (24V DC) to...
- Page 10 To mount the NT1, fi rst remove the threaded ring from the bottom of the microphone. From there, place the microphone in...
- Page 11 The RØDE RM2 ring mount is available as an optional accessory. It can be used in situations where the NT1 needs to be mounted in close proximity to instruments or in any tight space where the SMR Diagram 2 Adjust the angle of won’t quite fi...
- Page 12 Diagram 3 Always use the pop fi lter when recording vocals, to prevent plosives.
- Page 13 General Operation The gold dot on the face of the NT1 indicates the front of the microphone, and the pickup area of the capsule. The gold dot should always be facing towards the sound source that you wish to record.
- Page 14 Don’t be afraid to experiment with your own mic placements to produce the sound that you’d like to pick up with your NT1. Recording vocals •...
- Page 15 An ideal reference is to begin with the NT1 with the pop shield attached, mounted directly in front of the vocalist, approximately 15cm (6”) away. The pop shield will assist in keeping the performer at a constant minimum distance from the microphone and helps to maintain reasonable recording levels.
- Page 16 Recording electric guitar/bass To mic up a guitar or bass amplifi er (as opposed to direct input of that instrument) a microphone may be placed close to the loudspeaker of the amplifi er, directed slightly to the side (off-axis) of the speaker (see Diagram 4). In the absence of a PAD it may be necessary to move the mic further from the speaker to avoid signal distortion when loud volume is used.
- Page 17 Recording piano (mono) To record a piano using a single microphone, place the mic approximately 60cm (2’) above the centre of the sound board, aimed slightly towards the front of the piano (see Diagram 5). 60cm Diagram 5 Place the mic approximately 60cm above the soundboard.
- Page 18 Recording piano (stereo) To record a piano using a matched pair of NT1s using X/Y stereo technique, the matched microphones should be angled 90 - 110 degrees to each other, over the hammers, with one mic aimed towards the lower strings and the other to the higher strings (see Diagram 6).
- Page 19 Recording acoustic guitar (mono) A common (single) microphone position when recording acoustic guitar is between 20 – 30cm (8-12”) away from the front of the instrument, where the neck and body meet. Angle the mic towards the position between the sound hole and the neck joint of the guitar.
- Page 20 An alternative technique is to combine a small capsule microphone (like the NT5 or NT55) close to the guitar, with a large capsule mic like the NT1 at a distance of around 1m (3’). The individually captured sounds recorded by each microphone can then be mixed as desired.
- Page 21 Recording drums (one mic) There are various ways to record drum kits. Single mics ‘overhead’, multiple mics (X/Y or spaced pair) or multiple mics close to individual drums and cymbals (‘close miking’). To record a kit using a single microphone we suggest that you begin by placing the mic above the direct centre of the kit at the same height as the kit is wide, with the front of the microphone (gold dot) facing down.
- Page 22 Recording drums (overheads spaced) To record a kit using two overhead microphones they should be placed at a similar height to the single technique and, depending on the kit size, approximately 1-2m (3-6’) apart. The fi rst mic should be at an equal distance from the snare drum as the second mic is from the kick drum.
- Page 23 Recording drums (overheads XY) To record a kit using a matched pair of microphones in X/Y stereo technique, the microphones should be placed in the location of the single mic technique, with the front of each microphone (gold dot) pointing down and at an angle of 90 - 110 degrees to each other. Diagram 11 Recording drums with two overhead XY mics.
- Page 24 Safety and maintenance After use the NT1 should be removed from its shock mount, wiped with a dry, soft cloth and placed in the supplied protective dust cover or supplied zip case. Alternatively if the mic is being used regularly, we strongly suggest you cover the mic with the supplied protective dust cover.
- Page 25 We have an extensive distributor/dealer network, but if you have diffi culty getting the advice or assistance you require, please do not hesitate to contact us directly. Alternatively please visit www.rodemic.com/support for contact details and a list of Frequently Asked Questions. Importers & distributors For a full list of international importers and distributors, visit our website at www.rodemic.com/distributors.
- Page 26 Contact RØDE International 107 Carnarvon Street Silverwater NSW 2128 Australia 2745 N Raymond Ave Signal Hill CA 90755 PO Box 91028 Long Beach CA 90809-1028...
Need help?
Do you have a question about the NT1 and is the answer not in the manual?
Questions and answers