Table of Contents
Advertisement
Quick Links
Advertisement
Table of Contents

Summary of Contents for Impromat Klima ATW-MINI
- Page 1 ATW-MINI Technical Guide AIR-TO-WATER HEAT PUMP...
-
Page 2: Table Of Contents
CONTENTS IMPORTANT WARNINGS ........3 1. THE PRODUCT ........3 2. APPLICATION ........3 3. TECHNICAL DESCRIPTION OF THE PRODUCT ........3 4. SAFETY PRECAUTIONS ........4 5. STORAGE AND TRANSPORT ........4 6. SPECIFICATIONS ........5 DIMENSIONS ........6 7. -
Page 3: Important Warnings
Dear Customer, thank you for purchasing the ATW-MINI Heat Pump. We believe you will be satisfied with this product and that this product will bring comfort into your home. As this product is a complex appliance, pay high attention to this User Guide. This guide will make you completely familiar with the product application, placing, construction and will provide you with other necessary information. -
Page 4: Safety Precautions
• Maximum humidity 90% The outdoor unit must be stored and transported in vertical position and in the original box. If necessary, protect the fragile parts (e.g. exchanger). ATW-MINI indoor unit: • Dust/free, non-agressive environment • Temperature +5°C to +45°C... -
Page 5: Specifications
6. SPECIFICATIONS Comfort High Power Series Mini Mini Mini Mini Mini Mini Mini Mini Type 11 HP 14 HP 16 HP AOYG18LALL AOYG30LETL AOYG36LETL AOYG45LETL AOYG54LETL WOYK112LCT WOYK140LCT WOYK160LCT Applicable outdoor units WOYA60LDC WOYA80LDC AOYG36LATT AOYG45LATT AOYG54LATT WOYG112LCT WOYG140LCT WOYA100LDC 11,1 11,2 Heating capacity... -
Page 6: Dimensions
DIMENSIONS Heating water Return water Wiring Refrigerant 7. OPERATING PRINCIPLE The heat pump appliance is used to acquire low-temperature energy from the selected source and its transfer to higher temperature level. The air to water heat pump extracts heat from the ambient air. The core of the heat pump serves as an efficient compressor through which the refrigerant is compressed and then expanded in a hermetically closed circuit. -
Page 7: Installation And Positioning
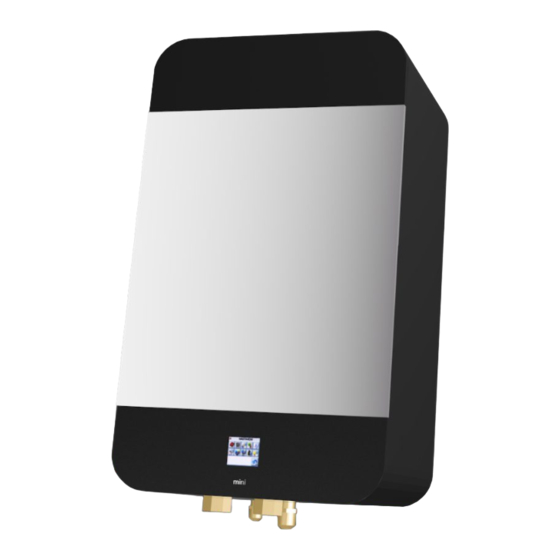
8. INSTALLATION AND POSITIONING The installation must be performed by a professional company authorized by the manufacturer. Do not install the appliance by yourself. The appliance might get damaged and people injured. It is possible to suspend the indoor unit on the wall. It has to be placed in the room in a way that enables the access for service and maintenance (see the illustration under). -
Page 8: Connection Of Regfrigerant Circuit
9. CONNECTION OF THE REFRIGERANT CIRCUIT The heat pump refrigerant circuit connection must be performed by an authorized installation company or a company certified or trained in air-conditioning and refrigeration services. Do not connect the refrigerant circuit by yourself. There is a serious danger of injury from refrigerant. - Page 9 10.2. SETTINGS The Settings menu is divided into two rows of icons. The top row icons are used for the control of the UTI-INV module (mode, equitherm regulation, HDW etc.), the bottom row icons are used to set the UTI-IQCP control panel (language, time, network connection etc.).
- Page 10 10.2.2 Parameters settings The menu with a number of parameters that can be viewed, and modified, if necessary. The current value of the parameter is displayed. If the parameter is user-editable, a box labelled „New” is displayed. Parameters in view mode: Moving up and down Current value between parameters...
- Page 11 10.2.3 Temperature List of other temperature sensors that are not shown on the main screen. The exchanger temperature and the required temperature are displayed. The E, F and G sensors are displyed - these values are only informative and do not affect the regulation.
- Page 12 10.2.6 Language setting The UTI-IQCP control panel offers three language versions. When you select the language, the user interface will switch to that language. By pressing the Back button, the setting will be saved and the screen will return to the Settings menu.
- Page 13 10.2.9 Network setting It is possible to set the IP address, subnet mask and gateway of the network so that the devices can be connected to the network. If the installation permits, it is possible to activate the DHCP server. DHCP deactivated: DHCP activated: Note: If you don’t know what value to set, do not make any changes, or connect the panel to the network.
- Page 14 10.2.11 Factory settings If the panel is not responding, or you have made a setting that led to a non-standard function, it is possible revert the panel to its factory settings: 1. Press the button on the panel for more than 10 seconds. (Note: the button may not be accessible when the panel is installed in a unit.) 2.
- Page 15 The settings menu is divided into two rows of icons. The top row icons are used for the control of the UTI-INV module (mode, equitherm regulation, HDW etc.), the bottom row icons are used to set the UTI-IQCP control panel (language, time, network connection etc.).
-
Page 16: Maintenance
11. MAINTENANCE Due to its design the heat pump is very easy to maintain. Basic maintenance is performed by the servicing organization once a year. During this regular maintenance, all important elements of the heat pump are checked. Special attention is paid to the correct volume of refrigerant in the circuit and a proper operation of the refrigerant circuit. -
Page 17: Refrigerant Circuit
12. REFRIGERANT CIRCUIT Models: High Power Outdoor unit Indoor unit Flow sensor Filter Control valve Heating 4-way Pressure sensor water valve sensor Accumulator Exchanger Heating emitter Injection expansion valve Plate heat exchanger Solenoid valve Filter Compressor with injection port Circulation Injection pump Expansion valve... -
Page 18: Electric Wiring
13. ELECTRIC WIRING (with Expander) - Page 19 ELECTRIC WIRING (without Expander)
-
Page 20: Installation Manual
14. INSTALLATION MANUAL Models: MINI 5, 8, 11(HP), 14(HP), 16(HP) CAUTION R410A REFRIGERANT This product contains R410A refrigerant and polyester oil. This product can be installed only by an authorized personnel. For authorized personnel DANGER This sign indicates crucial information about protection against injury by electric current, injury by leaking refrigerant etc. WARNING This sign indicates important information concerning safety operation of the appliance. -
Page 21: Working Conditions
15. WORKING CONDITIONS Heat pump can be used as a heating source for heating and warming of water. Working environment: O.U. environment according to Czech Standard ÈSN 33 2000-3 AA2-AA5; AB7; AD3 I.U. environment according to Czech Standard ÈSN 33 2000-3 AA5;... - Page 22 Selection of the place and installation of the equipment The indoor unit is designed for suspension on the wall using a mounting desk. It has to be placed in the room in a way that enables the access for service and maintenance (see the illustration under). The outdoor unit is designed to be attached to a stand.
- Page 23 When capping, do not use mineral oils for any parts. Failing this can cause shortening of equipment’s lifetime. Prior to soldering (min. 50% Ag hard), you must fill the piping with nitrogen gas to prevent flakes. Gas mustn’t be under pressure. The capping must be done with high-quality refrigerator tools.
-
Page 24: Special Function
Tightening torque of the stopper 6.35 mm(1/4in.) dia. 20 to 25N·m (200 to 250kgf·cm) 9.52 mm (3/8 in.) dia. 20 to 25 N·m (200 to 250 kgf·cm) 3-way valve 12.70 mm (1/2in.) dia. 25 to 30 N·m (250 to 300 kgf·cm) CAUTION 30 to 35 N·m (300 to 350 kgf·cm) 15.88 mm (5/8 in.) dia. -
Page 25: Wiring
16. WIRING Revision and service of wiring can only be performed by authorized personnel. Professional wiring must be confirmed on the warranty list. Wiring must comply with valid local and national electrotechnic standards. Inspection of the heat pump wiring must be performed after the installation of the heating system and after watering. - Page 26 External circuits - version without Expander Indoor unit ETS sensors: A - exchanger Fuse C - heating water H* - outdoor (or B indoor) air J3** J2** ∗ Ambient temperature sensor Description of the electric terminals (This sensor must be connected. If not Indoor unit connected, the output water temperature is adjusted to the set value of equitherm...
- Page 27 External circuits - version with Expander Indoor unit Fuse J3** J2** ∗ Ambient temperature sensor Description of the electric terminals (This sensor must be connected. If not Indoor unit connected, the output water temperature is adjusted to the set value of equitherm XBiv backup heater control, max.
- Page 28 Connection of the ETS temperature sensors The ATW-MINI controller uses a set of digital ETS sensors to monitor the temperature. Each of the sensors is identified by an address that is assigned to it in production. If you add or change sensor, the new sensors have to be addressed using the ATW-SW software.
- Page 29 The amount of melted gases in water depends on water temperature and the gas pressure. In heating water, we talk about melted air consisting mostly of N2, O2, and CO2. Chemically, nitrogen is harmless, but from the operation point of view, nitrogen reacts unfavourably as it reduces the heating capacity of water, increases the compression work and generates cavitation noise.
- Page 30 - after the system cools down to 40°C, empty the wash-out water keeping all regulations concerning wastewater, - clean filters from mechanical dirt, - start filling the system with the permanent contents immediately. 3) Pressure expansion tank parameters setting The chosen volume and pressure parameters of the expansion tank are important for long-term failure-free operation of the heating system.
- Page 31 Attention, pool water mustn´t enter the plate exchanger! Always use an extra exchanger! Attention, water of more than 60°C from another source mustn´t enter the plate exchanger! Example 1: Heating of the accumulation tank to equitherm or constant temperature. ATW-Mini tank outdoor...
- Page 32 Example 3: Heating system with equitherm regulation and 3-way valve for HDW heating. ATW-Mini HDW tank outdoor other distributors temperature sensor HDW sensor electric floor heating heater expansion safety valve tank 3-way valve distributor Example 2: Heating system with equitherm regulation and HDW pre-heating.
- Page 33 Design of the hydraulic circuit The ATW Mini heat pump is designed with respect to the easiest way of installation. All important elements of the hydraulic circuit are integrated in the indoor unit. The indoor unit contains an efficient circulation pump, an exchanger and a flow sensor.
-
Page 34: Description Of Parts
DESCRIPTION OF PARTS Indoor Unit Model ATW-MINI I.11 I.10 Mark Description Part number I0002110001 Exchanger I0002110002 Flow switch I0002110003 Circulating pump I0002140001 Manometer I0002110004 Control unit I0002110009 Control panel I0002110015 High tariff relay Expander I.10 I0002110016 (version with expander) I.11...
Need help?
Do you have a question about the ATW-MINI and is the answer not in the manual?
Questions and answers