Table of Contents
Advertisement
Quick Links
Download this manual
See also:
Quick User Manual
Advertisement
Table of Contents

Related Manuals for AEG Loop


Summary of Contents for AEG Loop
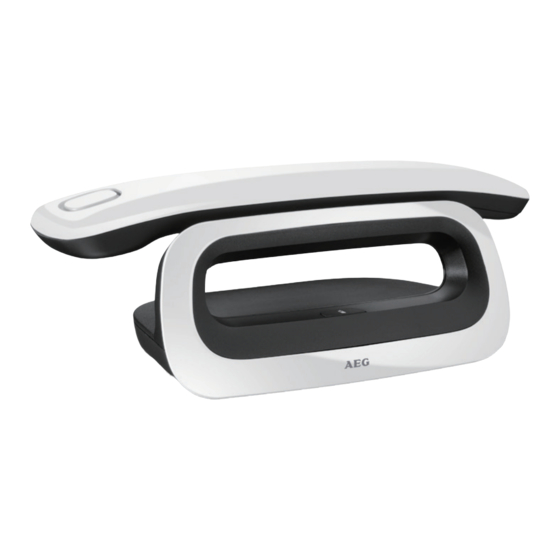
- Page 1 USER GUIDE CORDLESS TELEPHONE Loop...
-
Page 3: Important Safety Instructions
BECAUSE WE CARE Thank you for purchasing this product. This product has been designed and assembled with utmost care for you and the environment. This is why we supply this product with a quick installation guide to reduce the number of paper (pages) and therefor save trees to be cut for making this paper. -
Page 4: Intended Use
• NEVER use your phone outdoors during a thunderstorm. Unplug the base from the telephone line and the mains socket when there are storms in your area. Damage caused by lightning is not covered by the guarantee. • Do not use the telephone to report a gas leak in the vicinity of the leak. -
Page 5: Package Content
PACKAGE CONTENT The package contains the following items: • 1 Handset • 1 Base station • 1 Mains power adapter • 1 Telephone line cord • 2 AAA NiMH rechargeable batteries • User’s manual HANDSET & BASE CONNECTION • When purchased, all handsets are already registered to the base unit and should link to it when they are all powered up. -
Page 6: Installing Your Phone
INSTALLING YOUR PHONE Connecting the Base Station (See P5) • Plug the mains power cable and telephone line cord into the base station. • Plug the power adapter into a 100 - 240Vac, 50 - 60Hz mains power socket and the telephone line cord into a telephone line socket. Warning: Always use the cables provided in the box. -
Page 7: Get To Know Your Phone
Set the handset language to select “HS SETTINGS”. • Press • Press to select “LANGUAGE”. • Press to select the desired language. • Press to confirm. GET TO KNOW YOUR PHONE Handset Overview(see P1) • In idle mode: Press to access the main menu. • In sub-menu mode: Press to confirm the selection. - Page 8 • In idle mode: Press to access the call list. • In menu mode: Press to scroll up the menu items. • In Phonebook list / Redial list / Call List: Press to scroll up the list. • During a call: Press to increase the volume. • During ringing: Press to increase the ringer volume.
- Page 9 • Press to insert a digit / character / * / #. • key in idle mode: Press and hold to enable or disable the keypad lock. ALPHA- • key in idle mode: Press and hold to turn on NUMERIC / off the ringer. KEYPAD, • <0> key in predialing / number editing mode: *, # Press and hold to insert a pause. • <#> key in Call List mode: Press to review caller’s number if applicable.
- Page 10 Handset LCD Display Icons and Symbols(see P2) The LCD display gives you information on the current status of the telephone. More blocks indicate a stronger reception signal. Less blocks indicate a weaker reception signal. Indicates a call is in progress. Flashes when there is an incoming call.
-
Page 11: Text And Digit Entry Table
Main CALL LIST PHONE- BS SET- REGIS- ANS. MACHI- Menu BOOK TINGS SETTINGS TRA- FAULT NE (ONLY FOR TION MODELS WITH TAM BASE) Review Review pho- ALARM PIN? PIN? MSG PLAYBACK menu Call List nebook list RINGER RING DEL ALL OLD? Under a Under a RING... -
Page 12: Use Your Phone
8.5.1 Character Set Number Editing Alphanumeric Editing (For phone number edi- (For phonebook name editing and renaming handset) ting, date/time editing) 2nd 3rd 4th 5th 6th 7th 8th 9th 10th press space 0, P (Pause) ‘ & USE YOUR PHONE Make a Call 9.1.1 Preparatory Dialing... - Page 13 NOTE The first phonebook entry will be displayed. If there is no entry in the phonebook, it will show “EMPTY”. • Press to select the desired phonebook entry. • Press to dial the number. 9.1.4 Call from the Call List • In idle, press to access the call list and press to select.
- Page 14 If the handset is on the base or charger and if AUTO ANSWER is set to ON: When the phone rings, pick up the handset to answer a call. If you wish to switch AUTO ANSWER Off, see Set the Auto Answer. The default setting is ON.
- Page 15 Turn the Keypad Lock ON/OFF • In idle, press and hold to turn on the keypad lock. The “ ” icon is displayed on the LCD. • To unlock the keypad, press and hold Find the Handset (PAGING) Paging is a useful way for finding lost handset(s). • Press on the base station.
-
Page 16: Private Phonebook
9.9.2 Transfer an External Call to Another Handset During an external call: • Press to select INTERCOM. • Press to select the desired handset to intercom with. • The external call is put on hold automatically and the called handset rings. • Press on the called handset to establish an internal call. • Press on the calling handset or put the calling handset on the charging cradle to end the current call with the external party. - Page 17 • Press to select PHONEBOOK. Press again. NOTE The first entry in the phonebook will be displayed. If there is no entry stored in the phonebook, it will show “EMPTY”. • Press to select ADD. • Press and enter the name. • Press and enter the number.
-
Page 18: Phone Settings
• Press then to edit the melody (if applicable). • Press to save. 10.4 Delete a Phonebook Entry • In idle, press to access the phonebook. • Press to select the desired phonebook entry. • Press and to select DELETE. • Press to confirm. 10.5 Delete All Phonebook Entries • In idle mode, press to access the phonebook. - Page 19 • Press to confirm. 11.1.2 Set the Time Format • Press to select HS SETTINGS. • 2Press to select DATE & TIME. • 3Press to select TIME FORMAT. • Press to select your desired time format (12 HR or 24 HR). • Press to confirm. 11.1.3 Set the Time, Date, and Year • Press to select HS SETTINGS.
- Page 20 NOTE If DIRECT CALL is set to ON, and you want to change it back to OFF, Press to select HS SETTINGS, and follow the step 2 to 4 above to turn the feature off. 11.2.2 Alarm You can use this phone to set an alarm clock. When an alarm is set, <ALARM ICON>...
-
Page 21: Out Of Range
• Press to select INT RING. • Press to select the desired ringer melody. NOTE The respective ringer melody will play as you step through the melody list. • Press to confirm your choice. 11.2.5 Set the Ringer Volume You can set the handset ringer volume level to one of 6 ringer volume levels including VOLUME OFF . - Page 22 11.2.7 Rename the Handset • Press to select HS SETTINGS. • Press to select RENAME HS. • Press and enter the name of your handset • Press to confirm. 11.2.8 Set the Auto Answer • If you turn on the Auto Answer, you can answer a call automatically by just lifting the handset off the base or charger, without having to press any key.
- Page 23 • Press to confirm • Press to re-confirm. 11.4 Register a Handset Your handset is pre-registered to the base station. Up to five handsets can be registered to a a single base station. If for some reason, the handset is not registered to the base station, REGISTER”...
-
Page 24: Caller Display (Network Dependent)
CALLER DISPLAY (NETWORK DEPENDENT) 12.1 Call List This feature is available if you have subscribed to the Caller Line Identification service from your telephone company. Your phone can store up to 50 received calls with date/time information in the Call List. The number will be shown on the LCD when the phone is ringing. - Page 25 • Press to select a melody, and to save the entry to the Phonebook. (Note: the melody will only play when you receive a call from this number, if the incoming number matches the number stored.). NOTE If the phonebook is full, it will show PB FULL when you select ADD TO PB, and you will have to delete a phonebook entry before adding another.
- Page 26 12.8 Redial List The redial list stores the last 10 numbers dialled. A maximum of 24 digits can be displayed for each entry. 12.8.1 Access the Redial List • From the home screen, press • Press on to browse the redial list. >The last dialled number will appear first in the redial list.
-
Page 27: Technical Details
• Press again to confirm. >A confirmation tone is played. • Press to return to standby mode. 12.8.5 Delete All Entries from the Redial List • From the home screen, press • Press to “DELETE ALL” and then press • Press to select. >“CONFIRM?” is displayed. • Press again to confirm. -
Page 28: Cleaning And Care
CLEANING AND CARE Do not clean any part of your unit with benzene, thinners or other solvent chemicals as this may cause permanent damage which is not covered by the Guarantee. When necessary, clean it with a damp cloth. Keep your phone system away from hot, humid conditions or strong sunlight, and don‘t let it get wet. - Page 29 CE DECLARATION This product is in compliance with the essential requirements and other relevant provisions of the R&TTE directive 1999/5/EC. The Declaration of conformity can be found on: www.aegtelephones.eu...
- Page 30 © 2014 Binatone Electronics International Limited All rights reserved Subject to availability. Rights of modification reserved. AEG is a registered trademark used under license from AB Electrolux (publ) www.aegtelephones.eu...
Need help?
Do you have a question about the Loop and is the answer not in the manual?
Questions and answers