Table of Contents
Advertisement
Quick Links
Advertisement
Table of Contents

Related Manuals for Stryker SR-89MC


Summary of Contents for Stryker SR-89MC
-
Page 3: Table Of Contents
CONTENTS FUNCTIONS AND CHARACTERS ............1 STANDARD ACCESSORIES ..............2 OPTIONAL ACCESSORIES ..............2 INSTALLATION ..................2 Microphone connection ................2 Antenna connection ..................3 Power connection ..................3 Fuse replacement ..................3 Install Microphone hanger ................4 Intall external speaker .................. 4 Install earphone ................... 4 Install Remote PTT cable................ -
Page 4: Functions And Characters
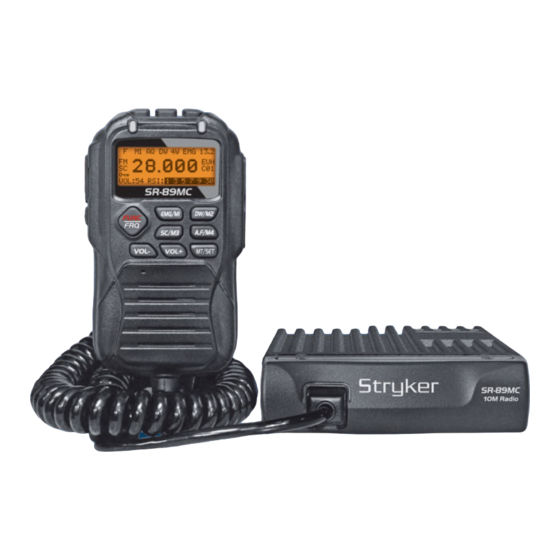
FUNCTIONS AND CHARACTERS Full Aluminum body offer best heat radiation Remote control microphone with Wide angle Dot matrix LCD 3 color display: Blue, Purple, Orange Dual watch Full channel scan EMG Channel CH9/19 SQ and ASQ Control 4 Memory channels for each Norm SQ, VOL, voltage level display Field strength display Automatic Power on/Manual Power on... -
Page 5: Standard Accessories
STANDARD ACCESSORIES Screws for bracket Pads for bracket Adjusting knobs Fuse(2A,250V) Pads Hanger Self-tapping Screws OPTIONAL ACCESSORIES Remote PTT Control Cable Earphone EK01 HS03 INSTALLATION Choose a conveniet location to install the radio. 1. Mark the location for screws by tracing the bracket. 2. -
Page 6: Antenna Connection
Antenna connection Note: Never press PTT before install the antenna, it could damage the radio. 1. Screw on the PL-259 from your antenna into antenna jack. 2. For proper operation of this radio, it is necessary to install the antenna in a well grounded place, and adjust the SWR. -
Page 7: Install Microphone Hanger
Intall Microphone hanger 1. Choose suitable location and mark for screw point. 2. Attach the hanger using the supplied screws. Connecting an external speaker This radio can use a 4-8 ohm, 4W external speaker. 1. Install the external speaker in the desired location. 2. -
Page 8: Know About This Radio
KNOW ABOUT THIS RADIO FUNC/FRQ Function menu / frequency mode EMG/M1 EMG CH9 and CH19, or program with second function DW/M2 Dual watch, or program with second function SC/M3 Channel scan, or program with second function AF/M4 AM/FM selection, or program with second function VOL-, Squelch level - Decrease volume or Squelch level VOL+, Squelch level +... -
Page 9: How To Use This Radio
HOW TO USE THIS RADIO Power on radio 1. Press key to turn on the radio. : When the radio is on, hold l b b b key, the radio will power off. 2. Adjust squelch level until you can hear background noise, refer to Page 7 for Squelch level setup. -
Page 10: Volume Control (1-56 Levels, Default Level 54)
Volume control ( 1-56 levels, Default level 54 ) 1. Press SQ/VOL key repeatedly, until LCD display VOL: XX XX stands for volume level. 2. Short Press key to choose wanted volume level. 3. Hold quickly increase volume level, hold will quickly decrease volume level. -
Page 11: Lcd Display
LCD display Dot matrix LCD display for channel number, frequency and operations. Dual watch 1W/4W: Power level M1-M4: Storage location CH9/19 Current Voltage Func FM/AM Mode Working norm Scan Current channel Keypad lock icon Volume level, SQ:11 Squelch level RX signal strength, PWR: TX signal strength. -
Page 12: Time Out Timer
Time Out Timer 1. Short Press key, F Icon appear and flashes. 2. Short Press key to enter Menu. 3. Repeatly short press key until LCD displays TOT: XXXX 4. Press to adjust the TOT time. 5. Short press any other key to confirm and exit. LCD color 1. -
Page 13: Keypad Lock
Keypad lock 1. To avoid wrong operation of keys, you can hold key to lock the keypad. 2. The LCD displays 3. Repeat the above function to unlock the keypad. Frequency mode 1. Hold for over 5 seconds, the display will change to frequency mode. -
Page 14: Dw Channels
DW channels Two channels need be pre-stored for dual watch function. 1. Short Press key, F Icon appear and flashes. 2. Short Press key to enter Menu. 3. Repeatly short press key until LCD displays DW0: XX 4. Press to choose first channel for 5. -
Page 15: Specification
Specification GENERAL Modulation Mode AM/FM Frequency Range 28.000-29.700Mhz Frequency Tolerance 0.005% Input Voltage 13.2V 112mm(L) x 143mm(W) X 30mm (H) Dimensions(in mm) Weight 785g Ferquency Control PLL Synthesizer Operating Temperature Range -20° C TO + 55° C Transmit 1.4A MAX Current Drain Receive Squelched 0.4A...
Need help?
Do you have a question about the SR-89MC and is the answer not in the manual?
Questions and answers