
Related Manuals for Medion AKOYA X57299


Summary of Contents for Medion AKOYA X57299
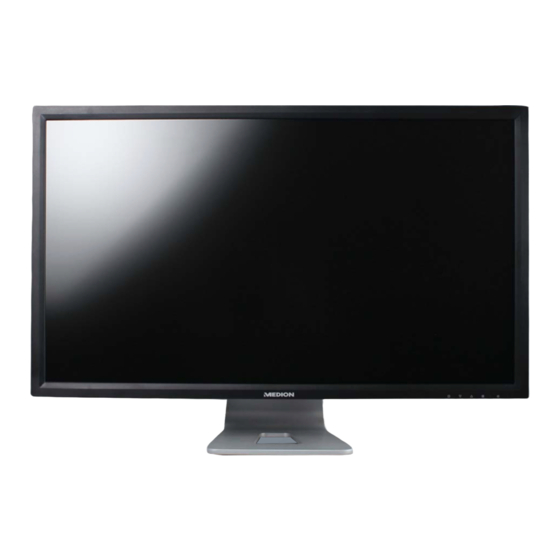
- Page 1 70,9 cm / 28“ LED-Backlight-Monitor ® ® MEDION AKOYA X57299 (MD 21299) Instruction manual...
-
Page 2: Table Of Contents
Contents Notes on how to use these instructions ....................... 3 1.1. Symbols and key words used in these instructions ......................3 Proper use ................................3 Package contents ..............................3 Safety instructions ..............................4 4.1. Operating safety ....................................4 4.2. Installation location ..................................4 4.3. -
Page 3: Notes On How To Use These Instructions
1. Notes on how to use these instructions Please be sure to read these operating instructions carefully and follow all instructions given. This guar- antees reliable operation and a longer life expectancy for your monitor. Always store these instructions near your monitor. Keep the operating instructions so that you can pass them on with the monitor if you sell it. -
Page 4: Safety Instructions
4. Safety instructions 4.1. Operating safety • This device is not intended for use by people (including children) with reduced physical, sensory or mental abilities or by those without experience and/or knowledge, unless they are supervised by a person responsible for their safety or they have been instructed in its use by that person. Children should be supervised to ensure they do not play with this device. -
Page 5: Repairs
• Despite the most modern production methods as a result of the highly complex technology, in rare cases there may be individual or multiple pixel drop-outs (dead pixels). 5. Notes on conformity Medion AG hereby declares that product conforms to the following European requirements: • ISO 9241-307 Class II standard (class of pixel defect) •... -
Page 6: Initial Operation
6. Initial operation 6.1. Preparations at your PC If you have been operating your computer with a CRT monitor, it may be necessary to make some adjustments. This is necessary if your previous monitor used settings for its operation that will not be supported by your new monitor. The monitor displays up to 3840 x 2160 pixels. -
Page 7: Supported Monitor Settings
6.2. Supported monitor settings This monitor supports the following modes Vertical Resolution Port frequency 640 x 400 56Hz 640 x 480 60Hz 72Hz 75Hz 720 x 400 70Hz 800 x 600 60Hz 56Hz 72Hz 75Hz 832 x 624 75Hz 848 x 480 60Hz 1024 x 768 60Hz... -
Page 8: Monitor Settings For Windows Xp
® 6.4. Monitor settings for Windows For Windows XP®, adjust the monitor settings in the Windows program “Display Properties”. The program can be started as follows: • right-click on the Windows desktop and left-click on “Properties”. • Start the “Display” program from the “Control panel”. Set the resolution under “Screen resolution ”... -
Page 9: Monitor Settings Under Windows Vista
® 6.5. Monitor settings under Windows Vista For Windows Vista®, adjust the monitor settings in the Windows program “Customize appearance and sounds”. The pro- gram can be started as follows: Right-click on the Windows desktop and left-click on “Customize”. ... -
Page 10: Monitor Settings Under Windows® 8
6.7. Monitor settings under Windows® 8 Open the “screen resolution” setting. Point the mouse curser at the top right-hand corner of the screen and then move the mouse curser downwards. Then click on „Search“. Enter “Display” in the search field. ... -
Page 11: Connecting The Monitor
6.9. Connecting the monitor Prepare your computer for the monitor as necessary so that the correct settings are available for your monitor. Make sure that the monitor is not connected to the mains (mains plug is not yet inserted) and the monitor and the computer are not switched on. -
Page 12: Operating Elements
7. Operating elements 1 2 3 4 5 6 This button starts the OSD (on screen display). Press the button to exit the OSD. + Blocking of On/Standby button, with deactivated OSD + Blocking of the OSD menu button, with deactivated OSD To activate/deactivate, keep the key combination pressed down until the displayed bar has moved completely from left to right. -
Page 13: Setting The Screen
8. Setting the screen The OSD (On Screen Display) menu lets you set specific screen parameters. 8.1. Using the OSD menu Touch the button to activate the OSD. Use the / buttons to select the options from the main menu. Confirm your selection with the ... - Page 14 COLOUR WARM Adds green to the screen and generates a darker hue. NORMAL Adds red to the screen and generates a warmer white and a more intense red COOL Adds blue to the screen and generates a cooler white USERDEFINED Individual settings for red (R), green (G) and blue (B) PICTURE MODE offers an optimal display environment corresponding to the...
-
Page 15: Power-Saving Options
9. Power-saving options This monitor switches to different power-saving modes which are specified by the respective computer/operating sys- tem. This complies with the current requirements for reducing the energy consumption. The monitor supports the following types of power-saving modes: Power consumption (nominal Colour of Status Standby (approx.) -
Page 16: Do You Need More Help
10.1.4. The picture flickers up/down or is inconsistent: Check: • Signal connector: If the pins are bent, contact your customer service. • Signal connector: The connectors of the signal cable must be inserted firmly in the sockets. • Graphics card: Check if the settings are correct. •... -
Page 17: Cleaning
11. Cleaning You can increase the lifespan of your monitor with the following measures: CAUTION! None of the parts inside the housing require cleaning or maintenance. • Always unplug the device and disconnect all cables before cleaning. • Do not use solvents, corrosive or aerosol detergents . •... -
Page 18: Pixel Defects On Screens
However, these approaches were mostly very compli- cated and varied from one manufacturer to the next. When handling warran- blue ty issues for all of its display products, MEDION therefore adheres to the strict green and transparent requirements of the standard ISO 9241-307, Class II; which Sub-Pixel has been briefly summarised below. -
Page 19: Technical Data
14. Technical data Model X57299 (MD 21299) Screen size 70.9 cm (28“), TFT with LED-backlight Format (aspect ratio) 16:9 Input voltage 100-240 V ~, 50/60 Hz Resolution 3,840 x 2,160pixels Brightness 300 cd/m² (typ.) Contrast ratio 1,000:1 (typ.) Dynamic contrast ratio 5,000,000:1 Response time 5 ms typ. -
Page 20: Legal Notice
This operating manual is protected by copyright. Mechanical, electronic and any other form of reproduction is prohibited without the written per- mission of the manufacturer Copyright is owned by the company: Medion AG Am Zehnthof 77 45307 Essen Germany The operating manual can be reordered via the service hotline and is available for download via the service portal at www.medion.com/gb/service/start/. - Page 22 120 Faraday Park, Faraday Road, Dorcan Swindon SN3 5JF, Wiltshire United Kingdom Hotline: 0333 32 12 106 (National rate) Fax: 01793 71 57 16 To contact us by email please visit the “Service and Support” section of our website at www.medion.co.uk. www.medion.co.uk...
Need help?
Do you have a question about the AKOYA X57299 and is the answer not in the manual?
Questions and answers