Table of Contents
Advertisement
Advertisement
Table of Contents

Related Manuals for Vetta V50


Summary of Contents for Vetta V50
- Page 1 CYCLE COMPUTER OWNER'S MANUAL ENGLISH...
-
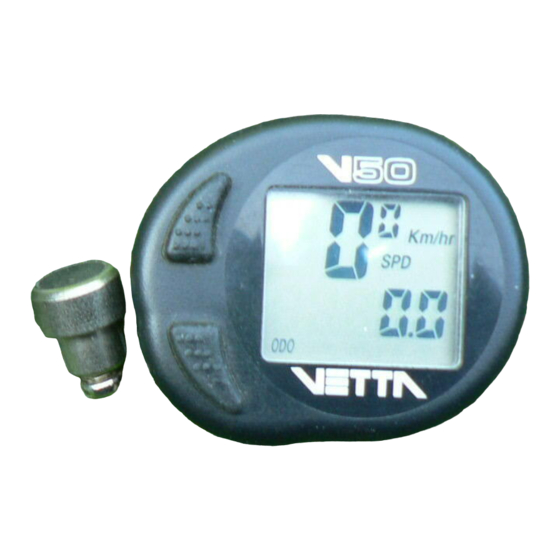
Page 2: Component Illustrations
Congratulations on your purchase of the new Vetta V-50 cycle computer. The V-50 is designed with the features and functions that you need, whether you are a road cyclist, offroad cyclist or a triathlete. The Vetta two button design allows easy programming and operation. The digital clock and average speed readings are two of the functions of this computer that make it ideal for training and measuring performance. -
Page 3: Function List
FUNCTION LIST SPEEDOMETER (SPD) (Km/hr or Mi/hr) Tells you your current speed on the upper line of the display screen at all times. CUMULATIVE ODOMETER (ODO) Tells you your cumulative distance until you perform an all clear total reset, the battery is changed, or the unit passes 9999.9 mi. - Page 4 ELAPSED TIME (RT) Elapsed time begins when the wheel begins to rotate. It starts automatically when the wheel is set into motion and stops when the wheel stops for over four seconds. When one hour of riding time has elapsed, the clock display will automatically display the time as hours and minutes.
-
Page 5: Feature List
FEATURE LIST AUTO POWER SAVING MODE (AUTO START-STOP) As a battery saving device, Vetta computers will automatically shut down after 10 minutes of non-use. Your V-50 will automatically restart itself as soon as the unit receives input from the wheel. -
Page 6: Battery Installation
BATTERY INSTALLATION The V-50 uses a common LR44 1.5v button cell battery. Replacement batteries are available at most camera shops and from your Vetta retailer. Under normal usage a battery should last approximately one year. NOTE: Most problems that occur with cycle computers are caused by dead or weak batteries. -
Page 7: Button Functions
WARNINGS AND CAUTIONS CAUTION Vetta encourages you to ride safely. Wear a helmet every time you ride, use front and rear lights at night, and always keep your eyes on the road ahead of you. CAUTION Vetta cycle computers are sophisticated electronic instruments. Vetta recommends that this product be installed only by a qualified bicycle retailer. - Page 8 PROGRAMMING THE COMPUTER HEAD Now that you are familiar with the features of your Vetta V-50 cycle computer, you are ready to begin programming the unit specifically for your bike. Take a few minutes to familiarize yourself with the buttons and their functions before you proceed to program the unit.
- Page 9 DETERMINING YOUR CORRECT WHEEL SIZE Vetta cycle computers are programmed using the circumference of the wheel measured in millimeters. Note that while your computer can be programmed to +/- 1mm for total accuracy, discrepancies of as much as 50mm or more will not have a significant effect on the accuracy of the unit for most normal rides.
- Page 10 WHEEL SIZE CALCULATION If the wheel size of your bike is not listed in the chart, follow these simple steps to calculate the wheel circumference number for your bike. STEP 1 Measure the distance from the center of the front axle to the ground in millimeters. If you are measuring in inches, simply multiply the number of inches by 25.4 to get millimeters.
- Page 11 PROGRAMMING YOUR WHEEL SIZE Once you select miles or kilometers and press the “SET” button, the V-50 will automatically advance into the wheel size setting mode. (See SETTING MILES/HOUR OR KILOMETERS/HOUR) STEP 1 The default wheel size setting of 2155 (700 x 32c) will appear on the screen with the first digit flashing.
-
Page 12: Setting The Clock
To reset the wheel circumference number, press the “SET” and “MODE” buttons simultaneously for three seconds to display current wheel size number. Again press the “SET” and “MODE” buttons simultaneously for three seconds and the original number will blink. Repeat the steps above to change the wheel size setting. - Page 13 STEP 1 Mount the Vetta universal sensor loosely (so that you can slide it around) to the fork blade using the zip-tie provided. The sensor can be mounted at any point along the fork.
- Page 14 STEP 3 Route the sensor wire up the back of the fork, securing it with electrical tape. CAUTION Do not use zip-ties to secure the sensor wire to the bike because doing so may result in cut or broken wires. CAUTION Be sure to leave enough slack in the wire to allow for the steer- ing motion of the bike and the action of the suspension fork, if you have one.
- Page 15 HANDLEBAR BRACKET AND HEAD UNIT INSTALLATION STEP 1 Attach the computer mounting bracket to the mounting band by sliding the disc on the top of the mounting band into the slot provided on the bracket until it snaps into place. STEP 2 Cut the plastic screw from the mounting band and place the mounting band on the handlebar/stem with the mounting bracket facing up.
- Page 16 STEP 5 Cut off the excess band. CAUTION Do not over tighten the mounting band as this may result in breakage (stripped screw or mounting band). The mounting band only needs to be tightened enough to keep it from rotating on the handlebar/stem during normal riding.
-
Page 17: Installation Test
1-2mm or less. If this does not solve the problem, talk to your Authorized Vetta Retailer. In the United States Vetta customers can call our service hotline at 1.800.GO.VETTA. -
Page 18: Warranty
Vetta will, at its sole discretion, repair or replace any product deemed defective. This express warranty is in lieu of all other warranties, either expressed or implied. Any warranties of merchantability or fitness for a particular purpose are limited to the one year duration of the above express warranty. - Page 19 WARRANTY RETURN AND REPAIR POLICY If you ever experience a problem with the function of your Vetta V-50 cycle computer, please visit your local Authorized Vetta Dealer for assistance. Should you experience a problem with your Vetta V-50 cycle computer that can not be solved by your local Authorized Vetta Dealer, please follow the simple steps on the following pages to assure quick and efficient processing of your claim.
- Page 20 STEP 1 Fill out the warranty information card within this manual. STEP 2 Contact the appropriate Vetta Customer Service Center listed below for help and to obtain a Return Authoriza- tion Number (RA Number). STEP 3 Send the unit and information card back to the appropriate Vetta Customer Service Center, together with the original copy of your purchase receipt and a detailed explanation of the problem you are experiencing.
- Page 21 WARRANTY INFORMATION CARD...
- Page 22 Problem...
Need help?
Do you have a question about the V50 and is the answer not in the manual?
Questions and answers