Table of Contents

Summary of Contents for Teka Kitchen Hoods
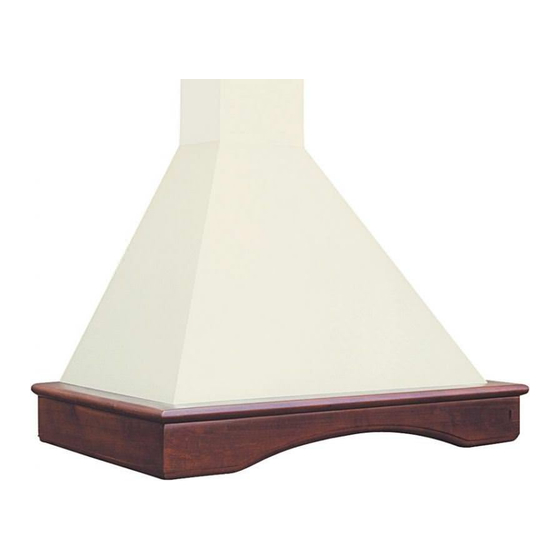
- Page 1 Instrukcja obsługi i montażu Wyciąg kuchenny LARO 90, TRENTI 90, VENTOLINE 60/90, NUBERO 60/90 Instructions Manual Kitchen Hoods LARO 90, TRENTI 90, VENTOLINE 60/90, NUBERO 60/90 Gea-Top/001...
-
Page 2: Istotne Informacje
Szanowni Państwo! Serdecznie gratulujemy trafnego wyboru. Jesteśmy przekonani, że nowoczesne, funkcjonalne praktyczne wyprodukowane z najwyższej jakości materiałów, spełni wszystkie Wasze wymagania. Prosimy o uważne zapoznanie się z treścią instrukcji obsługi przed pierwszym użyciem urządzenia aby maksymalnie wykorzystać jego możliwości oraz uniknąć... -
Page 3: Table Of Contents
Spis treści Istotne informacje 1. Opis urządzenia 2. Obsługa urządzenia 3. Czyszczenie i konserwacja 3.1 Czyszczenie obudowy 3.2 Rozwiązywanie problemów 3.3 Wymiana żarówek 4. Wymiary i specyfikacja 4.1 Specyfikacja techniczna 4.2 Wymiary 5. Akcesoria 6. Montaż 6.1 Montaż modeli: Trenti/ Nubero/ Ventoline 6.2 Montaż... -
Page 4: Czyszczenie I Konserwacja
Czyszczenie i konserwacja. Czyszczenie obudowy W żadnym wypadku nie należy używać metalizowanych gąbek do szorowania ani proszków i mleczek szorujących, które mogą rysować czyszczone powierzchnie. Zewnętrzne powierzchnie urządzenia czyści się szmatką zwilżoną wodnym roztworem płynnego detergentu. Rozwiązywanie problemów Aby wyjąć filtry metalowe z obudowy, nacisnąć na przycisk a następnie wyjąć... -
Page 5: Wymiary I Specyfikacja
Rys. 4 Napięcie (V) Częstotliwość (Hz) 230 - 240 Rys. 4 A (mm) MODEL LARO 90 A (mm) MODEL TRENTI 90 A (mm) MODEL VENTOLINE 60 VENTOLINE 90 A (mm) MODEL NUBERO 60 NUBERO 90 TEKA zastrzega sobie prawo do zmian technicznych swoich produktów w zakresie jakim jest to niezbędne, bez zmian głównych parametrów. -
Page 6: Akcesoria
Akcesoria redukcja 120/150 mm podpórki do osłony przewodu wentylacyjnego korki rozporowe (9 x 40) długie śruby (9 x 40) korki rozporowe (5 x 40) długie śruby (5 x 40) filtry węglowe (opcja) Montaż W celu uzyskania optymalnego odprowadzenia powietrza należy stosować przewód o przekroju 120 mm. -
Page 7: Filtry Z Węgla Aktywnego
8. Zamocować wewnętrzny wentylacyjny za pomocą klamry (nie dołączona) do wylotu silnika lub do redukcji 150/120 (rys. 7); 9. Jeżeli wewnętrzny przewód wentylacyjny jest zamontowany, zamocować osłony przewodu wentylacyjnego zahaczając je za podpórki. 10. Podłączyć przewód wentylacyjny do kanału wentylacyjnego i zamocować go przy pomocy klamry. - Page 8 Rys. 3 Montaż modeli: Trenti / Nubero / Ventoline Rys. 5 Rys. 5a Czyszczenie filtrów metalowych Rys. 5b Rys. 5c Gea-Top/001...
- Page 9 Montaż modelu Laro Rys. 6 Rys. 6b Rys. 6a Rys. 6c Gea-Top/001...
- Page 10 Montaż przewodu wentylacyjnego Rys. 7 Filtry z węgla aktywnego Rys. 8 Gea-Top/001...
- Page 11 Dear client: Congratulations on your choice. We are sure that this modern, functional and practical appliance, made with top quality materials, will fully satisfy your needs. Please read every INSTRUCTIONS MANUAL before using your kitchen hood for the first time, to ensure maximum performance from the appliance and to avoid breakdowns, which may be caused by incorrect use, as well as to allow any minor...
- Page 12 Index Safety instructions 1. Description of the appliance 2. Instructions for use 3. Cleaning and maintenance Cleaning the hood body Problem solving Changing the light bulbs 4. Size and specifications Technical specifications Dimensions 5. Accessories supplied 6. Installation Installing: Trenti / Nubero Ventoline Installing: Laro 7.
- Page 13 Cleaning and maintenance During cleaning and maintenance work, make sure the safety instructions set out on page 14 are complied with. Cleaning the Hood body • Never use metallic scourers, nor abrasive or corrosive products. • Dry the kitchen hood using a cloth that does not produce fibres.
- Page 14 fig.4 Network tension (V) 230 - 240 fig.4 A (mm) PAINTED STEEL LARO 90 A (mm) PAINTED STEEL TRENTI 90 A (mm) PAINTED STEEL VENTOLINE 60 VENTOLINE 90 A (mm) PAINTED STEEL NUBERO 60 NUBERO 90 TEKA INDUSTRIAL S.A. reserves the righ to make changes and corrections to its products as it deems necessary, without altering their basic characteristics.
- Page 15 Accessories supplied 120/150 mm reduction wall support for tubecover wall plugs (Ø9x40) long bolts (Ø9x40) wall plugs (Ø5x40) long bolts (Ø5x40) active carbon filters (optional) Installation On installing the kitchen hood make sure thet Safety Instructions set out on page 14 are complied with.
- Page 16 6. Remove the fixed and mobile chimneys; 7. Centre the upper support (G) around the shape marked, trace and drill the fixing points for fitting wall plugs (M), then fix the support (G) by using bolts (M); 8. Attach the inner tube, possibly flexible, with a clamp (not supplied) to the motor’s air outlet or to the 150/120 reduction as the case may be (fig.7);...
- Page 17 fig. 3 Installing: Trenti / Nubero / Ventoline fig. 5 fig. 5a Cleaning the metal filters fig. 5b fig. 5c Gea-Top/001...
- Page 18 Installing: Laro fig. 6 fig. 6b fig. 6a fig. 6c Gea-Top/001...
- Page 19 How to assemble the out-door scavenging pipe fig. 7 Active charcoal filters fig. 8 Gea-Top/001...
- Page 20 TEKA GROUP COUNTRY CITY Austria Wien Belgium Zellik Chile Santiago de Chile China Shangai Czech Republic Brno France Paris Greece Athens Hungary Budapest Indonesia Jakarta Malaysia Kuala Lumpur Mexico Mexico D.F. Poland Pruszkòw Portugal Ilhavo Russia Moscow Singapore Singapore Thailand Bangkok The Netherlands Zoetermeer...


Need help?
Do you have a question about the Kitchen Hoods and is the answer not in the manual?
Questions and answers