Download Print this page
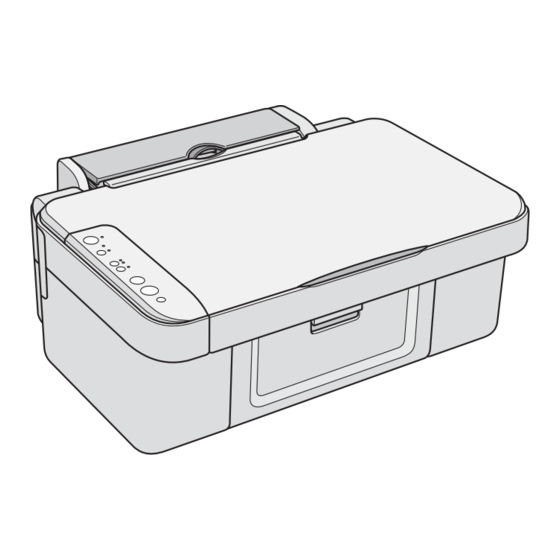
Epson Stylus CX3700 Service Manual

Epson Stylus CX3700 Service Manual

Color inkjet printer
Hide thumbs Also See for Stylus CX3700:

Advertisement

SERVICE MANUAL

Color Inkjet Printer
EPSON Stylus CX3700/CX3800/CX3805/
CX3810/DX3800/DX3850
SEIJ05-012

Advertisement

loading

Summary of Contents for Epson Stylus CX3700

  • Page 1: Service Manual

    SERVICE MANUAL Color Inkjet Printer EPSON Stylus CX3700/CX3800/CX3805/ CX3810/DX3800/DX3850 SEIJ05-012...
  • Page 2 The contents of this manual are subject to change without notice. All effort have been made to ensure the accuracy of the contents of this manual. However, should any errors be detected, SEIKO EPSON would greatly appreciate being informed of them.
  • Page 3 MAKE CERTAIN THAT THE SOURCE VOLTAGES IS THE SAME AS THE RATED VOLTAGE, LISTED ON THE SERIAL NUMBER/RATING PLATE. IF THE EPSON PRODUCT HAS A PRIMARY AC RATING DIFFERENT FROM AVAILABLE POWER SOURCE, DO NOT CONNECT IT TO THE POWER SOURCE.
  • Page 4: About This Manual

    CHAPTER 6. MAINTENANCE comment on the results achieved through a previous action. Provides preventive maintenance procedures and the lists of Epson- approved lubricants and adhesives required for servicing the product. I.ndicates an operating or maintenance procedure, practice or condition W A R N I N G that, if not strictly observed, could result in injury or loss of life.
  • Page 5 Revision Status Revision Issued Date Description Aug 10, 2005 First Release...
  • Page 6: Table Of Contents

    EPSON Stylus CX3700/CX3800/CX3805/CX3810/DX3800/DX3850 Revision A CONTENTS Chapter 1 PRODUCT DESCRIPTION Chapter 2 OPERATING PRINCIPLES 1.1 Overview ....................... 9 2.1 Overview ......................36 1.1.1 Features......................9 2.2 Printer Mechanism ....................36 1.2 Specifications ...................... 10 2.2.1 Printer Mechanism..................36 1.2.1 Printer specifications .................. 10 2.2.2 Print Head ....................
  • Page 7 EPSON Stylus CX3700/CX3800/CX3805/CX3810/DX3800/DX3850 Revision A Chapter 4 DISASSEMBLY/ASSEMBLY Chapter 5 ADJUSTMENT 4.1 Overview ......................93 5.1 Overview ......................134 4.1.1 Precautions....................93 5.1.1 Required Adjustments ................134 4.1.2 Tools ......................93 5.2 Adjustment by Using Adjustment Program ............137 4.1.3 Work Completion Check ................94 5.2.1 EEPROM Data Copy................
  • Page 8 C H A P T E R PRODUCT DESCRIPTION...
  • Page 9: Overview

    This unit provides scan mode so that data can be scanned and transferred to a As a printer, this unit achieves high-quality output at high speed on plain paper, connected computer or to e-mail via application software like EPSON SMART and uses new pigment ink for improved light fastness, water fastness, gas fastness, PANEL.
  • Page 10: Specifications

    EPSON Stylus CX3700/CX3800/CX3805/CX3810/DX3800/DX3850 Revision A 1.2 Specifications Print Direction Bi-directional minimum distance printing (with logic seeking) 1.2.1 Printer specifications Print Resolution This section covers specifications of the printer. Table 1-2. Print Resolution Horizontal Direction (Across Columns) Vertical Direction (Paper Feed) 1.2.1.1 Physical Specification...
  • Page 11 EPSON Stylus CX3700/CX3800/CX3805/CX3810/DX3800/DX3850 Revision A 1.2.1.4 Paper Support Table 1-5. Graphics Mode (Border-free Printing) Cut sheets Horizontal Resolution Printable Area Max. Dot Count CR Speed 360 dpi* 215.05 mm (8.46") 3048 285 cps Table 1-6. Cut Sheets 720 dpi 215.05 mm (8.46")
  • Page 12 EPSON Stylus CX3700/CX3800/CX3805/CX3810/DX3800/DX3850 Revision A Envelopes Exclusive papers Quality: EPSON Exclusive paper Table 1-7. Envelopes Dimensions Table 1-8. Exclusive Papers Paper Size Thickness Weight Paper Type Width Length Width Length Thickness Weight Item Size (mm) (mm) (mm) (g/m 241.3 mm 104.8 mm...
  • Page 13 EPSON Stylus CX3700/CX3800/CX3805/CX3810/DX3800/DX3850 Revision A 1.2.1.5 Printing Area Use paper under normal conditions. C A U T I O N • Temperature 15 to 25°C (59 to 77°F) Cut sheet (standard printing) • Humidity 40 to 60% RH Printable area...
  • Page 14 EPSON Stylus CX3700/CX3800/CX3805/CX3810/DX3800/DX3850 Revision A Cut sheet (border-free printing) Printable area For paper width (PW) and paper length (PL), refer to “1.2.1.4 Paper Support” (p.11). Refer to the following table. As for each overhang area, refer to Figure 1-4 (p.15).
  • Page 15 EPSON Stylus CX3700/CX3800/CX3805/CX3810/DX3800/DX3850 Revision A Table 1-11. Applicable Paper/Printing Area (For Copying) Left Right Bottom Paper Type Size Overhang Overhang Overhang Overhang Letter 8” x 10” Premium Glossy Photo Paper 5” x 7” 4” x 6” 2.54 2.54 2.96 5.08 2.54...
  • Page 16 EPSON Stylus CX3700/CX3800/CX3805/CX3810/DX3800/DX3850 Revision A Envelopes Printable area For paper width (PW) and paper length (PL), refer to “1.2.1.4 Paper Support” (p.11). Refer to the following table. As for each margin area, refer to Figure 1-5 (p.16). Table 1-12. Applicable Paper/Printing Area...
  • Page 17 EPSON Stylus CX3700/CX3800/CX3805/CX3810/DX3800/DX3850 Revision A 1.2.1.6 Ink Cartridge Specification Dimension: 12.7 mm (W) x 73.46 mm (D) x 55.25 mm (H) Type/color: EPSON-brand special ink cartridges Table 1-13. Ink Cartridge Color Size Europe Asia S size T0621 T0601 Black SS size...
  • Page 18: Scanner Specifications

    EPSON Stylus CX3700/CX3800/CX3805/CX3810/DX3800/DX3850 Revision A 1.2.2 Scanner Specifications 1.2.2.3 Image Scanning Area Table 1-15. Image Scanning Area This section covers specifications of the scanner. 1.2.2.1 Basic Specifications (readable width) (readable length) (out-of-range left margin) (out-of-range top margin) 216 mm (8.5") 1.5 mm ±...
  • Page 19: Common

    EPSON Stylus CX3700/CX3800/CX3805/CX3810/DX3800/DX3850 Revision A 1.2.3 Common 1.2.3.2 Environmental Performance Table 1-17. Environmental Performance 1.2.3.1 Electric Specification Primary power input Condition Temperature Humidity * Impact Vibration Table 1-16. Primary Power Input Operating 10 ~ 35°C * 20 ~ 80% * 0.15G...
  • Page 20 EPSON Stylus CX3700/CX3800/CX3805/CX3810/DX3800/DX3850 Revision A 1.2.3.4 Acoustic Noise Noise level Approx. 45 dB (according to ISO7779 when for copying) 1.2.3.5 Safety Standards: EMC Table 1-18. Safety Standards: EMC 100-120 V version 220-240 V version UL60950 Safety standards EN 60950 CSA C22.2 No.60950 FCC part15 subpart B class B EN 55022(CISPR Pub.22) class B...
  • Page 21: Interface

    EPSON Stylus CX3700/CX3800/CX3805/CX3810/DX3800/DX3850 Revision A 1.3 Interface Connector signal layout Table 1-20. Connector Pin Assignment and Signals The EPSON Stylus CX3700/CX3800/CX3805/CX3810/DX3800/DX3850 provides Pin No. Signal name Function Description the following interface. Cable power. Max. power consumption is 2 mA. 1.3.1 USB Interface...
  • Page 22: Stand-Alone Copy

    EPSON Stylus CX3700/CX3800/CX3805/CX3810/DX3800/DX3850 Revision A 1.4 Stand-alone Copy 1.4.1.2 Zoom Function The zoom function provides enlarged or reduced copies of originals. The either of the following can be selected from the operation panel. 1.4.1 Basic Specifications Actual (The state which “Fit to page” is not selected. It is the power-on default.) 1.4.1.1 Supported Paper Sizes, Types and Qualities...
  • Page 23: Copy Speed

    EPSON Stylus CX3700/CX3800/CX3805/CX3810/DX3800/DX3850 Revision A 1.4.2 Copy Speed Table 1-24. Copy Layout (for EAI) Zoom Paper Type Paper Size B&W / Color Layout Plain Paper/e-memo Pattern (A4) Plain Paper Letter B&W, Color Standard Black: 5 sec (Fastest mode 360 x 120dpi), 14 sec (Default 360 x 360dpi)
  • Page 24: Relation Between Original And Copy

    EPSON Stylus CX3700/CX3800/CX3805/CX3810/DX3800/DX3850 Revision A 1.4.4 Relation between Original and Copy 1.4.4.1 Standard Copy The following table shows the relative positioning of the original and copy. Right side of copy Table 1-27. Original (scanner) Copy (readable width) (out-of-range left margin)
  • Page 25: Borderfree Copy

    EPSON Stylus CX3700/CX3800/CX3805/CX3810/DX3800/DX3850 Revision A 1.4.4.2 BorderFree Copy The following table shows the relative positioning of the original and copy. Table 1-29. Original (scanner) Right side of copy (readable width) (readable length) (out-of-range left margin) (out-of-range top margin) Copy 216 mm (8.5") 1.5 mm ±...
  • Page 26 EPSON Stylus CX3700/CX3800/CX3805/CX3810/DX3800/DX3850 Revision A 1.4.4.3 Small Margins Copy The following table shows the relative positioning of the original and copy. Table 1-31. Original (scanner) Right side of copy (readable width) (readable length) (out-of-range left margin) (out-of-range top margin) Copy 216 mm (8.5")
  • Page 27: Control Panel

    EPSON Stylus CX3700/CX3800/CX3805/CX3810/DX3800/DX3850 Revision A 1.5 Control Panel 1.5.2 Indicators The control panel contains following six LEDs, which are used to indicate various 1.5.1 Buttons status. Table 1-34. Indicators The control panel contains following seven buttons, which are used to set and execute various operations.
  • Page 28 EPSON Stylus CX3700/CX3800/CX3805/CX3810/DX3800/DX3850 Revision A Power Button Power LED Power LED Power Button Error LED Error LED Ink Button Ink LED Ink Button Ink LED Paper Size Paper Size Paper Size Button Paper Size Button LED 1,2 LED 1,2 Fit to Page Button...
  • Page 29: Operations

    EPSON Stylus CX3700/CX3800/CX3805/CX3810/DX3800/DX3850 Revision A 1.5.3 Operations 1.5.3.1 Stand-alone Copy The functions of this unit caused by each button in stand-alone copy mode are described in the following table. Table 1-35. Operations Function Button Stand-alone Copy Power Button • Turn on or off this unit.
  • Page 30 EPSON Stylus CX3700/CX3800/CX3805/CX3810/DX3800/DX3850 Revision A 1.5.3.2 Low Power Panel Mode 1.5.3.3 Nozzle Check Pattern Print Without any panel operation for 15 minutes while the printer and scanner unit are in Nozzle check pattern can be printed only with this unit. Left ink quantity of each color standby status, this unit moves into the low power panel mode in which power is also printed by the unit of 10%.
  • Page 31: Printer Condition And Panel Status

    EPSON Stylus CX3700/CX3800/CX3805/CX3810/DX3800/DX3850 Revision A 1.5.4 Printer Condition and Panel Status Note : “---”: No change Blink: 0.5sec. On + 0.5sec. Off repetition Blink 2: 0.2sec. On + 0.2sec. Off + 0.2sec. On + 0.4sec. Off repetition Blink 3: Blink on and off along with access to a memory card Reverse blink: 0.5sec.
  • Page 32 EPSON Stylus CX3700/CX3800/CX3805/CX3810/DX3800/DX3850 Revision A Table 1-37. Printer Condition and Panel Status Indicators Printer Status Paper Size LED Priority Fit to Page Power LED Error LED Ink LED Paper jam — Blink — — — Reset request/Stop request/Job cancel request On (1 sec.)
  • Page 33: Memory Functions

    EPSON Stylus CX3700/CX3800/CX3805/CX3810/DX3800/DX3850 Revision A 1.5.4.1 Error Status 1.5.5 Memory Functions Mechanical fatal error 1.5.5.1 Parameters that are retained when power is turned off This error occurs when one of the followings happens. • The carriage could not recognize the home position.
  • Page 34: Printer Initialization (T.b.d)

    EPSON Stylus CX3700/CX3800/CX3805/CX3810/DX3800/DX3850 Revision A 1.5.6 Printer Initialization (T.B.D) There are four kinds of initialization method, and the following explains each initialization. Power-on initialization This printer is initialized when turning the printer power on, or printer recognized the cold-reset command (remote RS command).
  • Page 35 C H A P T E R OPERATING PRINCIPLES...
  • Page 36: Overview

    Mechanism, Paper Feeding Mechanism, Ink System. Compression Spring Like the previous printers, the Stylus CX3700/CX3800/CX3805/CX3810/DX3800/ DX3850 is equipped with two DC motors; one for the Paper Loading/Feeding Mechanism and the Pump Mechanism with the CR Lock Mechanism, and one for the PE Sensor CR Mechanism.
  • Page 37: Print Head

    EPSON Stylus CX3700/CX3800/CX3805/CX3810/DX3800/DX3850 Revision A 2.2.2 Print Head The basic operating principles of the Print Head, which plays a major role in printing, are the same as the previous printer (Stylus Photo R300/R310); on-demand method The Print Head is the same D2-CHIPS type as the previous SPC, and makes it possible which uses PZT (Piezo Electric Element).
  • Page 38 EPSON Stylus CX3700/CX3800/CX3805/CX3810/DX3800/DX3850 Revision A Ink Cavity Ink path Ink cavity The ink absorbed from the Ink Cartridge goes through the filter and then is stored temporarily in this tank called “ink cavity” until PZT is driven. Normal state Electric poles for CSIC...
  • Page 39: Carriage Mechanism

    EPSON Stylus CX3700/CX3800/CX3805/CX3810/DX3800/DX3850 Revision A 2.2.3 Carriage Mechanism CR measurement sequence To set the appropriate drive current value according to the variation of the CR The Carriage Mechanism consists of Carriage Unit (including the Print Head, CR mechanical load, the mechanical load is measured in a CR measurement sequence Encoder Board and PW Sensor), CR Motor, Timing Belt and CR Scale etc.
  • Page 40 EPSON Stylus CX3700/CX3800/CX3805/CX3810/DX3800/DX3850 Revision A 2.2.3.2 Carriage Home Position Detection Current position temporary detection sequence determines if the carriage is in the carriage lock position and releases the carriage if it is locked. The carriage is moved to the left frame hit position and the carriage motor is stopped.
  • Page 41: Paper Loading/Feeding Mechanism

    EPSON Stylus CX3700/CX3800/CX3805/CX3810/DX3800/DX3850 Revision A 2.2.4 Paper Loading/Feeding Mechanism The drive of the PF motor is transmitted to the LD roller shaft and the PF roller through gears for the Paper loading/feeding mechanism. The Paper loading mechanism plays a The following DC motor controls the Paper loading/feeding mechanism on this printer.
  • Page 42 EPSON Stylus CX3700/CX3800/CX3805/CX3810/DX3800/DX3850 Revision A For your reference, the top or the end of a paper is usually detected with the PE Sensor. 2.2.4.1 Paper Loading Mechanism In case that the PE Sensor cannot detect the top of a paper in the paper loading The Paper loading mechanism consists of the Change Lever in the Pump Unit, the sequence, the printer indicates the “Paper Out error”.
  • Page 43: Operating Principles

    EPSON Stylus CX3700/CX3800/CX3805/CX3810/DX3800/DX3850 Revision A Step 1 (ASF Home position) Step 2 When the PF Motor pinion When a paper is loaded gear rotates CCW direction from the ASF Unit, the Hopper & Paper Back Lever condition Hopper & Paper Back Lever condition...
  • Page 44 EPSON Stylus CX3700/CX3800/CX3805/CX3810/DX3800/DX3850 Revision A Step 3 Step 4 The PF Motor pinion gear While the LD Roller rotates rotates CCW direction (right CCW direction (right side Hopper & Paper Back Lever condition Hopper & Paper Back Lever condition side view), and the drive of...
  • Page 45: Paper Feeding Mechanism

    EPSON Stylus CX3700/CX3800/CX3805/CX3810/DX3800/DX3850 Revision A 2.2.4.2 Paper Feeding Mechanism Following figure shows you the transmission path for the PF Roller & the Paper Guide Roller and the EJ Roller & the Star Wheel. The Paper feeding mechanism consists of PF Motor, PF Roller, EJ Roller, PE Sensor, PF Encoder and PF Scale etc.
  • Page 46: Ink System Mechanism

    EPSON Stylus CX3700/CX3800/CX3805/CX3810/DX3800/DX3850 Revision A 2.2.5 Ink System Mechanism 1) Valve closing condition (CL position) By closing the air valve, the ink is forcibly absorbed from the Ink Cartridge The Ink System Mechanism consists of Pump mechanism with Carriage lock or the ink cavity by the Pump Unit and is ejected to the Waste Ink Pad while mechanism and Capping mechanism with Wiper mechanism.
  • Page 47 EPSON Stylus CX3700/CX3800/CX3805/CX3810/DX3800/DX3850 Revision A 2.2.5.1 Capping Mechanism Wiper with the Cap unit The wiping operation is controlled by the Carriage Unit movement. This operation The Capping mechanism covers the Print Head with the Cap to prevent the nozzle from is usually performed with every CL sequence which is to absorb the ink from the increasing viscosity when the printer is in stand-by state or when the printer is off.
  • Page 48 EPSON Stylus CX3700/CX3800/CX3805/CX3810/DX3800/DX3850 Revision A 2.2.5.2 Pump Unit Mechanism Ink eject operation (usual operation) The ink is absorbed from the Ink Cartridge, the ink cavity and is ejected to the The PF Motor also controls the Pump Unit mechanism (including the Change Lever) as Waste Ink Pad from the Cap when the Ink Tube is pressed by a roller in the Pump well as the Paper loading/feeding mechanism.
  • Page 49: Ink Sequence

    CX3700/CX3800/CX3805/CX3810/DX3800/DX3850. If the power is turned off during the Initial Ink Charge, the CL3 will be performed at next power on timing. Manual Cleaning The Stylus CX3700/CX3800/CX3805/CX3810/DX3800/DX3850 provides three types of manual cleaning to clean air bubbles, clogged ink with viscosity or foreign substances.
  • Page 50 EPSON Stylus CX3700/CX3800/CX3805/CX3810/DX3800/DX3850 Revision A Independently of the printing path after the previous CL, perform manual CL from Timer Cleaning CL1 to CL3 in order if the cumulative printing timer counter is less than 9min. Like the previous printers (Stylus Photo R300/R310), this printer dose not have Only when the cumulative printing timer counter is more than 9min, execute only Lithium battery which is used for the backup power source for Timer IC.
  • Page 51: Scanner Mechanism

    Scanner HP Sensor Scanner Carriage Shaft Scanner Carriage Unit The Scanner Mechanism of Stylus CX3700/CX3800/CX3805/CX3810/DX3800/ DX3850 is constructed of a Scanner Carriage Unit, Scanner Motor, Scanner HP Sensor, etc., in the same way as previous A4 size scanners. 2.3.1 Scanner Carriage Mechanism 2.3.1.1 Scanner Carriage Unit Overview...
  • Page 52 EPSON Stylus CX3700/CX3800/CX3805/CX3810/DX3800/DX3850 Revision A 2.3.1.2 Scanner Carriage Unit Movement Overview Drive of the Scanner Motor is transferred to the Scanner Carriage Unit by the Scanner Timing Belt. The Scanner Carriage Unit slides in the secondary scanning direction. Scanning image is performed in the main scan direction (=1 line) by the CCD sensor The Scanner Motor uses a stepping motor and drives using open loop control.
  • Page 53: Electrical Circuit Operating Principles

    Revision A 2.4 Electrical Circuit Operating Principles 2.4.1 PSB/PSE Board In the PSB/PSE Board of Stylus CX3700/CX3800/CX3805/CX3810/DX3800/ The electric circuit of the Stylus CX3700/CX3800/CX3805/CX3810/DX3800/ DX3850, the simulated oscillating stimulation flyback converter circuit method is DX3850 consists of the following boards.
  • Page 54: C612 Main Board

    EPSON Stylus CX3700/CX3800/CX3805/CX3810/DX3800/DX3850 Revision A 2.4.2 C612 Main Board 2.4.2.1 Main Elements Table 2-9 (p.54) shows the function of the each main elements on C571/577 Main The logic circuit of the C612 Main Board is composed of the follows; Board.
  • Page 55 EPSON Stylus CX3700/CX3800/CX3805/CX3810/DX3800/DX3850 Revision A Flash-ROM (IC5) CR Motor Data Motor Address PF Motor Driver (IC9) SDRAM (IC6) CPU-ASIC 2 in 1 Scanner Motor CN10 (IC8) (IC7) PF Encoder Sensor CIS Unit CN11 PE Sensor Converter (IC12) C612 Panel Board...
  • Page 56 EPSON Stylus CX3700/CX3800/CX3805/CX3810/DX3800/DX3850 Revision A 2.4.2.2 Print Head Driver Circuit Head Driver Nozzle The Print Head driver circuit consists of the following two components: (IC8) (IC11) Selector IC +42V +3.3V Head common driver circuit (Common driver IC11 & Wave amplifier...
  • Page 57: Motor Driver Circuit

    EPSON Stylus CX3700/CX3800/CX3805/CX3810/DX3800/DX3850 Revision A 2.4.2.3 Motor Driver Circuit +3.3V +42V +3.3V Motor Driver (IC8) (IC9) CR/PF Motor drive circuit CR-A OUT1A The motor driver IC (IC9) on the Main board drives CR/PF Motor. This product uses CR Motor CR-B...
  • Page 58 EPSON Stylus CX3700/CX3800/CX3805/CX3810/DX3800/DX3850 Revision A 2.4.2.4 Combination Circuit RTC Circuit This printer differs from previous models by using a combination IC that integrates the By adoption of the large-capacity capacitor (C9) for timer, the Power-off timer can be reset circuit, EEPROM and RTC.
  • Page 59 EPSON Stylus CX3700/CX3800/CX3805/CX3810/DX3800/DX3850 Revision A 2.4.2.5 Sensor Circuit Scanner HP Sensor Mounted in the Scanner Unit, this sensor detects whether the CIS Unit is inside or CPU (IC8) on the Main Board monitors the status of the printer by several sensors.
  • Page 60 EPSON Stylus CX3700/CX3800/CX3805/CX3810/DX3800/DX3850 Revision A The block diagram for the sensor circuit is shown below. +3.3V +3.3V (IC8) CVDD +3.3V_SN DACDAT PE Sensor CSCK CCLK CSDA CDIO • CRST CXRST Encroacher Sensor • CSIC +3.3V_SN ENCA EA_CR ENCB EB_CR +3.3V +3.3V_SN...
  • Page 61: Chapter 3 Troubleshooting

    C H A P T E R TROUBLESHOOTING...
  • Page 62: Overview

    EPSON Stylus CX3700/CX3800/CX3805/CX3810/DX3800/DX3850 Revision A 3.1 Overview Table 3-2. Sensor check point Sensor name Check point Signal level Switch mode This chapter describes unit-level troubleshooting. Refer to the flowchart in this chapter Less than 0.4V Off: No paper to identify the defective unit and perform component level repair if necessary. This...
  • Page 63 EPSON Stylus CX3700/CX3800/CX3805/CX3810/DX3800/DX3850 Revision A Table 3-3. Error Indications and Fault Occurrence Causes Printer Status Communication error Ink low Double feed Paper out Power — — — — Error — — — Blink Indications 7-seg. — — — — —...
  • Page 64 EPSON Stylus CX3700/CX3800/CX3805/CX3810/DX3800/DX3850 Revision A Table 3-4. Error Indications and Fault Occurrence Causes Printer Status Ink out or No Ink cartridge CSIC error Incorrect I/C Paper jam Power — — — — Error Blink Indications 7-seg. — — — —...
  • Page 65 EPSON Stylus CX3700/CX3800/CX3805/CX3810/DX3800/DX3850 Revision A Table 3-5. Error Indications and Fault Occurrence Causes Printer Status Maintenance request Fatal error (Mechanism) Power Blink Blink Error Blink Blink Indications 7-seg. “E” blink “E” blink Blink Blink Paper Size Blink Blink Fit to Page...
  • Page 66: Troubleshooting

    EPSON Stylus CX3700/CX3800/CX3805/CX3810/DX3800/DX3850 Revision A 3.3 Troubleshooting You can identify the troubles by using the checklist in this section after confirming the LED indication on the SPC. If you connect the SPC to your PC and see an error message on the STM3, you can short the total repair time.
  • Page 67 EPSON Stylus CX3700/CX3800/CX3805/CX3810/DX3800/DX3850 Revision A Table 3-6. Check point for the communication error according to each phenomenon Occurrence Defective timing Detailed phenomenon Check point Remedy unit/part name CR position 1. Check if the PS Board Connector Cable is connected to 1.
  • Page 68 EPSON Stylus CX3700/CX3800/CX3805/CX3810/DX3800/DX3850 Revision A Table 3-7. Check point for the error before the initial ink charge according to each phenomenon Occurrence Defective timing Detailed phenomenon Check point Remedy unit/part name CR position 1. Check if the Ink Cartridge can be used by installing it to 1.
  • Page 69 EPSON Stylus CX3700/CX3800/CX3805/CX3810/DX3800/DX3850 Revision A Table 3-8. Check point for the Double feed error according to each phenomenon Occurrence Defective timing Detailed phenomenon Check point Remedy unit/part name CR position 1. Check if the Extension Spring Retard operates correctly 1. Set the Extension Spring Retard between the in the paper loading sequence.
  • Page 70 EPSON Stylus CX3700/CX3800/CX3805/CX3810/DX3800/DX3850 Revision A Table 3-9. Check point for the paper out error according to each phenomenon Occurrence Defective timing Detailed phenomenon Check point Remedy unit/part name CR position 1. Check if any paper dust is not adhered to the surface of 1.
  • Page 71 EPSON Stylus CX3700/CX3800/CX3805/CX3810/DX3800/DX3850 Revision A Table 3-9. Check point for the paper out error according to each phenomenon Occurrence Defective timing Detailed phenomenon Check point Remedy unit/part name CR position 1. Check if the Extension Spring 0.143 does not come off in 1.
  • Page 72 EPSON Stylus CX3700/CX3800/CX3805/CX3810/DX3800/DX3850 Revision A Table 3-9. Check point for the paper out error according to each phenomenon Occurrence Defective timing Detailed phenomenon Check point Remedy unit/part name CR position 1. Check if the Compression Spring 2.36 does not come off 1.
  • Page 73 EPSON Stylus CX3700/CX3800/CX3805/CX3810/DX3800/DX3850 Revision A Table 3-10. Check point for the No ink cartridge/CSIC error/Incorrect ink cartridge according to each phenomenon Occurrence Defective timing Detailed phenomenon Check point Remedy unit/part name CR position 1. Check if Ink Cartridge is properly installed.
  • Page 74 EPSON Stylus CX3700/CX3800/CX3805/CX3810/DX3800/DX3850 Revision A Table 3-11. Check point for the paper jam error according to each phenomenon Occurrence Defective timing Detailed phenomenon Check point Remedy unit/part name CR position 1. Check if the ASF Unit is properly installed. 1. Install the ASF Unit properly.
  • Page 75 EPSON Stylus CX3700/CX3800/CX3805/CX3810/DX3800/DX3850 Revision A Table 3-11. Check point for the paper jam error according to each phenomenon Occurrence Defective timing Detailed phenomenon Check point Remedy unit/part name CR position 1. Check if the Extension Spring Retard operates correctly 1. Set the Extension Spring Retard between the in the paper loading sequence.
  • Page 76 EPSON Stylus CX3700/CX3800/CX3805/CX3810/DX3800/DX3850 Revision A Table 3-11. Check point for the paper jam error according to each phenomenon Occurrence Defective timing Detailed phenomenon Check point Remedy unit/part name CR position 3. Check if the Star Wheel Holders does not come off.
  • Page 77 EPSON Stylus CX3700/CX3800/CX3805/CX3810/DX3800/DX3850 Revision A Table 3-12. Check point for the Fatal error according to each phenomenon Occurrence Defective timing Detailed phenomenon Check point Remedy unit/part name CR position 1. Check if the Scanner Motor Connector Cable is 1. Connect the Scanner Motor Connector Cable connected to CN10 on the Main Board.
  • Page 78 EPSON Stylus CX3700/CX3800/CX3805/CX3810/DX3800/DX3850 Revision A Table 3-12. Check point for the Fatal error according to each phenomenon Occurrence Defective timing Detailed phenomenon Check point Remedy unit/part name CR position 1. Check if the Scanner HP Sensor Connector Cable is 1. Connect the Scanner HP Sensor Connector connected to CN13 on the Main Board.
  • Page 79 EPSON Stylus CX3700/CX3800/CX3805/CX3810/DX3800/DX3850 Revision A Table 3-12. Check point for the Fatal error according to each phenomenon Occurrence Defective timing Detailed phenomenon Check point Remedy unit/part name CR position 1. Check if the Scanner Carriage Unit is not damaged. 1. Replace the Scanner Carriage Unit with a new one.
  • Page 80 EPSON Stylus CX3700/CX3800/CX3805/CX3810/DX3800/DX3850 Revision A Table 3-12. Check point for the Fatal error according to each phenomenon Occurrence Defective timing Detailed phenomenon Check point Remedy unit/part name CR position 1. Check if the PF Motor Connector Cable is connected to 1.
  • Page 81 EPSON Stylus CX3700/CX3800/CX3805/CX3810/DX3800/DX3850 Revision A Table 3-12. Check point for the Fatal error according to each phenomenon Occurrence Defective timing Detailed phenomenon Check point Remedy unit/part name CR position 1. Check if the CR Scale does not come off or it properly 1.
  • Page 82 EPSON Stylus CX3700/CX3800/CX3805/CX3810/DX3800/DX3850 Revision A Table 3-12. Check point for the Fatal error according to each phenomenon Occurrence Defective timing Detailed phenomenon Check point Remedy unit/part name CR position 1. Check if the PF Scale is not damaged or contaminated.
  • Page 83 EPSON Stylus CX3700/CX3800/CX3805/CX3810/DX3800/DX3850 Revision A Table 3-12. Check point for the Fatal error according to each phenomenon Occurrence Defective timing Detailed phenomenon Check point Remedy unit/part name CR position 1. Check if the Slider Lock Lever is correctly released by 1.
  • Page 84: Superficial Phenomenon-Based Troubleshooting

    EPSON Stylus CX3700/CX3800/CX3805/CX3810/DX3800/DX3850 Revision A 3.3.1 Superficial Phenomenon-Based Troubleshooting This section explains the fault locations of the error states (print quality and abnormal noise) other than the error states (LED and STM3) in the previous section. Table 3-13. Check point for multiple sheets of paper are always loaded without LEDs and STM3...
  • Page 85 EPSON Stylus CX3700/CX3800/CX3805/CX3810/DX3800/DX3850 Revision A Table 3-14. Check point for the abnormal noise Occurrence Defective timing Detailed phenomenon Check point Remedy unit/part name CR position 1. Check if the grease on the Carriage Guide Shaft is 1. Wipe off the remaining grease on the Carriage Unit sufficient.
  • Page 86 EPSON Stylus CX3700/CX3800/CX3805/CX3810/DX3800/DX3850 Revision A Table 3-16. Check point for the poor printing quality Print Quality Defective Detailed phenomenon Check point Remedy State unit/part name 1. Check if there is not any foreign material/damage around 1. Remove the foreign material around the seal the seal rubber part on the Cap Unit.
  • Page 87 EPSON Stylus CX3700/CX3800/CX3805/CX3810/DX3800/DX3850 Revision A Table 3-16. Check point for the poor printing quality Print Quality Defective Detailed phenomenon Check point Remedy State unit/part name 1. Check if the Head FFC is securely connected to the Print 1. Connect the Head FFC to the Print Head and Head Connectors and the Main Board Connectors (CN5, the Main Board Connectors.
  • Page 88 EPSON Stylus CX3700/CX3800/CX3805/CX3810/DX3800/DX3850 Revision A Table 3-16. Check point for the poor printing quality Print Quality Defective Detailed phenomenon Check point Remedy State unit/part name 1. For printing in the Bi-D mode, check if Bi-D Adjustment 1. Perform Bi-D Adjustment to eliminate Adjustment has been performed properly.
  • Page 89 EPSON Stylus CX3700/CX3800/CX3805/CX3810/DX3800/DX3850 Revision A Table 3-16. Check point for the poor printing quality Print Quality Defective Detailed phenomenon Check point Remedy State unit/part name Printer driver & 1. Check if the suitable paper is used according to the printer 1.
  • Page 90 EPSON Stylus CX3700/CX3800/CX3805/CX3810/DX3800/DX3850 Revision A Table 3-16. Check point for the poor printing quality Print Quality Defective Detailed phenomenon Check point Remedy State unit/part name 1. Check if any paper dust is not adhered to the surface of 1. Set a cleaning sheet in the ASF up side the LD Roller.
  • Page 91 EPSON Stylus CX3700/CX3800/CX3805/CX3810/DX3800/DX3850 Revision A Table 3-16. Check point for the poor printing quality Print Quality Defective Detailed phenomenon Check point Remedy State unit/part name 1. Check if the Print Head Cover does not have the ink drop. 1. Clean the Print Head Cover carefully with a Print Head soft cloth.
  • Page 92: Chapter 4 Disassembly/Assembly

    C H A P T E R DISASSEMBLY/ASSEMBLY...
  • Page 93: Overview

    4.1.1 Precautions 4.1.2 Tools See the precautions given under the heading “WARNING” and “CAUTION” in the following column when disassembling or assembling Stylus CX3700/CX3800/ Use only specified tools to avoid damaging of the printer. CX3805/CX3810/DX3800/DX3850. Table 4-1. Tools...
  • Page 94: Work Completion Check

    EPSON Stylus CX3700/CX3800/CX3805/CX3810/DX3800/DX3850 Revision A 4.1.3 Work Completion Check Table 4-2. Work Completion Check Check If any service is made to the printer, use the checklist shown below to confirm all Classification Part Check Item Column works are completed properly and the printer is ready to be returned to the user.
  • Page 95: How To Ensure Of Quality On Re-Assembled Product

    EPSON Stylus CX3700/CX3800/CX3805/CX3810/DX3800/DX3850 Revision A 4.2 Caution regarding Assembling/Disassembling [Z-axis direction] • Align dowel of Housing Lower with positioning hole of Main Frame and of the Printer Mechanism, and How to Ensure ensure there is no gap. of Quality on Re-assembled Product...
  • Page 96: Disassembly Procedures

    Revision A E P SON Stylu s CX3700/CX3800/CX3805/CX3810/DX3800/DX3850 4.3 Disassembly Procedures The flowchart below shows step-by-step disassembly procedures. When disassembling each unit, refer to the page number shown in the figure. START “4.4.1 Document Cover/Document Cover “4.4.2 Paper Support Assy.” (p98) “4.4.3 Stacker Assy.”...
  • Page 97: Printer Section

    EPSON Stylus CX3700/CX3800/CX3805/CX3810/DX3800/DX3850 Revision A 4.4 Printer Section Part/Unit that should be removed before removing Document Cover/ Document Cover Mat/ASF Cover None 4.4.1 Document Cover/Document Cover Mat/ASF Cover Removal procedure Document Cover Document Cover Open the Document Cover, release the guide pins...
  • Page 98: Paper Support Assy

    EPSON Stylus CX3700/CX3800/CX3805/CX3810/DX3800/DX3850 Revision A 4.4.2 Paper Support Assy. 4.4.3 Stacker Assy. External view External view Housing, Lower Paper Support Assy. Housing, Upper Stacker Assy. Left Side Right Side Guide Pins Figure 4-3. Removing Paper Support Assy. Part/Unit that should be removed before removing Paper Support Assy.
  • Page 99: Scanner Unit

    EPSON Stylus CX3700/CX3800/CX3805/CX3810/DX3800/DX3850 Revision A 4.4.4 Scanner Unit Part/Unit that should be removed before removing Scanner Unit Document Cover External view (1) Removal procedure Release the tabs (x2, ) that secure the USB Cover with a precision USB Cover screwdriver (-), and remove the USB Cover.
  • Page 100: Panel Unit

    EPSON Stylus CX3700/CX3800/CX3805/CX3810/DX3800/DX3850 Revision A 4.4.5 Panel Unit Part/Unit that should be removed before removing Panel Unit Document Cover External view Removal procedure When performing the following work, be careful not to bend the C A U T I O N...
  • Page 101: Housing, Upper

    EPSON Stylus CX3700/CX3800/CX3805/CX3810/DX3800/DX3850 Revision A 4.4.6 Housing, Upper Part/Unit that should be removed before removing Housing, Upper Document Cover / Paper Support Assy. / Scanner Unit / Panel Unit External view Removal procedure Remove the screws (x7, ) that secure the Housing, Upper.
  • Page 102: Printhead

    EPSON Stylus CX3700/CX3800/CX3805/CX3810/DX3800/DX3850 Revision A 4.4.7 Printhead Part/Unit that should be removed before removing Print Head Document Cover / Paper Support Assy. / Scanner Unit / Panel Unit / External view Housing, Upper Removal procedure Carriage Unit Release the Carriage Lock with a flathead screwdriver or a similar tool, and Carriage Lock move the Carriage Unit to the center of the printer.
  • Page 103 EPSON Stylus CX3700/CX3800/CX3805/CX3810/DX3800/DX3850 Revision A When installing the Printhead to the Carriage Unit, match the guide pins (x2, ) of the Carriage Unit with the positioning holes (x2) of the Printhead. Tighten the screws in the order as shown in the figure.
  • Page 104: Printer Mechanism

    EPSON Stylus CX3700/CX3800/CX3805/CX3810/DX3800/DX3850 Revision A 4.4.8 Printer Mechanism Part/Unit that should be removed before removing Printer Mechanism Document Cover / Paper Support Assy. / Scanner Unit / Panel Unit / External view (1) Housing Upper Removal procedure Tabs Waste Ink Tube...
  • Page 105 EPSON Stylus CX3700/CX3800/CX3805/CX3810/DX3800/DX3850 Revision A External view (2) Remove the screws (x6, ) that secure the Printer Mechanism. Disconnect the PS Connector Cable from the connector (CN1) of the Main Board. Hold the designated position and lift Printer Mechanism upward...
  • Page 106 EPSON Stylus CX3700/CX3800/CX3805/CX3810/DX3800/DX3850 Revision A When installing the Printer Mechanism to the Housing, Lower, W A R N I N G The assembled accuracy of each part composed of Printer insert the Waste Ink Tube to the Eject Ink Joint and securely fasten mechanism is based on Housing Lower.
  • Page 107: Ps Board Unit

    EPSON Stylus CX3700/CX3800/CX3805/CX3810/DX3800/DX3850 Revision A 4.4.9 PS Board Unit Part/Unit that should be removed before removing PS Board Unit Document Cover / Paper Support Assy. / Scanner Unit / Panel Unit / External view Housing Upper / Printer Mechanism Removal procedure C.B.P.
  • Page 108: Waste Ink Pads/Stacker Lock/Rubber Feet

    EPSON Stylus CX3700/CX3800/CX3805/CX3810/DX3800/DX3850 Revision A 4.4.10 Waste Ink Pads/Stacker Lock/Rubber Feet Part/Unit that should be removed before removing Waste Ink Pads/Stacker Lock/Rubber Feet External view (1) Document Cover / Paper Support Assy. / Stacker / Scanner Unit / Panel Unit /...
  • Page 109 EPSON Stylus CX3700/CX3800/CX3805/CX3810/DX3800/DX3850 Revision A When installing the Waste Ink Pads, be sure to follow the steps When installing the Waste Ink Tube to the Housing, Lower, below. insert the Waste Ink Tube to both the groove of the Housing,...
  • Page 110 EPSON Stylus CX3700/CX3800/CX3805/CX3810/DX3800/DX3850 Revision A External view (2) Stacker Lock Removal Remove the tabs (x2, ) that secure the Stacker Lock, and remove the Right Side Compression Spring 5.1 Stacker Lock and Compression Spring 5.1 from the Housing, Lower. Tabs Pass the shaft of the Stacker Lock through the groove of the Housing Lower.
  • Page 111: Main Board Unit

    EPSON Stylus CX3700/CX3800/CX3805/CX3810/DX3800/DX3850 Revision A 4.4.11 Main Board Unit Part/Unit that should be removed before removing Main Board Unit Document Cover / Paper Support Assy. / Scanner Unit / Panel Unit / External view Housing, Upper / Printer Mechanism Removal procedure...
  • Page 112 EPSON Stylus CX3700/CX3800/CX3805/CX3810/DX3800/DX3850 Revision A PF Scale Sensor positioning adjustment A D J U S T M E N T After removing/replacing the Main Board Unit, perform the R E Q U I R E D Use the following procedure to confirm that the PF Scale is adjustment in the following order.
  • Page 113: Asf Unit

    EPSON Stylus CX3700/CX3800/CX3805/CX3810/DX3800/DX3850 Revision A 4.4.12 ASF Unit Part/Unit that should be removed before removing ASF Unit Document Cover / Paper Support Assy. / Scanner Unit / Panel Unit / External view (1) Housing, Upper / Printer Mechanism Removal procedure...
  • Page 114 EPSON Stylus CX3700/CX3800/CX3805/CX3810/DX3800/DX3850 Revision A External view (2) Open the Hopper, and remove Compression Spring 5.58. Remove the washer that secures the left shaft of the Paper Back Lever. Hopper Hopper Pad Ribs Do not touch the Retard Roller and the Hopper Pad.
  • Page 115: Holder Shaft Unit

    EPSON Stylus CX3700/CX3800/CX3805/CX3810/DX3800/DX3850 Revision A 4.4.13 Holder Shaft Unit Part/Unit that should be removed before removing Holder Shaft Unit Document Cover / Paper Support Assy. / Scanner Unit / Panel Unit / External view Housing Upper / Printer Mechanism / ASF Unit...
  • Page 116: Spur Gear 36.8/Extension Spring 0.143/Clutch

    EPSON Stylus CX3700/CX3800/CX3805/CX3810/DX3800/DX3850 Revision A 4.4.14 Spur Gear 36.8/Extension Spring 0.143/Clutch Part/Unit that should be removed before removing Spur Gear 36.8/Extension Spring 0.143/Clutch External view Document Cover / Paper Support Assy. / Scanner Unit / Panel Unit / Housing, Upper / Printer Mechanism / ASF Unit / Holder Shaft Unit...
  • Page 117: Pe Sensor Board/Pe Sensor Lever

    EPSON Stylus CX3700/CX3800/CX3805/CX3810/DX3800/DX3850 Revision A 4.4.15 PE Sensor Board/PE Sensor Lever Part/Unit that should be removed before removing PE Sensor Board/ PE Sensor Lever External view Document Cover / Paper Support Assy. / Scanner Unit / Panel Unit / Housing, Upper / Printer Mechanism / ASF Unit / Holder Shaft Unit / Spur Gear Groove 36.8 / Extension Spring 0.143 / Clutch...
  • Page 118: Cr Guide Frame

    EPSON Stylus CX3700/CX3800/CX3805/CX3810/DX3800/DX3850 Revision A 4.4.16 CR Guide Frame Part/Unit that should be removed before removing CR Guide Frame Document Cover / Paper Support Assy. / Scanner Unit / Panel Unit / External view Housing, Upper / Printer Mechanism / Main Board Unit Removal procedure C.B.S.
  • Page 119: Cr Motor

    EPSON Stylus CX3700/CX3800/CX3805/CX3810/DX3800/DX3850 Revision A 4.4.17 CR Motor Part/Unit that should be removed before removing CR Motor Document Cover / Paper Support Assy. / Scanner Unit / Panel Unit / External view Housing, Upper / Printer Mechanism / Main Board Unit / CR Guide Frame...
  • Page 120: Pf Motor

    EPSON Stylus CX3700/CX3800/CX3805/CX3810/DX3800/DX3850 Revision A 4.4.18 PF Motor Part/Unit that should be removed before removing PF Motor Document Cover / Paper Support Assy. / Scanner Unit / Panel Unit / External view Housing, Upper / Printer Mechanism / Main Board Unit...
  • Page 121: Carriage Unit/Cr Encoder Board/Pw Sensor Board/Head Ffc

    EPSON Stylus CX3700/CX3800/CX3805/CX3810/DX3800/DX3850 Revision A 4.4.19 Carriage Unit/CR Encoder Board/PW Sensor Part/Unit that should be removed before removing Carriage Unit/ CR Encoder Board/PW Sensor Board/Head FFC Board/Head FFC Document Cover / Paper Support Assy. / Scanner Unit / Panel Unit /...
  • Page 122 EPSON Stylus CX3700/CX3800/CX3805/CX3810/DX3800/DX3850 Revision A External view (2) Remove the screw (x1, ) that secures the Parallel Adjustment Lever (Left), and remove the Parallel Adjustment Lever (Left) from Main Frame while lifting left end of the Carriage Guide Shaft upward.
  • Page 123 EPSON Stylus CX3700/CX3800/CX3805/CX3810/DX3800/DX3850 Revision A External view (3) CR Encoder Removal Disconnect the Head FFC from the connector of the CR Encoder Board, and CR Encoder Board Connector pull out the Head FFC from the notch of Carriage. Notch Remove the screws (x2,...
  • Page 124: Paper Guide Upper Unit

    EPSON Stylus CX3700/CX3800/CX3805/CX3810/DX3800/DX3850 Revision A 4.4.20 Paper Guide Upper Unit Part/Unit that should be removed before removing Paper Guide Upper Unit Document Cover / Paper Support Assy. / Scanner Unit / Panel Unit / External view Housing Upper / Printer Mechanism / Main Board Unit / CR Guide Frame /...
  • Page 125: Ej Frame Unit

    EPSON Stylus CX3700/CX3800/CX3805/CX3810/DX3800/DX3850 Revision A 4.4.21 EJ Frame Unit Part/Unit that should be removed before removing Front Frame Document Cover / Paper Support Assy. / Scanner Unit / Panel Unit / External view Housing Upper / Print Head / Printer Mechanism / Main Board Unit /...
  • Page 126: Ink System Unit

    EPSON Stylus CX3700/CX3800/CX3805/CX3810/DX3800/DX3850 Revision A 4.4.22 Ink System Unit Part/Unit that should be removed before removing Ink System Unit Document Cover / Paper Support Assy. / Scanner Unit / Panel Unit / External view Housing Upper / Print Head / Printer Mechanism / Main Board Unit /...
  • Page 127: Paper Guide Front Unit

    EPSON Stylus CX3700/CX3800/CX3805/CX3810/DX3800/DX3850 Revision A 4.4.23 Paper Guide Front Unit Part/Unit that should be removed before removing Paper Guide Front Unit Document Cover / Paper Support Assy. / Scanner Unit / Panel Unit / External view Housing Upper / Print Head / Printer Mechanism / Main Board Unit /...
  • Page 128: Pf Roller Unit

    EPSON Stylus CX3700/CX3800/CX3805/CX3810/DX3800/DX3850 Revision A 4.4.24 PF Roller Unit Part/Unit that should be removed before removing PF Roller Unit Document Cover / Paper Support Assy. / Scanner Unit / Panel Unit / External view (1) Housing Upper / Print Head/ Printer Mechanism / Main Board Unit /...
  • Page 129: Scanner Section

    EPSON Stylus CX3700/CX3800/CX3805/CX3810/DX3800/DX3850 Revision A 4.5 Scanner Section Part/Unit that should be removed before removing Scanner Housing, Upper Document Cover / Scanner Unit Removal Procedure 4.5.1 Scanner Housing, Upper Following work should be performed in a room where there is a...
  • Page 130: Scanner Carriage Unit

    EPSON Stylus CX3700/CX3800/CX3805/CX3810/DX3800/DX3850 Revision A 4.5.2 Scanner Carriage Unit Part/Unit that should be removed before removing Scanner Carriage Unit Document Cover / Scanner Unit / Scanner Housing, Upper External view (1) Removal procedure Scanner Carriage Unit Do not scratch the Rod Lens Array when removing the Scanner C A U T I O N Carriage Unit.
  • Page 131 EPSON Stylus CX3700/CX3800/CX3805/CX3810/DX3800/DX3850 Revision A External view (2) Open and slide the CIS Unit toward right, and remove the CIS Unit from the Scanner CR Holder. Remove the CIS Spring (x2) from the Scanner CR Holder. CIS Unit Shaft Release the tabs (x2, ) that secure the Belt Clump with a tweezer.
  • Page 132: Scanner Motor Unit/Scanner Hp Sensor/Driven Pulley

    EPSON Stylus CX3700/CX3800/CX3805/CX3810/DX3800/DX3850 Revision A 4.5.3 Scanner Motor Unit/Scanner HP Sensor/ Part/Unit that should be removed before removing Scanner Motor Unit/ Scanner HP Sensor/Driven Holder Driven Pulley Document Cover / Scanner Unit / Scanner Housing, Upper External view Removal procedure Compound Gears Move the Scanner Carriage Unit to the center of the printer.
  • Page 133 C H A P T E R ADJUSTMENT...
  • Page 134: Overview

    EPSON Stylus CX3700/CX3800/CX3805/CX3810/DX3800/DX3850 Revision A 5.1 Overview In this printer, it is necessary to perform appropriate adjustment in order to maintain consistent printing function and quality, eliminate differences of each printer mechanism’s characteristics. Therefore, in case that the combination between the...
  • Page 135 EPSON Stylus CX3700/CX3800/CX3805/CX3810/DX3800/DX3850 Revision A Table 5-1. Required Adjustments Head Adjustment item EEPROM Market USB ID Waste ink Head ID First dot Bi-d PF band margin angular data copy setting input pad counter charge input adjustment adjustment offset adjustment Replaced part...
  • Page 136 EPSON Stylus CX3700/CX3800/CX3805/CX3810/DX3800/DX3850 Revision A When the Main board is replaced with new one, you may have C A U T I O N to replace waste drain ink pad also in case the EEPROM parameter back up function is not available on the defective main board.
  • Page 137: Adjustment By Using Adjustment Program

    EPSON Stylus CX3700/CX3800/CX3805/CX3810/DX3800/DX3850 Revision A 5.2 Adjustment by Using Adjustment Program 5.2.1 EEPROM Data Copy Adjustment procedure The procedures of the adjustment items will be explained here. The intended item is as Select “EEPROM Data Copy” in the Adjustment Program.
  • Page 138: Ink Charge

    EPSON Stylus CX3700/CX3800/CX3805/CX3810/DX3800/DX3850 Revision A 5.2.5 Ink Charge 5.2.8 First Dot Adjustment Adjustment procedure Adjustment procedure Select “Ink charge” in the Adjustment Program. Set Photo Paper A4/Letter on the Paper Support. Click the [Ink charge] button to perform the initial ink charge Select “First dot position adjustment”...
  • Page 139: Head Angular Adjustment

    EPSON Stylus CX3700/CX3800/CX3805/CX3810/DX3800/DX3850 Revision A 5.2.9 Head Angular Adjustment Band pattern OK pattern Adjustment procedure NG pattern [Judging Standard] The printed line should be straight line. Set Normal Paper A4/Letter on the Paper Support. [Reference] Select “Head angular adjustment” in the Adjustment Program.
  • Page 140: Bi-D Adjustment

    EPSON Stylus CX3700/CX3800/CX3805/CX3810/DX3800/DX3850 Revision A 5.2.10 Bi-D Adjustment 5.2.11 CR Offset Adjustment procedure Adjustment procedure Set Normal Paper A4/Letter on the Paper Support. Select “CR offset” in the Adjustment Program. Select “Bi-D adjustment” in the Adjustment Program. Check each box of the replaced parts/units checklist and then click the [Perform] button.
  • Page 141: Adjustment Except Adjustment Program

    EPSON Stylus CX3700/CX3800/CX3805/CX3810/DX3800/DX3850 Revision A 5.3 Adjustment Except Adjustment Program Set the thickness gauge at the position shown by the figure. The thickness gauge should be placed between the front of the Paper Guide Front Unit and the center ribs.
  • Page 142 EPSON Stylus CX3700/CX3800/CX3805/CX3810/DX3800/DX3850 Revision A Accede to following steps until you’ve completed the left side PG adjustment. 11. Loosen the screw (C.B.S 3x6) for securing the Parallel Adjustment Lever (Right). START Parallel Adjustment Lever (Right) Step 8 Move the Carriage Unit by C.B.S 3x6...
  • Page 143 EPSON Stylus CX3700/CX3800/CX3805/CX3810/DX3800/DX3850 Revision A 13. Move the Carriage Unit on the thickness gauge by using the Timing Belt, and 14. Accede to following steps until you’ve completed the right side PG check whether the thickness gauge moves or not.
  • Page 144: Pf Scale Sensor Positioning Adjustment

    EPSON Stylus CX3700/CX3800/CX3805/CX3810/DX3800/DX3850 Revision A 17. Accede to following steps to check left side PG again. 5.3.2 PF Scale Sensor Positioning Adjustment Parts to be removed and replaced START Replacement of Main Board Unit Replacement of PF Roller Unit Adjustment procedure Move the Carriage Unit by using the Timing Belt.
  • Page 145: Original Adjustment

    EPSON Stylus CX3700/CX3800/CX3805/CX3810/DX3800/DX3850 Revision A 5.3.3 Original Adjustment Open the document cover, and place the original adjustment jig as shown in the figure below. Parts to be removed and replaced Replacement of Scanner Housing, Upper Place the jig against the upper left corner...
  • Page 146 EPSON Stylus CX3700/CX3800/CX3805/CX3810/DX3800/DX3850 Revision A Click the “Single Test” icon on the “EPSON Scanner Function Test - A progress bar will be displayed followed by the window described below. C592B00W” window. <Window displayed when the adjustment is completed successfully> Single Test Icon Figure 5-18.
  • Page 147 EPSON Stylus CX3700/CX3800/CX3805/CX3810/DX3800/DX3850 Revision A <Window displayed when the adjustment is failed> Figure 5-22. Window displayed when the adjustment is failed If the adjustment could not be completed successfully, check whether the parts are correctly installed or not. If this does not work, perform the part replacement once again.
  • Page 148: Chapter 6 Maintenance

    C H A P T E R MAINTENANCE...
  • Page 149: Overview

    As for the operation of the Adjustment program, refer to Chapter 5 Adjustment. no problem. Note *1: The Stylus CX3700/CX3800/CX3805/CX3810/DX3850/DX3850 has three modes When using compressed air products; such as air duster, for for manual cleaning, and even during printing, the appropriate cleaning mode is cleaning during repair and maintenance, the use of such automatically selected and performed according to various conditions.
  • Page 150 EPSON Stylus CX3700/CX3800/CX3805/CX3810/DX3800/DX3850 Revision A Select the “EPSON Status Monitor 3” in the printer driver utility, and make sure Maintenance request error (Maintenance call error) that the printer is in stand-by state by using the Status monitor 3. If the printer is in Ink is used for the Print Head cleaning operation as well as the printing operation.
  • Page 151: Lubrication

    EPSON Stylus CX3700/CX3800/CX3805/CX3810/DX3800/DX3850 Revision A 6.1.3 Lubrication Refer to the following figures for the lubrication points. The characteristics of the grease have great affects on the mechanical function and <Lubrication Point> durability, especially does the characteristics about temperature environment. The type...
  • Page 152 EPSON Stylus CX3700/CX3800/CX3805/CX3810/DX3800/DX3850 Revision A <Lubrication Point> <Lubrication Point> 1. Paper Back Lever Surface Cartridge Cover Surface Lubrication Prohibited 2. Hopper Surface <Lubrication Type> Area <Lubrication Type> G-74 1. G-26 <Lubrication Amount> 2. G-26 0.02g x 1 point Paper Back...
  • Page 153 EPSON Stylus CX3700/CX3800/CX3805/CX3810/DX3800/DX3850 Revision A <Lubrication Point> <Lubrication Type> EJ Frame Unit Surface Contact position between the EJ Roller and the Paper Guide Front <Lubrication Type> Unit Paper Guide Front Unit KEN Grease <Lubrication Type> <Lubrication Amount> G-74 200mg EJ Roller <Lubrication Amount>...
  • Page 154 EPSON Stylus CX3700/CX3800/CX3805/CX3810/DX3800/DX3850 Revision A <Lubrication Point> Contact point between Bush 10 (Right) and PF Roller Unit Bush 10 (Right) <Lubrication Type> G-26 <Lubrication Amount> φ1 x φ of the PF Roller Unit PF Roller Unit <Remarks> Use a injector to apply.
  • Page 155 C H A P T E R APPENDIX...
  • Page 156: Connector Summary

    EPSON Stylus CX3700/CX3800/CX3805/CX3810/DX3800/DX3850 Revision A 7.1 Connector Summary See the following tables for the connector summary for the C612 Main board and each connector’s pin alignment. 7.1.1 Major Component Unit Table 7-1. Connector Summary for C612 Main Board Connector Function Table to refer to The major component units of this printer are as follows.
  • Page 157 EPSON Stylus CX3700/CX3800/CX3805/CX3810/DX3800/DX3850 Revision A Table 7-3. CN3 - PE Sensor Table 7-5. CN6 - Print Head Signal Name Function Signal Name Function PE Sensor signal GND2 — Ground — Ground Head drive pulse (trapezoid waveform) — Power supply for PE Sensor +42V power supply for nozzle selector —...
  • Page 158 EPSON Stylus CX3700/CX3800/CX3805/CX3810/DX3800/DX3850 Revision A Table 7-10. CN11 - Scanner Carriage Table 7-7. CN8 - CR Motor Signal Name Function Signal Name Function Reset CR-A CR Motor drive signal (A) Clock CR-B CR Motor drive signal (B) — Ground Table 7-8. CN9 - PF Motor —...
  • Page 159: Exploded Diagram

    EPSON Stylus CX3700/CX3800/CX3805/CX3810/DX3800/DX3850 Revision A 7.2 Exploded Diagram Following pages show exploded diagram. APPENDIX Exploded Diagram...
  • Page 160 EPSON Stylus CX3700/CX3800/CX3805/CX3810/DX3800/DX3850 Revision A Rev.01 C612-CASE-001 EPSON Stylus CX3700/CX3800/CX3805/CX3810/DX3800/DX3850 Figure 7-2. Stylus CX3700/CX3800/CX3805/CX3810/DX3800/DX3850 Exploded Diagram 1 APPENDIX Exploded Diagram...
  • Page 161 EPSON Stylus CX3700/CX3800/CX3805/CX3810/DX3800/DX3850 Revision A EPSON Stylus CX3700/CX3800/CX3805/CX3810/DX3800/DX3850 Rev.01 C612-ELEC-001 Figure 7-3. Stylus CX3700/CX3800/CX3805/CX3810/DX3800/DX3850 Exploded Diagram 2 APPENDIX Exploded Diagram...
  • Page 162 EPSON Stylus CX3700/CX3800/CX3805/CX3810/DX3800/DX3850 Revision A Rev.01 C612-MECH-001 EPSON Stylus CX3700/CX3800/CX3805/CX3810/DX3800/DX3850 Figure 7-4. Stylus CX3700/CX3800/CX3805/CX3810/DX3800/DX3850 Exploded Diagram 3 APPENDIX Exploded Diagram...
  • Page 163 EPSON Stylus CX3700/CX3800/CX3805/CX3810/DX3800/DX3850 Revision A Rev.01 C612-MECH-002 EPSON Stylus CX3700/CX3800/CX3805/CX3810/DX3800/DX3850 Figure 7-5. Stylus CX3700/CX3800/CX3805/CX3810/DX3800/DX3850 Exploded Diagram 4 APPENDIX Exploded Diagram...
  • Page 164 EPSON Stylus CX3700/CX3800/CX3805/CX3810/DX3800/DX3850 Revision A Rev.01 C612-MECH-003 EPSON Stylus CX3700/CX3800/CX3805/CX3810/DX3800/DX3850 Figure 7-6. Stylus CX3700/CX3800/CX3805/CX3810/DX3800/DX3850 Exploded Diagram 5 APPENDIX Exploded Diagram...
  • Page 165: Parts List

    EPSON Stylus CX3700/CX3800/CX3805/CX3810/DX3800/DX3850 Revision A 7.3 Parts List Code Parts Name HINGE,L Parts list for EPSON Stylus CX3700/CX3800/CX3805/CX3810/DX3800/DX3850 MAT,COVER,DOCUMENT Code Parts Name MAIN BOARD ASSY. PAPER SUPPORT ASSY. POWER SUPPLY UNIT;100V HOUSING,UPPER;EDG2 ASF UNIT HOUSING,PANEL;EDG2;TEXT;LETTER PRINTER MECHANISM(ASP)MAP10-100 BUTTON,PANEL;ENB7 HOLDER,SHAFT ASSY.
  • Page 166 EPSON Stylus CX3700/CX3800/CX3805/CX3810/DX3800/DX3850 Revision A Code Parts Name Code Parts Name PAPER GUIDE,FRONT ASSY. FFC,CIS MOTOR ASSY.,CR CLAMP,BELT SCALE,PF;B CR,CIS DOUBLE SIDED TAPE,D21 NON FIG INK CART.UNBOXED,BK-S,PIG'T;G38C,WST,AS SPUR GEAR,36 NON FIG INK CART.UNBOXED,C-S,PIG'T;G38C,WST,AS PAPER GUIDE,UPPER ASSY. NON FIG INK CART.UNBOXED,M-S,PIG'T;G38C,WST,AS ROLLER,PF ASSY.
  • Page 167: Electrical Circuits

    EPSON Stylus CX3700/CX3800/CX3805/CX3810/DX3800/DX3850 Revision A 7.4 Electrical Circuits The electric circuit diagrams below are shown at the following pages: C612 Main control circuit board C610 PSB/PSE power supply circuit board C612 Panel circuit board APPENDIX Electrical Circuits...
  • Page 168 Model : Stylus CX3700/CX3800/CX3805/ CX3810/DX3800/DX3850 Board : C612 MAIN Rev. : B Sheet : 1/2...
  • Page 169 Model : Stylus CX3700/CX3800/CX3805/ CX3810/DX3800/DX3850 Board : C610 PSB Rev. : B Sheet : 1/1...
  • Page 170 Model : Stylus CX3700/CX3800/CX3805/ CX3810/DX3800/DX3850 Board : C610 PSE Rev. : B Sheet : 1/1...
  • Page 171 Model : Stylus CX3700/CX3800/CX3805/ CX3810/DX3800/DX3850 Board : C612 PNL Rev. : A Sheet : 1/1...