Raymarine e7 Mounting And Getting Started
Charplotter
Hide thumbs
Also See for e7:
- User reference (320 pages) ,
- Installation and operation handbook (135 pages) ,
- Installation instructions manual (124 pages)

Related Manuals for Raymarine e7


Summary of Contents for Raymarine e7
- Page 1 e 7 / e 7 D / e 9 5 / e 9 7 / e 1 2 5 / e 1 2 7 / c 9 5 / c 9 7 / c 1 2 5 / c 1 2 7 Mounting a nd Ge tting S ta rte d Da te : 04-2012 Docume nt numbe r: 88001-2...
- Page 3 Ensure the vessel’s power supply is handbook, available on the documentation switched OFF before starting to install this Warning: Touchscreen display CD (if supplied), or the Raymarine website product. Do NOT connect or disconnect (www.raymarine.com). equipment with the power switched on, When exposed to prolonged periods of unless instructed in this document.
- Page 4 A radar beam can normally be assumed to spread parties. 20 degrees above and below the radiating element. e7 / e7D / e95 / e97 / e125 / e127 / c95 / c97 / c125 / c127...
- Page 5 3. Connect the equipment into an outlet on a between different items of electrical equipment, to If your Raymarine equipment is to be connected to other circuit different from that to which the receiver is provide the best conditions for EMC performance equipment using a cable not supplied by Raymarine, a connected.
- Page 6 Please check the Raymarine website (www.raymarine.com) to ensure you have the most up-to-date version(s) of the documentation for your product. e7 / e7D / e95 / e97 / e125 / e127 / c95 / c97 / c125 / c127...
-
Page 7: System Integration
System integration Your multifunction display is compatible with a wide range of marine electronics devices. SMART RA Y 240 D12244-1 The display uses a number of protocols to transfer data between the various devices in your system. The following table details which devices may be connected to your display, and the type of connections (in terms of protocols and physical interfaces):... - Page 8 Any combination of the following: SeaTalk, SeaTalk , or NMEA 0183. • Raystar125 GPS. • Raystar125+ GPS (via optional SeaTalk to SeaTalk converter). e7 / e7D / e95 / e97 / e125 / e127 / c95 / c97 / c125 / c127...
- Page 9 • Connections to multifunction NMEA 0183–compatible instruments. NMEA 0183 display NMEA outputs: 4. • Connections to multifunction display NMEA inputs: 2 Pilot control heads — Raymarine As determined by SeaTalk or SeaTalk (via optional SeaTalk to SeaTalk converter):: SeaTalk, SeaTalk SeaTalk bus bandwidth and power •...
- Page 10 SeaTalk (via optional SeaTalk to SeaTalk converter) Engine interface — third-party Third-party NMEA 2000 interfaces. NMEA 2000 (via optional DeviceNet adaptor cables). e7 / e7D / e95 / e97 / e125 / e127 / c95 / c97 / c125 / c127...
- Page 11 / e97 / e125 / e127 = 1 External display. Component Sonar transducer Direct connection to display (Sonar variant displays only): Raymarine transducer connection, OR Minn Kota transducer connection. • Raymarine P48. • Raymarine P58. • Raymarine P74. • Raymarine B60 20º...
- Page 12 SeaTalk (recommended): SeaTalk Raymarine • e7 / e7D / e95 / e97 / e125 / e127 / c95 / c97 / c125 / c127 multifunction display. Note: You can connect Raymarine multifunction displays using NMEA 0183 or SeaTalk but not all functions are supported.
-
Page 13: Location And Mounting
• Navionics Gold+ • Navionics Platinum • Navionics Platinum+ • Navionics Fish’N Chip • Navionics Hotmaps Refer to the Raymarine website (www.raymarine.com) for the latest list of supported chart cards. Location and mounting • Cable entry GPS location requirements Ensure the unit is mounted in a location which allows... - Page 14 GPS signal. GPS antenna mounted below decks will be more susceptible to performance issues related to the prevailing conditions. e7 / e7D / e95 / e97 / e125 / e127 / c95 / c97 / c125 / c127...
- Page 15 1. Remove the front bezel. Refer to the separate instructions provided for that procedure. D12269-1 e95 / e97 / e125 / e127 / Item e7 / e7D c95 / c97 c125 / c127 233 mm 290 mm 354 mm (9.17 in.) (11.42 in.)
- Page 16 / c97 c125 / c127 / e 95 / e 97 / e 125 / e 127 D12183-2 D12274-1 may be damaged. e7 / e7D / e95 / e97 / e125 / e127 / c95 / c97 / c125 / c127...
- Page 17 4. Ensure the bezel is correctly aligned with the display, 3. In a single firm motion, apply pressure to the outer as shown. edge of the display with your thumbs and pull the bezel towards you using your fingers. 5. Apply firm but even pressure to the bezel along the: i.
-
Page 18: Connections Overview
/ RayNet SeaTalk / RayNet Power / Video / NMEA Transducer SeaTalk Network 1 Network 2 Video in / out 0183 e125 e7 / e7D / e95 / e97 / e125 / e127 / c95 / c97 / c125 / c127... - Page 19 2. Power and data cable. accordance with the instructions in this systems guide. 3. Connection to 12/24 V power supply (e7/e7D is 12V only). Do not connect this unit to a system which 4. Red cable (positive). has positive grounding.
- Page 20 To calculate the round trip Orange Input Nega- length, double the figure stated here. / green tive D12266-2 e7 / e7D / e95 / e97 / e125 / e127 / c95 / c97 / c125 / c127...
- Page 21 The simulator mode is switched on / off in the System Input Positive Setup Menu. Input Nega- Note: Raymarine recommends that you do NOT tive use the simulator mode whilst navigating. NMEA Output Positive device Note: The simulator will NOT display any real data,...
- Page 22 (labelled 1 and 2), used for electronic charts and dragging it over to the displayed page. archiving waypoint, route and track data. e7 / e7D / e95 / e97 / e125 / e127 / c95 / c97 / c125 / c127...
-
Page 23: Hybridtouch Overview
1. Touchscreen — you can touch the screen to as rough sea conditions) when it is not appropriate to operate many common functions, including all use the touchscreen. In these situations, Raymarine menu operations (HybridTouch multifunction With a page featuring multiple applications displayed: strongly recommends that you activate the touch lock displays only). -
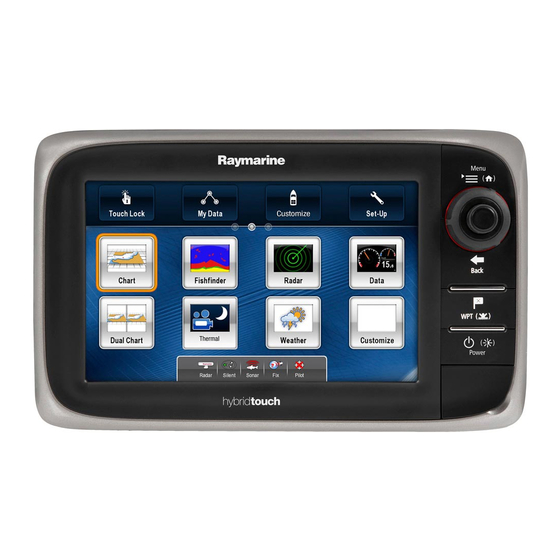
Page 24: Screen Overview
Use the touchscreen (HybridTouch displays only) or use the Rotary control to select menu items and scroll long menus. e7 / e7D / e95 / e97 / e125 / e127 / c95 / c97 / c125 / c127... -
Page 25: Man Overboard
• Enable Wi-Fi on your compatible device. • MOB data is displayed on the homescreen, replacing 1. Multifunction display. • Select the Raymarine Wi-Fi connection from the list of the status icons. available Wi-Fi networks on your compatible device. 2. Bluetooth connection. - Page 26 • Enable Wi-Fi on your tablet / smartphone. • Select the Raymarine Wi-Fi connection from the list of available Wi-Fi networks on your tablet / smartphone. e7 / e7D / e95 / e97 / e125 / e127 / c95 / c97 / c125 / c127...
- Page 28 www.ra ym a rin e .c o m...
Need help?
Do you have a question about the e7 and is the answer not in the manual?
Questions and answers