Table of Contents
Advertisement
Advertisement
Table of Contents
Troubleshooting

Related Manuals for Sailor 6300


Summary of Contents for Sailor 6300
- Page 1 USER MANUAL SAILOR 6300 MF/HF Radiotelex...
- Page 3 SAILOR 6300 MF/HF Radiotelex User manual Document number: 98-132519-B Release date: October 27, 2011...
- Page 4 Lundtoftegaardsvej 93D 2800 Lyngby DENMARK Please write "source for product SAILOR 6300 MF/HF Radiotelex" in the memo line of your payment. You may also find a copy of the source at thrane.com/foss. This offer is valid to anyone in receipt of this information.
- Page 5 Thrane & Thrane is a registered trademark of Thrane & Thrane A/S in the European Union and the United States. • SAILOR is a registered trademark of Thrane & Thrane A/S in the European Union, the United States and other countries. •...
- Page 6 Safety summary The following general safety precautions must be observed during all phases of operation, service and repair of this equipment. Failure to comply with these precautions or with specific warnings elsewhere in this manual violates safety standards of design, manufacture and intended use of the equipment.
- Page 7 About the manual Manual overview This manual describes how to use the SAILOR 6300 MF/HF Radiotelex. Note that this manual does not cover installation of the system. For information on installation refer to the installation manuals [2] and [3] listed below.
- Page 8 Typography In this manual, typography is used as indicated below: Bold is used for the following purposes: • To emphasize words or sentences. Example: “Do not push the Distress button if you are not in distress”. • To indicate what the user should select in the user interface. Example: “Select Message >...
-
Page 9: Table Of Contents
Contents Chapter 1 Introduction System overview ..............2 The Radiotelex application ..........3 Chapter 2 Using the system Before you start ..............6 Sending a DSC Distress alert ..........7 Sending a Distress telex .............8 Cancelling a Distress alert ..........9 Overview of the Radiotelex user interface ......10 Setting up a telex call ............13 Making a telex call ............16 Messages ................. - Page 10 Contents Generating a diagnostic report .........48 Troubleshooting guide .............49 Status signaling ..............51 Glossary ..................53 Index ..................57 viii...
-
Page 11: Chapter 1 Introduction
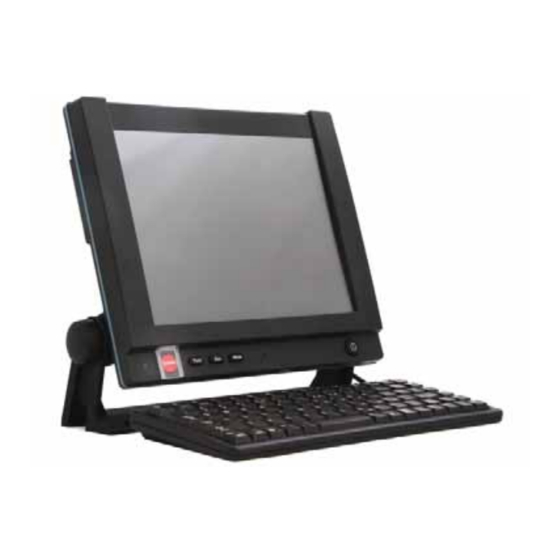
Chapter 1 Introduction With the SAILOR 6300 MF/HF Radiotelex system you can send and receive telex messages and send DSC Distress alerts over MF/HF radio. The Radiotelex program runs on a SAILOR 6006 Message Terminal with a keyboard. The Message Terminal is connected to a SAILOR 6300 MF/HF radio, which transmits and receives the telex messages and transmits DSC Distress alerts. -
Page 12: System Overview
Chapter 1: Introduction System overview The SAILOR 6300 MF/HF Radiotelex communicates on MF or HF radio frequencies. It is approved for shipboard installations to operate within the Global Maritime Distress and Safety System (GMDSS). Radiotelex supports worldwide ship-to-ship, ship-to-shore, and shore-to-ship communication. -
Page 13: The Radiotelex Application
Chapter 1: Introduction The Radiotelex application The Radiotelex application runs on the SAILOR 6006 Message Terminal. On the Message Terminal you can read and write telex messages and set up telex calls. The Message Terminal has a touch-screen and a keyboard for operating the Radiotelex system. - Page 14 Chapter 1: Introduction The Radiotelex application...
-
Page 15: Chapter 2 Using The System
Chapter 2 Using the system This chapter describes how to operate the SAILOR 6300 MF/HF Radiotelex. It has the following sections: • Before you start • Sending a DSC Distress alert • Sending a Distress telex • Cancelling a Distress alert •... -
Page 16: Before You Start
Chapter 2: Using the system Before you start The SAILOR 6300 MF/HF Radiotelex system must be set up for telex. This involves the following steps: At the time of installation 1. SAILOR 6006 is configurable to be either a mini-C GMDSS terminal or a Radiotelex terminal. -
Page 17: Sending A Dsc Distress Alert
If the subsequent communication is to be telex, use the ALERT function in the MF/HF radio to set up telex subsequent communication before pushing the button. Refer to the SAILOR 6300 MF/HF DSC User manual for details on how to set up the MF/HF radio. -
Page 18: Sending A Distress Telex
Chapter 2: Using the system Sending a Distress telex If telex subsequent communication is selected for the DSC Distress alert, a popup appears and guides you to the Call window, which is automatically set up to Broadcast FEC on the Distress frequency assigned by the MF/HF radio. You can now send a Distress telex as follows: 1. -
Page 19: Cancelling A Distress Alert
To cancel a Distress alert with telex subsequent communication, do as follows: 1. On the MF/HF radio, cancel the Distress alert by selecting the softkey ANNUL. For details, see the user manual for the SAILOR 6300 MF/HF DSC. 2. The radio sends a Distress cancel (on 1-6 channels). -
Page 20: Overview Of The Radiotelex User Interface
Overview of the Radiotelex user interface When the system is powered, the Message Terminal display shows the main menu and a status field. Below is an overview of the main screen in the SAILOR 6300 MF/HF Radiotelex. Time, UTC Name of current page... - Page 21 Chapter 2: Using the system • Status/Warning icon: This icon can show: System is idle. System is scanning the frequencies selected in the scan list. ARQ connection. Outgoing selective FEC. Incoming FEC (selective or broadcast). Outgoing Broadcast FEC. Red arrows instead of green arrows in the above icons mean that the signal quality is poor.
- Page 22 Chapter 2: Using the system Navigating the Radiotelex To navigate and select items, you can do one of the following: Touch screen: Select items by touching them with your finger on the screen. Keyboard: • When an item has an underlined letter, you may type Alt + <letter> to select the item, e.g.
-
Page 23: Setting Up A Telex Call
Chapter 2: Using the system Setting up a telex call Note The system must be configured and enabled before use. See Before you start on page 6. Setting up the transmission mode The Radiotelex system has three transmission modes: • ARQ (Automatic Repetition reQuest): A mode where two stations can communicate without breaking the connection. - Page 24 Chapter 2: Using the system To set up the transmission mode, do as follows: 1. From the main menu, select Call. Note If Telex is not selected in the MF/HF radio you get a warning that the radio is occupied. Use the Mode button on the radio to switch to Telex.
- Page 25 Chapter 2: Using the system • ITU intership channel: Allows you to type in a channel number to use for ship-to-ship communication. • ITU coast station channel: Allows you to type in a channel number to use for communication with a coast station. •...
-
Page 26: Making A Telex Call
Chapter 2: Using the system Making a telex call When you have set up telex mode, frequency/channel and recipient as described in the previous section, you are ready to make a call. Do as follows: 1. Select at the bottom of the Call setup window to start your telex session. - Page 27 Chapter 2: Using the system For a description of all the items at the bottom of the page, see Options in the telex page on page 20. 3. You can send text in the following two ways: • Type in your message directly in the text line at the bottom, using your connected keyboard or the on-screen keyboard, which is activated by pressing the text line on the screen and then the keyboard icon that appears in the right side of the text line.
- Page 28 Chapter 2: Using the system You can combine the two methods by adding text before or after the file contents, and type text at the bottom while the file is being transmitted. If you transmitted a file and you do not want to add further text, skip the next step and go directly to step 5.
- Page 29 Chapter 2: Using the system The recipient can now type in a message for you. The message will appear in the field just below your message. Note If the remote station forces an OVER on your part while you are transmitting data, 1-2 characters may incorrectly be marked has having been sent while the remote station may not have received these characters.
- Page 30 Chapter 2: Using the system Options in the telex page Buttons The table below shows the functions of the buttons that can appear at the bottom of the page: Button Function Transmits the text you have typed in the text line at the bottom.
- Page 31 Chapter 2: Using the system Button Function (ARQ only) Inserts a WRU command (Who are you? - request for identification) in your text. This command is automatically followed by [OVER], so that the recipient can answer back. When the WRU command is sent, you cannot send any more text until the direction is changed back to your side.
- Page 32 Chapter 2: Using the system Options menu To open the Options menu in the telex page, select Options at the bottom of the page. You now have the following options: • Insert • Date & Time: Inserts the current date and time (UTC format) in your message.
-
Page 33: Messages
Chapter 2: Using the system Messages Writing message files for telex If you want to write longer messages, you can use the Message function. To write a message, do as follows: 1. From the main menu, select Message. 2. Select New (if not already selected). To make sure the text is properly formatted at the receiving end, we recommend starting the file with a few empty lines (press Enter). - Page 34 Chapter 2: Using the system • Load a file by selecting Options > Load and select a file to load into the editor. You can then edit the text before you save it or send it. Note that you cannot load a file if it contains characters that are not telex characters.
- Page 35 Chapter 2: Using the system 8. To send the file as it is, select Send text at the bottom of the page. The Call setup window opens. Setup and make the call as described in Setting up a telex call on page 13 and Making a telex call on page 16. When you make the telex call your message appears on screen and is transmitted.
- Page 36 Chapter 2: Using the system Viewing the Inbox To see the Inbox, select Inbox at the bottom of the Message page. The Inbox page shows all telex messages sent to you and initiated by another station. It shows both single messages and ARQ conversations initiated by the other part.
-
Page 37: Receiving Telex Messages
Chapter 2: Using the system From the Inbox or Sent items You can only print a message from within the message, as shown in the previous section. To delete or save messages from the Inbox or Sent items, do as follows: 1. -
Page 38: Scanning Frequencies
The MF/HF radio scans every listed channel for 3 seconds. If no traffic is detected, it continues to the next channel. The scan list in the SAILOR 6300 MF/HF Radiotelex always shows the current telex frequency of the connected MF/HF radio (indicated with “MF/HF radio frequency”). - Page 39 Chapter 2: Using the system Editing the scan list The MF/HF scanning frequency is automatically listed and can only be changed from the MF/HF radio. You can add, change or delete additional scanning frequencies in the list. Note Scanning on multiple frequencies is primarily intended for receiving ARQ calls.
- Page 40 Chapter 2: Using the system The list opens. The green check marks show which frequencies are to be scanned. 2. To enable scanning of a frequency in the list, select the box next to the frequency. 3. Select OK. To change or delete a frequency in the list 1.
- Page 41 Chapter 2: Using the system 4. To change the frequency, select Edit. 5. Type in the Receive and Transmit frequencies or select from the list of Coast stations. Note You must always type in both frequencies, even if you are only going to use the receive frequency.
- Page 42 Chapter 2: Using the system To add a frequency to the list 1. In the SCAN LIST page, select Edit list. 2. Select New at the bottom. Scanning frequencies...
-
Page 43: Contacts - Individual
Chapter 2: Using the system 3. Type in the Receive and Transmit frequencies or select from the list of Coast stations. Note You must always enter a transmit frequency, even if it is not used (e.g. for NAVTEX, which is receive only). The transmit frequency must be within a valid maritime frequency band specified by ITU. - Page 44 Chapter 2: Using the system Adding a contact to the list To add a new contact to the list, do as follows: 1. Select New at the bottom of the CONTACTS page. 2. Type in the name and MMSI or SelCall number of the contact. 3.
- Page 45 Chapter 2: Using the system Editing a contact in the list To edit a contact in the list, do as follows: 1. In the CONTACTS page, select the contact you want to edit. 2. Select Edit at the bottom of the CONTACTS page. 3.
-
Page 46: Contacts - Coast Stations
Chapter 2: Using the system Contacts - Coast stations The main Contacts page contains two lists: A Contacts list and a Coast station list. To see your list of Coast stations, select Contacts > Coast stations. Contacts - Coast stations... - Page 47 Chapter 2: Using the system Adding a coast station to the list To add a new coast station to the list, do as follows: 1. Select New at the bottom of the COAST STATIONS page. 2. Type in the name of the coast station and the name of the country. 3.
- Page 48 Chapter 2: Using the system 2. Select Edit at the bottom of the COAST STATIONS page. 3. Change the information for the coast station. 4. Select OK. The list is now updated with the new information. For information on how to edit the channels for a coast station, see the next section.
- Page 49 Chapter 2: Using the system Viewing and editing the channels for a coast station To view and edit the channels for a coast station, do as follows: 1. From the coast stations list, select the coast station you want to view. 2.
- Page 50 Chapter 2: Using the system 3. To edit a channel, select the channel and then select Edit. Edit the channel and select OK. 4. To delete a channel, select the channel and then select Delete in the small window to the right. 5.
-
Page 51: Contacts Backup
Chapter 2: Using the system Contacts backup You can export your contacts for later use or import contacts from a file. To import or export your list of contacts, do as follows: 1. At the bottom of the Contacts page, select Backup. 2. -
Page 52: System Information
Chapter 2: Using the system System information To see information on your system, select System > About. This page shows serial number and software version of each unit. Select a unit to see more details. System information... -
Page 53: System Settings
Chapter 2: Using the system System settings To access the system settings, select System > Settings. Select the settings you want to change in the SYSTEM SETTINGS page: • Date and time format. Set up how date and time are displayed. •... -
Page 54: Power Status
Chapter 2: Using the system Power status Note The Power status only shows information for the SAILOR 6081 PSU and charger. If you have a different power supply in your system, there is no information available. 1. To see the status of the power source, select System > Power. - Page 55 Chapter 2: Using the system 2. To see the power settings, select Settings... in the lower right corner. Important The default settings are suitable for most installations. Do not change these settings unless you have a special battery type or installation that requires different settings. Only skilled personnel should change the power settings.
- Page 56 Chapter 2: Using the system Power status...
-
Page 57: Chapter 3 Troubleshooting
Chapter 3 Troubleshooting This chapter gives guidelines for troubleshooting and provides an overview of the different means of status signaling. It has the following sections: • Getting support • Generating a diagnostic report • Troubleshooting guide • Status signaling Getting support If this manual does not provide the remedies to solve your problem, you may want to contact your local distributor. -
Page 58: Generating A Diagnostic Report
Chapter 3: Troubleshooting Generating a diagnostic report To generate a diagnostic report, do as follows: 1. Select System. 2. Select Advanced at the bottom of the page. 3. Connect a USB memory stick to your Message Terminal. Note Do not save the file on the Message Terminal itself; the file format is not supported. -
Page 59: Troubleshooting Guide
The power supply is not a None. Battery and power SAILOR 6081 information is only shown if the power supply is a SAILOR 6081. No connection The USB cable is damaged or Check that the USB cable is between Message is not connected properly. - Page 60 Chapter 3: Troubleshooting Problem Possible cause Remedy No connection The CAN connection does not Check that the CAN cables are between Message work. connected correctly to the Terminal and Message Terminal and the MF/HF radio MF/HF radio, and that they are not damaged.
-
Page 61: Status Signaling
If the system uses a SAILOR 6081 PSU and Charger, the Message Terminal also shows errors or warnings related to the power supply. For information on the SAILOR 6081, see the manual for the SAILOR 6081 [4]. - Page 62 Chapter 3: Troubleshooting Event log From the list of active errors or warnings, you can select Event log to see a list of previous events. The list holds up to 100 events, including • Errors • Warnings • Cleared warnings and errors. Status signaling...
-
Page 63: Glossary
Glossary Glossary Automatic Repetition reQuest. An error-control method for data transmission that uses acknowledgements and timeouts to achieve reliable data transmission over an unreliable service. If the sender does not receive an acknowledgment before the timeout, it usually re-transmits the frame/packet until the sender receives an acknowledgment or exceeds a predefined number of re-transmissions. - Page 64 Glossary the receiver to detect and correct errors without the need to ask the sender for additional data. The advantage of forward error correction is that a back-channel is not required. GMDSS Global Maritime Distress Safety System. The system is intended to perform the following functions: alerting (including position determination of the unit in distress), search and rescue coordination, locating (homing), maritime safety information...
- Page 65 Glossary Medium Frequency. Radio frequencies (RF) in the range of 300 kHz to 3 MHz. Navtex, which is part of the current Global Maritime Distress Safety System occupies 518 kHz and 490 kHz for important digital text broadcasts. MMSI Maritime Mobile Service Identity. A series of nine digits which are sent in digital form over a radio frequency channel in order to uniquely identify ship stations, ship earth stations, coast stations, coast earth stations, and group calls.
- Page 66 Glossary and parallel ports. USB can connect computer peripherals such as mice, keyboards, digital cameras, printers, personal media players, flash drives, and external hard drives. Universal Time, Coordinated. The International Atomic Time (TAI) with leap seconds added at irregular intervals to compensate for the Earth’s slowing rotation.
-
Page 67: Index
Index Index Contacts, coast stations adding new, 37 alarm editing, 37 voltage level, 44 editing channels, 39 answer back string Contacts, individual, 33 define, 43 adding new, 34 insert, 20 editing, 35 backup of contacts, 41 date and time format, setting, 43 battery charge DE and WRU max. - Page 68 Index icons, 11 power Identification, 43 alarm level, 44 identification request (WRU), 21 status, 44 Inbox, 26 power source, 44 initial setup, 6 prepare the system for telex, 6 insert date and time, 22 print current page, 22 message, 26 manual document number, i message...
- Page 69 Index telex enable in radio, 6 make a call, 16 receive, 27 select frequency, 14 select recipient, 15 set up a call, 13 subsequent communication Distress, 8 time and date format, setting, 43 transmission modes for telex, 13 transmit a file, 22 troubleshooting, 49 typography used in this manual, vi user interface, 3...
- Page 70 98-132519-B info@thrane.com thrane.com •...
Need help?
Do you have a question about the 6300 and is the answer not in the manual?
Questions and answers