
Related Manuals for ViewSonic Precision


Summary of Contents for ViewSonic Precision
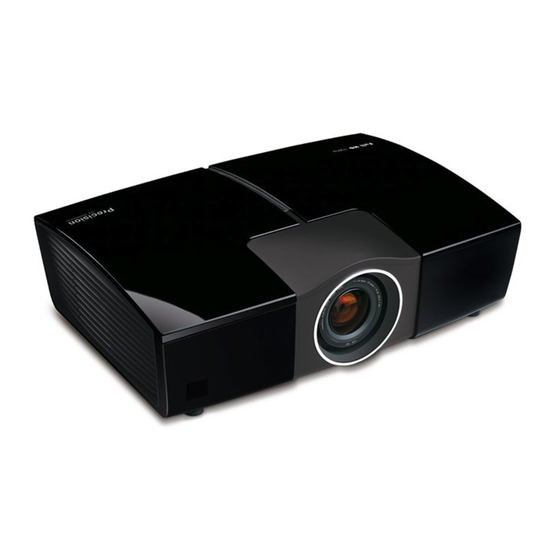
- Page 1 Precision by ViewSonic ® Home Theater Projector User’s Manual www.azulmarina.com ventas@azulmarina.com...
-
Page 2: Compliance Information
www.azulmarina.com Compliance Information Important Safety Instructions FCC Statement 1. Read these instructions. 2. Keep these instructions. This device complies with part 15 of FCC Rules. Operation is subject to the following two condi- tions: (1) this device may not cause harmful interference, and (2) this device must accept any 3. -
Page 3: Declaration Of Rohs Compliance
PS/2, VGA and XGA are registered trademarks of International Business Machines Corpora- Concentration tion. Disclaimer: ViewSonic Corporation shall not be liable for technical or editorial errors or omissions Lead (Pb) 0.1% < 0.1% contained herein; nor for incidental or consequential damages resulting from furnishing this material, or the performance or use of this product. - Page 4 1-1. User Picture Mode Adjustments Color Temperature 2-2-1 Picture Mode CE Conformity for European Countries 1-2. User Color Temperature Adjustments PCS (Precision Color System) 2-2-2 Black Level Following information is only for EU-member states 1-3. User PCS Adjustments 2-2-3 HQV Important Safety Instructions 2-1 Recalling the User Picture Mode &...
-
Page 5: Chapter 1: Introduction
Component (RCA) HDMI cable cover cable • Precision Color System for true color image enhancement. • Power horizontal and vertical lens shift. • HDMI 1.3 support with HDCP compliance. • 1.6x power optical zoom lens. • Auto-iris enables high contrast to produce deeper black levels. -
Page 6: Projector Overview
www.azulmarina.com Projector Overview Control Panel LED indicator: (8) (9) (10) 1. Daylight sensor. 2. Power indicator Refer to “LED Indicator Message” (Page 50). 3. Status indicator Refer to “LED Indicator Message” (Page 50). Button Function: (14) (13) (12) (11) 1. Control panel 9. - Page 7 www.azulmarina.com Connection ports Remote Control (8) (9) (10) (11) 1. RS-232 terminal When operating the projector via a computer, connect this to the controlling computer’s RS-232C port. (10) 2. USB terminal (Service purpose) (11) This connector is for firmware upgrade. (12) 3.
- Page 8 13. PICTURE MODE HDMI 1: Direct access key for HDMI 1 input. Selections of picture modes, for easy access to ViewSonic customized presets and customized settings. HDMI 2: Direct access key for HDMI 2 input. All: Browse through Normal, Vivid, Cinema and Professional picture mode.
-
Page 9: Installing The Batteries
www.azulmarina.com Installing the Batteries Remote Control Operation 1. Open the battery cover in the direction shown. Point the remote control at the infrared remote sensor and press a button. • Operating the projector from the front 2. Install batteries as indicated by the diagram inside the compartment. 3. -
Page 10: Chapter 2: Installation
2. Plug the attached power cord into the AC power socket of this projector. 3. Plug the other end of the power cord into a power outlet. ViewSonic Pro8100 offers a full complementary video input connectivity - from the hi-tech HDMI to the basic composite video. - Page 11 www.azulmarina.com A. Using Home Theater System as hub This setup is recommended if a highly sophisticated home theater system is available. This setup offers a great ease on utility for user, since settings of both audio and video can be changed without manual matching. Pros: Eliminate audio and video source matching between projector and audio amplifier.
- Page 12 Surround Audio Speakers C. Connecting Cable or Satellite TV There’s no build-in TV tuner in ViewSonic Pro8100. It will only take direct video output (HDMI, Component Video, S-Video or Composite Video.) with cable or satellite set-top-box. Please use by the recommended input priority order.
- Page 13 The illustration shows the connection to a home appliances control device. ViewSonic Pro8100’s ViewSonic Pro8100 can take analog PC video signal by RGB IN (Shown in the illustration below.). RS232 command code table and setup protocol are listed in the Appendix section.
-
Page 14: Adjusting The Projected Image
www.azulmarina.com Adjusting the Projected Image Adjusting the Projector Lens Position Adjusting the Projector Height 1. Press the Lens Shift button. 2. Use four directional buttons to adjust the lens position. The projector is equipped with two elevation feet to adjust the image height. To raise the image: The adjustable projection range 1. -
Page 15: Adjusting Projection Image Size
Projection Screen Selection 250” 7.80 307.2 12.62 496.8 ViewSonic Pro8100’s preset image modes are calibrated based on a no-gain, pure flat white 300” 9.36 368.7 15.14 596.2 projection screen. For best preset performance, it is highly recommended to use a no-gain, flat white professional projection screen. -
Page 16: Chapter 3: Remote Control Direct Access
www.azulmarina.com Chapter 3: Remote Control direct access Power Light Power button to turn on or off the projector. To illuminate remote control key pad backlight. Press on the remote control/top panel to turn Power ON on projector. Press on the remote control to illuminate the Light ON, no remote control keypad backlight. -
Page 17: Lens Shift
www.azulmarina.com Lens Shift Zoom and Focus Motorized vertical and horizontal lens shift for positioning display image without physically moving the unit. Motorized zoom and focus adjust. Press on the remote control to evoke lens shift adjustment Press on the remote control to browse through zoom and function. -
Page 18: Aspect Ratio
Aspect Ratio Picture Modes Selections of picture modes, for easy access to ViewSonic customized presets and customized settings. Selections of screen proportion. Press on the remote control to browse through avail- Press on the remote control to browse through available able picture modes. -
Page 19: Color Temperature
Color Temperature PCS (Precision Color System) Selections of color shading. PCS consists of advanced color enhancement functions such as Press on the remote control to browse through selections of flesh tone correction, edge enhancement, gamma correction color temperature. and 3D color management. Preset or customized settings can be selected in the OSD menu, PCS Settings section (page 33). -
Page 20: Black Level
www.azulmarina.com Black Level Black level defines the brightness levels at the darkest visual image HQV (Hollywood Quality Video) consists of image enhancement point. Higher black level removes color noise at darker grayscales functions such as advanced motion, adaptive noise reduction, ad- and increase contrast level. -
Page 21: Daylight Sensor
www.azulmarina.com Input Select Daylight Sensor Select connected input sources. Enable daylight sensor to automatically adjust the best viewing Press once on the remote control will show source status, condition based on ambient light condition. press twice or more to browse through available input sources. HDMI: High Definition Multimedia Interface. -
Page 22: Direct Input Keys
www.azulmarina.com Direct Input Keys Direct input source switching without browsing through entire input selections. Press once on the remote control will show source status, press twice for direct input access. HDMI 1: Direct access key for HDMI 1 input. HDMI 2: Direct access key for HDMI 2 input. Component Video 1: Direct access key for Com- ponent Video 1. - Page 23 www.azulmarina.com www.azulmarina.com ventas@azulmarina.com...
-
Page 24: Chapter 4: Advanced Operation (Osd Menu)
www.azulmarina.com Chapter 4: ADVANCED OPERATION (OSD Menu) 1. Main Menu 2. Setup Menu ► Press to enter the main menu (Fig. 1-2). From the Main Menu, press to enter the Setup Menu (Fig. 2). ◄ ► ▲ ▼ to navigate the Setup Menu Selections: Press to confirm the Sub-Menu selection. -
Page 25: Picture Sub-Menu
www.azulmarina.com 2-1. Picture Sub-Menu 2-1-1 Basic Sub-Menu ▲ ▼ to navigate the Basic Sub-Menu Selections. ▲ ▼ to navigate the Picture Sub-Menu (Fig. 2-1) Selections: Press to confirm the Sub-Menu selection. Press to confirm the Sub-Menu selection. Press to go to previous menu. Press to go to previous menu. -
Page 26: Color Temperature Sub-Menu
www.azulmarina.com 2-1-3 Image Adjust Sub-Menu 2-1-2 Color Temperature Sub-Menu These functions can only be utilized in PC input. ▲ ▼ to navigate the Color Temperature Sub-Menu Selections. ▲ ▼ to navigate the Image Adjust Sub-Menu Selections. Press to confirm the Sub-Menu selection. Press to confirm the Sub-Menu selection. - Page 27 Manual Overscan selections. ▲ ▼ Note: Requires use of optional .Anamorphic lens. ViewSonic does not provide this optional lens. For more Press to set overscan portions details on where to purchase the Anamorphic 2.35:1 lens, please visit www.viewsonic.com Note: 1080i and 1080p maximum overscan is 7.5%...
-
Page 28: Geometry Adjust
www.azulmarina.com 2-1-6 Geometry Adjust 2-2. Advanced Sub-Menu Adjust image geometry distortion caused by improper placement of projector electronically. Advanced options for image quality enhancement. Note: For best video performance, it is highly recommended to correct image distortion by ▲ ▼ to navigate the Advanced features (Fig. -
Page 29: Picture Mode
2-2-1 Picture Mode 2-2-2 Black Level ViewSonic customized presets for various viewing pleasures. Black Level selections for visual brightness levels of the virtual pure black point in video content. ▲ ▼ ▲ ▼ to navigate the image Mode (Fig. 2-2-1) Selections. - Page 30 www.azulmarina.com 2-2-3 HQV Selections of HQV (Hollywood Quality Video) for further details enhancements, film HIGH AUTO detecting modes, and luminance level adjustments. ▲ ▼ to navigate the Basic Sub-Menu (Fig. 2-2-3) Selections. Selections of luminance levels. Press to confirm the Sub-Menu selection. Off: No luminance level enhancement.
-
Page 31: Noise Reduction
www.azulmarina.com 2-2-4 Noise Reduction HQV technology reduces the irrelevant or noise data (Minimum loss of good data) from MEDIUM HIGH signal and creates better viewing quality. ▲ ▼ to navigate Selections of Noise Reduction Sub-Menu (Fig. 2-2-4). Press to confirm the Sub-Menu selection. Mosquito Noise Reduction: Reduce noise artifacts around object Press to go to previous menu. -
Page 32: Color Space
www.azulmarina.com 2-2-5 Color Space 2-3 Config Sub-Menu Configuration options for basic Projector settings Select the correct color spacing for the given input video format. Wrong selection may result ▲ ▼ to navigate the Config Sub-Menu (Fig. 2-3) Selections. in abnormal color performance. Selections. ▲... -
Page 33: Projector Settings
www.azulmarina.com 2-3-1 Projector Settings LAMP MODE NORMAL Projector Setting selections ▲ ▼ to navigate Selections of Projector Settings Sub-Menu (Fig. 2-3-1) Select lamp power efficiency mode Press to confirm the Sub-Menu selection. Normal: Standard mode, maximum lumen and power output Press to go to previous menu. - Page 34 www.azulmarina.com 2-3-3 Languages 2-3-2 OSD OSD location OSD language selections. ▲ ▼ to navigate Selections of Projector Settings Sub-Menu (Fig. 2-3-1) ▲ ▼ to navigate the Languages Sub-Menu (Fig. 2-3-3) Selections. Press to confirm the Sub-Menu selection. Press to confirm the Sub-Menu selection. Press to go to previous menu.
-
Page 35: High Altitude
www.azulmarina.com 2-3-4 Timers 2-3-5 High Altitude Timer settings Using Projector in high altitude. Projector fan spins faster to accommodate the low- ▲ ▼ to navigate the Timers Sub-Menu (Fig. 2-3-4) Selections. atmospheric pressure environment. Press to confirm the Sub-Menu selection. ▲... -
Page 36: Pcs Settings Sub-Menu
Sub-Menu selection. Press to go to previous menu. Press to go to previous menu. Precision Color System AUTO IRIS Split screen for Precision Color System AUTO IRIS Enable Auto Iris feature PCS DISPLAY comparison PCS ON PCS DISPLAY... -
Page 37: Pcs Display
www.azulmarina.com 2-4-1 PCS 2-4-2 PCS Display PCS image management PCS display selections: ▲ ▼ to navigate Selections of PCS Sub-Menu (Fig. 2-4-1) ▲ ▼ to navigate Selections of PCS display Sub-Menu (Fig. 2-4-2) Press to confirm the Sub-Menu selection. Press to confirm the Sub-Menu selection. -
Page 38: Flesh Tone
www.azulmarina.com 2-4-4 Edge Enhancement 2-4-3 Flesh tone Skin tone correction Adjustment of image outline edge thickness ▲ ▼ ▲ ▼ to navigate Selections of Flesh tone Sub-Menu (Fig. 2-4-3) Selections. to navigate Selections of Edge Enhancement Sub-Menu (Fig. 2-4-4). Press to confirm the Sub-Menu selection. -
Page 39: Gamma Correction
www.azulmarina.com 2-4-6 3D Color Management 2-4-5 Gamma Correction Gamma selections and custom adjustments. Advanced color management. Isolated color correction only affects the selected color. ▲ ▼ to navigate Selections of Gamma Correction Sub-Menu (Fig. 2-4-5). ▲ ▼ to navigate Selections of 3D Color Management Sub-Menu (Fig. 2-4-6). Press to confirm the Sub-Menu selection. -
Page 40: Memory Settings Sub-Menu
“User” section of each adjustment. ► ◄ Color – Press for richer color or for less saturated color Resetting all ViewSonic defaults. RESET ALL Customized Data will not be overwritten. It can still be recalled by “Load” data option. www.azulmarina.com ventas@azulmarina.com... -
Page 41: Custom Color Temperature
www.azulmarina.com 2-5-1 Custom Color Temperature GREEN OFFSET 50 Customize color temperature adjustment. This defines color temperature in white balance and offset colors. ▲ ▼ to navigate through Custom Color Temperature (Fig. 2-5-1) Selections. Green color temperature customization Press to confirm the Sub-Menu selection. ►... - Page 42 www.azulmarina.com 2-5-2 Save 2-5-3 Load Saving Changed Items Loading changed items ▲ ▼ ▲ ▼ to navigate the Saving (Fig. 2-5-2) Selections. to navigate the Loading (Fig. 2-5-3) Selections. Press to confirm the Sub-Menu selection. Press to confirm the Sub-Menu selection. Press to go to previous menu.
-
Page 43: System Status Screen
2-5-5 System Status Screen 2-5-4 Reset Press on the remote control to call up the main menu screen (Fig. 2-5-5-1). Resets of ViewSonic defaults ◄ ▲ ▼ Press on the remote control/side panel to bring up the system status bar (Fig. 2-5-5-1). - Page 44 Off: Daylight sensor disabled. Picture mode include: Normal, Vivid, CINEMA Cinema, Professional and User. PROFESSIONAL Precision Color System status, display if USER PCS is in use On – ViewSonic defined PCS enabled Off – PCS disabled User – User define PCS settings.
- Page 45 www.azulmarina.com System temperature status, display if system is operating under ideal temperature: Normal – System under ideal operating NORMAL temperature. Caution – System is above normal but below critical. Recommend to check setup environment to return operation temperature to normal. Warning –...
-
Page 46: Chapter 5: Making And Recalling The User Adjustments
www.azulmarina.com Chapter 5: Making and Recalling the User Adjustments Making Adjustments 1-1. User Picture Mode Adjustments 1-2. User Color Temperature Adjustments User Color Temperature includes the following adjustments: User Picture Mode includes the following adjustments: •Red Gain •Green Gain •Blue Gain •Red Offset •Green Offset •Blue Offset Under “Picture”... -
Page 47: User Pcs Adjustments
www.azulmarina.com 1-3. User PCS Adjustments 2-1 Recalling the User Picture Mode & Color Temperature User PCS includes the following adjustments: Perform adjustments: User Picture Mode •Flesh Tone •Edge Enhancement •Gamma Correction •3D Color Management Press “Menu” button on the remote Perform adjustments: control. -
Page 48: Recalling The User Pcs Adjustments
www.azulmarina.com 2-2 Recalling the User PCS Adjustments 2-3 Recalling Both User Picture Mode and User PCS (Custom 1 & 2) Perform adjustments: Pro8100 offers two quick access keys (Custom 1 and 2) on the remote control. It provides an easy execution for recalling custom-setting combinations. Pressing “Cust 1”... - Page 49 www.azulmarina.com www.azulmarina.com ventas@azulmarina.com...
-
Page 50: Maintenance
www.azulmarina.com Appendix Maintaining the Air Filter The air filter, which is located at the back of the projector, should be replaced or cleaned when Maintenance warned by system either because 200 hours of use or rise of internal temperature. If it is not The projector needs proper maintenance. -
Page 51: Replacing The Lamp
www.azulmarina.com Replacing the Lamp • The lamp contains inorganic mercury. If the lamp bursts, the mercury inside the lamp will go Projector lamps have a finite life. Replace the lamp when: out of the projector. Leave the area immediately if the lamp shatters while being operated and •... -
Page 52: Troubleshooting
www.azulmarina.com Troubleshooting List of Compatible Signals If you think something is wrong, check the followings before contacting customer service. Analog PC timing If This Happens Check Mode Resolution V-Sync H Sync * Is the power cord or battery pack plugged in? 640 x 480 50 Hz 24.69 kHz... - Page 53 www.azulmarina.com 1280 x 720 60 Hz 45.1 kHz 1080p 1920 x 1080 60 Hz 67.5 kHz 1280 x 800 60 Hz 49.7 kHz UXGA 1600 x 1200 60 Hz 75 kHz 1280 x 800 75 Hz 62.8 kHz 1280 x 800 60 Hz 49.7 kHz 1280 x 800...
-
Page 54: Led Indicator Message
www.azulmarina.com LED Indicator Message Product Specification Power LED Status LED Indicates Display type 3 x 0.74-inch LCD projector Blinking in Green Standby mode Resolution 1920 x 1080 (1.07 Billion Colors) Green Green Warming up F = 1.83 – 2.36 Green Projector ON. -
Page 55: Rs232 Command Code
www.azulmarina.com RS232 command code HDMI-1 1. Protocol Setting Send String (HEX) HDMI-2 Send String (HEX) 4.1 Key-Pad & IR command Command Send String (HEX) Picture mode Color Temp. 2. Power ON/OFF command Aspect Ratio Command Send String (HEX) Menu Power ON Exit Power OFF Down... - Page 56 www.azulmarina.com 4.2 Key-Pad & IR command 2 6. Data get Command Send String (HEX) Send String (HEX) Normal Command Byte 0 ~ Byte 11 Byte12 ~ Byte18 Aspect Ratio Anamorphic 1 Error Code Get BE EF 1A 0C 00 7A 46 4F 00 01 00 00 00 00 00 00 00 00 00 Anamorphic 2 Filter Counter Get BE EF 1A 0C 00 91 93 50 00 01 00 00 00 00 00 00 00 00 00 Temp Get...
-
Page 57: Remote Control Code
Lens Shift 0xB7 Zoom - ¹ When discrete code mode is enabled. Note: Manufacture prefix code needs to be added to the IR command code. ViewSonic ² When discrete code mode is disabled. manufacture prefix code is 0x83, 0xF4. www.azulmarina.com... -
Page 58: Customer Support
If a product proves to be defective in material or workmanship during AUS=1800 880 818 the warranty period, ViewSonic will, at its sole option, repair or replace the product with a like product. Australia/New Zealand www.viewsonic.com.au... - Page 59 Exclusion of damages: ViewSonic’s liability is limited to the cost of repair or replacement of the product. ViewSonic shall not be liable for: Damage to other property caused by any defects in the product, damages based upon inconvenience,...
- Page 60 www.azulmarina.com www.azulmarina.com ventas@azulmarina.com...
Need help?
Do you have a question about the Precision and is the answer not in the manual?
Questions and answers