Table of Contents
Advertisement
Quick Links
Advertisement
Table of Contents

Related Manuals for Matrox VS4


Summary of Contents for Matrox VS4
- Page 1 Matrox VS4 Installation and User Guide November 3, 2014 Y11239-201-0301...
- Page 2 Disclaimer Matrox Electronic Systems Ltd. reserves the right to make changes in specifications at any time and without notice. The information provided by this document is believed to be accurate and reliable. However, no responsibility is assumed by Matrox Electronic Systems Ltd. for its use; nor for any infringements of patents or other rights of third parties resulting from its use. No license is granted under any patents or patent rights of Matrox Electronic Systems Ltd.
- Page 3 The warranty is voided by removal or alteration of identification labels on the Matrox Product or its parts. In the event of a defect in a Matrox Product during the applicable warranty period, Matrox shall at its sole option, either i) repair the defect using new or refurbished parts and return the repaired Matrox Product within a reasonable delay;...
- Page 4 Matrox at its sole discretion. Matrox disclaims any representation that it will be able to repair any Matrox Product under this warranty or make a Matrox Product exchange without risk to or loss of the programs or data.
- Page 5 Matrox Product or any business interruption. Matrox disclaims and shall have no obligation to indemnify or defend You or any third party in respect of any actual or alleged infringement of any actual or pending patents, copyright or other intellectual property rights.
- Page 6 When returning a Matrox Product, leave the configuration as it was when You were using it, and leave all identification stickers on the Matrox Product. Pack the Matrox Product in its original box and return it to your Matrox dealer or distributor where the Matrox Product was purchased, together with your proof of purchase.
- Page 7 However, Licensee must use the Software on a single computer owned or leased by Licensee at a time, in conjunction with and for the purpose of, operating the Matrox hardware. Licensee shall also have the right to make one copy of the Software in any computer-readable or printed form for back-up or archival purposes;...
- Page 8 Software. Licensee is solely responsible for adequate protection and backup of the data and equipment used in connection with any of the Software, and Matrox will not be liable for any damages that may be suffered in connection with use of the Software.
- Page 9 This License will automatically terminate if Licensee fails to comply with any of the terms and conditions hereof. In such event, Licensee must destroy all copies of the Software and all of its component parts. Matrox reserves the right to terminate this License without prejudice to any additional recourses Matrox may have against Licensee if Licensee violates any of this Licenses' terms and conditions.
- Page 10 The failure of Matrox to enforce at any time any of the provisions of this Agreement, or the failure to require at any time performance by the Licensee of any of the provisions of this Agreement, shall in no way be construed to be a present or future waiver of such provisions, nor in any way affect the right of Matrox to enforce each and every such provision thereafter.
- Page 11 End User agrees to indemnify Matrox for any and all claims arising from any violation by it of the terms of this License Agreement.
-
Page 12: Limitation Of Liability
MPEG Licensing Authority, LLC (or MPEG LA). Matrox has no obligation to indemnify, defend or hold End User harmless from and against any claims of infringement of intellectual property that reads upon or is infringed by a generally recognized audio, video, technology or patent standard or recommendations, including without limitation AVC/H.264, IEEE... - Page 13 Matrox is given a reasonable opportunity to object to or restrict such disclosure requirement to the extent practicable, and then such disclosure shall be permitted only subject to the terms and conditions of such order or other legal requirement.
- Page 14 INJURY. LICENSEE WILL NOT USE, OR PERMIT TO BE USED, THE PRODUCTS FOR SUCH HIGH-AVAILABILITY, FAIL-SAFE OR CRITICAL APPLICATIONS AND FURTHER, LICENSEE AGREES TO INDEMNIFY, DEFEND AND HOLD HARMLESS MATROX AND ITS MANAGERS, DIRECTORS, OFFICERS, EMPLOYEES, AGENTS, AFFILIATES, SUCCESSORS, AND ASSIGNS FROM AND...
-
Page 15: Table Of Contents
Before installing your Matrox hardware ..........6 Start with a functioning system..............6 Avoid costly damage .................. 6 Installing your Matrox VS4 card ............6 Installing Matrox VS4 software..............7 Updating your VS4 firmware ................7 Important note about sleep and hibernation modes ......7 Removing your Matrox VS4 software........... - Page 16 Source window..................19 How to record ..................22 Record functionality ................25 Recording sessions ...................25 Disk space indicator ..................26 Record status....................26 Record Path button ...................28 Record log file ...................28 Event markers ...................29 Settings ....................31 Accessing the VS4Recorder Pro settings ..........32 Session and Machine names..............32 Source settings ..................32 Record Path ....................33 Files and file naming ..................34...
- Page 17 Telestream Wirecast Overview..................... 64 Using Matrox VS4 for streaming ............64 Recording your source video to disk..........66 Specifying settings in the Matrox ISO Recording tool ....... 69 Matrox VS4 file naming conventions............73 Record functionality ...................74 Record status ....................76 Input states and video formats ..............76 Record log file ...................
- Page 18 Matrox VS4 Specifications General....................96 Connections ..................96 Environmental specifications ..............96 Appendix B Matrox Customer Support How to get Matrox customer support ..........100 Registration ..................... 100 Keep up to date with our website ............100 Contacting us ..................100 Index ..................101 Contents...
-
Page 19: Introducing Matrox Vs4
Introducing Matrox VS4 This chapter lists the Matrox VS4 system requirements, and describes the VS4 documentation. -
Page 20: Welcome To Matrox Vs4
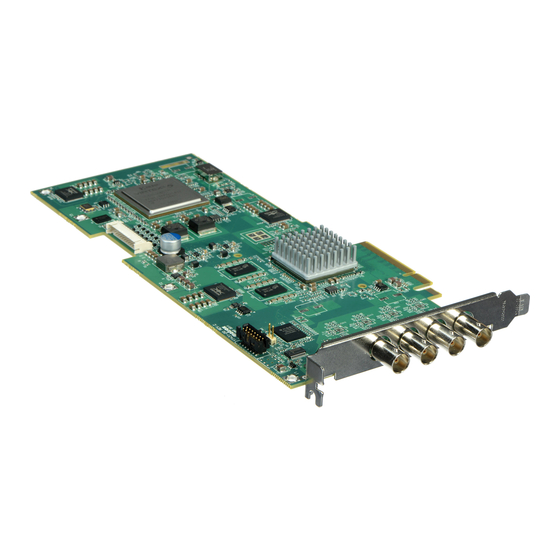
Welcome to Matrox VS4 Matrox VS4 is a quad HD-SDI card that lets you record up to four channels simultaneously using the VS4Recorder Pro stand-alone recording application, and when using Telestream Wirecast or StudioCoast vMix, you can create video streaming productions as well as record your source feeds. -
Page 21: Style Conventions
• 1080i at 29.97 fps Represents full-size 1920×1080 interlaced video at 29.97 frames per second. Last-minute information • Any important information that was not available for inclusion in this guide by publication time is provided to you in the Matrox VS4 Release Notes. About this guide... - Page 22 Your notes Chapter 1, Introducing Matrox VS4...
-
Page 23: Installing Matrox Vs4
Installing Matrox VS4 Hardware and Software This chapter describes how to install your Matrox VS4 hardware and software. -
Page 24: Before Installing Your Matrox Hardware
To avoid damage, please observe the following precautions: • Do not remove your Matrox VS4 card from its anti-static bag until you’re ready to install it. Before removing the card, place the package within easy reach of the area where you intend to perform the installation. -
Page 25: Installing Matrox Vs4 Software
When you install Mtx.utils while your VS4 card is installed in your computer, the Mtx.utils Setup program automatically verifies the firmware on your VS4 card and updates it if required. If you install Mtx.utils on a computer without the VS4 card, the next time you start your computer with your VS4 card installed, Mtx.utils Setup will update your VS4 firmware if needed. -
Page 26: Removing Your Matrox Vs4 Software
Removing your Matrox VS4 software Perform the following steps to remove the VS4 software from your computer. When uninstalling the VS4 software, your current VS4 settings are kept for future VS4 software installations. Choose Start > All Programs > Matrox Mtx.utils > Uninstall Matrox Mtx.utils... -
Page 27: Connecting External Devices To
Connecting External Devices to Matrox VS4 This chapters shows how to connect external devices to Matrox VS4. -
Page 28: Available Matrox Vs4 Connections
VS4. • StudioCoast vMix When using VS4 with StudioCoast vMix, the four inputs of the primary VS4 can be used as input devices to feed live video and audio to StudioCoast vMix for streaming and ISO recording. -
Page 29: Connecting Devices To Matrox Vs4
Connect an SDI video cable (not provided) from your SDI source device to an available SDI input ( 1 , 2 , 3 , or 4 ) on the Matrox VS4 card. ¡ Important If connecting sources with different video formats, the sources must have compatible frame rates. - Page 30 Your notes Chapter 3, Connecting External Devices to Matrox VS4...
-
Page 31: Using The Vs4Recorder Pro Application
Using the VS4Recorder Pro Application This chapter describes how to use the VS4Recorder Pro application to record your VS4 video input sources. -
Page 32: Overview
Overview VS4Recorder Pro is a versatile stand-alone application that lets you frame accurately record four live audio/video feeds using a VS4 card. It’s ideal for multi-camera productions, providing HD/SD recordings that can be easily repurposed and archived, while simultaneously offering a complete multi-viewer experience. -
Page 33: Vs4Recorder Pro Interface
VS4Recorder Pro interface View bar (page Source window (x4) Control bar (page (page VS4Recorder Pro interface... -
Page 34: View Bar
View bar Hides the VS4Recorder Pro interface while Minimize button keeping the application running and accessible. Expands the VS4Recorder Pro interface to the maximum size allowable within the display area of the monitor while maintaining the Maximize/Restore interface aspect ratio. This option is not button available when in full-screen mode. -
Page 35: Control Bar
Control bar Indicates that VS4Recorder Pro is set to Multi-Cam mode. For more information, see “Multi-Cam mode” on page Record Mode button Indicates that VS4Recorder Pro is set to Independent mode. For more information, see “Independent mode” on page In Multi-Cam mode and on the Master machine when using VS4Control, the Session Record button starts/stops the recording session for all selected sources (see... - Page 36 In Multi-Cam mode and when using VS4Control, the Record Path button appears once a recording session is stopped. Click this button to open Windows Explorer at the specified record path to view the recorded files and record log file. If dropped/skipped frames occurred in any source recording during the Record Path recording session, the Dropped-Frame icon...
-
Page 37: Source Window
Source window Source window popover Indicates the status of the current source Record Status recording. For more information, see “Record status” on page Displays the label and filename of the source Label and recording as specified in the VS4Recorder Pro filename overlay settings (see “Label and filename overlay”... - Page 38 Indicates that a video source is not connected to the VS4 input, or the connected video input source is invalid. The source cannot be recorded in this state.
- Page 39 Source audio monitoring is currently enabled for the selected audio pair. For more information see “Audio monitoring” on page Audio Monitoring button Source audio monitoring is currently disabled. For more information see “Audio monitoring” on page In Multi-Cam mode and when using VS4Control, the timer represents the duration of the current source recording only.
-
Page 40: How To Record
Provides a visual representation of the available disk space on the source's specified Disk space record path disk, and displays the approximate indicator remaining record time before the disk is full. For more information, see “Disk space indicator” on page When in quad-view mode, this button switches VS4Recorder Pro to single-view mode with the corresponding source expanded to fill the... - Page 41 Connect up to four sources to the SDI inputs on the VS4 card (see Chapter 3, “Connecting External Devices to Matrox VS4”). Make sure to always connect a source to Input 1. ¦ Note To ensure that each recording has the same starting timecode when...
- Page 42 Independent mode Click the Record button in the source window popover (see “Source window popover” on page 20) for each source that you want to record. ¦ Note If dropped/skipped frames are detected during a source recording, the Record Status LED in the corresponding source window turns yellow, and a Dropped-Frame indicator appears (see “Record status”...
-
Page 43: Record Functionality
This section describes the VS4Recorder Pro record functionality. Recording sessions VS4Recorder Pro offers two modes for recording and a multiple-VS4 networking workflow: Multi-Cam mode, Independent mode and VS4Control. To select a record mode, click the Record Mode button on the Control bar. To... -
Page 44: Disk Space Indicator
Recording sessions and timecodes VS4Recorder Pro includes timecode metadata (see “Viewing VS4Recorder Pro metadata in Adobe Premiere Pro” on page 60) in every recorded video file for easy synchronization in Adobe Premiere Pro CC and CS6. The starting timecode in a video file corresponds to the timecode at the moment when the source recording was started. - Page 45 Green LED (on) Red LED (pulsing) Source is connected Source is recording and enabled without incident Blue LED (pulses briefly) Yellow LED (pulsing) An event marker has Recording currently experiencing been created dropped/skipped frames Remarks • The green LED indicates that a valid sources is connected; however, if a source is disabled during a Multi-cam session, the green LED will replace the pulsing red LED.
-
Page 46: Record Path Button
Record Path button At the end of a recording session, a Record Path button appears either on the VS4Recorder Pro Control bar when in Multi-Cam mode (see “Control bar” on page 17), or in the recording’s source window when in Independent mode (see “Source window popover”... -
Page 47: Event Markers
• VS4Control One record log file is created per machine, and they are generated once the entire recording session is stopped. The record log files include the breakdown of events for all sources that were recorded from their respective machines during the recording session. The location of the record log files depend on the record path selected: If the Use same path option is selected, the record log files are located in the same machine-specific folder that contains all the video and audio... - Page 48 • Event markers are also good visual cues for verifying that files are in sync when editing. Event markers in a set of split video files on the timeline can help in the adjustment any offset files in the set. Chapter 4, Using the VS4Recorder Pro Application...
-
Page 49: Settings
Settings This section explains the VS4Recorder Pro settings. Settings... -
Page 50: Accessing The Vs4Recorder Pro Settings
Source settings VS4Recorder Pro automatically detects the format of each valid input source, and displays it in the Settings window. The VS4 independent inputs allow you to use HD and SD sources in the same production. However, when connecting sources with different video formats, the sources must have compatible frame rates (see “Supported input formats”... -
Page 51: Record Path
Working with 1080i/PsF and SD sources Some PsF and SD 16:9 video signals do not include scan mode or aspect ratio information as part of the signal. To avoid possible errors in detection when the input source is 1080i/PsF at 25/29.97 fps, NTSC, or PAL, VS4Recorder Pro requires that you indicate whether or not the 1080 source is PsF , and whether or not the NTSC/PAL source has a 16:9 aspect ratio. -
Page 52: Files And File Naming
The folder name is in the following format: SessionName-YYYY-MM-DD HHMMSS If the Use same path option is cleared in the VS4Recorder Pro settings, a separate session folder is created for each of the source recordings in the source’s specified record path. The folders are differentiated by the source input number in the following format: SessionName-YYYY-MM-DD HHMMSS_input •... - Page 53 File naming convention As captured video files are created and saved, a naming convention is applied to make them easy to locate and identify. The naming convention follows a specific order of identifiers; however, the saved video file path changes somewhat depending on your settings.
-
Page 54: The Index Is Incremented When An Input Is Stopped And/Or Started During A Capture Session
_InputIndex_index.fileextension Remarks • mx: Masterindex • sx: Slaveindex • InputIndex: The SDI input on the VS4 The index is incremented when an input is stopped and/or started during a capture session. Labels In addition to filenames, you can also give a descriptive label to each source. For example, you can label source 1 as Camera 1. -
Page 55: Capture Duration
Under Session and File , specify a descriptive label in the Label box for each source. Capture duration You can set a capture duration limit that stops a recording session after a specific time limit. Once the limit is reached, the recording session will stop automatically. -
Page 56: Automatic File Splitting
• VS4Control: The time limit is set and controlled through the settings of the Master only (the slave settings are ignored). When you stop the Master, the recording stops and the timer resets. The Capture duration option will not be available for slave units (see “VS4Control”... - Page 57 • Multi-Cam mode: One split timer is set for all inputs. When you stop the recording session, the split timer resets. When you connect an input while capturing, that input will split at the scheduled interval without resetting. When you disconnect and reconnect an input while capturing, that input will split at the scheduled interval without resetting.
-
Page 58: Video Codec
Split file naming An automatic naming convention is applied to split video files. An index will be appended to the split file (see “File naming convention” on page 35). However, if a file name is changed during a capture, the next split file will not get the new file name (as its base file name). - Page 59 ¦ Note When selecting a video codec, make sure that the codec is supported in your editing application. Working with MPEG-2 I-frame .avi files requires a system with the appropriate Matrox codec installed. For details, see “Working with editing applications” on page...
-
Page 60: H.264 Video Capture
• MPEG-2 I-frame (AVI) Creates an MPEG-2 I-frame .avi file with embedded stereo PCM audio. If this option is selected, specify the Data Rate (in Mb/s) at which the MPEG-2 I-frame codec will record your source video: You can set the data rate to any value between 10 Mb/s and 50 Mb/s. Click to set the Data Rate to the default SD value. - Page 61 Confirm that your CPU supports QSV technology. Enable your Intel graphics card to work with Intel integrated graphics (iGPU) in BIOS and save changes. Install the latest Intel graphics drivers (strongly recommended). QSV acceleration may not be available or not work with old graphics drivers. Go to your Screen Resolution settings, and click Detect to expose inactive video outputs.
- Page 62 ® Select the detected “Available display output on: Intel HD Graphics”. From the Multiple displays drop-down, select “Try to connect anyway on: VGA” and click Apply . Select your main display, and then from the Multiple displays drop-down, select “Extend these displays”. Click Apply , then Keep changes , and then to close the Screen Resolution settings.
-
Page 63: Audio Settings
Only the Target Data Rate will be available if you selected Constant bit rate (CBR). If you select Variable bit rate (VBR), three other settable controls will be available: The GOP size, the target and maximum data rates for the video compression. - Page 64 File type Under Audio Codec , select the type of separate audio files that you want to create: • WAV Records PCM audio to separate .wav files. • AAC Records AAC audio to separate .aac files. WAV files The WAV audio format has a restriction; namely, .wav files have a maximum size of 4 GB.
-
Page 65: Timecode Settings
Bit depth Select the bit depth that you want for the two channels of embedded PCM audio in your video file, and the separate audio files that are recorded. Channel type Select the channel type that you want for all the separate audio files that are recorded. - Page 66 To set the embedded timecode option, under Timecode , select one of the following: • SDI Embedded The starting timecode value for the recorded video file is based on the timecode present in the SDI video signal. • Session The starting timecode can be set to a valid value. •...
- Page 67 • Multi-Cam mode The starting timecode value is based on the session timer on the Control bar (see “Control bar” on page 17). • Independent mode The starting timecode value is based on the timer in the respective source window popovers (see “Source window popover”...
-
Page 68: Vu Meters
This selection makes the time-of-day, as interpreted by the machine, the recording starting value, and the time-based timecode increments in the control window once the recording starts. When not recording, with this option selected, the previous session's timecode is displayed. ¦... -
Page 69: Vs4Control
You can enable or disable VS4Control from the option button at the bottom of the VS4Recorder Pro Settings dialog. VS4Control allows you to capture an unlimited number of SDI streams at the same time (each computers with a VS4 card). One VS4, set as a master, can synchronize the capture on four computers (one master, three slaves) over a network. -
Page 70: Vs4Control Status Pane
VS4Control status pane The VS4Control status pane is where all pertinent information regarding your VS4Control recording session is located, such as your session’s Multicast IP address (see “Multicast IP address” on page 53), the machine names, and the machine statuses. The machine statuses are as follows: •... -
Page 71: Multicast Ip Address
¦ Note The Capture duration option will not be available for slave units. Multicast IP address The use of a Multicast IP address is what allows for several VS4 units to be centrally connected, as slaves, to one VS4, as a master. -
Page 72: Audio Monitoring
When first opening VS4Recoder Pro, a (valid) default multicast IP address is displayed in VS4Control, but it can be changed (an entered address will be validated). The change must be done on all the machines connected to the same Master. Since the Multicast IP address is editable, anyone joining an address on a network is part of one group session;... -
Page 73: View Modes
View modes The VS4Recorder Pro interface offers different modes for viewing your input sources. You can choose to view all four input sources simultaneously in quad-view mode, or cycle through isolated inputs for viewing in single-view mode. VS4Recorder Pro also includes a full-screen option for both source-view modes. -
Page 74: Full-Screen Mode
Single-view mode This mode displays only one source window by expanding the selected source window to fill the entire VS4Recorder Pro window area. When in single-view mode, you can cycle through the different inputs using the VS4Recorder Pro shortcut keys (see “Keyboard shortcuts”... -
Page 75: Label And Filename Overlay
Enter full-screen Exit full-screen mode mode Locking the Control bar and the Source window popover By default, the Control bar and the Source window popover behave as follows: • In full-screen mode, the VS4Recorder Pro Control bar and Source window popover will appear when you move the mouse on the screen, and will disappear after a few seconds of mouse inactivity. -
Page 76: Keyboard Shortcuts
Keyboard shortcuts VS4Recorder Pro offers the following keyboard shortcuts: Recording Keyboard shortcut Independent mode Multi-Cam mode — Enable Multi-Cam mode Enable Independent mode — Start recording source 1 Enable source 1 for recording CTRL+1 CTRL+2 Start recording source 2 Enable source 2 for recording Start recording source 3 Enable source 3 for recording CTRL+3... - Page 77 Full-screen mode Exit Full-screen mode Settings Window Open Settings window CTRL+S CTRL+SHIFT+S Close Settings window Switch between fields in Settings window VU Meters Show VU meters CTRL+V Hide VU meters CTRL+SHIFT+V CTRL+P Show audio peaks Hide audio peaks CTRL+SHIFT+P Label and Filename Overlay Show labels only CTRL+L CTRL+SHIFT+L...
-
Page 78: Working With Editing Applications
Matrox VFW codecs on that system. To work with MPEG-2 I-frame .avi files on a Mac OS system without Matrox MXO2, CompressHD, or Mojito MAX hardware, you must download and install the MPEG-2 I-frame codec on that system. To download the Matrox VFW software codecs (Windows) or MPEG-2 I-frame codec (Mac OS), visit the Support section of our website at www.matrox.com/video/support. - Page 79 Duration Media Duration (Premiere Pro Project Metadata) The following is the Matrox metadata embedded in the video files captured with VS4Recorder Pro, which can be displayed and used within Premiere Pro, but that can only be viewed through the Matrox metadata list.
-
Page 80: Multi-Camera Editing
Viewing Matrox XMP metadata in Adobe Premiere Pro The custom Matrox metadata is displayable in Adobe applications like Premiere Pro CC and CS6. To display the Matrox XMP metadata in Premiere Pro, perform the following steps: In the metadata panel, select Metadata Display . -
Page 81: Using Matrox Vs4 With
Using Matrox VS4 with Telestream Wirecast This chapter describes how to stream and record your video input feeds using Matrox VS4 in Telestream Wirecast. -
Page 82: Overview
You can use up to two Matrox VS4 cards in your system. In a two-card system, all eight VS4 inputs can be used as input devices to feed live video and audio to Telestream Wirecast for streaming. ISO recording is supported on the four inputs of the primary VS4 (see “Selecting your primary VS4 card”... - Page 83 ¦ Note For a VS4 input or system audio source to appear in the list of audio sources, a shot must have been added for that VS4 input or system audio source. To configure your video source settings, choose Sources > Show Sources...
-
Page 84: Recording Your Source Video To Disk
Matrox ISO recording tool. You can, however, record your feeds without streaming. ¦ Note Up to two VS4 cards are supported per system. In a two-card system, ISO recording is supported on the four inputs of the primary VS4. - Page 85 Select the Matrox VS4 input that you want to record under MATROX INPUT DEVICES ¦ Note If your system includes two VS4 cards, ISO recording is supported on the four inputs of the primary VS4. For interlaced (i) and progressive segmented frame (PsF) sources, select the video format that matches your source video from the Video Format list.
- Page 86 Select any Matrox VS4 input under MATROX INPUT DEVICES , and then click ISO Record to open the Matrox ISO Recording tool. Select the settings that you want for recording as explained in “Specifying settings in the Matrox ISO Recording tool”...
-
Page 87: Specifying Settings In The Matrox Iso Recording Tool
To specify the settings that you want for recording your clips, select a Matrox input under MATROX INPUT DEVICES in the Source Settings dialog box, and then click the ISO Record button. ¦ Note You can hide or show the settings in the Matrox ISO Recording tool by clicking respectively. - Page 88 “Working with editing applications” on page 77. • If the Video File Type is set to Matrox AVI , use the provided slider to select the data rate (in Mb/sec) at which the Matrox MPEG-2 I-frame codec will record your source video to disk. The last setting for an SD or HD source is automatically saved and loaded when an SD or HD source is connected to the input.
- Page 89 When 2 , 4 , 6 , or 8 is selected, the Matrox ISO recording tool embeds the first audio pair (channels 1-2) from your input source in the video file.
- Page 90 In the Matrox ISO Record dialog box, once you’ve specified the Matrox ISO record settings that you want for a VS4 input, you can save your settings as a preset and load the preset at any time to apply those settings to an input with a compatible video format.
-
Page 91: Matrox Vs4 File Naming Conventions
Paste . The video file type, codec settings, audio file type, and audio settings that are compatible with your VS4 input are applied. Default settings will be applied for any incompatible settings. Matrox VS4 file naming conventions... -
Page 92: Record Functionality
Record timecode Starting a recording session also starts the record timecode for each selected input. Depending on the video input frame rate, Matrox VS4 displays the timecode in either drop frame (HH:MM:SS;FF) or non-drop frame (HH:MM:SS:FF) SMPTE format. Drop frame format is used for NTSC, 23.98 fps, 29.97 fps, and 59.94 fps video, and non-drop frame format is used for all... - Page 93 The files are differentiated by a recording number (see “Matrox VS4 file naming conventions” on page 73). • Connecting an input source during a recording session You can connect an input source to an unselected input during a recording session, and then select the input to record your source feed.
-
Page 94: Record Status
77). Record status indicator Input states and video formats Matrox VS4 automatically detects the video format of the source connected to a VS4 input and displays it in the Matrox ISO Recording tool. Input indicator Chapter 5, Using Matrox VS4 with Telestream Wirecast... -
Page 95: Record Log File
• No input signal/Invalid input signal If VS4 detects no input signal or an invalid input signal for an input, Disconnected or Invalid Input Signal will be displayed respectively. -
Page 96: Multi-Camera Editing
Premiere Pro CC and CS6 on a Windows system with Matrox VS4, MXO2, CompressHD, Mojito MAX, or Mojito 4K hardware installed. For more information, see “Multi-camera editing” in this section. ¦ Note Matrox MPEG-2 I-frame .avi files are not supported in Avid editing applications on Windows systems. - Page 97 Using Matrox VS4 with StudioCoast vMix This chapter describes how to stream and record your video input feeds using Matrox VS4 in StudioCoast vMix.
-
Page 98: Using Matrox Vs4 With Studiocoast Vmix
VS4 with StudioCoast vMix. Overview You can use your Matrox VS4 system as an input device to feed live video and audio to StudioCoast vMix for streaming and ISO recording, such as for broadcasting or recording live sports events, concerts, news, educational seminars, and corporate meetings. -
Page 99: Selecting Vs4 Inputs In Vmix
Selecting VS4 inputs in vMix This section provides instructions on how to select the VS4 inputs for video and audio in StudioCoast vMix. Set the recording audio as explained in “Setting the recording audio” page 80. Connect your video source(s) to the VS4 SDI input(s) as explained in “Connecting devices to Matrox VS4”... -
Page 100: Changing The Audio Input
Click OK to apply your changes (all other Camera settings can be left at their default settings). You should see a preview of your selected video source play back in the Matrox VS4 Input preview window. If you don’t see your source video, check that your Matrox VS4 hardware and selected video source are properly connected. -
Page 101: Using The Vmix Multicorder Feature
Using the vMix MultiCorder feature You can record up to four VS4 video input sources to Matrox MPEG-2 I-frame .avi files using the StudioCoast vMix MultiCorder feature. Select the VS4 inputs that you want to record as explained in “Selecting VS4 inputs in vMix”... -
Page 102: Recording The Vmix Output
You can record the output from vMix to Matrox MPEG-2 I-frame .avi files, such as to record video effects that you’ve applied to your Matrox VS4 video input. Select the VS4 inputs that you want to record as explained in “Selecting VS4... -
Page 103: Selecting Your Mpeg-2 I-Frame Settings
85. From the File Format list, select AVI . Select Audio if you want to record the VS4 audio input to your .avi file. Click OK to apply your changes (all other settings can be left at their default settings). - Page 104 From the Codec list, select the Matrox codec for which you want to change the settings (either Matrox MPEG-2 I-frame or Matrox MPEG-2 I-frame ) and click Drag the Data Rate slider until your desired data rate is displayed. The higher the data rate you select, the better the video quality will be.
- Page 105 MPEG-2 Rounds the AC coefficients up to the nearest whole number when calculating the quantization coefficient. Matrox Custom Truncates the AC coefficients to the lowest whole number when calculating the quantization coefficient. In some cases, this setting may yield less artifacts in graphics.
- Page 106 Your notes Chapter 6, Using Matrox VS4 with StudioCoast vMix...
-
Page 107: Monitoring Your Matrox Vs4 System
Monitoring Your Matrox VS4 System This chapter explains how to use the Matrox X.info program to display important details about your Matrox VS4 system and installed VS4 cards. -
Page 108: Using X.info To Display Vs4 Information
VS4 card exceeds the maximum operating temperature. ¦ Note References to the VS4 card apply to both VS4 and VS4 Pro cards. Matrox X.info runs continuously to monitor your system, whenever your computer is turned on and the VS4 card is installed. - Page 109 Using X.info to display VS4 information...
-
Page 110: Displaying Hardware Information
(for example, serial number and production date) for each of the installed VS4 cards in your system is displayed on a separate VS4 Card page. If you have two VS4 cards installed, use X.info to select which is to be your primary card. -
Page 111: Monitoring Your Vs4'S Operating Temperatures
VS4 system. If needed, move your VS4 card to a PCIe slot in your computer that is not too close to another card that generates heat, such as a display card. - Page 112 Your notes Chapter 7, Monitoring Your Matrox VS4 System...
-
Page 113: Matrox Vs4 Specifications
Matrox VS4 Specifications This appendix provides the Matrox VS4 card specifications. -
Page 114: General
• Maximum altitude for operation: 3,000 meters This temperature range assumes that the hardware components on the card don’t exceed the maximum operating temperature as explained in “Monitoring your VS4’s operating temperatures” on page 93. Appendix A, Matrox VS4 Specifications... - Page 115 • Maximum altitude for transport: 12,000 meters • Operating humidity: 20% to 80% relative humidity (non-condensing) • Storage humidity: 5% to 95% relative humidity (non-condensing) Environmental specifications...
- Page 116 Your notes Appendix A, Matrox VS4 Specifications...
-
Page 117: Matrox Customer Support
Matrox Customer Support This appendix explains how you can register your Matrox product and obtain customer support. -
Page 118: How To Get Matrox Customer Support
Matrox product, please contact your Matrox representative. He or she should be able to help you quickly correct any installation or system configuration problem. If your representative is unable to solve your problem, contact Matrox for further information and assistance. Registration You can register your Matrox product in the Matrox Support section of our website at www.matrox.com/video/support. -
Page 119: Index
Index settings in VS4Recorder Pro Variable bit rate (VBR) encoding AAC files Connections, available on Matrox VS4 recording in Telestream Wirecast Customer support recording in VS4Recorder Pro setting in Telestream Wirecast setting in VS4Recorder Pro Disk space indicator, VS4Recorder Pro... - Page 120 SD setting in VS4Recorder Pro MP4 files setting in Telestream Wirecast Machine 16, 52, designation Multi-cam editing identification Matrox ISO video files name VS4Recorder Pro video files Master machine, See VS4Control Multi-Cam mode, VS4Recorder Pro Matrox contacting us Naming WWW site...
- Page 121 Technical support using Matrox DVCPRO codec Telestream Wirecast using Matrox DVCPRO HD codec audio codec settings using Matrox DVCPRO50 codec audio file type using Matrox MPEG-2 I-frame codec for HD dropped frames using Matrox MPEG-2 I-frame codec for SD Index...
- Page 122 VU meters, VS4Recorder Pro Timecode Drop-frame timecode Warnings displayed for hardware issues setting Warranty WAV files Video formats, expressed in VS4 documentation maximum duration View modes in VS4Recorder Pro setting in Telestream Wirecast setting in VS4Recorder Pro vMix See StudioCoast vMix...
- Page 123 (Español) Información para usuarios europeos – Declaración de conformidad Observación referente a los productos de hardware de Matrox apoyados por este manual Estos dispositivos cumplen con la directiva de la CE 2006/95/EC para dispositivos digitales de Clase A. Dichos dispositivos han sido sometidos a prueba y se ha comprobado que cumplen con las normas EN55022/CISPR22 y EN55024/CISPR24.
- Page 124 www.matrox.com/video...
Need help?
Do you have a question about the VS4 and is the answer not in the manual?
Questions and answers