Table of Contents
Advertisement
Ningbo Ginlong Technologies Co., Ltd.
No. 57 Jintong Road, Binhai Industrial Park,
Xiangshan, Ningbo, Zhejiang, 315712, P.R.China
Tel: +86 (0)574 6578 1806
Fax: +86 (0)574 6578 1606
Email: info@ginlong.com
Web: www.ginlong.com
Please record the serial number of your inverter and quote this when you contact us.
PV Grid Tie Inverter
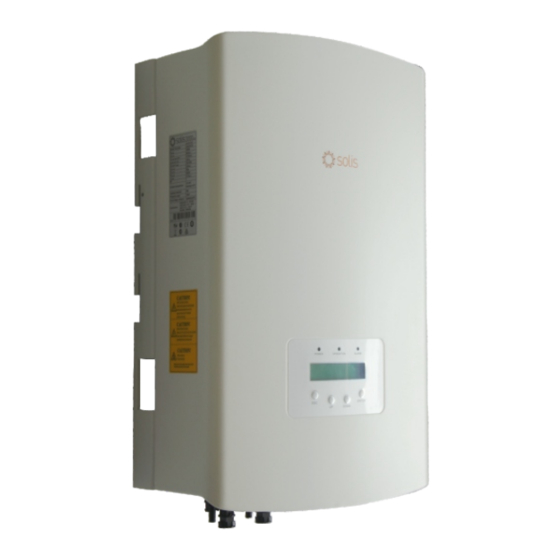
Solis Single Phase Inverter
Installation and Operation Manual
2014, Ningbo Ginlong Technologies Co., Ltd.
C
Ver 2.1
Advertisement
Table of Contents

Summary of Contents for SOLIS Single Phase Inverter
- Page 1 PV Grid Tie Inverter Solis Single Phase Inverter Installation and Operation Manual Ningbo Ginlong Technologies Co., Ltd. No. 57 Jintong Road, Binhai Industrial Park, Xiangshan, Ningbo, Zhejiang, 315712, P.R.China Tel: +86 (0)574 6578 1806 Fax: +86 (0)574 6578 1606 Email: info@ginlong.com Web: www.ginlong.com...
-
Page 2: Table Of Contents
Contents Contents ……………………………………………… 1. Introduction 6. Operation ………………………………………………… 1.1 Product Descriptions …………………………………………… ………………………………… 6.1 Main Menu 1.2 Packaging …………………………………………… ………………………………………… 6.2 Information 2. Safety Instructions 6.3 Settings ……………………………………… ……………………………………………… 6.3.1 Set Time ……………………………………… 2.1 Safety Symbols …………………………………… …………………………………… 6.3.2 Set Address 2.2 General Safety Instructions ………………………... -
Page 3: Introduction
1. Introduction 1.1 Product Descriptions 1.2 Packaging Solis single phase series inverters can transfer DC power from PV panels into AC When you receive the inverter, please check if all the parts listed below are included: power and feed into grid. -
Page 4: Safety Instructions
2.Safety Instructions 2.Safety Instructions Improper use may result in potential electric shock hazards or burns. This manual WARNING: contains important instructions that should be followed during installation and To reduce the risk of fire, branch-circuit over-current protective devices (OCPD) are required for circuits connected to the Inverter. maintenance. -
Page 5: Overview
3. Overview 3. Overview 3.1 Front Panel Display 3.3 Keypad There are four keys in the front panel of the Inverter(from left to right): ESC, UP, DOWN and ENTER keys. The keypad is used for: Scrolling through the displayed options (the UP and DOWN keys); Access to modify the adjustable settings (the ESC and ENTER keys). -
Page 6: Installation
4. Installation 4. Installation 4.1 Select a Location for the Inverter 4.2 Mounting the Inverter To select a location for the inverter, the following criteria should be considered: Please use suitable fixings for wall type (e.g. use dynabolts for brick, masonry, etc). The temperature of the inverter heat-sink could up to 75℃. -
Page 7: Electrical Connections
Before connecting inverter, please make sure the PV array open circuit voltage is within the limit of the inverter E(F) Maximum 500Voc for Solis-1K-2G Solis-1.5K-2G Solis-2K-2G Maximum 600Voc for Solis-2.5K-2G Solis-3K-2G Solis-3.6K-2G Solis-4K-2G Solis-4.6K-2G Solis-5K-2G Please don’t connect PV array positive or negative pole to the ground, it could Figure 4.3 Wall Mount Bracket... - Page 8 4. Installation 4. Installation The steps to assemble the DC connectors are listed as follows: I) Strip off the DC wire for about 7mm, Disassemble the connector cap nut (see Figure 4.6). Figure 4.9 Connector with Cap nut Screwed on Figure 4.6 Disassemble the Connector Cap nut v) Then connect the DC connectors to the inverter.
- Page 9 Figure 4.14). Please try to pull out the wire to make sure the it’s well connected. Figure 4.11 AC Grid Terminal Connector Inside Each Solis Single Phase Inverter is supplied with an AC grid terminal connector, which is shown in Figure 4.12. Figure 4.14 Connect Wires to the Terminal c) Tighten the cap nut to the terminal (as shown in Figure 4.15).
-
Page 10: Start & Stop
The red LED power will light, and the LCD shows the company's Smart phone monitoring name and the inverter model. GPRS monitoring Ginlong Solis-5K-2G Internet Figure 5.1 Company Name and Inverter Model on LCD Router Web server Wi-Fi monitoring 3. -
Page 11: Operation
(Figure 6.2(a)) or unlocks (Figure 6.2 (b)) the screen. 6.2 Information The Solis Single Phase Inverter main menu provides access to operational data and 5.2 Stop the Inverter information. The information is displayed by selecting "Information" from the menu and then by scrolling up or down. -
Page 12: Settings
This function is used to set the address when the inverter is connected to the PC. The address number can be assigned from “01”to “99”(see Figure 6.4). The default address Figure 6.9 Alarm Message number of Solis Single Phase Inverter is “01”. 6.4.2 Temperature YES=<ENT> NO=<ESC>... -
Page 13: Advanced Settings
6. Operation 6. Operation 6.4.3 Standard No. 6.5.1 Selecting Standard The screen shows the reference standard of the Inverter (see Figure 6.11). NOTE: The inverter is customized according to the local standard before shipping to the customer. The " User-Def" function can be only used by the service Standard: G83/2 engineer and must to be allowed by the local energy supplier. -
Page 14: Maintenance
Turn off the inverter (refer to Section 5.2) and wait for This function is used to start up or stop the power generation of Solis Single Phase a cool-down period before before any maintenance or cleaning operation. - Page 15 DC Switch Optional 1. Serial number of Solis Single Phase Inverter; 2. The distributor/dealer of Solis Single Phase Inverter (if available); 3. Installation date. 4. The description of problem (i.e. the alarm message displayed on the LCD and the status of the LED status indicator lights.
- Page 16 DC Switch Optional DC Switch Optional G83/2 G83/2...
- Page 17 DC Switch Optional DC Switch Optional G59/3 G59/3 .31. .32.
- Page 18 DC Switch Optional G59/3 .33.


Need help?
Do you have a question about the Single Phase Inverter and is the answer not in the manual?
Questions and answers