Table of Contents
Advertisement
Quick Links
Advertisement
Table of Contents

Related Manuals for Teledyne DA1855A


Summary of Contents for Teledyne DA1855A
- Page 1 Operator’s Manual DA1855A Differential Amplifier...
- Page 3 DA1855A Differential Amplifier Operator’s Manual November, 2014...
- Page 4 Spare parts, replacement parts and repairs are warranted for 90 days. In exercising its warranty, Teledyne LeCroy, at its option, will either repair or replace any assembly returned within its warranty period to the Customer Service Department or an authorized service center.
-
Page 5: Table Of Contents
Operator’s Manual Table of Contents Safety Instructions ........................1 Symbols ..........................1 Precautions ......................... 1 Operating Environment ....................... 2 Cooling ..........................2 Cleaning ..........................2 Calibration ........................... 3 Power..........................3 Specifications ........................... 4 Nominal Characteristics ...................... 4 Warranted Characteristics ....................6 Typical Characteristics ...................... - Page 6 Performance Verification Test Record ................77 Reference ..........................80 Differential Mode and Common Mode ................80 Differential Mode Range and Common Mode Range ............80 Common Mode Rejection Ratio ..................80 Certifications ........................82 Returning a Product ......................85 Contact Teledyne LeCroy ....................86...
-
Page 7: Safety Instructions
Operator’s Manual Safety Instructions This section contains instructions that must be observed to keep this oscilloscope accessory operating in a correct and safe condition. You are required to follow generally accepted safety procedures in addition to the precautions specified in this section. The overall safety of any system incorporating this accessory is the responsibility of the assembler of the system. -
Page 8: Operating Environment
DA1855A Differential Amplifier • Use indoors only. • Keep product surfaces clean and dry. • Do not block the cooling vents. Leave a minimum six-inch (15 cm) gap between the instrument and the nearest object. Keep the underside clear of papers and other objects. -
Page 9: Calibration
Calibration should be performed by qualified personnel only. Schedule an annual factory calibration as part of your regular maintenance. Extended warranty, calibration, and upgrade plans are available for purchase. Contact your Teledyne LeCroy sales representative or customersupport@teledynelecroy.com to purchase a service plan. -
Page 10: Specifications
DA1855A Differential Amplifier Specifications These specifications are valid for instruments when the following conditions have been met: • The instrument is being operated from a power source, which meets the line voltage and frequency specifications. • The instrument has been operating for at least 20 minutes in an environment, which is within the operating environmental specifications. - Page 11 Operator’s Manual General, continued Auto Zero Amplifier initiates an automatic balance cycle, when either gain button is depressed, to remove output offset drift Effective Gain Indicator Indicators show the effective system gain or attenuation, factoring Probe Attenuation, Attenuator and gain settings. (Probe must have coding connectors.
-
Page 12: Warranted Characteristics
DA1855A Differential Amplifier Precision Voltage Generator Output Range ± 15.5 V ≈ 10 Ω Output Impedance 100 μV Resolution Control Individual increment and decrement digits carry over to the next decade Reference Type Oven stabilized buried zener diode Can be applied to –Input and available at... -
Page 13: Typical Characteristics
Precision Voltage Generator Temperature Coefficient (power consumption) ≈ 28 W, ≈ 39 VA DA1855A ≈ 56 W, ≈ 78 VA DA1855A-PR2 Output Zero is the output voltage from zero with zero Volt applied between inputs. This specification is valid within 30 minutes from last Autozero cycle, and when the differential amplifier is operating in an environment with stable ambient temperature. -
Page 14: Physical Characteristics
DA1855A Differential Amplifier Physical Characteristics Height DA1855A 7.29 cm (2.87 inch) DA1855A-PR2 8.75 cm (3.4 inch) Width DA1855A 21.2 cm (8.36 inch) DA1855A-PR2 43.9 cm (17.3 inch) Depth DA1855A 23.2 cm (9.12 inch) DA1855A-PR2 42.5 cm (16.7 inch) Weight DA1855A 2.15 kg (4 lbs 12 oz.) -
Page 15: Overview
20 MHz, 1 MHz or 100 kHz to limit noise above the frequency of interest. The DA1855A output is limited at ± 500 mV so that the oscilloscope is not overdriven by large inputs. This allows an oscilloscope to directly measure the settling of D/A converters with 14 bit (60ppm) precision. -
Page 16: Model Description
DA1855A Differential Amplifier Model Description The DA1855A series is comprised of 2 models which differ in physical configuration. Both contain the same 100 MHz differential amplifier which provides high common mode rejection, extremely fast overdrive recovery, selectable ÷1 or ÷10 attenuation, selectable X1 or X10 gain, a 5-1/2 digit Precision Voltage Generator (PVG), selectable upper bandwidth limiting filters, an effective gain display, and ±... -
Page 17: Optional Accessories
All front panel controls are now accessible through the oscilloscope user interface. The DA1855A user interface can be viewed from the Channel setup dialog for the channel to which it is connected. The DA1855A front panel controls will operate manually when the Differential Amplifier is connected to an oscilloscope not provided with a ProBus interface. -
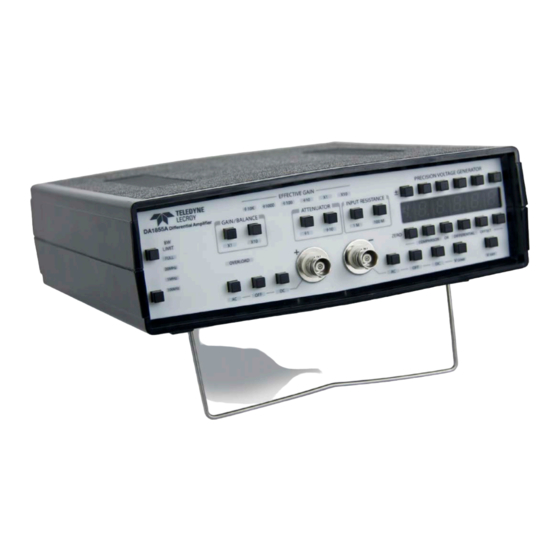
Page 18: Front Panel
+INPUT and them –INPUT. Output Termination Proper gain is obtained when the DA1855A drives a 50 Ω load such as an oscilloscope with input impedance set to 50 Ω. Automatic 50 Ω termination is obtained when the DA1855A is connected to a Teledyne LeCroy oscilloscope through the ProBus interface. - Page 19 Precharge is particularly useful prior to selecting AC coupling when the input voltage has a DC component in excess of 19 V. The DA1855A input coupling is set to OFF and connected to the circuit under test. When the +INPUT is changed from OFF to AC mode, the coupling capacitor is already charged, and the trace properly centered on the oscilloscope screen.
-
Page 20: Precision Voltage Generator
The –INPUT has the same coupling modes as the +INPUT plus one additional option, VCOMP (comparison voltage). The DA1855A contains a precision DC voltage source which is controlled by the oscilloscope OFFSET control. (When the amplifier is used stand alone, without ProBus interface to a Teledyne LeCroy oscilloscope, the voltage is controlled by the push buttons above and below the front panel numerical display.) This voltage source is called the Precision Voltage Generator (PVG). - Page 21 This is known as the PVG absolute mode, and the only mode available in the original DA1855, (non “A” model). The DA1855A retains the option of operating in this same manner as well as supporting PVG roll through zero mode.
- Page 22 DIFF DIFF mode allows the PVG to inject a calibrated offset signal into the DA1855A while still using both inputs for full differential operation. This mode can be used as a position control to move the trace on the oscilloscope screen in preference to using the oscilloscope's position or offset control. The oscilloscope's position and offset controls should always be set to zero so that the DA1855A's dynamic range is properly centered.
-
Page 23: Rear Panel
Overload When a signal, which could damage the DA1855A, has been applied to either input connector, the DA1855A protects itself by disconnecting the signal. The input coupling mode changes to OFF, and the OVERLOAD light is turned on. - Page 24 Generator (PVG). The voltage present on this connector is the same voltage as that applied to the – INPUT when the –INPUT coupling is set to VCOMP or internally to the DA1855A when VDIFF is selected. The OFFSET VOLTAGE output can be used to monitor the PVG with a digital Voltmeter (DVM).
- Page 25 Effective voltage is always referred to the input of the DA1855A or the probe tip if a probe is used. When using probes, the maximum effective voltage range may be limited by the maximum voltage rating of the probe.
-
Page 26: Instrument Settings
DC components. Retained Settings All front panel settings, including Precision Voltage Generator (PVG) settings are retained when the instrument is turned off. The DA1855A return to the same state they were in when power was removed. - Page 27 Set the oscilloscope deflection factor to no greater than 100mV/div. The most useful range for the oscilloscope deflection factors will be between 1mV/div and 100mV/div. Using a scale factor of 200 mV/Div will allow the nonlinear portion of the DA1855A's output to be viewed on screen.
- Page 28 10µV/div. In the X10 GAIN mode, the DA1855A has lower noise than many oscilloscopes, so it is preferable to use the /DA1855A X10 GAIN mode and a lower oscilloscope scale factor. For example, to obtain the best noise performance at 1mV/div, set the DA1855A to X10 mode and the oscilloscope to 10mV/div rather than the use X1 mode and 1mV/div.
- Page 29 The DXC100A is a high performance matched passive differential probe pair designed for use with Teledyne LeCroy DA1855A series differential amplifiers. The probe pair consists of two well matched individual probes that share a common compensation box to allow the attenuation factor on both probes to be simultaneously switched between ÷10 and ÷100.
-
Page 30: General Operating Information
Check to make sure the power switch located on the rear panel is in the OFF position. Connect the power cable to an appropriate power source. The DA1855A will operate on a 50 or 60 Hz AC power source with a nominal voltage range from 100 V to 240 V. -
Page 31: Setting Up The Oscilloscope With Probus Interface
Connect the RJ-45 type connector of the ProBus interface cable to the REMOTE connector and one end of the BNC cable to the AMPLIFIER OUTPUT on the rear panel of the DA1855A and the other end of the BNC cable to the ProBus connector. Connect the ProBus connector to any vertical channel and, if necessary, press the Front Panel channel button to turn on the channel. - Page 32 Set the DA1855A Atten/Gain to Manual. In the List Select menu, select Atten and in the Value menu select /1. The waveform’s magnitude on the oscilloscope’s display will increase by a factor of 10, to 50 mV/div, the waveform will extend and extend off the top and bottom of the screen.
- Page 33 . This internally applies the Precision Voltage Generator’s COMP output to the –INPUT. The OFF light on the DA1855A’s front panel goes out and the –Coupling menu on the user interface disappears (the –INPUT connector is disabled). The positive and negative peaks of the waveform displayed on the oscilloscope are (respectively) 10 divisions above and below the display center line.
- Page 34 FULL BWL List Select: Gain List Select: Atten ÷1 1 M Ω List Select Input R Leaving the OFFSET control set as in the previous example, the DA1855A front panel indicators should be lit as follows: +INPUT –INPUT COMP BW LIMIT...
- Page 35 Change the oscilloscope’s sensitivity from 5 mV/div to 1 mV/div. Select Auto Zero in the List Select menu and push the button next to Auto Zero window to cause the DA1855A to adjust its DC balance.
-
Page 36: Setting Up The Oscilloscope Without Probus Interface
Ω. If the oscilloscope has only a 1 MΩ input, terminate the coaxial cable at the oscilloscope’s input with a 50 Ω feed through terminator. It is important that the DA1855A be terminated by 50 Ω. Set the oscilloscope vertical scale factor to 50mV/div. Set the oscilloscope’s input coupling to GND or OFF and position the trace to center screen. - Page 37 Set the Function generator’s output to 50 kHz and 100 mVp-p sine wave and the output connected to the DA1855’s +INPUT. Set the oscilloscope to 50 mV/div (equivalent to 5 mV/div with DA1855A set at X10 GAIN) and time/div adjusted for 2 to 3 cycles.
- Page 38 OFF) and re-center the trace to center screen using the oscilloscope’s position control. Return its input coupling to DC. Now press the X10 button on the DA1855A to invoke its auto zero function. (Note that pressing the gain button that is already selected causes the DA1855A to adjust its DC balance, but does not change its gain.)
- Page 39 Set the Function generator’s output to 50 kHz and 100 mVp-p sine wave and the output connected to the DA1855A’s +INPUT. Set the oscilloscope to 50 mV/div (equivalent to 5 mV/div with DA1855A set at X10 GAIN) and time/div adjusted for 2 to 3 cycles.
- Page 40 (or OFF) and re-center the trace to center screen using the oscilloscope’s position control. Return its input coupling to DC. Now press the X10 button on the DA1855A to invoke its Auto balance function. (Note that pressing the gain button that is already selected causes the DA1855A to adjust its DC balance, but does not change its gain.)
-
Page 41: Determining The Proper Offset Mode
Operator’s Manual • By using the DA1855A in the differential offset mode and the oscilloscope in a high sensitivity setting, high resolution voltage measurements can be made. The –INPUT is the reference for these measurements. • The Precision Voltage Generator can be used as a position control which allows the DA1855A to operate in its most linear region. - Page 42 ROY OSCILLOSCOPE WITH US INTERFACE “I know the input to the DA1855A is a sine wave, but I am seeing a square wave on the oscilloscope.” This comment is the result of setting the oscilloscope Volt/Div to something greater than 100 mV/div. If the oscilloscope sensitivity is set to 200mV/div, the DA1855A will limit at 2½...
- Page 43 The DA1855A is designed to cleanly limit the output signal to± 500 mV. The DA1855A goes into limit when its output reaches ± 500 mV and is designed to recover very quickly once its input signal level decreases sufficiently to allow the amplifier to return to its linear range.
-
Page 44: Care And Maintenance
DA1855A Differential Amplifier Care and Maintenance Cleaning Clean only the exterior of the amplifier using a soft cloth moistened with water or isopropyl alcohol. Using abrasive agents, strong detergents or other solvents may damage the exterior of the amplifier. Calibration Interval The recommended calibration interval is one year. -
Page 45: Applications
Operator’s Manual Applications Introduction Some parts of a power supply operation, such as saturation voltage, upper gate drive, loop response etc., have been difficult to perform without the proper accessories to expand the measurement capabilities of oscilloscopes. To obtain accurate voltage and current waveforms is a necessity before any waveform analysis can occur. -
Page 46: Effects Of Probes On Saturation Voltage Measurements
Volt signal less than a microsecond after being overdriven by several hundred divisions. It is obvious that the oscilloscope input or an input preamplifier such as the DA1855A needs to recover and therefore that a probe with high frequency performance is required. - Page 47 Operator’s Manual recovery performance is the oscilloscope or differential amplifier’s probe performance. Probes play an important role in device ON voltage measurements. They attenuate the voltage’s magnitude as well as provide a convenient way of connecting to the device under test. in addition to attenuating the input signal they also attenuate the rate of change of the oscilloscope or differential amplifier’s input signal.
- Page 48 DA1855A Differential Amplifier When viewed at 500 m/div, the same 400 V square wave shows the probe compensation to be slightly over peaked. Figure 5 When the time/div is decreased to value normally used to view 20 to 150 kHz switch mode power conversion circuits, the slightly peaked LF compensation appears as a DC level shift.
-
Page 49: Saturation Voltage Measurement
There is no need to ‘float’ the oscilloscope. The probe connected to the –INPUT becomes the reference lead (same as black lead on a DMM). The DA1855A will reject the power line portion (common mode part) of the signal and allows us to see the actual signal of interest. Set the VOLTS/DIV to 50 mV/div and adjust the OFFSET to read 00.000 on the DA1855A front panel... -
Page 50: Gate Drive Voltage
For this measurement, the XC100 is set to ÷100 and the DA1855A is set for ÷10 attenuation and a gain of X1. The total attenuation from probe tip to the oscilloscope is 1000. -
Page 51: Upper And Lower Gate Drive
Q1 and the +INPUT probe to the gate of Q1. The XC100 probes are set for an attenuation of ÷100 and the DA1855A for an attenuation of ÷1 and a gain of X1. The EFFECTIVE GAIN indicator should read an overall gain of ÷100. To make room for other traces, the OFFSET control on the oscilloscope was set to –5.0 Volt, moving the trace up one division. -
Page 52: Remote Control Commands
Many of the commands begin with the “PRx:” prefix, where “x” is the channel which the DA1855A amplifier is connected to. These commands are similar to the channel commands which use the prefix “Cx:”. -
Page 53: Gain Control Mode
Manual. (Refer to Gain Control Modes on page 47, Operation, for more information.) The gain control mode can be selected in the DA1855A control menu through the oscilloscope front panel, or through remote control by sending the commands which correspond tot the gain mode. -
Page 54: Auto-Zero
The amplifier inputs will be disabled for a fraction of a second during the autozero cycle. Command Syntax <channel>:AutoZero <channel>:={PR1, PR2, PR3, PR4} Example The following command initiates an auto zero in the DA1855A Differential Probe attached to channel 1: CMD$=”PR1:AZ”:CALL IBWRT(SCOPE%,CMD$) Bandwidth Limit PRx:BANDWIDTH_LIMIT, PRx:BWL... -
Page 55: Coupling
Operator’s Manual Coupling PRx:COUPLING, PRx:CPL Command/query Description The PRx:COUPLING command sets the input coupling for the + and – inputs of the differential amplifier. The valid arguments are AC, Ground and The PRx:COUPLING? query returns the input coupling setting of the + and –... -
Page 56: Gain
DA1855A Differential Amplifier Gain PRx:GAIN,PRx:GAI Command/Query Description The PRx:GAIN command sets the differential amplifier gain. The command will also switch the Atten/Gain control mode to Manual if it was in Auto. The valid arguments are 1 and 10. The PRx:GAIN? query returns the gain of the differential amplifier connected to the selected channel. -
Page 57: Offset
Description The PRx:OFFSET command sets the Precision Voltage Generator (PVG) value of the DA1855A Differential Amplifier connected to the specified input channel. The oscilloscope channel offset is always set to 0 Volt. The maximum range and resolution is determined by the effective gain of the differential amplifier. -
Page 58: Input-Resistance
DA1855A Differential Amplifier Input-Resistance PRx:PINPUTR,PRx:PINR Command/Query Description The PRx:PINPUTR command sets the input resistance for both inputs of the differential amplifier. The valid arguments are 1M or 100M when the differential amplifier input attenuation is set to ÷1 and an attenuating probe is not being used. -
Page 59: Probe Attenuation
Description The PRx:PROBEATTENUATION? query returns the attenuation value of the probe connected to the input of the DA1855A. Only probes which support probe code sensing will be correctly reported. Attenuation values of 1, 10, 100 or 1000 are sensed and can be reported. Probes which do not support probe code sensing will be reported having an attenuation of 1. -
Page 60: Precision Voltage Generator
DA1855A Differential Amplifier Precision Voltage Generator PRx:PVGMODE,PRx:PVGM Command Query Description The PRx:PVGMODE command sets the operating mode of the Precision Voltage Generator (PVG) of the differential amplifier. The valid arguments are V and OFF. COMP DIFF The PRx:PVGMODE? query returns the operating mode of the Precision Voltage Generator (PVG) of the differential amplifier connected to the specified channel. -
Page 61: Volt / Div
Operator’s Manual Volt / DIV PRx:VOLT_DIV,PRx:VDIV Command/Query Description When used with the "PRx" argument for channel number, the VOLT/DIV command sets the vertical sensitivity at the probe tip. The effective gain of the differential amplifier, including any attenuating passive probes, is factored into the vertical sensitivity. -
Page 62: Performance Verification
DA1855A Differential Amplifier Performance Verification This procedure can be used to verify the warranted characteristics of the DA1855A Differential Amplifier. The recommended calibration interval for this Differential Amplifiers is one year. The complete performance verification procedure should be performed as the first step of annual calibration. Test results can be recorded on a photocopy of the Test Record provided in Appendix A. - Page 63 Table 5, List of required Equipment Description Minimum Requirements Test Equipment Examples Wide Band Oscilloscope 500 MHz bandwidth 2 mV - Teledyne LeCroy LT374 series 200mv scale factors oscilloscope 1 ns - 10 μs sweep speed 2% vertical accuracy 50 Ω termination Digital Multimeter DC: 0.01% accuracy...
-
Page 64: Preliminary Procedure
DA1855A Differential Amplifier Preliminary Procedure 1. Connect the DA1855A Differential Amplifier to an AC power source within the range listed in the Nominal Characteristics in the Specification section. 2. Allow at least 20 minutes warm-up time for the DA1855A and test equipment before performing the Verification Procedure. -
Page 65: Functional Check
Remove the function generator output cable from the oscilloscope. 1. ProBus operation a. Connect the ProBus and the BNC cables to the output of the DA1855A and to channel 1 of the oscilloscope. b. Verify that channel 1 is selected and that the DA1855 is being recognized by showing DA1855A on the screen’s menu. -
Page 66: Verification Procedure
DA1855A Differential Amplifier 3. Bandwidth Limiting a. Press the 10 MHz BW Limit button on the front panel of the DA1855A and verify that the slope of the trace’s leading and trailing edge has decreased. b. Press the resp. 1 MHz and 100 kHz BW Limit buttons and verify that in each case that the slope of the leading and trailing edges decreases. - Page 67 Operator’s Manual Figure 9, X1 Gail Accuracy Press the X1 GAIN button to remove any residual DC offset from the input. (A DC component may interfere with the RMS computation in some DMMs.) k. After the DMM has stabilized, record the reading to 100 μV resolution as ‘Amplifier Output Voltage’...
- Page 68 The actual attenuation of the attenuator is determined using higher amplitude signals. a. Disconnect the DA1855A amplifier output cable and the precision 50 Ω termination from the DMM. b. Disconnect the sine wave generator output cable from the +INPUT and remove the 50 Ω...
- Page 69 Operator’s Manual Figure 10, X10 Gain Accuracy Setup. h. Remove the DMM cable from the BNC Tee and from the banana plug adapter on the DMM. Connect the 50 Ω termination end of the termination/attenuator/ BNC Tee combination on the sine wave generator cable to the Banana Plug adapter on the DMM.
- Page 70 Disconnect the DMM cable from the BNC Tee and remove the BNC to banana plug adapter from the cable and DMM. s. Connect the DMM cable to the DA1855A AMPLIFIER OUTPUT connector. t. Insert the precision 50 Ω termination between the other end of this cable and the input of the DMM.
- Page 71 Operator’s Manual Figure 13, X10 Gain Accuracy Setup v. Divide the sine wave generator output voltage recorded in step 2-q by the exact attenuation factor recorded in step 2-l. This represents the actual voltage on the input of the amplifier. Record the result as ‘Amplifier Input Voltage’ in the Test Record.
- Page 72 Divide the reading recorded in step 3-f by 10.00 and record the result as ‘Expected Output Voltage’ to four digit resolution in the space provided in the Test Record. h. Set the DA1855A GAIN to X1 and the ATTENUATOR to ÷10. Disconnect the sine wave generator output cable and standard 50 Ω termination from the DMM and reconnect to the +INPUT.
- Page 73 Error’ in the Test Record. p. Check that the calculated error is less than ± 1%. q. Disconnect the DMM, sine wave generator, cables and terminations, but leave the amplifier output cable (without termination) connected to the DA1855A AMPLIFIER OUTPUT.
- Page 74 Use the standard wide bandwidth 50 ∧ termination. The precision termination is not accurate at frequencies higher than 100 kHz. c. Verify that the DA1855A GAIN is set to X1 and the ATTENUATOR to ÷10. d. Connect a BNC cable to the output of the leveled sine wave generator.
- Page 75 Operator’s Manual Set the sine wave generator output frequency to 50 MHz. Be careful not to alter the output amplitude. NOTE: The displayed waveform will be compressed in time to form a solid rectangle. It is not necessary to alter the time/div setting as long as the peak amplitude can be measured.
- Page 76 Change the output frequency to 10 MHz, taking care not to change the output amplitude. e. Measure the peak to peak output amplitude of the DA1855A. Record the reading to two digit resolution (xx0 mV) as ‘Amplifier Output Voltage at 10 MHz’ in the Test Record.
- Page 77 BNC cable to each end of the BNC ‘Y’. p. Set both the DA1855A +INPUT and –INPUT to DC. q. Connect the two free ends of the 6” BNC cables to the DA1855A +INPUT and – INPUT. r. Reconnect the AMPLIFIER OUTPUT cable to channel 1 of the oscilloscope. Refer to Figure 19.
- Page 78 Disassemble setup by removing all cable, adapters, etc. from the instruments. 6. Check Low Frequency CMRR. NOTE: The attenuation of the DA1855A at 70 Hz and 100 kHz is so insignificant that the Differential Mode Gain can be assumed to be unity (1.0). However, the high value of the CMRR specification requires the zoom and averaging function to boost the level of the common mode feedthrough to an amplitude where it can be measured.
- Page 79 Connect the two free ends of the 6” BNC cables to the +INPUT and –INPUT of the DA1855A. Refer to Figure 21. Verify that both the +INPUT and –INPUT of the DA1855A are set to DC. Connect another BNC cable from the AMPLIFIER OUTPUT on the DA1855A under...
- Page 80 DA1855A Differential Amplifier k. Set the oscilloscope to display channel 1, coupling to DC and impedance to 50 Ω and the vertical sensitivity as necessary to measure the amplitude of the displayed waveform. Refer to Figure 21 Figure 21, LF CMRR Check Setup The displayed signal is the Common Mode Feedthrough.
- Page 81 Remove the sine wave generator output cable and reconnect it to the female to female BNC adapter and cables attached to the DA1855A inputs. Refer to Figure 21. v. Connect the DA1855A output to channel 1 of the oscilloscope w.
- Page 82 Connect a BNC cable from the DA1855A OFFSET VOLTAGE output connector on the rear panel of the DA1855A to the DMM input. Do not use a 50 Ω termination. b. Push the PVG ZERO button, located at the lower left side of the Precision Voltage Generator display.
-
Page 83: Performance Verification Test Record
This record can be used to record the results of measurements made during the performance verification of the DA1855A Differential Amplifier. Photocopy this page and record the results on the copy. File the completed record as required by applicable internal quality procedures. - Page 84 DA1855A Differential Amplifier DA1855A Test Record Step Description Intermediate data Test Result X1 Gain Accuracy Sine Wave Generator Output Voltage _____________ V Amplifier Output Voltage _____________ V X1 Gain Error (Test limit ≤ 1%) _____________% X10 gain Accuracy Sine Wave Generator Output Voltage...
- Page 85 Operator’s Manual High Frequency CMRR Step Description Intermediate data Test Result Amplifier Output Voltage at 10 MHz _____________ V Differential Mode Gain at ___________ 10 MHz Common Mode Feedthrough at 10 MHz ___________ Common Mode Gain at ___________ 10 MHz Common Mode Rejection Ratio at 10 MHz (Test limit: ≥...
-
Page 86: Reference
DA1855A Differential Amplifier Reference Differential Mode and Common Mode Differential amplifiers amplify the voltage difference which appears between the + input and – input. This voltage is referred to as the Differential Mode or Normal Mode voltage. The voltage component which is referenced to earth and is identical on both inputs is rejected by the amplifier. - Page 87 Operator’s Manual The common mode frequency in these graphs is assumed to be sinusoidal. In real life applications, the common mode signal is seldom a pure sine wave. Signals with pulse wave shapes contain frequency components much higher than the repetition rate may suggests. As such, it is very difficult to predict actual performance in the application for CMRR versus frequency graphs.
-
Page 88: Certifications
DA1855A Differential Amplifier Certifications EMC Compliance EC D - EMC ECLARATION ONFORMITY The amplifier meets intent of EC Directive 2004/108/EC for Electromagnetic Compatibility. Compliance was demonstrated to the following specifications as listed in the Official Journal of the European Communities: EN 61326-1:2013, EN 61326-2-1:2013 EMC requirements for electrical equipment for measurement, control, and laboratory use. -
Page 89: Safety Compliance
Operator’s Manual & N – EMC USTRALIA EALAND ECLARATION ONFORMITY Amplifier complies with the EMC provision of the Radio Communications Act per the following standards, in accordance with requirements imposed by Australian Communication and Media Authority (ACMA): EN 55011:2010 Radiated and Conducted Emissions, Group 1, Class A, in accordance with EN61326-1:2013 and EN61326-2-1:2013 Australia / New Zealand Contacts: Vicom Australia Ltd. -
Page 90: Environmental Compliance
The product is subject to disposal and recycling regulations that vary by country and region. Many countries prohibit the disposal of waste electronic equipment in standard waste receptacles. For more information about proper disposal and recycling of your Teledyne LeCroy product, please visit teledynelecroy.com/recycle. ESTRICTION AZARDOUS... -
Page 91: Returning A Product
5. Package the probe case in a cardboard shipping box with adequate padding to avoid damage in transit. 6. Mark the outside of the box with the shipping address given to you by the Teledyne LeCroy representative; be sure to add the following: •... -
Page 92: Contact Teledyne Lecroy
Ph: 800-909-7112 / 408-653-1260 customersupport@teledynelecroy.com psgsupport@teledynelecroy.com European Headquarters Singapore, Oscillosocpes Teledyne LeCroy SA Teledyne LeCroy Singapore Pte Ltd. 4, Rue Moïse Marcinhes Blk 750C Chai Chee Road #02-08 Case postale 341 Technopark @ Chai Chee 1217 Meyrin 1 Singapore 469003... - Page 94 925177-00 November, 2014...
Need help?
Do you have a question about the DA1855A and is the answer not in the manual?
Questions and answers