
Related Manuals for Honeywell HBD2FR1


Summary of Contents for Honeywell HBD2FR1
-
Page 1: Contents
® equIP Series 1080p TDN Rugged Network IR Bullet Camera NTSC / PAL HBD2FR1 HBD2FR1X User Guide Document 800-13338 – Rev A – 03/2013... - Page 3 User Guide...
- Page 4 Revisions Issue Date Revisions 03/2013 New document.
-
Page 5: Cautions And Warnings
Cautions and Warnings THIS SYMBOL INDICATES THAT DANGEROUS VOLTAGE CONSTITUTING A RISK OF RISK OF ELECTRIC SHOCK ELECTRIC SHOCK IS PRESENT DO NOT OPEN WITHIN THE UNIT. CAUTION: TO REDUCE THE RISK OF ELECTRIC SHOCK, THIS SYMBOL INDICATES THAT DO NOT REMOVE COVER (OR BACK). IMPORTANT OPERATING AND NO USER SERVICEABLE PARTS INSIDE. -
Page 6: Fcc Compliance Statement
6 | HBD2FR1(X) User Guide Regulatory Statements FCC Compliance Statement Information to the User This equipment has been tested and found to comply with the limits for a Class A digital device, pursuant to part 15 of the FCC Rules. These limits are designed to provide reasonable protection against harmful interference when the equipment is operated in a commercial environment. -
Page 7: Safety Instructions
Safety Instructions Before installing or operating the unit, read and follow all instructions. After installation, retain the safety and operating instructions for future reference. HEED WARNINGS - Adhere to all warnings on the unit and in the operating instructions. INSTALLATION •... -
Page 8: Warranty And Service
Honeywell will repair or replace, at its sole option, free of charge, any defective products returned prepaid. In the event that you have a problem with any Honeywell product, please call Customer Service at 1.800.323.4576 for assistance or to request a Return Merchandise Authorization (RMA) number. -
Page 9: Table Of Contents
Installing the Honeywell IP Utility ........ - Page 10 Logging Out of the Web Client ........74 Uninstalling Honeywell ONVIF ActiveX (Internet Explorer) ......74 Uninstalling VLC Media Player (Chrome and Firefox) .
- Page 11 Alarm Connection ......... 23 Figure 3-1 Overview of Honeywell IP Utility User Interface ......26 Figure 3-2 IP Utility User Interface.
- Page 12 12 | HBD2FR1(X) User Guide www.honeywellvideo.com...
- Page 13 Tables | 13 Tables Table 2-1 Parts List ..........19 Table 3-1 IP Network Settings Options .
- Page 14 14 | HBD2FR1(X) User Guide www.honeywellvideo.com...
-
Page 15: About This Document
About This Document This document contains instructions for installing, configuring, and operating the Honeywell ® equIP Series HBD2FR1(X) network camera. This document is intended for system installers, administrators, and operators. Overview of Contents This document contains the following chapters and appendixes: •... -
Page 16: Related Documents
16 | HBD2FR1(X) User Guide Related Documents For more information, please refer to the following documents: Document title Part number Description ® 800-13339 Installation guide equIP Series HBD2FR1(X) 1080p TDN Network IR Bullet Camera Quick Installation Guide Typographical Conventions This document uses the following typographical conventions:... -
Page 17: Introduction
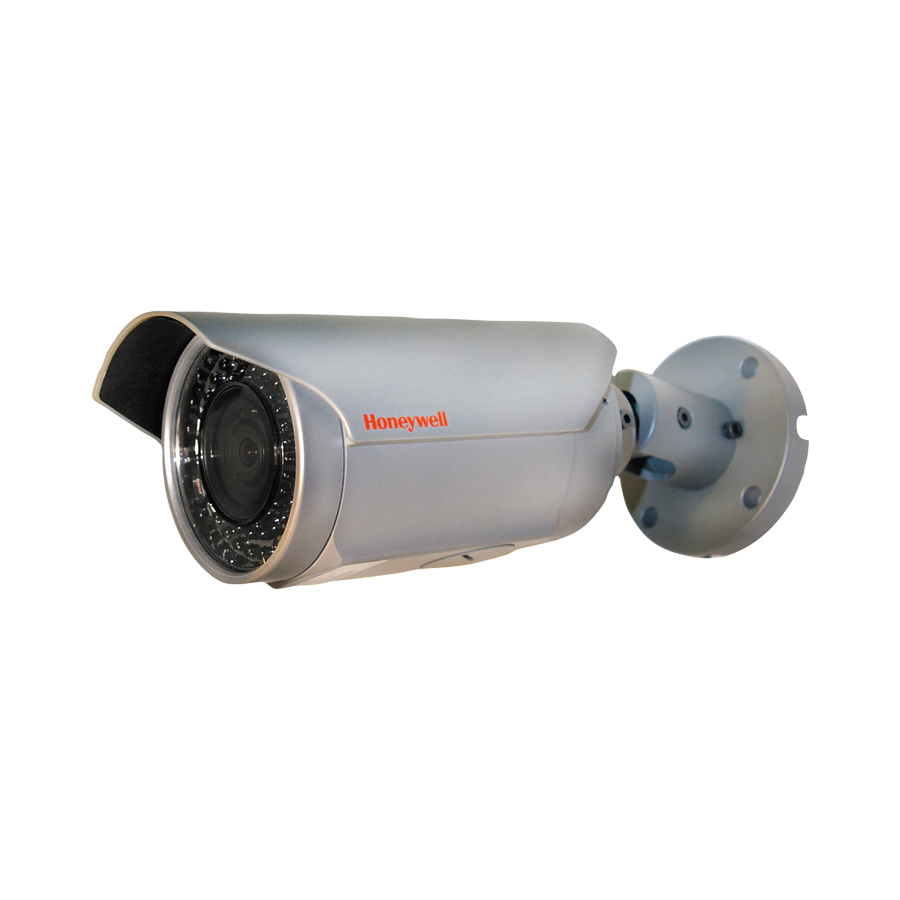
Introduction Honeywell’s ONVIF IR HBD2FR1(X) network camera provides high quality video surveillance over a network connection. Features • Outstanding image quality, 1080p (1920 x 1080) resolution • 30 fps (25 fps PAL) progressive scan • True day/night, 3–9 mm VFAI MFZ lens with removable IR cut filter •... - Page 18 18 | HBD2FR1(X) User Guide www.honeywellvideo.com...
-
Page 19: Installing The Camera
Adapter plate for mounting camera to a 4S electrical box Software DVD (includes user guide) Quick installation guide (800-13339) Product warranty If any parts are missing or damaged, contact the dealer you purchased the camera from or call Honeywell Customer Service. 800-13338 - A - 03/2013... -
Page 20: Parts Of The Camera
20 | HBD2FR1(X) User Guide Parts of the Camera Sunshield Bracket Adjustment Screws Camera Body Mounting the Camera You can mount the camera to a wall, ceiling, or to a 4S electrical box using the supplied adapter plate. The mounting surface must be flat and capable of supporting the combined weight of the camera, sunshield, and mounting bracket (approximately 3.92 lb. -
Page 21: Mounting The Camera To A 4S Electrical Box
Installing the Camera | 21 Mounting the Camera to a 4S Electrical Box To mount the camera to a 4S box using the adapter plate Attach the base of the camera mounting bracket to the supplied adapter plate using the four supplied M5×20 machine screws and nuts. -
Page 22: Audio And Alarms
22 | HBD2FR1(X) User Guide Audio and Alarms Connect the audio and alarm wires. Audio Alarm Orange Yellow IN– IN– Green OUT+ Brown OUT+ Blue OUT– Black OUT– White Connecting Audio The camera supports bidirectional audio. There are two supported voice band channels that function in full duplex mode. -
Page 23: Positioning The Camera
Installing the Camera | 23 Figure 2-2 Alarm Connection Alarm Audio – on page 57 to configure the alarm output. Configuring Alarms Positioning the Camera Position the camera to achieve the desired view. To adjust the camera’s position, loosen the bracket screws with the supplied Allen key, reposition the camera, and then tighten the screws. -
Page 24: Setting Focus And Zoom
24 | HBD2FR1(X) User Guide Setting Focus and Zoom You can set the camera’s focus and zoom locally or remotely. To set the focus and zoom locally Unscrew the cap on the underside of the camera using a coin. Connect the supplied video output cable to the VIDEO 2-pin connector. -
Page 25: Installing The Honeywell Ip Utility
(page About the Honeywell IP Utility The Honeywell IP Utility is a software application used to discover and configure equIP Series and Performance Series products residing on an IP network. Using the IP Utility, you can change your HBD2FR1(X) camera’s network settings (including device name), upgrade the camera’s firmware, and manage the camera’s user settings. -
Page 26: Figure 3-1 Overview Of Honeywell Ip Utility User Interface
26 | HBD2FR1(X) User Guide Figure 3-1 Overview of Honeywell IP Utility User Interface Use the Product Filter drop-down Refresh button Connect button menu to select a specific device, Limited/No connectivity such as all H3D1F cameras. Disconnect button button The About menu displays the software version installed. -
Page 27: Installing The Honeywell Ip Utility
Center webpage. Note If you have an older version of Honeywell IP Utility installed on your computer you may need to uninstall it before you can install the new version. For instructions on how to uninstall the IP Utility, see on page 33. -
Page 28: Figure 3-2 Ip Utility User Interface
[DVD drive]\Honeywell_IP_Utility\ and double-click Honeywell_IP_Utility_ Setup.exe. Follow the InstallShield wizard’s on-screen instructions to complete the installation. Open the IP Utility by double-clicking the Honeywell IP Utility icon on the desktop. The IP Utility opens on your desktop (see Figure 3-2). -
Page 29: Connecting To A Camera
Installing the Honeywell IP Utility | 29 Connecting to a Camera When you open the IP Utility, the devices on the network—including devices on other subnets—are automatically discovered and listed in the Discovery pane on the left of the screen. After the initial discovery, the list of discovered devices auto-refreshes at regular intervals. -
Page 30: Configuring The Camera's Ip Network Settings
30 | HBD2FR1(X) User Guide Configuring the Camera’s IP Network Settings You can configure a connected camera’s IP network settings either automatically or manually using the IP Utility. Contact your network administrator if you experience any network-related issues or if you have questions about your network. -
Page 31: Figure 3-4 Ip Network Settings Configuration
Installing the Honeywell IP Utility | 31 Figure 3-4 IP Network Settings Configuration Enter a descriptive name for the camera in the Device Name field. For example, FrontLobbyDome01. (By default, the device name is the device type plus the MAC address.) -
Page 32: Changing The Camera's Password
32 | HBD2FR1(X) User Guide Changing the Camera’s Password You can change a connected camera’s administrator (admin) or guest password using the IP Utility. To change the camera administrator or guest password Connect to the camera (see on page 29). -
Page 33: Using An Onvif Ip Device With A Network Video Recorder
Features. Click Honeywell IP Utility, and then click Uninstall. If you are prompted to confirm that you want to uninstall Honeywell IP Utility, click Yes. To uninstall the IP Utility in Windows XP Click Start, click Control Panel, and then double-click Add or Remove Programs. - Page 34 34 | HBD2FR1(X) User Guide www.honeywellvideo.com...
-
Page 35: Setting Up The Camera
Setting Up the Camera This chapter describes how to: • Start the web client (page • View live video (page • Configure camera setup, including IR settings (page • Configure camera compression settings (page • Remotely adjust camera zoom and focus (page •... -
Page 36: Before You Begin
36 | HBD2FR1(X) User Guide Before You Begin You must have Windows administrator privileges and your workstation must meet the following minimum requirements to run the web client application. Operating System Windows XP Professional, SP3 Windows Server 2003 R2 (32 bit) -
Page 37: Figure 4-2 Preferred Uac Settings
Setting Up the Camera | 37 Do one of the following: • If Internet Explorer is already in the Allowed list, then select all the check boxes (Domain, Home/Work, Public, Group Policy). • If Internet Explorer is not already in the Allowed list, click Allow another program, browse for iexplore, and then click Open. -
Page 38: Figure 4-4 Trusted Sites Configuration
38 | HBD2FR1(X) User Guide Add Camera URL to Trusted Sites in Internet Explorer Open the Honeywell IP Utility. Connect to your camera. Click Launch Browser to open the camera login page. In the browser, click Tools... -
Page 39: Figure 4-5 Adding A Subnet To Trusted Sites
Setting Up the Camera | 39 Figure 4-5 Adding a Subnet to Trusted Sites Click Add to add the website to the list of trusted websites, and then click Close. Configuring Windows XP Service Pack 3 and IE Security Settings Note Make sure your Windows user account has administrator privileges. -
Page 40: Starting The Web Client
40 | HBD2FR1(X) User Guide Starting the Web Client To start the web client in Internet Explorer Open the Honeywell IP Utility. Connect to your camera. Click Launch Browser. Connect to the device, and then click Launch Browser. Alternatively, you can enter the IP address of the camera directly into the address bar of the browser. - Page 41 Setting Up the Camera | 41 The first time you open the web client you will be prompted to install Honeywell ONVIF ® ActiveX on your computer. If a previous version of Honeywell ActiveX is installed, you will be prompted to upgrade.
- Page 42 42 | HBD2FR1(X) User Guide Follow the on-screen instructions to install the VLC player. Select Full installation. Open your browser. Note You may need to restart Firefox after installing VLC media player. Type the IP address of the camera (listed in the IP Utility) in the address bar of the browser, and then press Enter.
-
Page 43: Viewing Live Video
The Snapshot function lets you save an image from Live view to a default folder on your computer (for example, C:\Documents and Settings\User\My Documents\Honeywell Video Systems\Snapshot). Files are saved as: DeviceName_Date_Time.jpg. The Snapshot function is available to both administrators and guests. -
Page 44: Configuring Camera Settings
44 | HBD2FR1(X) User Guide Note To configure the settings for Snapshot, including the file type and save path, see on page 71. System Setup To take a snapshot in Google Chrome and Mozilla Firefox Click the Snapshot button A window opens displaying the snapshot (your browser must be configured to allow pop-ups). -
Page 45: Basic Camera Setup Process
Setting Up the Camera | 45 Figure 4-8 Camera Setup View Basic Camera Setup Process Aim and focus the camera locally (see on page 24). Setting Focus and Zoom Create a typical scene. Add the motion, scene complexity, and lighting levels (day or night) expected in normal operation. -
Page 46: Setting Auto Exposure
46 | HBD2FR1(X) User Guide Setting Auto Exposure To configure Auto Exposure settings, see 4-2. Click Apply to save your changes. Table Table 4-2 Auto Exposure Settings Setting Options Description ALC (Automatic Level 1–25 The shutter speed is constant and brightness is controlled Light Compensation) through the lens iris by opening and closing it. -
Page 47: Setting Day/Night And Ir
Setting Up the Camera | 47 Setting Day/Night and IR To configure Day/Night settings, see 4-3. Click Apply to save your changes. Table Table 4-3 Day/Night Settings Setting Options Description Day/Night Day, Night, Controls true day/night (TDN) operation. Auto When Auto is selected, the IR cut filter is removed automatically in low-light scenes. -
Page 48: Setting White Balance
48 | HBD2FR1(X) User Guide Setting White Balance To configure White Balance settings, see 4-4. Click Apply to save your changes. Table Table 4-4 White Balance Settings Setting Options Description WB Control Auto, Manual, Auto adjusts white balance automatically. Recommended for WBC Push environments with changing lighting conditions. -
Page 49: Figure 4-10 Codec Type
Setting Up the Camera | 49 The camera supports two simultaneous video streams. The primary stream delivers H.264-compressed video.The secondary stream delivers either H.264 or MJPEG-compressed video (see Table 4-5). Table 4-5 Video Stream Configurations Codec Type Description H.264 H.264 compression used for primary stream; no secondary stream H.264 + H.264 H.264 compression used for primary and secondary stream H.264 + MJPEG... -
Page 50: Figure 4-12 Secondary Stream Settings (H.264 Or Mjpeg)
50 | HBD2FR1(X) User Guide Note To configure the secondary stream, either H.264 + H.264 or H.264 + MJPEG must be selected as the codec type. Figure 4-12 Secondary Stream Settings (H.264 or MJPEG) MJPEG settings shown for NTSC models... -
Page 51: Configuring Priority Settings
Setting Up the Camera | 51 Table 4-7 Compression Settings Setting Options Description Target Bit Rate 250–8000 kbps Available when Priority is set to Bit Rate or Frame Rate. For more information, see on page 51. Configuring Priority Settings Maximum Bit Rate 250–8000 kbps Available when Priority is set to Quality. - Page 52 52 | HBD2FR1(X) User Guide Table 4-9 Range of User-Definable Bit Rate Values Stream Codec Resolution Range 1920×1080 Between 1000 and 8000 kbps 1280×720 Between 1000 and 6000 kbps Primary H.264 800×450 Between 500 and 3000 kbps 640×360 Between 500 and 3000 kbps 320×180...
- Page 53 Setting Up the Camera | 53 Setting Frame Rate as Priority (Primary Stream Only) To set frame rate as the priority Next to Frame Rate, select the frame rate that you want to maintain. Next to Priority, select Frame Rate. Next to Target Bit Rate, enter a value between 250 and 8000 kbps (see Table...
-
Page 54: Configuring Zoom And Focus
54 | HBD2FR1(X) User Guide Configuring Zoom and Focus The Zoom and Focus view (Figure 4-13) lets you remotely adjust the camera’s zoom and focus settings. Figure 4-13 Zoom and Focus View By default, the camera’s zoom is set to Wide and focus is set to Far. -
Page 55: Focus
Setting Up the Camera | 55 Focus To adjust the focus, select one of the following buttons: A double minus (– –) or a double positive (++) sign indicates a coarse adjustment. A single minus (–) or a single positive (+) sign indicates a fine adjustment. -
Page 56: Camera-To-Client Settings
56 | HBD2FR1(X) User Guide Camera-to-Client Settings To listen to or capture audio from a camera In the Camera to Client(PC) area, do one of the following: • Select the Primary Stream check box. • Select the Secondary Stream check box. -
Page 57: Configuring Alarms
Setting Up the Camera | 57 Configuring Alarms The Alarm Setup view (Figure 4-15) lets you configure the camera’s alarm relay settings. Figure 4-15 Alarm Setup View Alarm Input and Output The camera has one alarm input and one alarm output. Connect mechanical or electrical switches to the alarm input connection to enable event-triggered recording. -
Page 58: Configuring Video Analytics
58 | HBD2FR1(X) User Guide Configuring Video Analytics The Video Analytics view (Figure 4-16) lets you configure the camera’s tamper detection and video motion detection settings. Figure 4-16 Video Analytics View Each setting has three threshold levels: high (80%), medium (50%), and low (30%). When these... -
Page 59: Setting Tamper Detection
Setting Up the Camera | 59 Setting Tamper Detection The tamper detection settings alert the web client user to possible camera sabotage when the following occurs: • The camera video is blurred. • The camera is blinded. • The camera field of view has changed. To avoid false alarms, tamper detection should be manually disabled when: •... -
Page 60: Setting Video Motion Detection (Vmd)
60 | HBD2FR1(X) User Guide Scene Change Scene change detection works best detecting objects with distinct edges and corners. Scenes that appear flat or monochrome may trigger false alarms. To set the scene change threshold Click Reset Scene. Next to Scene Change, select one of the following options: •... - Page 61 Setting Up the Camera | 61 In cameras with a wide field of view, or where activity happens far away from the camera, people and vehicles might appear rather small in the image and it might not be possible to apply a single area of interest to the whole field of view and reliably detect motion.
- Page 62 62 | HBD2FR1(X) User Guide Adjusting Video Motion Detection Sensitivity Increasing Sensitivity If relevant scene motion does not trigger VMD alarms, do the following: • Decrease the Motion Threshold level (from 80% to 50%, or from 50% to 30%). This will increase the sensitivity of the motion detection, causing smaller objects to be detected and decrease the contrast level (amount of noise) required to trigger an alarm.
-
Page 63: Figure 4-18 Vmd Configuration (Low Motion Threshold - 30%)
Setting Up the Camera | 63 Figure 4-18 VMD Configuration (Low Motion Threshold - 30%) Figure 4-19 VMD Configuration (Medium Motion Threshold - 50%) 800-13338 - A - 03/2013... -
Page 64: Figure 4-20 Vmd Configuration (High Motion Threshold - 80%)
64 | HBD2FR1(X) User Guide Figure 4-20 VMD Configuration (High Motion Threshold - 80%) Wide Field of View For cameras with a wide-angle field of view covering a larger scene, people who walk far away from the camera might appear rather small in the image. If motion needs to be detected in the entire field of view, the following region-of-interest box configuration is recommended: •... -
Page 65: Configuring Date And Time
Setting the Network Time Protocol (NTP) Server Network Time Protocol (NTP) is a networking protocol for clock synchronization between computer systems over packet-switched, variable-latency data networks. Honeywell ONVIF cameras use NTP to synchronize camera time with an NTP server. Note Some anti-virus software, such as McAfee, will force-stop the NTP service. -
Page 66: Ntp Server
66 | HBD2FR1(X) User Guide There are two ways to configure NTP: • Use a DHCP server to set the NTP server address. • Specify an NTP server IP address for time synchronization. DHCP To use a DHCP server to synchronize time •... - Page 67 Setting Up the Camera | 67 Installing the NTP Software Included With Your Camera To install the NTP software Insert the DVD that was shipped with your camera into your workstation’s DVD-ROM drive, and then browse to the NTP folder. Click one of the following setup files: ntp-4.2.6p5@london-o-lpv-win32-setup.exe NTP installation package with IPv6 support for XP/ 2003 Server/Vista/Windows 7/Windows Server 2008...
- Page 68 68 | HBD2FR1(X) User Guide On the Please specify your configuration settings screen you must do at least one of the following to specify the NTP servers to synchronize with: • If the computer can access public Internet time servers, then under Want to use predefined public NTP servers select the closest geographic region to where the computer is installed.
- Page 69 Setting Up the Camera | 69 When prompted to review the generated confide file, click No. On the NTP Service Options screen, accept the defaults, and then click Next. On the Enter the user ID and password used for running the service screen enter a password for the NTPD account, and then click Next.
-
Page 70: Overlay Settings
70 | HBD2FR1(X) User Guide After clicking Next, if a message appears indicating that the computer policy does not allow you to create a new user account, click Back and select one of the other account options (either Use existing account or Use SYSTEM account) from the top of the Please specify your service settings screen. -
Page 71: System Setup
Setting Up the Camera | 71 System Setup The System Setup view (Figure 4-23) lets you configure port allocation settings and the snapshot file type and save path (Internet Explorer only). You can also reset the camera to factory defaults and restart the camera from this screen. Figure 4-23 System Setup View Setting the Port Allocation... -
Page 72: Setting The Snapshot File Type And Path (Internet Explorer Only)
72 | HBD2FR1(X) User Guide Setting the Snapshot File Type and Path (Internet Explorer Only) In the Snapshot area you can set the file type and save path for snapshots. Next to Path, click to choose a save path. Next to Type, select either BMP or JPEG (JPEG is the default file type). -
Page 73: Viewing Device Information
Setting Up the Camera | 73 Viewing Device Information The Device Information view (Figure 4-24) displays the network settings and firmware details of the camera. Figure 4-24 Device Information View In the Device Information area you can view read-only network settings, firmware settings, and video formats for the camera without having to access the IP Utility. -
Page 74: Logging Out Of The Web Client
Click the Start button, click Control Panel, click Programs, and then click Programs and Features. Click Honeywell ONVIF ActiveX, and then click Uninstall. If you are prompted to confirm that you want to uninstall the application, click Yes. To uninstall the IP Utility in Windows XP Click Start, click Control Panel, and then double-click Add or Remove Programs. -
Page 75: Troubleshooting
See the back cover for international contact information. Any equipment returned to Honeywell Video Systems for warranty or service repair must have a Return Merchandise Authorization (RMA) number. The RMA number must be clearly marked on all return packages and internal paperwork. - Page 76 76 | HBD2FR1(X) User Guide www.honeywellvideo.com...
-
Page 77: Specifications
Specifications Note These specifications are subject to change without notice. Video Signal Video Standard NTSC/PAL Scanning System Progressive scan Image Sensor 1/2.7-in. CMOS Number of Pixels (H×V) 1920 × 1080 (1080p) Minimum Illumination 0.25 lux @ 50 IRE, F1.2 0.11 lux @ 30 IRE, F1.2 0 lux with IR LEDs on Video Output 1.0 Vp-p, 75 ohms... - Page 78 Windows Server 2003 R2 (32 bit), Windows XP Professional SP3, Internet Explorer 8 or 9, Google Chrome v23.0.1271.97 or later, Mozilla Firefox v17.01 or later Installation, Management, Honeywell IP Utility software identifies the IP address, checks device status, and Maintenance and upgrades firmware over HTTP. Available at www.honeywellsystems.com/support/download-center/index.html...
- Page 79 Specifications | 79 Regulatory Emissions FCC Part 15B, EN 55022 Immunity EN 50130-4 Safety EN 60950-1 North America ETL listed to UL/CSA 60950-1 800-13338 - A - 03/2013...
- Page 80 80 | HBD2FR1(X) User Guide www.honeywellvideo.com...
- Page 82 Document 800-13338 – Rev A – 03/2013 © 2013 Honeywell International Inc. All rights reserved. No part of this publication may be reproduced by any means without written permission from Honeywell. The information in this publication is believed to be accurate in all respects. However, Honeywell cannot assume responsibility for any consequences resulting from the use thereof.