
Related Manuals for Elation Design Spot LED


Summary of Contents for Elation Design Spot LED
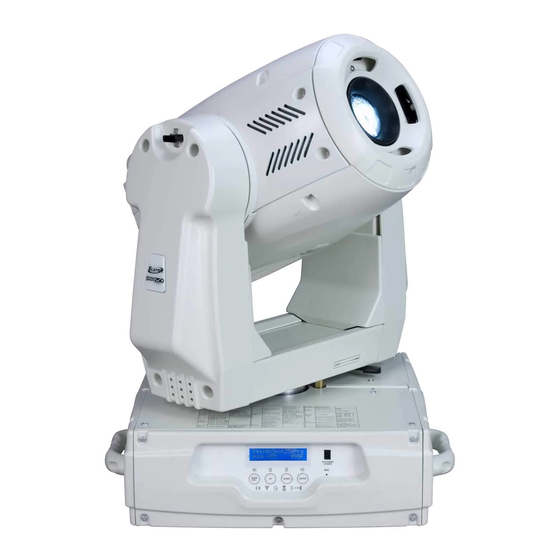
- Page 1 Design Spot LED Elation Professional 6122 S Eastern Ave Los Angeles, Ca 90040 www.elationlighting.com Rev. 3/04/2010 – visage Version 1.0...
- Page 2 Design Spot LED™ ©Elation Professional® Design Spot LED™...
-
Page 3: Table Of Contents
Design Spot LED™ CONTENTS General Information……………………………………………………………………… 4 a. Introduction………………………………………………………………………. 4 b. Unpacking………………………………………………………..…………..….. 4 c. Customer Support…………………………………………….………………… 4 d. Warranty Registration……………………………………………………..……. 5 e. Discharge Lamp Warning………………………………………………………. 5 Safety Instructions………………………………………………………..…………. 7 Features…………………………………………………………………………………… 8 General Guidelines………………………………………………………………………. 9 Mounting and Installation………………………………………………………….……. 10 a. Mounting Points…………………………………………………………………. 11 b. -
Page 4: General Information
UNPACKING: Thank you for purchasing the Design Spot LED™ by Elation Professional®. Every Design Spot LED™ has been thoroughly tested and has been shipped in perfect operating condition. Carefully check the shipping carton for damage that may have occurred during shipping. -
Page 5: Warranty Registration
Please do not discard the shipping carton in the trash. Please recycle whenever possible. WARRANTY REGISTRATION: The Design Spot LED™ carries a two year (730 days) limited warranty. Please fill out the enclosed warranty card to validate your purchase. All returned service items whether under warranty or not, must be freight pre-paid and accompany a return authorization (R.A.) number. - Page 6 Design Spot LED™ Only handle the power cord by the plug. Never pull out the plug by tugging the wire portion of the cord. Please be aware that damages caused by manual modifications to the device are not subject to warranty.
-
Page 7: Safety Instructions
2. Never touch the fixture during normal operation. This can cause severe personal injuries and/or damage to the fixture. 3. Be sure to unplug the DESIGN SPOT LED™ from the power outlet before performing any service related issues. 4. Never look directly into the light source. You risk injury to your retina, which may induce blindness. -
Page 8: Features
• Electronic Focus via DMX • Pan and Tilt Locking System • Firmware Upgrades via Elation E-Loader • 8 User Assignable Program Presets - Internal Program: Edit and save programs to the incorporated EEPROM through the front control panel or external controller; you can save a maximum of 48 scenes, and run the saved programs by using the “run”... -
Page 9: General Guidelines
Design Spot LED™ 4. GENERAL GUIDELINES This fixture is a professional lighting effect designed for use on stage, in nightclubs, in theatres, etc. Do not attempt operation or installation without a proper knowledge on how to do so. This fixture was designed for indoor use only. -
Page 10: Mounting And Installation
0,5m Mounting The DESIGN SPOT LED™ is fully operational in two different mounting positions, hanging upside-down from a ceiling, or set on a flat level surface (see illustration below). Be sure this fixture is kept at least 0.5m (1.5 ft) away from any flammable materials (decoration etc.). -
Page 11: Mounting Points
Design Spot LED™ Mounting points Overhead mounting requires extensive experience, including amongst others calculating working load limits, a fine knowledge of the installation material being used, and periodic safety inspection of all installation material and the fixture. If you lack these qualifications, do not attempt the installation yourself. -
Page 12: Securing
Securing the DESIGN SPOT LED™ Regardless of the rigging option you choose for your DESIGN SPOT LED,™ always be sure to secure your fixture with a safety cable. The fixture provides a built-in rigging point for a safety cable on the hanging bracket as illustrated above. -
Page 13: Understanding Dmx
Your cables should be made with a male and female XLR connector on either end of the cable. Also, remember that a DMX line must be daisy chained and cannot be split, unless using an approved DMX splitter such as the Elation Opto Branch 4™ or DMX Branch/4™. - Page 14 DMX cable with XLR input and output connectors. Always be sure daisy chain your in and out data connections, never split or “Y” your DMX connections unless you are using an approved DMX splitter such as the Elation Opto Branch 4™ or DMX Branch/4™.
-
Page 15: Dmx Terminator
2 and 3 of a male XLR connector (DATA + and DATA -). This fixture is inserted in the female XLR connector of the last fixture in your daisy chain to terminate the line. Using a line terminator (Elation part: DMX T PACK) will decrease the possibilities of erratic behavior. - Page 16 In the case of the Design Spot LED™, which is a 16 channel fixture, you should set the starting DMX address of the first unit to 1, the second unit to 17 (16 + 1), the third unit to 33 (16 + 17), and so on.
-
Page 17: Fixture Menu
LED Control Panel: The control panel located on the top, front of the fixture allows you to access the main menu and make all necessary adjustments to the Design Spot LED™. During normal operation, tapping the “MODE/ESC” key once will access the fixture’s main menu. - Page 18 Design Spot LED™ Time Information Current Time XXXX(Hours) Power on running time Total Life Hours XXXX(Hours) Fixture running time Last Run Hours XXXX(Hours) Fixture Last times clear Timer Password Password=XXX Timer Password “038” Clear Last Run ON/OFF Clear Fixture Last time...
- Page 19 Design Spot LED™ Standard Mode User Mode User’s mode to change Basic Mode channel numbers Extended Mode User Mode A User Mode B User Mode C Edit User Mode Max Channel = XX Preset User modes PAN = CH01 Select Programs...
- Page 20 Design Spot LED™ 7.1.3 “Set to Slave” - Slave setting for Master/Slave Operation With this function, you can define the device as slave for operation in Master/Slave mode. Each slave setting will have a different function for a dynamic lightshow without a controller.
- Page 21 Design Spot LED™ Last Run Hours This function tracks a cycle run time. Use this function to keep track of rental period, or to note the time from the last service. This setting can be reset at any time, see “L-Timer Password.”...
- Page 22 Design Spot LED™ the fixture. RDMX is on by default. For operational instructions please see Section 8/Page 29 of this manual “Remote DMX addressing.” No DMX Status – This function dictates how the fixture will function if it looses DMX signal during normal operation.
- Page 23 Design Spot LED™ Speed 2: Pan and Tilt speeds are identical to the first generation Design Spot 250. Speed 3: Includes a faster Pan speed. Pan speed is 0.5 seconds faster than original Design Spot 250. Tilt speed will be the same as speed 2.
- Page 24 Design Spot LED™ 2. Tap the UP button until “DISP” is displayed. 3. Press ENTER, the display will show “VALU”. 4. Tap the UP button until ”LOCK” is displayed and tap the ENTER button. 5. Press the UP button to select “ON” to activate this function, or “OFF” to deactivate this function.
- Page 25 Design Spot LED™ fixture channel and test it’s function independently from the control board. 7.5.2 Manual Control –This function will center the pan and tilt motors and at the same time bring the dimmer to 100%. The pan and tilt function will still operate if the fixture needs to be positioned to a flat clear surface.
- Page 26 7.7.4 Rec Controller - The Design Spot LED™ features an integrated DMX recorder. Pre-programmed scenes can be transmitted to the fixture via any DMX compliant controller.
-
Page 27: Dmx Addressing
Design Spot LED™ 8. DMX ADDRESSING Setting the DMX address - After the fixture is turned “ON” it will immediately complete a reset process that test all the fixture’s functions. When the reset process concludes the LCD will display the fixture’s current DMX. If the fixture is not receiving a DMX signal, the display will flash continuously. - Page 28 Design Spot LED™ Controller Settings: 1. Set the DMX value of channel 1 to a value of 7. 2. Set the DMX value of channel 2 to a value of 7 or 8. When channel 2 is set to "7" you can adjust the starting address between 1 and 255. When set to "8"...
-
Page 29: Operating Modes
Design Spot LED™ 9. OPERATING MODES Operating Modes: The Design Spot LED™ can operate in six different modes. This next section will detail the differences in the operating modes. • Auto Program Mode (Master) - The fixture will chasing through the built-in programs, sending a DMX control signal to all other fixtures connect via DMX cables instruction for a synchronized light show. - Page 30 16 fixtures to be linked together to provide a synchronized light show without the use of a controller. Only use this when linking several Design Spot LED together for use without a controller. Any fixture can act as a “Master or a “Slave.”...
-
Page 31: Working With Built-In Programs
Design Spot LED™ 10. WORKING WITH BUILT-IN PROGRAMS The fixture comes equipped with a built-in DMX recorder that allows custom programs to be installed and recalled directly from the fixture’s control board. Programs can be created and stored using the fixture’s control board or by using an external DMX controller. The following instructions will detail the procedures for using the on-board system menu as well as using a DMX compliant controller. - Page 32 Design Spot LED™ “PAN-Fine” – precision pan movement. “TILT” – tilt movement. “TILT-Fine” – precision tilt movement “Move Speed” – adjust pan and tilt motor speed “Gobo Wheel 1” – select gobos from gobo wheel 1 “Gobo Rot. 1” – adjust gobo 1 indexing or rotation “Gobo Wheel 2”...
- Page 33 Design Spot LED™ 64 scenes. Keep in mind that a scene can only be access when it is stored inside one of the 10 available programs. Follow the procedure below to build an internal program: • Access the main menu and toggle to “Edit Programs” which is menu function 8.
-
Page 34: Dmx Channel Traits
Design Spot LED™ 11. DMX CHANNEL TRAITS: The chart below details the channel layout for 16 DMX channels (default). In 8bit mode the “Pan Fine” and “Tilt Fine” channels are not used, thus converting the fixture into a 14-channel DMX fixture. -
Page 35: Dmx Channel Values
Design Spot LED™ DMX channel function and values: Mode/Channel Value Function " " PAN Movement 8bit " 0-255 Pan Movement By 630/540 Pan Fine 16bit " " 0-255 Fine control of Pan movement TILT Movement 8bit " 0-255 Tilt Movement Tilt Fine 16bit "... - Page 36 Design Spot LED™ 140-159 Gobo 4 shake slow to fast 160-179 Gobo 5 shake slow to fast 180-199 Gobo 6 shake slow to fast 200-119 Gobo 7 shake slow to fast 220-255 Rot. gobo wheel cont. rotation slow to fast Rotating gobo index, rotating gobo rotation "...
- Page 37 Design Spot LED™ 176-183 Macro 7 184-191 Macro 8 192-199 Macro 9 200-207 Macro 10 208-215 Macro 11 216-223 Macro 12 224-231 Macro 13 232-239 Macro 14 240-247 Macro 15 248-255 Macro 16 Focus " Continuous adjustment from far to near...
- Page 38 Design Spot LED™ 226-235 Blackout by movement 236-245 Blackout by all wheel changing 246-255 No function Lamp on/off, reset, internal programs " 0-19 Color/Gobo change is normal 20-29 Color change to any position – Split Colors are Possible 30-39 Split Colors/Gobs are Possible...
-
Page 39: Error Codes
Design Spot LED™ 12. ERROR CODES: When power is applied, the unit will automatically enter a “reset/test” mode. This mode brings all the internal motors to a home position. If there is an internal problem with one or more of the motors an error code will flash in the display in the form of “XXer” were as XX will represent a function number. - Page 40 Design Spot LED™ 05Er - Color-wheel error: The color wheel is not located in the default position after start-up or after a reset command. This message will appear after a fixture reset if the color wheel’s magnetic-indexing circuit malfunctions (sensor failed or magnet is missing) or there is a stepper motor failure (defective motor or a defective motor IC drive on the main PCB).
-
Page 41: Cleaning And Maintenance
There are no user serviceable parts inside this fixture with the exception of the lamp. Please refer all other service related issues to an authorized Elation service technician. Should you decide to service the fixture yourself please order genuine Elation parts directly from Elation. -
Page 42: Photometric Data
Design Spot LED™ PHOTOMETRIC DATA: ©Elation Professional® Design Spot LED™... -
Page 43: Gobo Patterns
Design Spot LED™ GOBOS: ©Elation Professional® Design Spot LED™... -
Page 44: Dimensional Drawings
Design Spot LED™ DIMENSIONAL DRAWINGS: ©Elation Professional® Design Spot LED™... -
Page 45: Circuit Schematic
Design Spot LED™ 17. CIRCUIT SCHEMATIC ©Elation Professional® Design Spot LED™... -
Page 46: Warranty
® defective parts at its expense, and will absorb all expenses for warranty service and repair labor by reason of defects in material or workmanship. The sole responsibility of Elation Professional under this warranty shall be limited to the repair of the product, or replacement ®... - Page 47 The consumer’s and or Dealer’s sole remedy shall be such repair or replacement as is expressly provided above; and under no circumstances shall Elation Professional® be liable for any loss or damage, direct or consequential, arising out of the use of, or inability to use, this product.
-
Page 48: Technical Specifications
Design Spot LED™ 19. TECHNICAL SPECIFICATIONS Power supply AC 100 ~ 240V / 50Hz ~ 60Hz Voltage Requirements User Selectable via Internal Tap Fuse protection 5A/250V, GMA (5x20mm fine-wire fuse) Power Consumption 240 Watts Lamp Type GX100 – 90 Watt... - Page 49 Design Spot LED™ Weight (net) 24Kgs / 53 Lbs Fixture IP Rating IP20 Maximum Ambient Temp 45˚C DB Rating 55db @ 3’ Please Note: Specifications and improvements in the design of this unit and this manual are subject to change without any prior written notice.
- Page 50 Design Spot LED™ ©Elation Professional® Design Spot LED™...
- Page 51 Design Spot LED™ ©Elation Professional® Design Spot LED™...
- Page 52 Elation Professional 6122 S Eastern Ave. Los Angeles, CA. 90040 323-582-3322 / 323-832-9142 fax www.ElationLighting.com / Info@ElationLighitng.com Rev. 3/04/2010 – visage Version 1.0...
Need help?
Do you have a question about the Design Spot LED and is the answer not in the manual?
Questions and answers