
Subscribe to Our Youtube Channel
Related Manuals for Gastroback Design Bread Maker Plus


Summary of Contents for Gastroback Design Bread Maker Plus
-
Page 1: Operating Instructions
Operating Instructions Design Bread Maker Plus Art.-Nr. 42820 Design Brotbackautomat Plus Read all provided instructions before first use! Model and attachments are subject to change! For domestic use only! -
Page 2: Table Of Contents
Carefully read all provided instructions before you start running the appliance and pay attention to the warnings mentioned in these instructions. Table of Contents Knowing Your Design Bread Maker Plus ..............36 Important Safeguards ..................38 General Safety Instructions ................38 Important Safeguards for Electrical Appliances ............40 High Temperatures –... - Page 3 Your new Bread Maker provides freshly baked fragrant breads and cakes. Even jam and yoghurt for your well-set breakfast table will be made quite easily. Try some new recipes to your individual taste. The Design Bread Maker Plus will make your ideas come true without effort.
-
Page 4: Knowing Your Design Bread Maker Plus
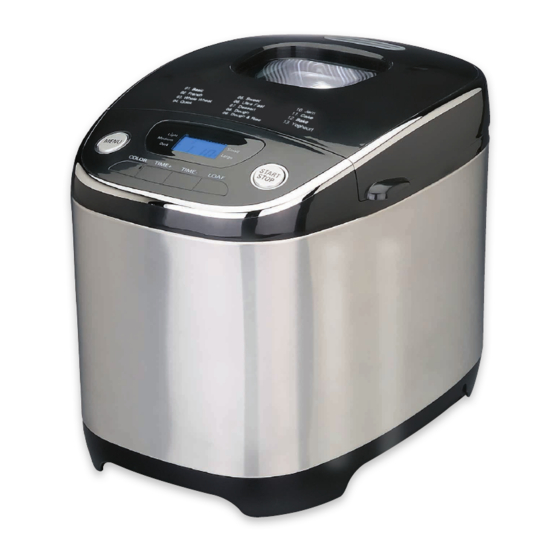
Knowing Your Design Bread Maker Plus C + D + E + F + G + H... - Page 5 Housing Power cord (not shown) Lid – with handles on each side, ventilation slits, and a window for checking the baking process Kneading paddle Bread pan – non-stick coated, with handle for easy installation and removal Drive shaft – put on the kneading paddle here (not shown in the bread pan) Heating compartment Coupling of the kneading works –...
-
Page 6: Important Safeguards
Important Safeguards Carefully read all instructions before operating this appliance and save for further reference. Do not attempt to use this appliance for any other than the intended use, described in these instructions. Any other use, especially misuse, can cause severe injuries or damage by electric shock, moving parts, heat, or fire. - Page 7 been given supervision or instruction concerning the use of the appliance by a person respon- sible for their safety. Children must always be supervised to ensure that they do not play with the appliance or any parts of the appliance or the packaging. Always keep the appliance where it is dry, frost-free, and clean, and where young children cannot reach it.
-
Page 8: Important Safeguards For Electrical Appliances
1 day. (See: ›Care and Cleaning‹) Do not clean the appliance in an automatic dishwasher. High Temperatures – Risk of Burns The Design Bread Maker Plus is designed for baking bread and cakes and making jam and yoghurt in a household environment. For this purpose, the appliance is heated electrically. -
Page 9: Moving Parts - Risks Of Injuries
• Do not touch the hot surfaces with any parts or your body or any heat-sensitive or moisture- sensitive objects during operation or while the appliance is still hot. Only touch the appliance and its parts at the handles and operating elements during operation and thereafter. Beware of hot steam and condensate, when opening the lid. -
Page 10: Technical Specifications
Functions of the Buttons Each time you press a button, a signal sounds. The buttons COLOR, LOAF, TIME+, and TIME– need only to be touched slightly. Use the buttons of the Design Bread Maker Plus to operate the following functions: Button Function MENU Selection of the desired baking program. -
Page 11: Programs Of The Bread Maker
STOP For termination of a program, keep the button pressed until a signal sounds. NOTE: After terminating a program with this button, all settings are deleted. There is no way to continue the previously used program. Thus, do NOT use this button, if you wish to add further ingredients. In this case, unplug the appliance for no longer than 10 minutes. -
Page 12: Program Schedule
QUICK Including time periods for kneading, rise and baking, but rise with soda or baking powder. SWEET For bread with additional ingredients (e.g. fruit juices, grated coconut, raisins, dry fruits, chocola- te, or sugar). Due to a longer phase of rising the bread will be light and airy. -
Page 13: Warming Function
Program 3 WHOLE BASIC FRENCH WHEAT QUICK SWEET ULTRA FAST Complete 2h 48 min/ 3h 18 min / 3h 28 min / 1h 55 min / 2h 51 min / 59 min / Cycle 2h 50 min 3h 20 min 3h 30 min 1h 58 min 2h 53 min... -
Page 14: Memory Function
Memory Function When being live again after a power failure of up to approx. 10 minutes, the program will continue from the same point. However, if the power cut lasts for more than 10 minutes, the actual baking program will not be continued. Tip: However, after you have cancelled the baking process by pressing the START/STOP button for 2 seconds, all previously entered settings will be lost. -
Page 15: Before First Use
1. Unpack the appliance and all accessories carefully. 2. Check that no parts are damaged or missing. (See: ›Knowing Your Design Bread Maker Plus‹) 3. Carefully remove all shipping materials and promotional materials, but DO NOT remove any warning labels or the model label. -
Page 16: Operation
WARNING: Always ensure that the appliance and all its parts and accessories are out of reach of young children. Your new Design Bread Maker Plus is intended for cooking edible food and is heated electrically. Thus, the heating elements will become very hot during operation. -
Page 17: Starting The Baking Program
IMPORTANT: The bread pan is locked on the coupling of the kneading works. Do not use violence when attempting to remove the bread pan to avoid damage. 3. Open the lid and pull the bread pan upward out of the appliance. For this, turn the bread pan counterclockwise until you can lift it up easily. - Page 18 4. Use the COLOR button to select the desired colour of your bread. The arrow on the left side of the LCD screen shows whether you have chosen Light, Medium, or Dark. Tip: The buttons COLOR, LOAF, TIME+, and TIME– respond even to light touches. Slightly tip on the buttons with your finger.
-
Page 19: Applying Some Additional Baking Time
minutes at the maximum. (See: ›Warming Function‹) Thereafter, the appliance switches OFF completely and the interior cools down. WARNING – High Temperature: Risk of Burns! The heating compartment and all parts within (e.g. bread pan) will get very hot during ope- ration. -
Page 20: Preparing Yoghurt
Important: Do not use any hard or sharp-edged objects, because this may lead to scratches on the non-stick coating. 4. Immediately rinse the bread pan with warm water, after removing the bread. This is impor- tant, because it prevents the kneading paddle from sticking to the drive shaft. IMPORTANT: Do not cut the bread in the bread pan to avoid damage to the non-stick coa- ting. -
Page 21: Solving Problems
10. Shortly press the START/STOP button to start the program. An acoustic signal sounds as soon as the program has been completed. 11. Leave your homemade yoghurt cool down. Then store in the refrigerator. Solving Problems If any problems occur during operation, you will find solutions in this section. Further informa- tion on processing your food is given in section Tips for Best Results. -
Page 22: Care And Cleaning
Unusual information is shown on the screen. Problem Possible Reason The Solution H:HH The temperature is too Immediately press the START/STOP button to (after starting the high. stop the program, and unplug the appliance. program) Then open the lid and let the Bread Maker cool down completely before using it again. -
Page 23: Cleaning The Appliance
4. Take the kneading paddle out of the bread pan. If the kneading paddle sticks to the drive shaft and is hard to remove, fill the bread pan with hot dishwater for approx. 30 minutes. Then try again. Cleaning the Appliance IMPORTANT: Do not immerse the appliance, power cord or bread pan in water or other liquids to avoid damage. -
Page 24: Storage
Information and Service Please check www.gastroback.de for further information. For technical support, please contact Gastroback Customer Care Center by phone: +49 (0)4165/22 25-0 or e-mail info@gastro- back.de. Warranty We guarantee that all our products are free of defects at the time of purchase. -
Page 25: Recipes
Recipes WARNING: Please keep the maximum capacity of the Bread Maker in mind (750 g). Do not overfill the bread pan to avoid overflow and hazard of overheating, fire and electric shock. Basic White Bread Walnut or Pineseed Bread Ingredients Ingredients Loaf size up to 750 g 500 g... -
Page 26: Corn Bread
Corn Bread Preparation Fill the ingredients into the bread pan in the Ingredients stated order. Refine cooking oil is recom- mend. Program selection: WHOLE WHEAT. Loaf size up to 750 g 500 g Water 240 g 160 g Salt 18 g 12 g Sweet Bread Milk Powder... -
Page 27: Raisin Bread
Coffee Bread Bread Flour 350 g 210 g Yeast Ingredients Raisin 22 g 15 g Loaf size up to 750 g 500 g Preparation Water 200 ml 120 ml Fill the ingredients into the bread pan in the stated order. The corresponding amount of Salt fresh milk can be used instead of water. -
Page 28: Rice Pudding
Rice Pudding Pasta Dough Ingredients Ingredients Beaten eggs Water 260 ml Milk 160 g Flour 400 g Soft Cooked Rice 250 g Preparation Sugar 70 g Fill the ingredients into the bread pan. Water Raisin 60 g and flour are the main ingredients, all others Vanilla are optional. - Page 29 Friendly Note: The bread maker is in data initiation mode during the first 3 seconds, after it has been plugged in. Please do not press any buttons during this time. If you experience any problems while using the control buttons, unplug the bread maker from the mains outlet and plug it in again.
- Page 30 Notizen/Notes...
- Page 31 Notizen/Notes...
- Page 32 GASTROBACK GmbH Gewerbestraße 20 . 21279 Hollenstedt / Germany Telefon +49 (0)41 65/22 25-0 . Telefax +49 (0)41 65/22 25-29 info@gastroback.de . www.gastroback.de...
Need help?
Do you have a question about the Design Bread Maker Plus and is the answer not in the manual?
Questions and answers
How many grams in a 1/2 pack of vanilla sugar, I bought your breadmaker and all is well but the ingredient list is a bit confusing