Table of Contents
Advertisement
Advertisement
Table of Contents

Related Manuals for Samsung AEX060EDEHA


Summary of Contents for Samsung AEX060EDEHA
-
Page 2: Table Of Contents
Do not use the units if you see some damages on the units and recognize something bad such as loud noisy, smell of burning. f In order to prevent electric shocks, fires or injuries, always stop the unit, disable the protection switch and contact SAMSUNG’s technical support if the unit produces smoke, if the power cable is hot or damaged or if the unit is very noisy. - Page 3 f Do not attempt to repair, move, alter or reinstall the unit by unauthorized personnel, these operations may cause product damage, electric shocks and fires. f Do not place containers with liquids or other objects on the unit. f All the materials used for the manufacture and packaging of the air to water heat pump are recyclable. f The packing material and exhaust batteries of the remote controller(optional) must be disposed of in accordance with local regulations.
-
Page 4: Product Specifications
Line-up Remark Chassis Heat pump units Model name AEX060EDEHA Accessories f Keep supplied accessories until the installation is finished. f Hand the installation manual over to the customer after finishing installation. f The quantities are indicated in parentheses. Installation manual (1) -
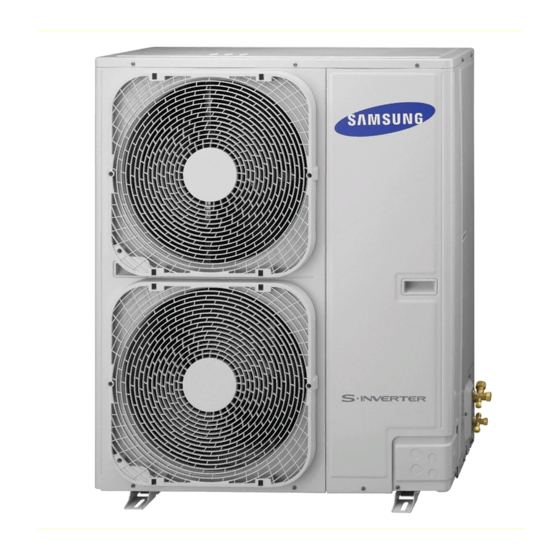
Page 5: Main Components
Main components Dimensions(Overall) Heat pump for R-410A. 54.1 Installing the unit Deciding on where to install the outdoor unit Decide the installation location regarding the following condition and obtain the user’s approval. f The outdoor unit must not be placed on its side or upside down, as the compressor lubrication oil will run into the cooling circuit and seriously damage the unit. - Page 6 Installing the unit f Install the outdoor unit in a place (such as near buildings etc.) where it can be prevented from sea breeze which can damage the outdoor unit. Outdoor Outdoor unit unit Sea breeze Sea breeze f If you cannot avoid installing the outdoor unit by the seashore, construct a protection wall around to block the sea breeze.
- Page 7 Space requirements for outdoor unit When installing 1 outdoor unit (Unit : mm) * When the air outlet is opposite the wall * When the air outlet is towards the wall 2,000 or more 300 or more 600 or more * When 3 sides of the outdoor unit are blocked by * The upper part of the outdoor unit and the air the wall...
- Page 8 Installing the unit When installing more than 1 outdoor unit (Unit : mm) * When the air outlet is towards the wall 300 or more 600 or more 600 or more 600 or more * When 3 sides of the outdoor unit are blocked by the wall 300 or more 300 or more 600 or more...
-
Page 9: Outdoor Unit Installation
Outdoor unit installation The outdoor unit must be installed on a rigid and stable base to avoid any increase in the noise level and vibration, particularly if the outdoor unit is to be installed in a location exposed to strong winds or at a height, the unit must be fixed to an appropriate support(wall or ground). - Page 10 Installing the unit Drain work While Air-Water Heat Pump is running in heating mode, Ice can begin accumulate on the surface of condenser. To prevent Ice from growing, system go into De-frost mode and then Ice on the surface changes to water. Dropped water from condenser shall be eliminated through running drain holes to prevent Ice growing at low temperature.
-
Page 11: Selecting A Location In Cold Climates
Selecting a location in cold climates • When operating the unit in a low outdoor ambient temperature, be sure to follow the instructions NOTE described below. f To prevent exposure to wind, install the unit with its suction side facing the wall. f Never install the unit at a site where the suction side may be exposed directly to wind. -
Page 12: Electrical Connections
Total fuse in Volts in normal Additional Load unit operation AEX060EDEHA 220-240 20 A 25 A 30 A f The power cable is not supplied with air conditioner. f Supply cords of parts of appliances for outdoor use shall not be lighter than polychloroprene sheathed flexible cord (Code designation IEC:60245 IEC 57 / CENELEC:H05RN-F) f Equipment complying with EN/IEC 61000-3-12. - Page 13 Connecting the cable Between indoor unit and outdoor unit connection cable specifications(common in use) Power supply Communation cable Power supply Max/Min(V) Indoor power cable 1Φ, 220-240V, 50Hz ±10% 0.75~1.5mm², 3wires 0.75~1.5mm², 2wires f For Indoor Power Cable, use the grade H07RN-F or H05RN-F materials. When installing the indoor unit in a computer room or net work room, use the double shielded (Tape aluminum / polyester braid + copper ) cable of FROHH2R type.
- Page 14 Connecting the cable • You should connect the power cable into the power cable terminal and fasten it with a clamp. • The unbalanced power must be maintained within 2% of supply rating. CAUTION - If the power is unbalanced greatly, it may shorten the life of the condenser. If the unbalanced power is exceeded over 4% of supply rating, the indoor unit is protected, stopped and the error mode indicates.
-
Page 15: Connecting The Power Terminal
Connecting the power terminal f Connect the cables to the terminal board using the compressed ring terminal. f Connect the rated cables only. f Connect using a wrench which is able to apply the rated torque to the screws. f If the terminal is loose, fire may occur caused by arc. If the terminal is connected too firmly, the terminal may be damaged. -
Page 16: Refrigerant Piping Work
• Use the vacuum pump that the vacuum induction is available up to 5Torr. (-100.7kPa) Flare nut • Use only flare nut supplied with the product. Allowable length of the refrigerant pipe and the installation examples f AEX060EDEHA, Outdoor unit Item Example... -
Page 17: Selecting The Refrigerant Pipe
Temper grade Outdoor unit capacity (kW) Gas side (mm) diameter (mm) (mm) (mm) ø 6.35 AEX060EDEHA ø6.35 ø15.88 ø 9.52 f Install refrigerant pipe depending on the outdoor unit C1220T-0 capacity. ø12.70 f Make sure to use C1220T-1/2H (Semi-hard) pipe for ø15.88... -
Page 18: Cutting Or Flaring The Pipes
Refrigerant piping work Cutting or flaring the pipes 1. Make sure that you prepared the required tools. - Pipe cutter, reamer, flaring tool and pipe holder, etc. 2. If you want to shorten the pipe, cut it with a pipe cutter ensuring that the cut edge remains at 90° with the side of the pipe. - Page 19 Selecting the insulator of the refrigerant pipe f According to pipes size, insulate pipes on gas and liquid side by selecting appropriate insulations. f Standard condition is under a temperature of 30°C and a humidity of 85%. If the units are installed in extreme weather conditions, select the insulator by table below.
-
Page 20: Insulating The Refrigerant Pipe
Refrigerant piping work Insulating the refrigerant pipe f You must check if there is a gas leak before completing all the installation process. f Use EPDM insulation which meets the following condition. Item Unit Standard Remarks Density g/cm² 0.048~0.096 Dimension change route by heat -5 or less KSM 3014-01 Water absorption rate... -
Page 21: Performing The Refrigerant Gas Leak Test
Performing the refrigerant gas leak test f Use a manifold gauge for R-410A to prevent the inflow of foreign substances and resist against the internal pressure. f Pressure test with dry oxygen free nitrogen only. Apply pressure to the liquid side pipe and gas If you apply pressure more than 4.1MPa, the pipes may be side pipe with Nitrogen gas of 4.1 MPa (41.8 damaged. -
Page 22: Vacuum Drying
Refrigerant piping work Vacuum drying f Use a manifold gauge for R-410A to prevent the inflow of foreign substances and resist against the internal pressure. f Use the vacuum pump with the check valve to prevent pump oil from flowing backward while the vacuum pump is stopped. -
Page 23: Refrigerant Charging
* Charge additional refrigerant according to the total length of the pipe. Each factory charging values are determined according to basic pipe length as below. AEX060EDEHA ≤ 5m When extra pipe length are required, additional charging works must be implemented as describes below. -
Page 24: Charging Refrigerant
Refrigerant piping work Charging refrigerant f The R-410A refrigerant is blended refrigerant. Add only liquid refrigerant. f Measure the quantity of the refrigerant according to the length of the liquid side pipe. Add quantity of the refrigerant using a scale. Important information regulation regarding the refrigerant used This product contains fluorinated greenhouse gases covered by the Kyoto Protocol. -
Page 25: Adding Refrigerant
Adding refrigerant f The R-410A refrigerant is blended refrigerant. Add only liquid refrigerant. f Measure the quantity of the refrigerant depending on the length of the liquid side pipe. Add fixed quantity of the refrigerant using a scale. * Adding refrigerants in cooling conditions Manifold gauge Suction charging Outdoor unit... - Page 26 Refrigerant piping work To close the valve stem 1. Open the cap and turn the valve stem clockwise by using a hexagonal wrench. Valve stem Service port Sealing edge 2. Tighten the valve stem until it reached the sealing edge. • Do not apply excessive force to the valve stem and always use special instruments.
-
Page 27: Checking Correct Grounding
Checking correct grounding If the power distribution circuit does not have a grounding or the grounding does not comply with specifications, an grounding electrode must be installed. The corresponding accessories are not supplied with the air conditioner. 1. Select an grounding electrode that complies with the specifications given in the illustration. 50cm Carbon Steel core... -
Page 28: Setting The Option Switch And Function Of The Keys
Setting the option switch and function of the keys Testing operations 1. Check the power supply between the outdoor unit and the auxiliary circuit breaker. • 1 phase power supply : L, N 2. Check the Indoor unit 1) Check that you have connected the power and communication cables correctly. (If the power cable and communication cables one mixed up or connected incorrectly, the PCB will be damaged.) 2) Check the temp. - Page 29 Display Number of Display contents Units press Segment 1 Segment 2 Segment 3 Segment 4 Target discharge 100s digit 10s digit 1s digit °C temperature 100s digit 10s digit 1s digit step Not used exchanger capacity Protection Frequency control state 0 : no 0 : Normal protection...
-
Page 30: Pump Down Procedure
Pump down procedure Objective of pump down For product repairs and indoor unit relocation, pump down operation must be done recover the refrigerant into the outdoor unit. Cautions when performing pump down f Product limits amount of refrigerant in the outdoor unit due to slim design. f Collect the majority of the refrigerant in the system in an empty refrigerant vessel and perform a pump down operation with remaining refrigerant. - Page 31 Collecting refrigerant in refrigerant vessel before pump down operation If the amount of refrigerant in the system exceeded the maximum allowable limit, reduce the amount of the refrigerant by following the below instruction before pump down operation. 1. Prepare an exclusive rechargeable refrigerant vessel, scale and a manifold gauge. 2.
- Page 32 Pump down procedure When refrigerant recovery is difficult due to the large amount of refrigerant 1. Prepare manifold gauge, scale and an empty refrigerant vessel. 2. As shown below, connect the middle hose of manifold gauge to the refrigerant vessel and then connect the both ends of manifold gauge to the outdoor unit service valve individually.
-
Page 33: Completing The Installation
Completing the installation f Check the following after completing the installation. • Check the external surface and the inside of the outdoor unit. • Is there any possibility of short circuit? Outdoor unit • Is the place well-ventilated and ensures space for service? • Is the outdoor unit fixed securely? Installation • Check the external surface and the inside of the indoor unit. -
Page 34: Final Checks And Trial Operation
Final checks and trial operation Turn on the outdoor unit 3 hours before the test operation to preheat the compressor. If the compressor is not preheated, ‘CH’ will appear on the outdoor unit PCB. Inspection before test operation 1. Check the power cable and communication cable of the indoor and outdoor unit. 2. -
Page 35: Trouble Shooting
Trouble shooting • Incorrect handling of thermostat, safety valve or other valves may lead to tank rupture. When servicing the unit follow instructions carefully: WARNING • Always turn off main power supply when water supply is being shut off. • Test the free operation of the safety valve regularly by opening the valve ensuring the water flows freely. • Electrical connection and all servicing of the electrical components should only be carried out by an authorized electrician. - Page 36 Error codes Display Explanation Error Source Compressor overload error OUTDOOR UNIT DC LINK over/low voltage error OUTDOOR UNIT [Inverter] Compressor rotation error OUTDOOR UNIT [Inverter] Compressor sensor error OUTDOOR UNIT [Inverter] DC LINK voltage sensor error OUTDOOR UNIT EEPROM read/write error OUTDOOR UNIT [Inverter] OTP error OUTDOOR UNIT...
-
Page 39: Installation Manual
AEX060EDEHA Air to Water Heat Pump Outdoor Unit installation manual imagine the possibilities Thank you for purchasing this Samsung product. To receive more complete service, please register your product at www.samsung.com/register E S F I P D DB68-03338A-1...
Need help?
Do you have a question about the AEX060EDEHA and is the answer not in the manual?
Questions and answers