Table of Contents
Advertisement
Quick Links
Advertisement
Table of Contents

Related Manuals for Sonel MRP-201


Summary of Contents for Sonel MRP-201
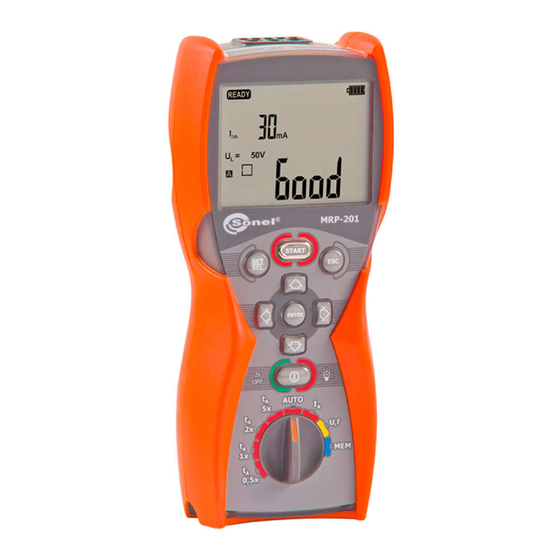
- Page 1 OPERATION MANUAL RCD TESTER MRP-201...
- Page 2 MRP-201 Measuring terminals Start the measurement ESC - return to previous function, procedure exit the function Contact electrode SET/SEL - - used for entering meter settings and selecting the digit to be changed Shift/selection: Approving selected function right / left,...
- Page 3 OPERATING MANUAL RCD TESTER MRP-201 SONEL SA ul. Wokulskiego 11 58-100 Świdnica, Poland Version 1.05 07.01.2015...
- Page 4 The MRP-201 meter is a modern, easy and safe measuring device. Please acquaint yourself with the present manual in order to avoid measuring errors and prevent possible problems related to operation of the meter.
-
Page 5: Table Of Contents
CONTENTS SAFETY ........................5 MEASUREMENTS ....................6 ......... 6 ELECTION OF GENERAL MEASUREMENT PARAMETERS ..........7 EMEMBERING THE LAST MEASUREMENT RESULT ............8 EASUREMENT OF ALTERNATING VOLTAGE ............. 8 EASUREMENT OF VOLTAGE AND FREQUENCY ....... 8 ALIDATION OF THE CONNECTIONS THE PROTECTIVE CONDUCTOR .............. - Page 6 10.1 ..................39 TANDARD EQUIPMENT 10.2 ..................39 PTIONAL ACCESSORIES MANUFACTURER ....................40...
-
Page 7: Safety
Safety MRP-201 meter is designed for performing check tests of protection against electric shock in mains systems. The meter is used for making the measurements the results of which determine safety of electrical installations. Therefore, in order to provide conditions for correct operation and the correctness of the obtained results, the following recommendations must be observed: ... -
Page 8: Measurements
Attention: Due to continuous development of the meter’s software, the actual appearance of the display, in case of some of the functions, may slightly differ from the display presented in this operating manual. Measurements WARNING: During RCD measurements, the earthed parts and parts accessible in the electrical installation being tested must not be touched. -
Page 9: Remembering The Last Measurement Result
Parameters Change Power Program Parameter Auto-OFF Beeper RCD-AUTO source update Symbol(s) Parameter symbol(s) Press ENTER to validate the last change and go to the measurement function, Press ESC to go the measurement function without validating the changes. Notes: - Symbol in this case indicates positive phase/polarity, while symbol - negative. -
Page 10: Measurement Of Alternating Voltage
Measurement of alternating voltage The meter measures and displays alternating mains voltage in all measuring functions. This voltage is measured for the frequencies within the range of 45..65 Hz. The test leads should be connected as for a given measuring function. Measurement of voltage and frequency Set the rotary switch in the U,f position. -
Page 11: Measurement Of Rcd Parameters
- The person making a measurement must ensure that he/she is standing on a non-insulated floor during the measurement; otherwise the result of the measurement may be incorrect. - The threshold value, which triggers the signal of exceeded allowable voltage on PE conduit, is approximately 50 V. - Page 12 Connect the test leads as shown on the drawing. Connecting conductor necessary for pulsed current with direct current offset and for direct current. The meter is ready for measurement. voltage L-PE Perform measurement by pressing START push- button. Read the main measurement result current.
- Page 13 Response time t at I current. contact voltage. Resistance- to-earth R Notes: - The value of I and its multiplication factor along with current waveform must be selected in a ∆n manner enabling the meter to perform the measurement. The set of measurement parameters, which is not supported by the meter, can not be entered - when one parameter is entered the remaining parameters change their values to default values (see Technical Specifications: Table of forced current values).
-
Page 14: Measurement Of Rcd Disconnection Time
Additional information displayed by the meter The meter is ready for measurement. Voltage on terminals L and PE is not within the measurable range. L and N conductors have been switched (voltage between terminals PE and N). The temperature inside the meter has risen above the limit, the measurement is blocked. - Page 15 Current Type Measurement Parameter n waveform of switch mode Connect the test leads as shown on the drawing. Connecting conductor necessary for pulsed current with direct current offset and for direct current. The meter is ready for measurement. voltage L-PE...
-
Page 16: Automatic Measurement Of Rcd Parameters
RCD after each tripping. MRP-201 provides two AUTO modes to be chosen from the main menu: - FULL mode... - Page 17 - STANDARD mode Mode selection is described in Section 2.1. 2.6.3.1 FULL mode Turn on the meter. Turn the rotary switch to AUTO position. If displayed parameters differ from those required, set them according to the following algorithm, and according to the rules described in general parameters setting.
- Page 18 voltage L-PE Press START push-button to start measurement. After each activation turn-on tested RCD. Read the main measurement result: - good or bad. Enter the result into memory by pressing ENTER, or see the components of the result go to displaying voltage values by pressing ESC.
- Page 19 positive n negative n positive n negative n 10.* positive 11.* negative * points in which an efficient RCD should be disconnected For RCD A: Measurement conditions Parameters n measured Initial phase (polarization) multiplication factor positive 0.5I n negative 0.5I n positive n...
- Page 20 positive 0.5I n negative 0.5I n positive n negative n positive n negative n positive n negative n 10.* positive 11.* negative 12.* positive 0.5I n 13.* negative 0.5I n 14.* positive n 15.* negative n 16.* positive n 17.* negative n 18.*...
- Page 21 the values of R and mains voltage did not allow to generate the required current value for one of component measurements. - The meter automatically skips the measurements impossible to perform, e.g. the value of selected current and its multiplication factor exceed the testing range of the meter. Δ...
- Page 22 Current Type Parameter waveform n of switch Connect test leads according to the drawing. Connecting conductor necessary for pulsed current with direct current offset and for direct current. The meter is ready for measurement. voltage L-PE...
- Page 23 Press START push-button to start measurement. After each activation turn-on tested RCD. Read the main measurement result: - good or - bad. Notes: - Measured parameters are the same as those presented in the table for FULL and RCD AC mode for selected current waveform.
-
Page 24: Memory Of Measurement Results
Memory of measurement results MRP-201 meters are equipped with the memory that can store 10000 single measurement results. The whole memory is divided into 10 memory banks with 99 cells in each bank. Thanks to dynamic memory allocation, each of the memory cells can contain different quantity of single measurement results, depending on the needs. - Page 25 The cell contains the measurement results of all types. After 5s the first result displayed. buttons to view different types of results. Select the bank and cell number (see section 3.2) or leave the current number. Then press ENTER again. The following screen appears for a moment, accompanied by three short beeps, and then the meter returns to display the last result of the measurement.
-
Page 26: Changing The Cell And Bank Number
Notes: - In case of RCD's the above warning message will appear also when an attempt is made to store a result of specific measurement (or result component) that has been made at different preset of I n current or for a different type of RCD set (standard / short-time delay / selective) than the measurements the results of which are already stored in this cell, despite the fact that the memory space designated for this result component may be free. -
Page 27: Deleting Memory Data
The symbol indicating the content of the cell saved as last, is displayed and after 5 seconds the first result is shown. The cell number is flashing. Use SET/SEL buttons and then buttons. To view the content of a cell, use buttons. -
Page 28: Deleting The Whole Memory
Press ENTER to start deleting or ESC to abort. The deletion progress is shown on the display as scrolling cell numbers. When deletion is complete, the meter generates two short beeps and sets the cell number to 1 and the bank number to 0. -
Page 29: Communication With Pc
Press ENTER to start deleting or ESC to abort. The deletion progress is shown on the display as scrolling bank and cell numbers. When deletion is complete, the meter generates two short beeps and sets the cell number to 1 and the bank number to 0. - Page 30 Press ENTER; the radio transmission screen will appear. To transmit data, follow the instructions of the software. Press ESC to exit the transmission mode.
-
Page 31: Troubleshooting
4 Troubleshooting Before returning the instrument for repair, call the service, perhaps the meter is not damaged, and the problem has occurred for another reason. The meter repairs should be carried out only in the outlets authorized by the manufacturer. The following table describes the recommended procedure in certain situations that occur when using the meter. - Page 32 Symptom Cause Action of the tripping time for measurements with the same RCD. opposite polarities of differential current. Performing t or I Contact voltage, which Check the connections of measurement is is generated during t the protective conductor impossible. measurement, may Verify the selection of exceed the value of safe RCD in relation to the...
-
Page 33: Meter Power Supply
Measurements performed with an insufficient supply voltage feature additional errors which the user is unable to evaluate. Replacing batteries (rechargeable batteries) MRP-201 is powered by four R6 disposable or rechargeable batteries (alkaline batteries are recommended). The (rechargeable) batteries are placed in the compartment at the bottom of the enclosure. - Page 34 Selected power source: rechargeable batteries. buttons to switch between disposable and rechargeable batteries. Press ENTER to validate the choice. The meter goes to the measurement readiness mode. NOTE! After replacing the batteries/rechargeable batteries, always set the power supply type. The correct charge indication depends on this setting (the discharge characteristics of disposable and rechargeable batteries are different).
-
Page 35: General Principles Regarding Using Ni-Mh Accumulators
General principles regarding using Ni-MH accumulators - If you do not use the device for a prolonged period of time, then it is recommended to remove the accumulators and store them separately. - Store the accumulators in a dry, cool and well ventilated place and protect them from direct sunlight. The temperature of the environment in the case of prolonged storage should not exceed 30ªC. -
Page 36: Cleaning And Maintenance
Cleaning and maintenance NOTE! Apply solely the maintenance methods specified by the manufacturer within the present manual. The casing of the meter may be cleaned with a soft, damp cloth using all-purpose detergents. Do not use any solvents or cleaning agents which might scratch the casing (powders, pastes, etc.). The electronic system of the meter does not require maintenance. -
Page 37: Technical Specifications
Technical specifications Basic data Abbreviation "m.v." used in the specification of measurement uncertainty means a standard measured value. Voltage measurement Range Resolution Measurement uncertainty (2% m.v. + 6 digits) 0.0 ... 299.9 V 0.1 V (2% m.v. + 2 digits) 300...500V ... - Page 38 Effective value of forced leakage current at measurement of RCD disconnection time Multiplication factor setting n 10.5 10.5 Multiplication factor setting n ...
- Page 39 it is possible to start the measurement from the positive or the negative half-period of forced leakage current test current passage time at f = 50.0Hz....... max. 7510 ms Measurement of RCD disconnection current I for differential unidirectional pulsed current and unidirectional pulsed current with 6mA direct current offset ≥30mA and (0,15...2)I Test range according to IEC 61557: (0.15...1.4)I...
-
Page 40: Additional Data According To Iec 61557-6 (Rcd)
s) the product meets the EMC requirements (immunity for industrial environment) according to the following standards ..........................................EN 61326-1:2009 and EN 61326-2-2:2006 Additional data according to IEC 61557-6 (RCD) Data on additional uncertainties are useful mainly when the meter is used in non-standard conditions and for metrological laboratories for the purpose of calibration. -
Page 41: Equipment
10 Equipment 10.1 Standard equipment Standard set of equipment supplied by the manufacturer includes: MRP-201 meter – WMPLMRP201 set of test leads: adapter WS-05 with UNI-SCHUKO angle plug (CAT III 300V) – WAADAWS05 leads 1,2m (CAT III 1000V) with banana plugs – 3 pcs (yellow WAPRZ1X2YEBB, red- WAPRZ1X2REBB and blue - WAPRZ1X2BUBB) ... - Page 42 LSWPLMRP201 WAPROSONPE5 calibration certificate "SONEL Pomiary Elektryczne" ( SONEL Electrical Measurements) - software for generating measurement reports 11 Manufacturer The manufacturer of the device, which also provides guarantee and post-guarantee service is the following company: SONEL S.A. ul. Wokulskiego 11 58-100 Świdnica...
- Page 43 WARNINGS AND GENERAL INFORMATION DISPLAYED BY THE METER NOTE! MRP-201 meter is designed to operate at the rated phase voltages 220V, 230V and 240V. Connection of the voltage higher than acceptable between any of the terminals may damage the meter and cause a hazardto the user.
- Page 44 SONEL S.A. Wokulskiego 11, St 58-100 Swidnica Poland +48 74 85 83 860 +48 74 85 83 800 fax +48 74 85 83 808 http://www.sonel.pl e-mail: export@sonel.pl...
Need help?
Do you have a question about the MRP-201 and is the answer not in the manual?
Questions and answers