Advertisement
EVOLUTION
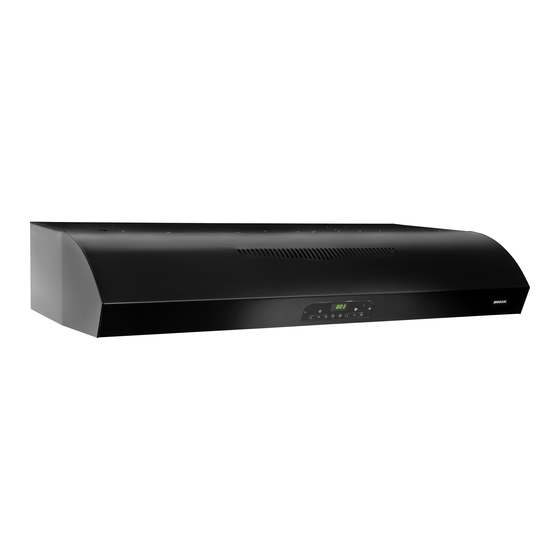
QP3 Series Range Hoods
READ AND SAVE THESE INSTRUCTIONS
FOR DOMESTIC COOKING ONLY
WARNING
TO REDUCE THE RISK OF FIRE, ELECTRIC SHOCK, OR IN-
JURY TO PERSONS, OBSERVE THE FOLLOWING:
1. Use this unit only in the manner intended by the manufacturer.
If you have questions, contact the manufacturer at the ad-
dress or telephone number listed in the warranty.
2. Before servicing or cleaning unit, switch power off at service
panel and lock the service disconnecting means to prevent
power from being switched on accidentally. When the service
disconnecting means cannot be locked, securely fasten a
prominent warning device, such as a tag, to the service panel.
3. Installation work and electrical wiring must be done by a qual-
ified person(s) in accordance with all applicable codes and
standards, including fire-rated construction.
4. Sufficient air is needed for proper combustion and exhaust-
ing of gases through the flue (chimney) of fuel burning equip-
ment to prevent backdrafting. Follow the heating equipment
manufacturer's guideline and safety standards such as those
published by the National Fire Protection Association (NFPA),
and the American Society of Heating, Refrigeration and Air
Conditioning Engineers (ASHRAE), and the local code au-
thorities.
5. This product may have sharp edges. Be careful to avoid cuts
and abrasions during installation and cleaning.
6. When cutting or drilling into wall or ceiling, do not damage
electrical wiring and other hidden utilities.
7. Ducted fans must always be vented to the outdoors.
8. Use only metal ductwork.
9. Do not use this fan with any solid-state speed control device.
10. As an alternative, this product may be installed with the UL-
approved cord kit designated for the product, following in-
structions packed with the cord kit.
11. This unit must be grounded.
TO REDUCE THE RISK OF A RANGE TOP GREASE FIRE:
1. Never leave surface units unattended at high settings.
Boilovers cause smoking and greasy spillovers that may ig-
nite. Heat oils slowly on low or medium settings.
2. Always turn hood ON when cooking at high heat or when
cooking flaming foods (i.e. Crepes Suzette, Cherries Jubilee,
Peppercorn Beef Flambé).
3. Clean ventilating fans frequently. Grease should not be al-
lowed to accumulate on fan or filter.
4. Use proper pan size. Always use cookware appropriate for the
size of the surface element.
TO REDUCE THE RISK OF INJURY TO PERSONS IN THE
EVENT OF A RANGE TOP GREASE FIRE, OBSERVE THE
FOLLOWING:*
1. SMOTHER FLAMES with a close-fitting lid, cookie sheet, or
metal tray, then turn off the burner. BE CAREFUL TO PRE-
VENT BURNS. If the flames do not go out immediately,
EVACUATE AND CALL THE FIRE DEPARTMENT.
3
TM
MODELS QP330BL • QP330SS • QP330WW
QP336BL • QP336SS • QP336WW
QP342BL • QP342SS • QP342WW
WARNING
2. NEVER PICK UP A FLAMING PAN — You may be burned or
spread the fire.
3. DO NOT USE WATER, including wet dishcloths or towels -
violent steam explosion will result.
4. Use an extinguisher ONLY if:
A. You know you have a Class ABC extinguisher and you
already know how to operate it.
B. The fire is small and contained in the area where it started.
C. The fire department is being called.
D. You can fight the fire with your back to an exit.
* Based on "Kitchen Fire Safety Tips" published by NFPA.
CAUTION
1. For indoor use only.
2. For general ventilating use only. Do not use to exhaust haz-
ardous or explosive materials and vapors.
3. To avoid motor bearing damage and noisy and/or unbal-
anced impeller, keep drywall spray, construction dust, etc.,
off power unit.
4. Do not use over cooking equipment greater than 60,000
BTU/hr. as the blower motor will shut down intermittantly.
5. Your hood motor has a thermal overload which will automati-
cally shut off the motor if it becomes overheated. The motor
will restart when it cools down. If the motor continues to shut
off and restart, have the hood serviced.
6. The top of the hood MUST NOT BE LESS than 24" and at a
maximum of 30" above cooktop for best capture of cooking
impurities.
7. This hood is not intended to be used as a shelf.
8. Please read specification label on product for further infor-
mation and requirements.
NOTE If hood is to be installed non-ducted:
Purchase a set of (2) non-ducted filters for 30" wide
hoods (Model BPPF30) & 36" wide hoods (Model
BPPF36) or a set of (3) non-ducted filters for 42" wide
hoods (Model BPPF42) from your local distributor or
retailer and attach them to the aluminum mesh filters.
Installer: Leave this manual
with the homeowner.
Homeowner: Cleaning, Maintenance and
Operating instructions on page 2.
Page 1
Advertisement
Table of Contents

Subscribe to Our Youtube Channel
Related Manuals for Broan QP330BL


Summary of Contents for Broan QP330BL
- Page 1 MODELS QP330BL • QP330SS • QP330WW QP336BL • QP336SS • QP336WW QP342BL • QP342SS • QP342WW Page 1 EVOLUTION QP3 Series Range Hoods READ AND SAVE THESE INSTRUCTIONS FOR DOMESTIC COOKING ONLY WARNING WARNING TO REDUCE THE RISK OF FIRE, ELECTRIC SHOCK, OR IN- 2. NEVER PICK UP A FLAMING PAN — You may be burned or JURY TO PERSONS, OBSERVE THE FOLLOWING: spread the fire. 1. Use this unit only in the manner intended by the manufacturer. 3. DO NOT USE WATER, including wet dishcloths or towels - If you have questions, contact the manufacturer at the ad- violent steam explosion will result. dress or telephone number listed in the warranty. 4. Use an extinguisher ONLY if: 2. Before servicing or cleaning unit, switch power off at service A. You know you have a Class ABC extinguisher and you panel and lock the service disconnecting means to prevent already know how to operate it.
-
Page 2: Operation
MODELS QP330BL • QP330SS • QP330WW QP336BL • QP336SS • QP336WW QP342BL • QP342SS • QP342WW Page 2 CONTENTS OPERATION Always turn the hood ON before cooking in order to establish an INCLUDED WITH THE HOOD: air flow in the kitchen. After turning off the range, let the hood run for a few minutes to clear the air. (1) 3¼” X 10” Operate the hood as follows: DAMPER / DUCT CONNECTOR GREASE FILTERS (2 - FOR 30” & 36” HOODS) 3 - FOR 42” HOODS) (1) 7” ROUND... -
Page 3: Clock Setting
MODELS QP330BL • QP330SS • QP330WW QP336BL • QP336SS • QP336WW QP342BL • QP342SS • QP342WW Page 3 CLOCK SETTING 10-MINUTE DELAY OFF Press the button once, the “hours” will begin blinking in the When your hood fan is on (any speed) press the button to LED screen. Use the and buttons to set the appropriate activate the delay off feature. When activated, the hood fan will hours for the clock. A small indicator will illuminate in the left automatically turn off after 10-minutes has elapsed. The delay corner of the LED screen to designate “pm” . After the hours are feature is active when the following appear on the LED screen: set, press the button to advance the menu to the minute se- A green indicator illuminated above the delay button, a nu- lection. The minutes will begin blinking in the LED screen. Use meric countdown “10-0” , and a clockwise rotating LED. The delay the and buttons to set the minutes. Press the... -
Page 4: Prepare Hood Location
LOW-VOLTAGE Note: Canadian version does not have this function. WIRES FUSES DAMPER MOTOR RANGE HOOD CONTROL BOARD MAIN LIGHT FUSE FUSE REMOTE CONTROL The hood is compatible with Broan RF Remote Control Model BCR1 (optional). Purchase separately. PREPARE HOOD LOCATION ROOF CAP 3¼" X 10" or 7" ROUND DUCT (For vertical discharge) The Range Hood Control Board contains a Main Fuse and a Light Fuse to protect the controls from power surges. If a fuse has opened (blown), the green fan setting or light setting indicators will not operate properly when the fan or light buttons are pressed, and the fan and lights will not turn on. -
Page 5: Prepare The Hood
MODELS QP330BL • QP330SS • QP330WW QP336BL • QP336SS • QP336WW QP342BL • QP342SS • QP342WW Page 5 PREPARE THE HOOD Use the proper diagram below, for placement of ductwork and electrical cutout in cabinet or wall. For a non-ducted installation, DO NOT cut a duct access hole. Remove parts bag from inside the foam packaging end cap. 3¼” X 10” VERTICAL DUCTING Remove all protective polyfilm from the hood (stainless HOOD MOUNTING SCREWS (5) steel hoods only). " (30" hood) " (30" hood) " (36" hood) " (36" hood) " (42" hood) " (42" hood) CABINET FRONT... - Page 6 MODELS QP330BL • QP330SS • QP330WW QP336BL • QP336SS • QP336WW QP342BL • QP342SS • QP342WW Page 6 11 NON-DUCTED INSTALLATION ONLY: Purchase a set of (2) non-ducted filters for 30” wide hoods (Model BPPF30) & 36” wide hoods (Model BPPF36) or a set of (3) non-ducted filters for 42” wide hoods (Model BPPF42) from your local distributor or retailer. Attach the non-ducted filters to the aluminum mesh filters following instructions packed with the non-ducted filters. NON-DUCT DIVERTER FOR NON-DUCTED INSTALLATIONS - Skip to “INSTALL THE HOOD” . 7” ROUND KNOCKOUT NON-DUCTED INSTALLATION ONLY: PLATE (also From parts bag: Attach Non-Duct Diverter to Air Box remove 3¼” x 10” with 2 Screws and 2 Washers. vertical plate) SCREWS 3¼” X 10” VERTICAL KNOCKOUT 3¼” X 10” PLATE HORIZONTAL KNOCKOUT PLATE 12 DUCTED INSTALLATION ONLY: NON-DUCT Remove 3¼” x 10 vertical, 3¼” x 10” horizontal, or 7-inch...
Need help?
Do you have a question about the QP330BL and is the answer not in the manual?
Questions and answers