Advertisement
Quick Links
Re: Order No. 9351
ASSEMBLY INSTRUCTIONS
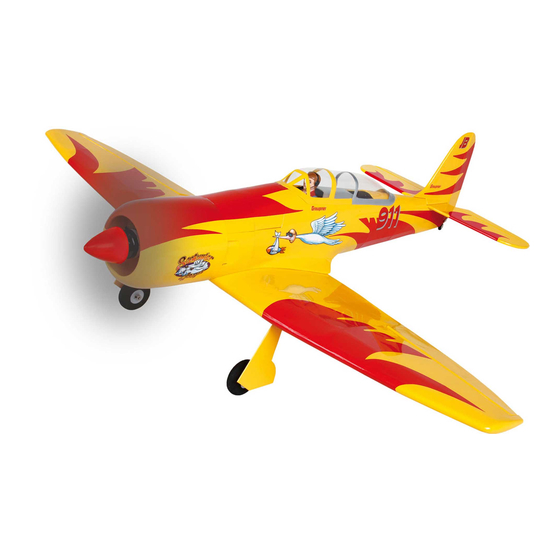
SEA FURY
RC semiscale model for 2 LiPo cells
Requires a HoTT radio control system with 6 functions
GRAUPNER GmbH & Co. KG D-73230 KIRCHHEIM/TECK GERMANY
We reserve the right to introduce modifications. Not liable for printing errors!
11/2011
- 1 -
Advertisement

Related Manuals for GRAUPNER SEA FURY


Summary of Contents for GRAUPNER SEA FURY
-
Page 1: Assembly Instructions
SEA FURY RC semiscale model for 2 LiPo cells Requires a HoTT radio control system with 6 functions GRAUPNER GmbH & Co. KG D-73230 KIRCHHEIM/TECK GERMANY We reserve the right to introduce modifications. Not liable for printing errors! 11/2011 - 1 -... - Page 2 General The model SEA FURY is a particularly beautiful RC semiscale model, which, thanks to its compact dimensions, is easy to transport. However, the small dimensions should not mislead you into thinking that the assembly and operation of the model does not require sound model aircraft experience.
- Page 3 Screw on the servo cover and make the aileron and landing flap connection. Connect the pushrods and glue in the horns of the ailerons. GRAUPNER GmbH & Co. KG D-73230 KIRCHHEIM/TECK GERMANY We reserve the right to introduce modifications. Not liable for printing errors! 11/2011...
- Page 4 The figure shows the servo lead exiting at the wing root. Later, use the CRP tube Ø 5x125 mm to push the halves of the wing onto the fuselage. GRAUPNER GmbH & Co. KG D-73230 KIRCHHEIM/TECK GERMANY We reserve the right to introduce modifications. Not liable for printing errors!
- Page 5 Viewed in flight direction, the motor should rotate to the right; if this is not the case, switch any two of the leads and re-insert. GRAUPNER GmbH & Co. KG D-73230 KIRCHHEIM/TECK GERMANY We reserve the right to introduce modifications. Not liable for printing errors!
- Page 6 Slide on the spinner cap and motor bonnet. Align the motor bonnet so that the spinner cap is exactly centred and is about 5 mm in front GRAUPNER GmbH & Co. KG D-73230 KIRCHHEIM/TECK GERMANY We reserve the right to introduce modifications. Not liable for printing errors!
- Page 7 First try this procedure without any adhesive. Above all, make sure you do not use activator for the gluing process. GRAUPNER GmbH & Co. KG D-73230 KIRCHHEIM/TECK GERMANY We reserve the right to introduce modifications. Not liable for printing errors!
- Page 8 Attach a 320 mm servo extension cable to each aileron and elevator servo. GRAUPNER GmbH & Co. KG D-73230 KIRCHHEIM/TECK GERMANY We reserve the right to introduce modifications. Not liable for printing errors!
- Page 9 Ø 2.2x12 metal screws as shown. Push on the wheel with the protruding wheel hub facing the strut; then secure it with 2 plywood spacers. GRAUPNER GmbH & Co. KG D-73230 KIRCHHEIM/TECK GERMANY We reserve the right to introduce modifications. Not liable for printing errors!
- Page 10 Push the strut into the retraction mechanism, and try out the undercarriage. If everything fits, connect the strut to the M3 grub screw and screw into the undercarriage. GRAUPNER GmbH & Co. KG D-73230 KIRCHHEIM/TECK GERMANY We reserve the right to introduce modifications. Not liable for printing errors! 11/2011...
- Page 11 Caution: After closing the G3.5 connector, the motor can start; do not touch the propeller! GRAUPNER GmbH & Co. KG D-73230 KIRCHHEIM/TECK GERMANY We reserve the right to introduce modifications. Not liable for printing errors!
- Page 12 Just before touch-down reduce air speed through careful use of up-elevator. Always land the model into the wind. Here at GRAUPNER Modellbau, we hope you will have many enjoyable flights with your new aircraft model, the SEA FURY GRAUPNER GmbH &...
-
Page 13: Safety Notes
Be sure to use only those parts included in the kit, together with other genuine Graupner accessories and replacement parts as recommended expressly by us. If you change a component of the propulsion system, you can no longer be sure that the system will work reliably, and such changes also invalidate your guarantee. - Page 14 Likewise, always switch the receiving system off first and only then the transmitter. Check that the control surfaces follow the movement of the transmitter joysticks. GRAUPNER GmbH & Co. KG D-73230 KIRCHHEIM/TECK GERMANY We reserve the right to introduce modifications. Not liable for printing errors!
- Page 15 If material defects or manufacturing faults should arise in a product distributed by us in the Federal Republic of Germany and purchased by a consumer (§ 13 BGB), we, Graupner GmbH & Co. KG, D-73230 Kirchheim/Teck, Germany, acknowledge the obligation to correct those defects within the limitations described below.
Need help?
Do you have a question about the SEA FURY and is the answer not in the manual?
Questions and answers